` documentation](/expedy-print/parameter-tags/apn-mobile-data) for details.
---
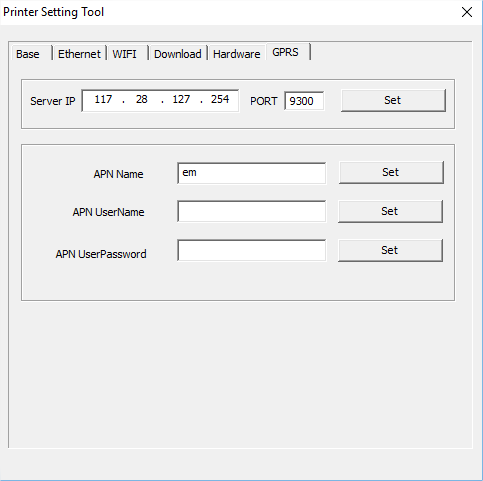
## Configure the APN (Windows Software)
1. Download and install the [PrinterSetting software](https://github.com/ExpedyDev/printer-setting-tool/releases) (see the [installation guide](/expedy-print/installation/how-to-install-the-printersetting-software))
2. Go to the **GPRS** section
3. In the **APN Name** field, enter the APN provided by your SIM card operator
4. Click **SET** to apply
---
## Connection not working? (LED flashing red)
If the GPRS connection fails and the LED flashes **red once**, check the following:
- Verify the APN is correctly configured for your operator
- Check your [SNTP server configuration](/expedy-print/parameter-tags/ntp-clock), we recommend using **time.google.com**
- Still not working? [Contact our support team](https://help.expedy.io/support/tickets/new)
---
url: https://docs.expedy.io/en/expedy-print/installation/update-the-sim-card-apn-settings
title: Update the SIM card APN settings
updated_at: 2026-10-20T21:46:43.661128+00:00
---
# Update the SIM card APN settings
Every Expedy cloud printer ships with an embedded 4G SIM card and a pre-configured APN, so it normally connects to the Expedy servers on its own the moment you plug it in. In rare cases, a printer leaves the factory with an APN that does not match the SIM card supplied with it. The printer then powers up but never reaches the server.
The good news: you can fix this yourself in a few minutes, without any software to install and without sending the printer back. This guide walks you through the whole procedure.
## Symptoms
Your printer is affected if:
- The LCD screen never displays `Server Connected`
- The printer stays on a searching or connecting state after several minutes
- A test ticket shows an APN value that does not match the SIM card provided with the printer
## What you need
- A network (Ethernet) cable
- An internet router with a free Ethernet port
- Access to the Expedy console: [https://www.expedy.fr/console/v3/](https://www.expedy.fr/console/v3/)
- The APN value that matches the SIM card installed in your printer (see below)
### Which APN value should I use?
The APN is not the same for every printer: it depends on the IoT M2M SIM card provider. Throughout this guide we use `simbase` as an example, because that is the APN of one of the SIM operators we work with. If your printer uses a SIM card from another provider, replace `simbase` with the APN of that provider.
If you are not sure which value applies to your printer, contact our support team before running the procedure.
## Procedure
### 1. Power off the printer
Switch the printer off completely before touching the SIM card.
### 2. Remove the SIM card
Take the SIM card out of its slot and keep it aside. Removing it forces the printer to fall back on a wired connection, which is what we need for the next step.
### 3. Connect the printer over Ethernet
Power the printer back on and connect it to your internet router with a network cable. The printer will connect to the Expedy server through the wired link, no configuration required.
Wait until the LCD screen confirms the connection before moving on.
### 4. Open the Expedy console
Go to [https://www.expedy.fr/console/v3/](https://www.expedy.fr/console/v3/) and sign in with your account.
### 5. Send the APN command
Select your printer in the list, then send the following text as a message:
```text
simbase
```
Here `simbase` is the APN of the IoT M2M SIM operator used as an example in this guide. Replace it with the APN of your own SIM card provider if it differs, keeping the `` and `` tags exactly as shown.
The printer receives the command and stores the new APN in its configuration.
### 6. Print a test ticket
On the printer, use the LCD screen menu and select **choice 1** to print a test ticket.
### 7. Check the APN value
Read the test ticket. The APN line should now display the value you sent, `simbase` in our example:
```text
simbase
```
If it still shows the previous value, repeat steps 5 and 6 and make sure the message was sent to the correct printer.
### 8. Power off the printer
Switch the printer off again.
### 9. Reinsert the SIM card
Put the SIM card back in its slot, then disconnect the network cable. The printer must now run on its 4G connection only.
### 10. Power on and confirm
Power the printer back on. After a few seconds, the LCD screen should display:
```text
Server Connected
```
Your printer is now autonomous again: no Wi-Fi, no cable, no local network needed.
## Troubleshooting
**The printer does not connect over Ethernet in step 3.**
Check that the router port is active and that the cable is properly seated at both ends. The printer needs a DHCP-enabled connection with outbound internet access.
**The test ticket still shows the old APN.**
Confirm that you selected the right printer in the console, and that the command was sent exactly as written, including the angle brackets and with no extra spaces.
**The screen still does not show `Server Connected` after reinserting the SIM.**
Give the printer up to a minute to register on the mobile network. If nothing changes, verify that the SIM card is correctly inserted and that the printer is not in an area with poor 4G coverage. Try moving it closer to a window or to a different room.
**The APN was applied but the printer still cannot reach the network.**
The APN you sent may not be the one expected by your SIM card provider. Contact our support team to confirm the correct value, then run the procedure again with it.
## Still stuck?
Open a ticket with our support team and include your printer serial number along with a photo of the test ticket:
[https://help.expedy.io/support/tickets/new](https://help.expedy.io/support/tickets/new)
---
url: https://docs.expedy.io/en/expedy-print/installation/beep-setting
title: Beep setting
updated_at: 2026-10-22T05:49:51.032857+00:00
---
# Beep setting
To configure sound notification, download the [Printer Setting](/expedy-print/installation/how-to-install-the-printersetting-software) software, then in the Hardware tab, check "Beep After Cut", then click SET. A sound notification confirms that the new setting has been accepted.
Compatible models:
CLOUD: PP58EWG, PP58EWG-R, PP80EWG, XPDY80EWB, XPDY80EWBG
UBER EATS: PP80UEWBT, XPDY80UWB
POS: PP80USBEBW, XPDY80U, XPDY80USBEBW, XPDYPOS80UEB
***The audible notification is only triggered after a paper cut (autocut), so for cloud models you need to use the paper cut tag at the end of the ticket*.**
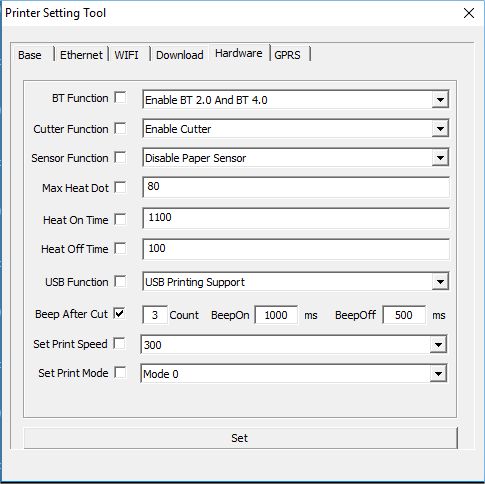
**Please note:** The software can be used to edit, but not to read, parameters already set on the connected printer. The data displayed in the software is given as an example.
---
url: https://docs.expedy.io/en/expedy-print/installation/text-encoding-settings
title: Text encoding settings
updated_at: 2026-10-18T22:09:04.12022+00:00
---
# Text encoding settings
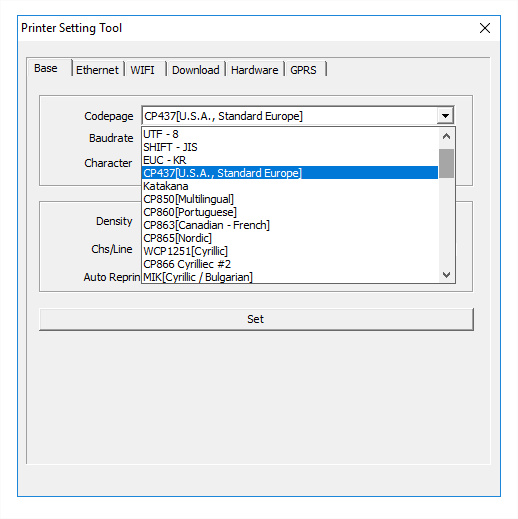
If special or accented characters do not appear correctly on the printed text, follow the instructions below.
Open PrinterSetting software (Help: [Install PrinterSetting software](/expedy-print/installation/how-to-install-the-printersetting-software))
In the Base tab, in the Codepage drop-down menu, select CP437 usa standard europe. Then click on [Set].
Compatible models:
CLOUD: PP58EWG, PP58EWG-R, PP80EWG, XPDY80EWB, XPDY80EWBG
UBER EATS: PP80UEWBT, XPDY80UWB
POS: PP80USBEBW, XPDY80U, XPDY80USBEBW, XPDYPOS80UEB
---
url: https://docs.expedy.io/en/expedy-print/installation/how-to-install-the-printersetting-software
title: How to install the PrinterSetting software
updated_at: 2026-10-23T04:48:46.786247+00:00
---
# How to install the PrinterSetting software
> Windows only
## Compatible models
| Range | Models |
|---|---|
| **CLOUD** | PP58EWG, PP58EWG-R, PP80EWG, XPDY80EWB, XPDY80EWBG |
| **UBER EATS** | PP80UEWBT, XPDY80UWB |
| **POS** | PP80USBEBW, XPDY80U, XPDY80USBEBW, XPDYPOS80UEB |
## Installation steps
1. **Download the PrinterSetting software**
[github.com/ExpedyDev/printer-setting-tool/releases](https://github.com/ExpedyDev/printer-setting-tool/releases)
2. **Connect the printer**
Use a USB cable, or an Ethernet cable plugged into the same network as your computer.
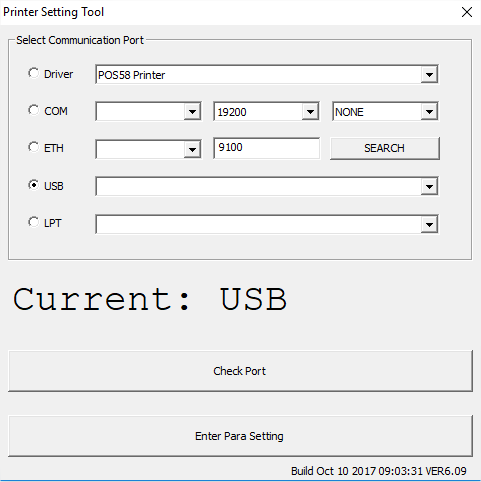
3. **Select the port**
Choose **USB** or **ETH**, then click **[Check Port]**.
4. **Confirm the connection**
A *Check Port Success* receipt is printed to confirm that the printer is reachable.
5. **Open the configuration panel**
Click **[Enter Para Setting]** to access the settings.
## Good to know
- Every modification is confirmed by a printed receipt and/or a beep.
> **Warning**
> The software lets you edit the printer settings, but the values displayed when you open it are not the ones currently in use. They are the default settings.
---
url: https://docs.expedy.io/en/expedy-print/installation/drivers-win-mac-linux-pos-cash-register-printer
title: Drivers Win/Mac/Linux POS cash register printer
updated_at: 2026-10-20T18:41:08.942351+00:00
---
# Drivers Win/Mac/Linux POS cash register printer
The **Expedy** POS printer is a multi-interface thermal (inkless) printer, available in our [store](https://www.expedy.io/product) or by [quotation](https://help.expedy.io/support/tickets/new).
Compatible drivers:
POS: PP80USBEBW, XPDY80U, XPDY80USBEBW, XPDYPOS80UEB
## Driver installation
Download **Win/Mac/Linux** drivers at the following link: [Download](https://www.expedy.fr/download/driverpos80.zip)
Connect the printer to your computer via **USB**, or to your network (router or Internet box) using an **Ethernet RJ45** or **WiFi** cable.
Run the Driver file. Find the USB or network printer (WiFi/Ethernet)
Click on **INSTALL**
The driver is installed on your machine
---
# USB Printer Adapter
---
url: https://docs.expedy.io/en/usb-cloud-printer-adapter/tutorials/print-a-pdf-from-your-computer-to-a-cloud-printer
title: Print a PDF from your computer to a cloud printer
updated_at: 2026-10-22T12:58:00.362648+00:00
---
# Print a PDF from your computer to a cloud printer
In this tutorial, I'll show you how to build a web page that sends a PDF file from your computer to a remote printer using the **Expedy Print** service.
The example uses a label printer to print adhesive shipping labels in the standard 4×6 format (10×15 cm), for instance, labels generated from an e-commerce platform, sent to a printer in another area of your warehouse, or to a dropshipping partner on the other side of the world.
The form also includes a text field to generate a PDF on the fly. Both features (file upload and text-to-PDF) can be used independently or together.
**Full source code:** [github.com/ExpedyDev/pdftoprinter](https://github.com/ExpedyDev/pdftoprinter)
---
## Requirements
### Hardware
- A thermal printer (this example uses a **Netum NT-LP110F**, but Zebra, Brother, BeePRT and other models are compatible, including A3/A4/photo formats)
- An **Expedy Cloud Print** adapter
- A standard internet connection
### Web
- [FPDF](http://www.fpdf.org/) library
- [FPDI](https://www.setasign.com/products/fpdi/about/) library
- An active **Expedy Print** account
- **ExpedyPrint API V2**
---
## 1. Creating the HTML form
The form includes two fields:
- A text field to generate a PDF on the fly
- A file picker to upload one or more existing PDF files
```html
Create a PDF and print
Create a PDF and print
```
---
## 2. PHP code
Here is the complete PHP code with inline comments:
```php
setSourceFile($file);
for ($pageNumber = 1; $pageNumber <= $pageCount; $pageNumber++) {
$tplIdx = $pdf->importPage($pageNumber);
$pdf->AddPage();
$pdf->useTemplate($tplIdx);
}
}
}
}
// Add a page from the text field
if (!empty($text)) {
$pdf->AddPage();
$pdf->SetFont('Arial', 'B', 16);
$pdf->Cell(40, 10, $text);
}
$pdf->Output('F', $pdfName);
$file_url = 'https://' . $_SERVER['HTTP_HOST'] . '/' . $pdfName;
sendToExpedyPrinter($file_url);
echo "Your files have been sent to the printer!
";
} else {
echo "No text or PDF file specified.
";
}
}
function sendToExpedyPrinter($file_url) {
$printer_uid = 'ENTER_PRINTER_UID';
$data = array(
'usb_msg' => $file_url,
'origin' => 'Your defined origin tag.. a uri, a name ..'
);
$options = array(
CURLOPT_URL => "https://www.expedy.fr/api/v2/devices/" . $printer_uid . "/usb/4/print",
CURLOPT_RETURNTRANSFER => true,
CURLOPT_ENCODING => "",
CURLOPT_MAXREDIRS => 10,
CURLOPT_TIMEOUT => 30,
CURLOPT_HTTP_VERSION => CURL_HTTP_VERSION_1_1,
CURLOPT_CUSTOMREQUEST => "POST",
CURLOPT_POSTFIELDS => json_encode($data),
CURLOPT_HTTPHEADER => array(
"Accept: application/json",
"Authorization: xxxxxxxxxxxxxxxxxxxxxxxxxxxxxxxx:xxxxxxxxxxxxxxxxxxxxxxxxxxxxxxxxxxxxxx",
"Content-Type: application/json"
),
);
$curl = curl_init();
curl_setopt_array($curl, $options);
$response = curl_exec($curl);
$err = curl_error($curl);
curl_close($curl);
if ($err) {
echo "cURL Error #: " . $err;
} else {
echo $response;
}
}
?>
```
---
## Key points
### FPDF and FPDI libraries
Both libraries are required: FPDF handles PDF generation, while FPDI merges multiple files into a single document. This merging step matters, it is more efficient for the printer to receive one multi-page PDF than several separate files sent one by one to the API.
### Text formatting
If the text field is filled in, an extra page is appended to the generated PDF. The font can be customised here:
```php
$pdf->SetFont('Arial', 'B', 16);
```
### PDF dimensions
This example uses the 4×6 format (105×148 mm) for shipping labels. Width and height can be adjusted to match any paper format:
```php
$pdf = new \setasign\Fpdi\Fpdi('P', 'mm', array(105, 148));
```
### Printer UID
Retrieve your printer's unique identifier from the Expedy console under **Printers**. Do not include the `#`. Example: `GSEPOHGEIO`.
```php
$printer_uid = 'ENTER_PRINTER_UID';
```
### API keys
Available in the Expedy console under **API Keys**. Format: `sid:token`.
```php
"Authorization: xxxxxxxxxxxxxxxxxxxxxxxxxxxxxxxx:xxxxxxxxxxxxxxxxxxxxxxxxxxxxxxxxxxxxxx",
```
### USB port
In this example, the printer is connected on USB port 4. To identify the correct port, go to the Expedy console > **Machines** > **USB SCAN**.
```php
CURLOPT_URL => "https://www.expedy.fr/api/v2/devices/" . $printer_uid . "/usb/4/print",
```
---
## Testing a print job
If everything is set up correctly, a PDF file will be created in your root folder and the API will return a confirmation response.
> ⚠️ **Note:** generated PDF files are not deleted automatically. They can take up significant disk space on your hosting over time.
---
url: https://docs.expedy.io/en/usb-cloud-printer-adapter/rpi-installation/installation-on-raspberry-pi
title: Installation on Raspberry Pi
updated_at: 2026-10-20T10:16:35.299472+00:00
---
# Installation on Raspberry Pi
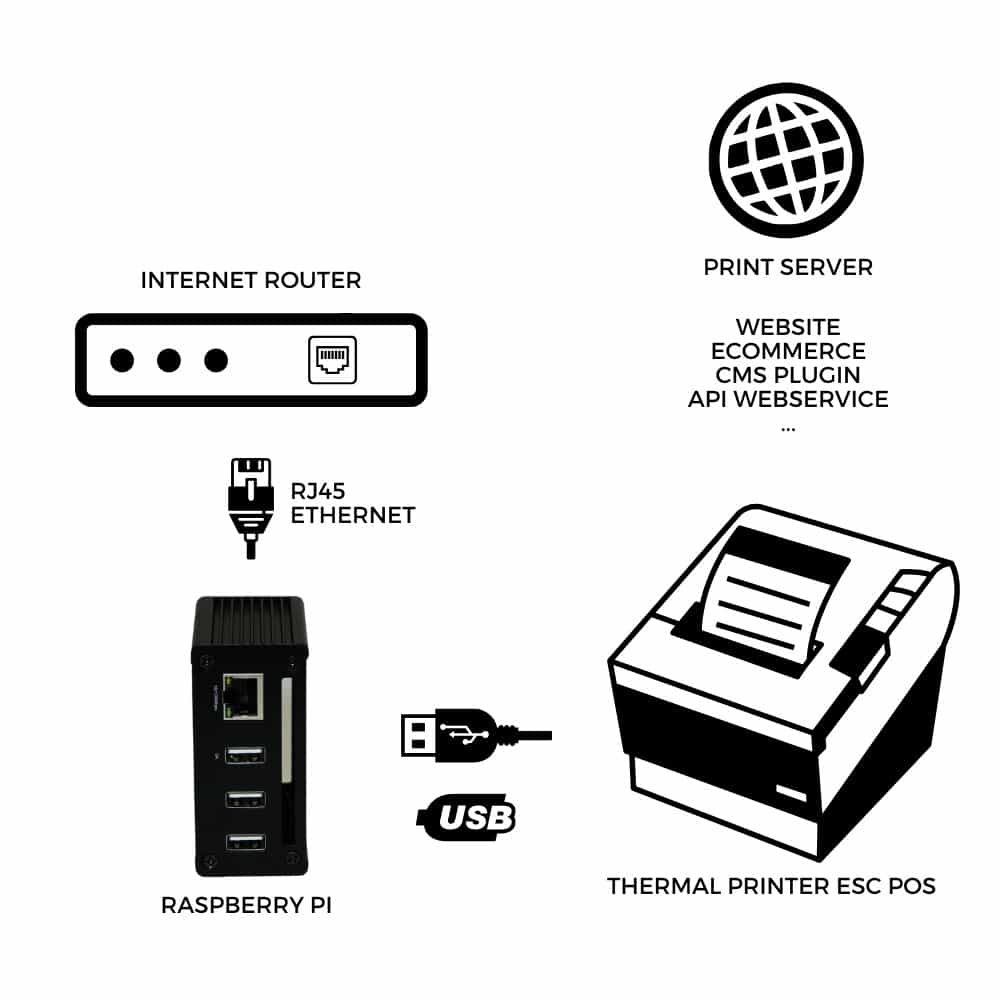
Transform your Raspberry Pi Zero or 4 into a Cloud Print Server. Connect a USB printer, plug in to your network, and start sending print jobs from any application or API.
You have purchased an [Expedy Raspberry Pi SD card](https://shop.expedy.io/en/products/cloud-printer-raspberry-pi?variant=54747436220760) or the [IMG.GZ download file](https://shop.expedy.io/en/products/cloud-printer-raspberry-pi), compatible with Raspberry Pi Zero and 4, all versions. Thank you for your trust! 😊
> ℹ️ Using a **Raspberry Pi 1, 2, 3 or 5**? [Contact us](https://help.expedy.io/support/tickets/new)
>
> Already have a **pre-installed SD card**? Skip directly to [Step 4, Start RPI](#4-start-rpi).
---
## 1. Download the IMG.GZ file
Download the Expedy image file from your order confirmation or directly from the [product page](https://shop.expedy.io/en/products/cloud-printer-raspberry-pi).
---
## 2. Install Raspberry Pi Imager
Download: [https://www.raspberrypi.com/software/](https://www.raspberrypi.com/software/)
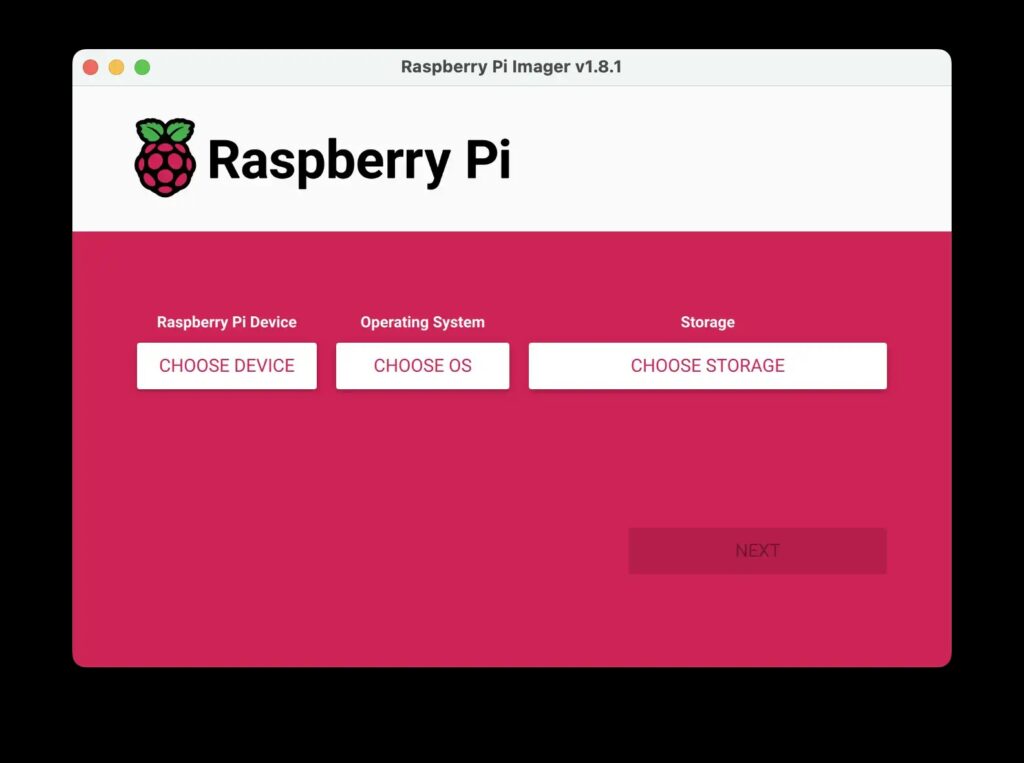
1. Insert a new SD card into your computer (minimum **8 GB**)
2. **Raspberry Pi Device**, Leave empty
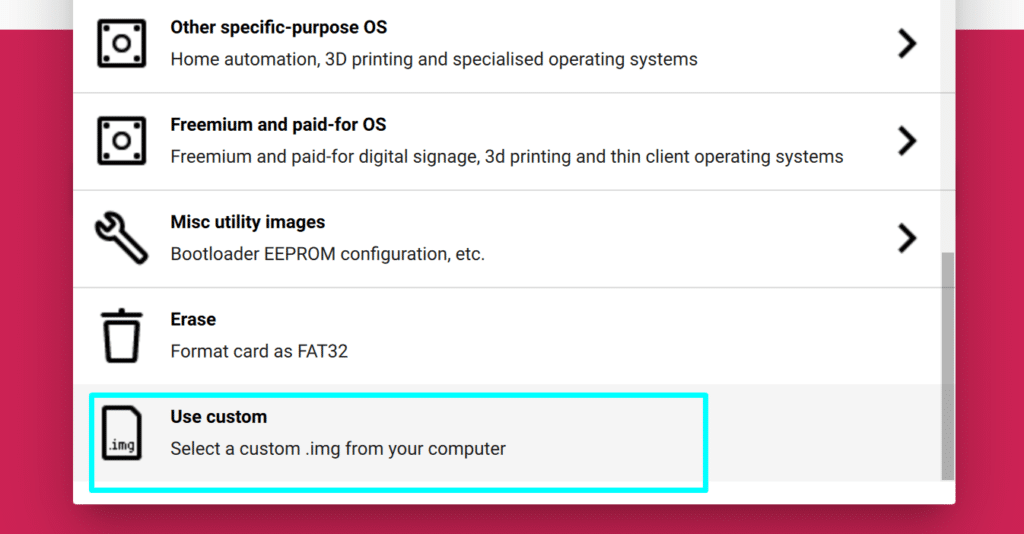
3. **Operating System**, Select ***Use Custom*** and choose the downloaded `.img.gz` file
4. **Storage**, Select your SD card
5. Click **Write**, if Raspberry Pi Imager offers to apply custom settings, select ***No***
---
## 3. Enter your API key
1. Insert the SD card into your computer
2. Open the **boot** volume on the SD card
3. Edit the `rpi_id.txt` file and enter the unique RPI ID key received by email, [Buy a key](https://www.expedy.io/raspberry-pi)
4. Save the file and safely eject the SD card
---
## 4. Start RPI
1. Insert the SD card into your Raspberry Pi Zero or 4
2. Connect the Raspberry Pi to your router via **Ethernet cable**
3. Connect your printer to the **USB1 port**
4. Power up the Raspberry Pi
---
## 5. Printer settings
1. Log in to [https://www.expedy.fr/console/v3/](https://www.expedy.fr/console/v3/)
2. Open the device, from **Machines** or from **Printers** depending on how it was registered
3. In the **Check Status** card, click **Check Status**. For a Raspberry Pi the console pings the machine through the API and answers **Online** or **Offline**
4. Open the **Raspberry Pi settings** card and click **USB scan**
5. The **USB ports** grid lists what is connected on `USB 1` to `USB 4`. A port with nothing plugged in shows **Free**, and the time of the **Last scan** appears next to the heading
Each detected port then exposes its own selectors:
| Selector | Options |
|---|---|
| Print mode | `ESC/POS` for receipt printers driven by ESC/POS commands (Epson TM, Star TSP143, Munbyn, Citizen), no driver required. `LABEL` for laser, inkjet, label and photo printers, which need a driver installed. |
| Width | `58`, `80`, `104` or `210 MM`, matching the roll actually loaded |
| Graphic mode | `Graphics (Default)`, or `BitImageRaster` / `BitImageColumn` if support asks for it |
Not registered on your account yet? See [Add a Raspberry Pi print server to your account](/expedy-print/installation/add-a-raspberry-pi-cloud-print-server-to-your-account).
## 6. Connect your application
- [Browse the code-free integrations](/integrations)
- [Create a print job with the API](/expedy-print/api-print-v2/create-a-print-job)
- [Format your receipts](/expedy-print/receipt-layout/text-layout-tags)
---
## Frequently asked questions
**The PING doesn't show the current date, what should I check?**
- Verify the network connection
- Make sure the RPI ID key is correctly entered in `rpi_id.txt`
- Check that **port 1883** is open on your router. Most standard internet boxes have it open by default, contact your network provider if you don't have router access
---
**The Raspberry Pi is connected and the printer is recognized, but nothing prints?**
- Go to **Printers** → Select printer → **Print Jobs History** and check for API requests
- Check the USB connection on the **USB1 port**, plugins and Zapier use USB1 by default. In custom integrations, you can target any USB port and connect up to **4 printers** on the same Raspberry Pi
---
**Can the Raspberry Pi connect via Wi-Fi?**
Yes, Wi-Fi is supported. For further details, [contact us](https://help.expedy.io/support/tickets/new).
---
---
url: https://docs.expedy.io/en/usb-cloud-printer-adapter/api-devices/get-devices-all
title: List all your devices
updated_at: 2026-10-22T10:52:40.240767+00:00
---
# List all your devices
```api
GET https://www.expedy.fr/api/v2/devices/all
```
This endpoint allows you to list all your devices
## Authentication
This endpoint requires an `Authorization` header with a valid API key.
## Response 200
OK
| Parameter | Type | Required | Description |
|-----------|------|----------|-------------|
| `device_uid` | `string` | No | |
| `version` | `string` | No | |
| `last_ping` | `string` | No | |
| `rpi_nickname` | `string` | No | |
| `rpi_disk_size` | `string` | No | |
| `rpi_vid_list` | `string` | No | |
**Response Example:**
```json
[
{
"device_uid": "MMAAZ112PI",
"version": "4.5.1",
"last_ping": "1657333235",
"rpi_nickname": "Lobby welcome displays",
"rpi_disk_size": "50",
"rpi_vid_list": "1_8R9VAPYBY24;1_D5JNX9PASFM;1_K7Y26X3R7IQ;1_NY4RW9GHX96;"
},
{
"device_uid": "5ZBNU4TY42H",
"version": "4.5.1",
"last_ping": "1657333235",
"rpi_nickname": "Room Service Dispatch",
"rpi_disk_size": "25",
"rpi_vid_list": ""
},
{
"device_uid": "NTK8YLP7ILE",
"version": "4.5.1",
"last_ping": "1657333235",
"rpi_nickname": "Kitchen Dispatch",
"rpi_disk_size": "25",
"rpi_vid_list": "1_TP7YLRUCNKF;"
}
]
```
---
url: https://docs.expedy.io/en/usb-cloud-printer-adapter/api-devices/get-devices-device-uid
title: Get device summary info
updated_at: 2026-10-18T13:43:38.257743+00:00
---
# Get device summary info
```api
GET https://www.expedy.fr/api/v2/devices/{device_uid}
```
This endpoint allows you to get a device's summary and status info
## Authentication
This endpoint requires an `Authorization` header with a valid API key.
## Path Parameters
| Parameter | Type | Required | Description |
|-----------|------|----------|-------------|
| `device_uid` | `string` | Yes | The Device's unique id, as found in your Expedy account |
## Response 200
OK
| Parameter | Type | Required | Description |
|-----------|------|----------|-------------|
| `device_uid` | `string` | No | |
| `rpi_nickname` | `string` | No | |
| `version` | `string` | No | |
| `last_ping` | `string` | No | |
| `rpi_disk_size` | `string` | No | |
| `rpi_vid_list` | `string` | No | |
**Response Example:**
```json
{
"device_uid": "MMAAZ112PI",
"rpi_nickname": "Lobby welcome displays",
"version": "4.5.1",
"last_ping": "1657333235",
"rpi_disk_size": "25",
"rpi_vid_list": "1_8R9VAPYBY24;1_D5JNX9PASFM;1_K7Y26X3R7IQ;1_NY4RW9GHX96;"
}
```
---
url: https://docs.expedy.io/en/usb-cloud-printer-adapter/rpi-installation/connecting-an-esc-pos-receipt-printer-to-the-cloud-print-box-adapter
title: Connecting an ESC POS receipt printer to the Cloud Print Box adapter
updated_at: 2026-10-23T07:57:27.306959+00:00
---
# Connecting an ESC POS receipt printer to the Cloud Print Box adapter
The [Expedy Cloud Print Box](https://www.expedy.io/product) adapter converts a conventional receipt printer into a cloud printer, via USB cable.
The cloud function lets you transmit print orders from an Internet source (merchant site, marketplace, delivery platform, [API](https://docs.expedy.io), [Zapier](/integrations/zapier/how-to-integrate-expedy-print-with-zapier), eCommerce [plugins](https://docs.expedy.io), Make.com...).
The printer must be compatible with **ESC POS or ESC/P** commands. This very standard language is used by 99% of manufacturers of 58 and 80 mm thermal ticket printers (Epson, Star Micronics, Brother, Citizen, etc.).
## Connect the printer to the adapter
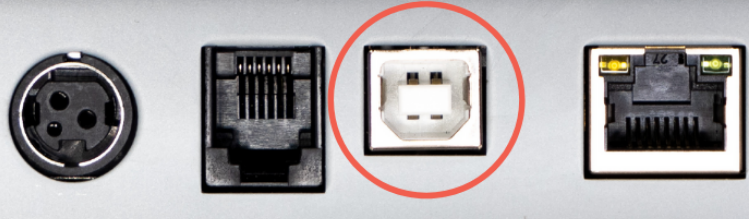
Use the USB type B cable supplied by the printer manufacturer (note that some manufacturers use reinforced cables, so using another cable will not work).
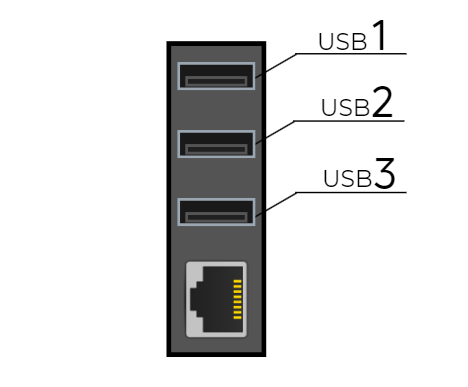
Connect the printer's USB cable to the USB1 port on the Expedy adapter as shown in the diagram below:
Power up the printer
Connect the Expedy adapter to your Internet router using an RJ45 LAN network cable.
Connect the power cable to the Expedy
The Expedy adapter will boot up and connect to the Internet.
## Test adapter connectivity to the Internet
Now that the hardware has been correctly installed, follow the steps below to test a ticket print.
Log in to your [Expedy account](https://www.expedy.fr/console/v3/)
Go to the **Machines** section
Then select your machine
Click on the **Ping** button at top right
If the adapter is properly connected to the Internet, you should get this message with the current time and date: **I'm up ! :) V4.6.0 - Today is 06-02-2024, 20h08**
If the **Ping** button displays the message **Sorry, no answer ... click to retry**, double-check the connectivity of the network cable to your Internet router.
## Detect and configure the printer
Log in to your [Expedy account](https://www.expedy.fr/console/v3/)
Go to the **Machines** section
Then select your machine
In the **Print Service** section, click on the **USB Scan** button
If the adapter is properly connected to the Internet and the printer correctly installed, the number of your printer is displayed:
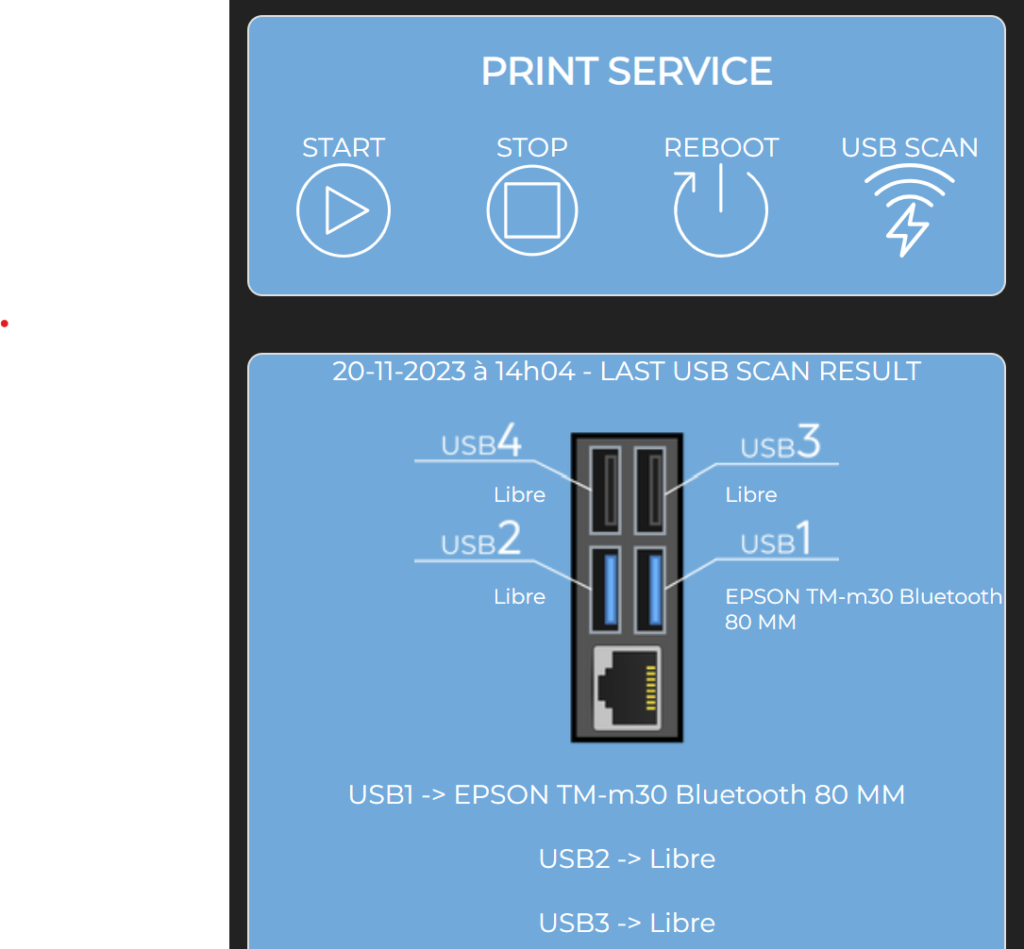
Select printer paper width, 58 or 80mm, printer type ESC POS, then click on **Save**.
If **USB Scan** doesn't detect a printer, recheck printer connectivity.
---
url: https://docs.expedy.io/en/usb-cloud-printer-adapter/api-system/get-devices-device-uid-ping
title: Ping
updated_at: 2026-10-20T20:51:25.277887+00:00
---
# Ping
```api
GET https://www.expedy.fr/api/v2/devices/{device_uid}/ping
```
This endpoint allows you to ask the device to ping back the platform
Use it in conjunction with the /status endpoint to check if the unix stamp was incremented, and confirm the device is correctly up and running.
## Authentication
This endpoint requires an `Authorization` header with a valid API key.
## Path Parameters
| Parameter | Type | Required | Description |
|-----------|------|----------|-------------|
| `device_uid` | `string` | Yes | The Device's unique id, as found in your Expedy account |
## Response 200
OK
| Parameter | Type | Required | Description |
|-----------|------|----------|-------------|
| `last_ping` | `number` | No | (ex: `1641509604`) |
**Response Example:**
```json
{
"last_ping": 1641509604
}
```
---
url: https://docs.expedy.io/en/usb-cloud-printer-adapter/rpi-installation/cloud-print-box-ethernet-cable-and-wifi-connection
title: Ethernet cable and WiFi connection
updated_at: 2026-10-22T06:53:39.71205+00:00
---
# Ethernet cable and WiFi connection
Turn any compatible printer into a remote print server with the [Expedy Cloud Print Box](https://www.expedy.io/product).
> ⚠️ **Ports 1883 and 8883** must be open on your network for the adapter to connect to the Expedy servers.
---
## 1. Connect via Ethernet
1. Connect an **RJ45 Ethernet cable** between the Cloud Print Box and your internet router
2. Connect a **USB cable** between the Cloud Print Box and your printer (USB Type-B port, usually on the back of the printer)
> ⚠️ Always use the USB cable supplied by the printer manufacturer when possible
3. **Power on the printer first**, then connect the power cable to the Cloud Print Box
4. The Cloud Print Box will boot and connect to the internet automatically
---
## 2. Verify connectivity

1. Log in to the [Expedy console](https://www.expedy.fr/console/v3/login.php?msg=Connexion)
2. Go to **Machines** and select your machine
3. Check that **Last PING** displays the current date and time, this confirms a successful internet connection
---
## 3. Detect and configure the printer
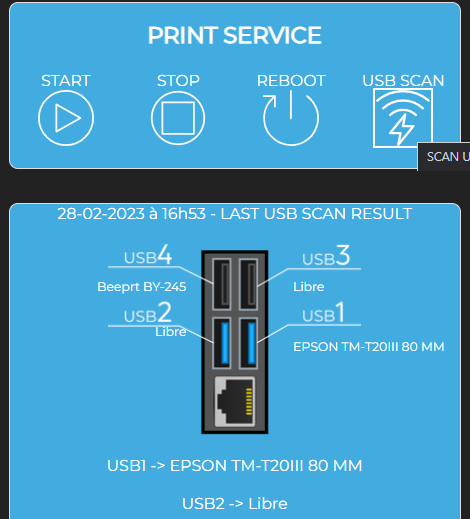
1. In the **Print Service** section, click **USB Scan**
2. Select **ESC/POS** as the printer type
3. Choose your paper width: **58mm** or **80mm**
4. Set the appropriate [graphics mode](https://docs.expedy.io)
5. Click **Save**
Your printer is now ready to receive remote print jobs via the [API](https://docs.expedy.io) or [eCommerce plugins](https://docs.expedy.io).
---
## 4. Connect via Wi-Fi
Both **2.4 GHz and 5 GHz** frequencies are supported.
> ℹ️ To configure Wi-Fi, the Cloud Print Box must already be connected to the internet, either via Ethernet cable or a 4G USB dongle.
### Add a Wi-Fi network
1. Log in to the [Expedy console](https://www.expedy.fr/console/v3/login.php?msg=Connexion)
2. Go to **Machines** and select your machine
3. In the **Wi-Fi** module, click **Add New**
4. Enter your network **SSID** (network name) and **password**
> 💡 If you haven't changed your router credentials, they're usually printed on a label on the back of your router or shown on its LCD screen
5. Click **Save New SSID** to confirm
6. Click **Update Configuration** to push the Wi-Fi settings to the device
---
url: https://docs.expedy.io/en/usb-cloud-printer-adapter/api-system/get-devices-device-uid-update
title: Update Firmware
updated_at: 2026-10-20T14:48:40.853737+00:00
---
# Update Firmware
```api
GET https://www.expedy.fr/api/v2/devices/{device_uid}/update
```
This endpoint allows you to initiate a device software update, if any are available.
## Authentication
This endpoint requires an `Authorization` header with a valid API key.
## Path Parameters
| Parameter | Type | Required | Description |
|-----------|------|----------|-------------|
| `device_uid` | `string` | Yes | The Device's unique id, as found in your Expedy account |
## Response 200
OK
| Parameter | Type | Required | Description |
|-----------|------|----------|-------------|
| `last_ping` | `integer` | No | (ex: `1641509604`) |
**Response Example:**
```json
{
"last_ping": 1641509604
}
```
---
url: https://docs.expedy.io/en/usb-cloud-printer-adapter/api-system/get-devices-device-uid-reboot
title: Reboot
updated_at: 2026-10-20T20:14:39.824684+00:00
---
# Reboot
```api
GET https://www.expedy.fr/api/v2/devices/{device_uid}/reboot
```
This endpoint allows you to remotely reboot the device.
## Authentication
This endpoint requires an `Authorization` header with a valid API key.
## Path Parameters
| Parameter | Type | Required | Description |
|-----------|------|----------|-------------|
| `device_uid` | `string` | Yes | The Device's unique id, as found in your Expedy account |
## Response 200
OK
| Parameter | Type | Required | Description |
|-----------|------|----------|-------------|
| `last_ping` | `integer` | No | (ex: `1641509604`) |
**Response Example:**
```json
{
"last_ping": 1641509604
}
```
---
url: https://docs.expedy.io/en/usb-cloud-printer-adapter/api-system/get-devices-device-uid-shutdown
title: Shutdown
updated_at: 2026-10-20T10:02:00.523818+00:00
---
# Shutdown
```api
GET https://www.expedy.fr/api/v2/devices/{device_uid}/shutdown
```
USE WITH CARE, This endpoint allows you to shutdown the device. BEWARE, You'll need to be physically near the device to be able to start it up again. This endpoint is usually used to safely shutdown the device before physically deploying it at another geographical location.
## Authentication
This endpoint requires an `Authorization` header with a valid API key.
## Path Parameters
| Parameter | Type | Required | Description |
|-----------|------|----------|-------------|
| `device_uid` | `string` | Yes | The Device's unique id, as found in your Expedy account |
## Response 200
OK
| Parameter | Type | Required | Description |
|-----------|------|----------|-------------|
| `last_ping` | `integer` | No | (ex: `1641509604`) |
**Response Example:**
```json
{
"last_ping": 1641509604
}
```
---
url: https://docs.expedy.io/en/usb-cloud-printer-adapter/api-wifi/get-devices-device-uid-wifi-conf
title: Get Actual Configuration
updated_at: 2026-10-23T05:45:36.015434+00:00
---
# Get Actual Configuration
```api
GET https://www.expedy.fr/api/v2/devices/{device_uid}/wifi/conf
```
This endpoint allows you to get the device's actual wifi configuration in json format.
## Authentication
This endpoint requires an `Authorization` header with a valid API key.
## Path Parameters
| Parameter | Type | Required | Description |
|-----------|------|----------|-------------|
| `device_uid` | `string` | Yes | The Device's unique id, as found in your Expedy account |
## Response 200
OK
| Parameter | Type | Required | Description |
|-----------|------|----------|-------------|
| `last_ping` | `integer` | No | (ex: `1641509604`) |
| `wifi_conf` | `array` | No | |
**`wifi_conf` properties:**
| Parameter | Type | Required | Description |
|-----------|------|----------|-------------|
| `wifi_id` | `integer` | No | (ex: `40`) |
| `wifi_ssid` | `string` | No | (ex: `my_local_ssid`) |
| `wifi_psk` | `string` | No | (ex: `***********************`) |
**Response Example:**
```json
{
"status": "ok",
"last_ping": 1641490999,
"wifi_conf": [
{
"wifi_id": 40,
"wifi_ssid": "my_local_ssid",
"wifi_psk": "***********************"
}
]
}
```
---
url: https://docs.expedy.io/en/usb-cloud-printer-adapter/api-wifi/put-devices-device-uid-wifi-add
title: Add SSID to Device Wifi Configuration
updated_at: 2026-10-22T15:48:15.258731+00:00
---
# Add SSID to Device Wifi Configuration
```api
PUT https://www.expedy.fr/api/v2/devices/{device_uid}/wifi/add
```
This endpoint allows you to add a new SSID to the device's wifi configuration.
## Authentication
This endpoint requires an `Authorization` header with a valid API key.
## Path Parameters
| Parameter | Type | Required | Description |
|-----------|------|----------|-------------|
| `device_uid` | `string` | Yes | The Device's unique id, as found in your Expedy account |
## Request Body
Content-Type: `application/json`
| Parameter | Type | Required | Description |
|-----------|------|----------|-------------|
| `wifi_ssid` | `string` | No | (ex: `my_new_local_ssid`) |
| `wifi_psk` | `string` | No | |
**Request Example:**
```json
{
"wifi_ssid": "my_new_local_ssid",
"wifi_psk": "my_new_ssid_password"
}
```
## Response 200
OK
| Parameter | Type | Required | Description |
|-----------|------|----------|-------------|
| `last_ping` | `integer` | No | (ex: `1641509604`) |
| `wifi_conf` | `array` | No | |
**`wifi_conf` properties:**
| Parameter | Type | Required | Description |
|-----------|------|----------|-------------|
| `wifi_id` | `integer` | No | (ex: `40`) |
| `wifi_ssid` | `string` | No | |
| `wifi_psk` | `string` | No | |
**Response Example:**
```json
{
"status": "ok",
"last_ping": 1641491009,
"wifi_conf": [
{
"wifi_id": 40,
"wifi_ssid": "my_local_ssid",
"wifi_psk": "***********************"
},
{
"wifi_id": 41,
"wifi_ssid": "my_new_local_ssid",
"wifi_psk": "***********************"
}
]
}
```
---
url: https://docs.expedy.io/en/usb-cloud-printer-adapter/api-wifi/patch-devices-device-uid-wifi-wifi-id-del
title: Delete SSID from Device Wifi Configuration
updated_at: 2026-10-22T06:01:46.522838+00:00
---
# Delete SSID from Device Wifi Configuration
```api
PATCH https://www.expedy.fr/api/v2/devices/{device_uid}/wifi/{wifi_id}/del
```
This endpoint allows you to delete an SSID from the device's wifi configuration.
## Authentication
This endpoint requires an `Authorization` header with a valid API key.
## Path Parameters
| Parameter | Type | Required | Description |
|-----------|------|----------|-------------|
| `device_uid` | `string` | Yes | The Device's unique id, as found in your Expedy account |
| `wifi_id` | `integer` | Yes | The ssid's id to delete from wifi configuration |
## Response 200
OK
| Parameter | Type | Required | Description |
|-----------|------|----------|-------------|
| `last_ping` | `integer` | No | (ex: `1641509604`) |
| `wifi_conf` | `array` | No | |
**`wifi_conf` properties:**
| Parameter | Type | Required | Description |
|-----------|------|----------|-------------|
| `wifi_id` | `integer` | No | (ex: `40`) |
| `wifi_ssid` | `string` | No | |
| `wifi_psk` | `string` | No | |
**Response Example:**
```json
{
"last_ping": 1641491009,
"wifi_conf": [
{
"wifi_id": 41,
"wifi_ssid": "my_new_local_ssid",
"wifi_psk": "***********************"
}
]
}
```
---
url: https://docs.expedy.io/en/usb-cloud-printer-adapter/api-wifi/get-devices-device-uid-wifi-update
title: Update Configuration
updated_at: 2026-10-20T10:09:02.277822+00:00
---
# Update Configuration
```api
GET https://www.expedy.fr/api/v2/devices/{device_uid}/wifi/update
```
This endpoint allows you to apply any new Wifi configuration change you made to the targeted device.
## Authentication
This endpoint requires an `Authorization` header with a valid API key.
## Path Parameters
| Parameter | Type | Required | Description |
|-----------|------|----------|-------------|
| `device_uid` | `string` | Yes | The Device's unique id, as found in your Expedy account |
## Response 200
OK
| Parameter | Type | Required | Description |
|-----------|------|----------|-------------|
| `last_ping` | `integer` | No | (ex: `1641509604`) |
**Response Example:**
```json
{
"last_ping": 1641509604
}
```
---
url: https://docs.expedy.io/en/usb-cloud-printer-adapter/api-usb-printer/get-devices-device-uid-usb-conf
title: Get Last Saved Usb Port Configuration
updated_at: 2026-10-22T05:59:50.414374+00:00
---
# Get Last Saved Usb Port Configuration
```api
GET https://www.expedy.fr/api/v2/devices/{device_uid}/usb/conf
```
This endpoint allows you to get the device's last known usb configuration in json format.
## Authentication
This endpoint requires an `Authorization` header with a valid API key.
## Path Parameters
| Parameter | Type | Required | Description |
|-----------|------|----------|-------------|
| `device_uid` | `string` | Yes | The Device's unique id, as found in your Expedy account |
## Response 200
OK
| Parameter | Type | Required | Description |
|-----------|------|----------|-------------|
| `last_ping` | `integer` | No | (ex: `1641509604`) |
| `usb_conf` | `array` | No | |
**`usb_conf` properties:**
| Parameter | Type | Required | Description |
|-----------|------|----------|-------------|
| `usb_port` | `integer` | No | (ex: `2`) |
| `usb_status` | `integer` | No | (ex: `1`) |
| `device_manufacturer` | `string` | No | (ex: `Datamax-O`Neil`) |
| `device_model` | `string` | No | (ex: `Datamax-O'Neil E-Class MarkIII`) |
| `device_width` | `integer` | No | If detected, the printer's width size in Millimeters. (ex: `80`) |
**Response Example:**
```json
{
"last_ping": 1641511426,
"usb_conf": [
{
"usb_port": 1,
"usb_status": 1,
"device_manufacturer": "Datamax-O`Neil",
"device_model": "Datamax-O'Neil E-Class MarkIII"
},
{
"usb_port": 2,
"usb_status": 0
},
{
"usb_port": 3,
"usb_status": 1,
"device_manufacturer": "Caysn",
"device_model": "Thermal Printer",
"device_width": 80
},
{
"usb_port": 4,
"usb_status": 0
}
]
}
```
---
url: https://docs.expedy.io/en/usb-cloud-printer-adapter/api-usb-printer/get-devices-device-uid-usb-scan
title: Scan Usb Ports
updated_at: 2026-10-20T09:02:55.069884+00:00
---
# Scan Usb Ports
```api
GET https://www.expedy.fr/api/v2/devices/{device_uid}/usb/scan
```
This endpoint allows you to initiate a scan of the device's usb ports for any compatible printer connected (up to 4, depending on your device model)
## Authentication
This endpoint requires an `Authorization` header with a valid API key.
## Path Parameters
| Parameter | Type | Required | Description |
|-----------|------|----------|-------------|
| `device_uid` | `string` | Yes | The Device's unique id, as found in your Expedy account |
## Response 200
OK
| Parameter | Type | Required | Description |
|-----------|------|----------|-------------|
| `last_ping` | `integer` | No | (ex: `1641509604`) |
**Response Example:**
```json
{
"last_ping": 1641509604
}
```
---
url: https://docs.expedy.io/en/usb-cloud-printer-adapter/api-usb-printer/get-devices-device-uid-usb-scan-read
title: Get Usb Port Scan Result
updated_at: 2026-10-19T20:20:58.325372+00:00
---
# Get Usb Port Scan Result
```api
GET https://www.expedy.fr/api/v2/devices/{device_uid}/usb/scan/read
```
This endpoint allows you to get the device's last known usb scan result in json format.
## Authentication
This endpoint requires an `Authorization` header with a valid API key.
## Path Parameters
| Parameter | Type | Required | Description |
|-----------|------|----------|-------------|
| `device_uid` | `string` | Yes | The Device's unique id, as found in your Expedy account |
## Response 200
OK
| Parameter | Type | Required | Description |
|-----------|------|----------|-------------|
| `last_ping` | `integer` | No | (ex: `1641509604`) |
| `usb_scan` | `array` | No | |
**`usb_scan` properties:**
| Parameter | Type | Required | Description |
|-----------|------|----------|-------------|
| `usb_port` | `integer` | No | (ex: `2`) |
| `usb_status` | `integer` | No | (ex: `1`) |
| `device_manufacturer` | `string` | No | (ex: `Datamax-O`Neil`) |
| `device_model` | `string` | No | (ex: `Datamax-O'Neil E-Class MarkIII`) |
**Response Example:**
```json
{
"last_ping": 1641511426,
"usb_conf": [
{
"usb_port": 1,
"usb_status": 1,
"device_manufacturer": "Datamax-O`Neil",
"device_model": "Datamax-O'Neil E-Class MarkIII"
},
{
"usb_port": 2,
"usb_status": 0
},
{
"usb_port": 3,
"usb_status": 1,
"device_manufacturer": "Caysn",
"device_model": "Thermal Printer",
"device_width": 80
},
{
"usb_port": 4,
"usb_status": 0
}
]
}
```
---
url: https://docs.expedy.io/en/usb-cloud-printer-adapter/api-usb-printer/post-devices-device-uid-usb-usb-port-print
title: Create a USB Print Job
updated_at: 2026-10-20T15:39:19.213527+00:00
---
# Create a USB Print Job
```api
POST https://www.expedy.fr/api/v2/devices/{device_uid}/usb/{usb_port}/print
```
Sends a print job to a printer plugged into one of the USB ports of your Expedy device.
**Base URL:** `https://www.expedy.fr/api/v2`
---
## Authentication
This endpoint requires an `Authorization` header containing your **SID** and **TOKEN**, separated by a single colon.
```http
Authorization: :
```
```http
Authorization: 9F3K7Q2WZ1ABCDEF:b1c2d3e4f5a6b7c8d9e0f1a2b3c4d5e6
```
> ⚠️ This is **not** a Bearer token. Do **not** add a `Bearer` or `Basic` prefix — send the raw `SID:TOKEN` value.
Both values are available in the [Expedy console](https://www.expedy.fr/console/) under **API**. All requests must be made over **HTTPS** (TLS).
---
## Path parameters
| Parameter | Type | Required | Description |
|-----------|------|----------|-------------|
| `device_uid` | `string` | Yes | UID of the device, found in the console under **Machines** (e.g. `OOBBZ100PI`). |
| `usb_port` | `string` | Yes | The USB port the printer is plugged into: `1`, `2`, `3` or `4`, matching the ports shown in the console. Use [`/usb/scan/read`](#related-endpoints) to see what is connected to each one. |
A port only accepts jobs once a printer has been detected on it and configured. If the port is empty, or the printer on it was never configured, the job is rejected.
---
## Request body
Content-Type: `application/json`
| Parameter | Type | Required | Description |
|-----------|------|----------|-------------|
| `usb_msg` | `string` | Yes | The content to print, built with the [receipt layout tags](/expedy-print/receipt-layout/text-layout-tags) (``, ``, `![]() `, ``, ``, …). Plain text, QR codes, images, or a PDF URL. |
| `notification_url` | `string` | No | A URL the print service calls once it has handed the job to the printer. Use it to close the loop in your own system instead of assuming the job printed. |
| `origin` | `string` | No | A free-form label to tag the source of the job (a URI, an app name, a department…). Useful for filtering and debugging in your logs. |
| `printer_han` | `string` | No | The script to compose the receipt in: `cn` Chinese, `kr` Korean, `jp` Japanese. Omit it for Latin scripts. See [Asian characters](#asian-characters). |
**Request example:**
```json
{
"usb_msg": "ORDER #1234\nTable 7\n--------------------------------\n1 x Burger\n2 x Fries\n",
"notification_url": "https://www.example.com/print-callback",
"origin": "pos-kitchen-01"
}
```
**cURL example:**
```bash
curl -X POST "https://www.expedy.fr/api/v2/devices/OOBBZ100PI/usb/1/print" \
-H "Authorization: :" \
-H "Content-Type: application/json" \
-d '{"usb_msg":"Hello","origin":"my-app"}'
```
---
## Asian characters
Chinese, Japanese and Korean need `printer_han`, set to the script you are printing.
| Value | Script |
|---|---|
| `cn` | Chinese |
| `kr` | Korean |
| `jp` | Japanese |
`1` is still accepted as a synonym of `cn`.
By default the receipt is composed in single-byte mode: each character is mapped through one of the printer's code pages. No single-byte code page contains Hanzi, Kana or Hangul, so **without this parameter every such character is replaced with a `?`** before the job even reaches the device.
```json
{
"usb_msg": "주문 #1234\n",
"printer_han": "kr"
}
```
**The value has to match the script.** Each one selects a different encoding and they do not overlap: Korean sent as `cn` comes out as `?`, exactly as if the parameter had been left out.
**The printer has to carry the matching font.** `printer_han` switches the data stream to multi-byte mode; the glyphs themselves come from the printer's font ROM. A model shipped without that font will not print the characters even with the right value, and a printer sold for the Chinese market carries Hanzi, which does not mean it carries Hangul or Kana. Test the exact script you need on the exact model you deploy, and [contact support](https://help.expedy.io/support/tickets/new) if the result isn't readable.
**Latin text does not need it.** Leave `printer_han` out for European languages; accented characters are handled in the default mode.
Send your content as **UTF-8** in every mode. The API stores and returns exactly what it receives, so the print history in the console shows the text as it arrived, which is the quickest way to tell a data problem from a printer one.
---
## Response `200 OK`
The job was **accepted and queued**.
> ℹ️ **A `200` confirms server-side reception only — not that the ticket was physically printed.**
> Delivery is asynchronous: the device receives the job when it next connects. The printer may be offline, out of paper, powered off, or unreachable at that moment. Pass a `notification_url` if you need to know what actually happened.
| Parameter | Type | Description |
|-----------|------|-------------|
| `request_uid` | `string` | Unique identifier of the accepted print job (e.g. `1X5ERXL94BYVWHP92DK3MCASUGJ`). |
| `last_ping` | `integer` | Unix timestamp of the device's last contact with the server. A value far in the past means the device was not online when you sent the job. |
**Response example:**
```json
{
"last_ping": 1641509604,
"request_uid": "1X5ERXL94BYVWHP92DK3MCASUGJ"
}
```
`last_ping` is worth reading on every call: it is the cheapest signal that a device has gone silent.
---
## Errors
| Status | Meaning |
|--------|---------|
| `403` | Missing or invalid credentials (`SID` / `TOKEN`), or the device does not belong to this account. |
| `404` | Unknown `device_uid`, or no configured printer on that `usb_port`. |
| `405` | Wrong HTTP method — this endpoint is `POST` only. |
| `422` | Empty or malformed `usb_msg`. |
| `500` | The job could not be handed to the device. Retry, then contact [support](https://help.expedy.io/support/tickets/new) if it persists. |
---
## Good practices
- **Idempotency.** Every accepted request produces a print. The endpoint does **not** de-duplicate, so if you retry after a network error, guard against double printing on your side.
- **Keep `usb_msg` within the paper width.** 32 characters per line at 58 mm, 48 at 80 mm. See the [layout reference](/expedy-print/receipt-layout/text-layout-tags).
- **Test with and without images.** Some printer models reject certain image types and may fail the whole job — validate before production.
---
## Related endpoints
```api
GET https://www.expedy.fr/api/v2/devices/{device_uid}/usb/scan/read
```
Returns what is currently plugged into each USB port, with the detected manufacturer and model. Use it to discover which port to print to, and to confirm a printer is still where you expect.
`/usb/conf` returns the saved configuration of each port — paper width, print mode, graphic mode.
---
## SDK & examples
Prefer a ready-made client? Use the official Node.js SDK:
👉 **[github.com/ExpedyDev/expedy-sdk-node](https://github.com/ExpedyDev/expedy-sdk-node)**
---
# Integrations
---
url: https://docs.expedy.io/en/integrations/dood/connect-a-receipt-printer-to-dood
title: Print DOOD orders on a receipt printer
updated_at: 2026-10-21T13:01:36.880528+00:00
---
# Print DOOD orders on a receipt printer
[DOOD](https://www.dood.com/) is an online ordering solution for hospitality. It connects to Expedy PRINT through **HubRise**: DOOD sends its orders to HubRise, HubRise forwards them to your cloud printer, and the ticket comes out within seconds.
## What you need
- An Expedy account with an active printer. Not added yet? Follow the guide for your machine, [Expedy XPDY80](/expedy-print/installation/add-an-expedy-xpdy80-cloud-printer-to-your-account), [HSPOS](/expedy-print/installation/add-an-hspos-cloud-printer-to-your-account), [Star Micronics](/expedy-print/installation/add-a-star-micronics-printer-to-your-account) or [Raspberry Pi](/expedy-print/installation/add-a-raspberry-pi-cloud-print-server-to-your-account)
- A [HubRise account](https://manager.hubrise.com/signup), which aggregates your sales channels
- A DOOD account linked to your HubRise location
## How it works
| Step | What happens |
|---|---|
| 1 | An order is placed on DOOD |
| 2 | DOOD pushes it to HubRise |
| 3 | Expedy PRINT receives it and prints a standardised ticket |
A single printer covers every channel connected to the same HubRise location, so you do not need one machine per platform.
## Connect it
The setup happens once, on the HubRise side, and is described step by step in the reference guide:
**[Connect a receipt printer to HubRise](/integrations/hubrise/connecting-a-receipt-printer-to-hubrise)**
Then link your DOOD account to the same HubRise location. That part is done from the DOOD back office, or by DOOD support.
## Receipt settings
Once connected, the printer page in the [Expedy console](https://www.expedy.fr/console/v3/) controls what gets printed:
- **Print order when**, the status that triggers printing, `NEW`, `RECEIVED` or `ACCEPTED`
- **Then change status to**, the automatic status update applied after printing
- **Number of copies**, one ticket for the kitchen, one for the counter or the delivery bag
- The receipt header and footer, logo, company name, address and registration number
All of it is detailed in [Connect a receipt printer to HubRise](/integrations/hubrise/connecting-a-receipt-printer-to-hubrise).
> Depending on the connector or the point-of-sale software you use, this setup may be handled by your partner. Check with them before you start.
## Need help?
- [Browse all integrations](/integrations)
- [Open a support ticket](https://help.expedy.io/support/tickets/new)
---
url: https://docs.expedy.io/en/integrations/aquilacms/connect-a-receipt-printer-to-aquilacms
title: Print AquilaCMS orders on a receipt printer
updated_at: 2026-10-19T20:02:41.291481+00:00
---
# Print AquilaCMS orders on a receipt printer
[AquilaCMS](https://www.aquila-cms.com/) is an online ordering solution for hospitality. It connects to Expedy PRINT through **HubRise**: AquilaCMS sends its orders to HubRise, HubRise forwards them to your cloud printer, and the ticket comes out within seconds.
## What you need
- An Expedy account with an active printer. Not added yet? Follow the guide for your machine, [Expedy XPDY80](/expedy-print/installation/add-an-expedy-xpdy80-cloud-printer-to-your-account), [HSPOS](/expedy-print/installation/add-an-hspos-cloud-printer-to-your-account), [Star Micronics](/expedy-print/installation/add-a-star-micronics-printer-to-your-account) or [Raspberry Pi](/expedy-print/installation/add-a-raspberry-pi-cloud-print-server-to-your-account)
- A [HubRise account](https://manager.hubrise.com/signup), which aggregates your sales channels
- A AquilaCMS account linked to your HubRise location
## How it works
| Step | What happens |
|---|---|
| 1 | An order is placed on AquilaCMS |
| 2 | AquilaCMS pushes it to HubRise |
| 3 | Expedy PRINT receives it and prints a standardised ticket |
A single printer covers every channel connected to the same HubRise location, so you do not need one machine per platform.
## Connect it
The setup happens once, on the HubRise side, and is described step by step in the reference guide:
**[Connect a receipt printer to HubRise](/integrations/hubrise/connecting-a-receipt-printer-to-hubrise)**
Then link your AquilaCMS account to the same HubRise location. That part is done from the AquilaCMS back office, or by AquilaCMS support.
## Receipt settings
Once connected, the printer page in the [Expedy console](https://www.expedy.fr/console/v3/) controls what gets printed:
- **Print order when**, the status that triggers printing, `NEW`, `RECEIVED` or `ACCEPTED`
- **Then change status to**, the automatic status update applied after printing
- **Number of copies**, one ticket for the kitchen, one for the counter or the delivery bag
- The receipt header and footer, logo, company name, address and registration number
All of it is detailed in [Connect a receipt printer to HubRise](/integrations/hubrise/connecting-a-receipt-printer-to-hubrise).
> Depending on the connector or the point-of-sale software you use, this setup may be handled by your partner. Check with them before you start.
## Need help?
- [Browse all integrations](/integrations)
- [Open a support ticket](https://help.expedy.io/support/tickets/new)
---
url: https://docs.expedy.io/en/integrations/dropbox/connect-a-receipt-printer-to-dropbox
title: Print your Dropbox photos automatically
updated_at: 2026-10-21T08:51:25.523223+00:00
---
# Print your Dropbox photos automatically
[Dropbox](https://www.dropbox.com/) is a cloud file storage service. Through **Zapier**, every new image can go straight to a printer: a black and white copy on a thermal receipt printer, or a full colour print on a photo printer driven by a Raspberry Pi.
## Two very different ways to print an image
| | Receipt printer, thermal | Raspberry Pi or Cloud Print Box |
|---|---|---|
| Hardware | Expedy XPDY80, HSPOS, Star Micronics | Your own laser, inkjet or photo printer, Kodak or DNP and the like, on USB |
| Result | Black and white, no ink, nothing to buy beyond the paper roll | Full colour, photo quality |
| Formats | `.JPG` `.GIF` `.PNG`, wrapped in the `
`, ``, ``, …). Plain text, QR codes, images, or a PDF URL. |
| `notification_url` | `string` | No | A URL the print service calls once it has handed the job to the printer. Use it to close the loop in your own system instead of assuming the job printed. |
| `origin` | `string` | No | A free-form label to tag the source of the job (a URI, an app name, a department…). Useful for filtering and debugging in your logs. |
| `printer_han` | `string` | No | The script to compose the receipt in: `cn` Chinese, `kr` Korean, `jp` Japanese. Omit it for Latin scripts. See [Asian characters](#asian-characters). |
**Request example:**
```json
{
"usb_msg": "ORDER #1234\nTable 7\n--------------------------------\n1 x Burger\n2 x Fries\n",
"notification_url": "https://www.example.com/print-callback",
"origin": "pos-kitchen-01"
}
```
**cURL example:**
```bash
curl -X POST "https://www.expedy.fr/api/v2/devices/OOBBZ100PI/usb/1/print" \
-H "Authorization: :" \
-H "Content-Type: application/json" \
-d '{"usb_msg":"Hello","origin":"my-app"}'
```
---
## Asian characters
Chinese, Japanese and Korean need `printer_han`, set to the script you are printing.
| Value | Script |
|---|---|
| `cn` | Chinese |
| `kr` | Korean |
| `jp` | Japanese |
`1` is still accepted as a synonym of `cn`.
By default the receipt is composed in single-byte mode: each character is mapped through one of the printer's code pages. No single-byte code page contains Hanzi, Kana or Hangul, so **without this parameter every such character is replaced with a `?`** before the job even reaches the device.
```json
{
"usb_msg": "주문 #1234\n",
"printer_han": "kr"
}
```
**The value has to match the script.** Each one selects a different encoding and they do not overlap: Korean sent as `cn` comes out as `?`, exactly as if the parameter had been left out.
**The printer has to carry the matching font.** `printer_han` switches the data stream to multi-byte mode; the glyphs themselves come from the printer's font ROM. A model shipped without that font will not print the characters even with the right value, and a printer sold for the Chinese market carries Hanzi, which does not mean it carries Hangul or Kana. Test the exact script you need on the exact model you deploy, and [contact support](https://help.expedy.io/support/tickets/new) if the result isn't readable.
**Latin text does not need it.** Leave `printer_han` out for European languages; accented characters are handled in the default mode.
Send your content as **UTF-8** in every mode. The API stores and returns exactly what it receives, so the print history in the console shows the text as it arrived, which is the quickest way to tell a data problem from a printer one.
---
## Response `200 OK`
The job was **accepted and queued**.
> ℹ️ **A `200` confirms server-side reception only — not that the ticket was physically printed.**
> Delivery is asynchronous: the device receives the job when it next connects. The printer may be offline, out of paper, powered off, or unreachable at that moment. Pass a `notification_url` if you need to know what actually happened.
| Parameter | Type | Description |
|-----------|------|-------------|
| `request_uid` | `string` | Unique identifier of the accepted print job (e.g. `1X5ERXL94BYVWHP92DK3MCASUGJ`). |
| `last_ping` | `integer` | Unix timestamp of the device's last contact with the server. A value far in the past means the device was not online when you sent the job. |
**Response example:**
```json
{
"last_ping": 1641509604,
"request_uid": "1X5ERXL94BYVWHP92DK3MCASUGJ"
}
```
`last_ping` is worth reading on every call: it is the cheapest signal that a device has gone silent.
---
## Errors
| Status | Meaning |
|--------|---------|
| `403` | Missing or invalid credentials (`SID` / `TOKEN`), or the device does not belong to this account. |
| `404` | Unknown `device_uid`, or no configured printer on that `usb_port`. |
| `405` | Wrong HTTP method — this endpoint is `POST` only. |
| `422` | Empty or malformed `usb_msg`. |
| `500` | The job could not be handed to the device. Retry, then contact [support](https://help.expedy.io/support/tickets/new) if it persists. |
---
## Good practices
- **Idempotency.** Every accepted request produces a print. The endpoint does **not** de-duplicate, so if you retry after a network error, guard against double printing on your side.
- **Keep `usb_msg` within the paper width.** 32 characters per line at 58 mm, 48 at 80 mm. See the [layout reference](/expedy-print/receipt-layout/text-layout-tags).
- **Test with and without images.** Some printer models reject certain image types and may fail the whole job — validate before production.
---
## Related endpoints
```api
GET https://www.expedy.fr/api/v2/devices/{device_uid}/usb/scan/read
```
Returns what is currently plugged into each USB port, with the detected manufacturer and model. Use it to discover which port to print to, and to confirm a printer is still where you expect.
`/usb/conf` returns the saved configuration of each port — paper width, print mode, graphic mode.
---
## SDK & examples
Prefer a ready-made client? Use the official Node.js SDK:
👉 **[github.com/ExpedyDev/expedy-sdk-node](https://github.com/ExpedyDev/expedy-sdk-node)**
---
# Integrations
---
url: https://docs.expedy.io/en/integrations/dood/connect-a-receipt-printer-to-dood
title: Print DOOD orders on a receipt printer
updated_at: 2026-10-21T13:01:36.880528+00:00
---
# Print DOOD orders on a receipt printer
[DOOD](https://www.dood.com/) is an online ordering solution for hospitality. It connects to Expedy PRINT through **HubRise**: DOOD sends its orders to HubRise, HubRise forwards them to your cloud printer, and the ticket comes out within seconds.
## What you need
- An Expedy account with an active printer. Not added yet? Follow the guide for your machine, [Expedy XPDY80](/expedy-print/installation/add-an-expedy-xpdy80-cloud-printer-to-your-account), [HSPOS](/expedy-print/installation/add-an-hspos-cloud-printer-to-your-account), [Star Micronics](/expedy-print/installation/add-a-star-micronics-printer-to-your-account) or [Raspberry Pi](/expedy-print/installation/add-a-raspberry-pi-cloud-print-server-to-your-account)
- A [HubRise account](https://manager.hubrise.com/signup), which aggregates your sales channels
- A DOOD account linked to your HubRise location
## How it works
| Step | What happens |
|---|---|
| 1 | An order is placed on DOOD |
| 2 | DOOD pushes it to HubRise |
| 3 | Expedy PRINT receives it and prints a standardised ticket |
A single printer covers every channel connected to the same HubRise location, so you do not need one machine per platform.
## Connect it
The setup happens once, on the HubRise side, and is described step by step in the reference guide:
**[Connect a receipt printer to HubRise](/integrations/hubrise/connecting-a-receipt-printer-to-hubrise)**
Then link your DOOD account to the same HubRise location. That part is done from the DOOD back office, or by DOOD support.
## Receipt settings
Once connected, the printer page in the [Expedy console](https://www.expedy.fr/console/v3/) controls what gets printed:
- **Print order when**, the status that triggers printing, `NEW`, `RECEIVED` or `ACCEPTED`
- **Then change status to**, the automatic status update applied after printing
- **Number of copies**, one ticket for the kitchen, one for the counter or the delivery bag
- The receipt header and footer, logo, company name, address and registration number
All of it is detailed in [Connect a receipt printer to HubRise](/integrations/hubrise/connecting-a-receipt-printer-to-hubrise).
> Depending on the connector or the point-of-sale software you use, this setup may be handled by your partner. Check with them before you start.
## Need help?
- [Browse all integrations](/integrations)
- [Open a support ticket](https://help.expedy.io/support/tickets/new)
---
url: https://docs.expedy.io/en/integrations/aquilacms/connect-a-receipt-printer-to-aquilacms
title: Print AquilaCMS orders on a receipt printer
updated_at: 2026-10-19T20:02:41.291481+00:00
---
# Print AquilaCMS orders on a receipt printer
[AquilaCMS](https://www.aquila-cms.com/) is an online ordering solution for hospitality. It connects to Expedy PRINT through **HubRise**: AquilaCMS sends its orders to HubRise, HubRise forwards them to your cloud printer, and the ticket comes out within seconds.
## What you need
- An Expedy account with an active printer. Not added yet? Follow the guide for your machine, [Expedy XPDY80](/expedy-print/installation/add-an-expedy-xpdy80-cloud-printer-to-your-account), [HSPOS](/expedy-print/installation/add-an-hspos-cloud-printer-to-your-account), [Star Micronics](/expedy-print/installation/add-a-star-micronics-printer-to-your-account) or [Raspberry Pi](/expedy-print/installation/add-a-raspberry-pi-cloud-print-server-to-your-account)
- A [HubRise account](https://manager.hubrise.com/signup), which aggregates your sales channels
- A AquilaCMS account linked to your HubRise location
## How it works
| Step | What happens |
|---|---|
| 1 | An order is placed on AquilaCMS |
| 2 | AquilaCMS pushes it to HubRise |
| 3 | Expedy PRINT receives it and prints a standardised ticket |
A single printer covers every channel connected to the same HubRise location, so you do not need one machine per platform.
## Connect it
The setup happens once, on the HubRise side, and is described step by step in the reference guide:
**[Connect a receipt printer to HubRise](/integrations/hubrise/connecting-a-receipt-printer-to-hubrise)**
Then link your AquilaCMS account to the same HubRise location. That part is done from the AquilaCMS back office, or by AquilaCMS support.
## Receipt settings
Once connected, the printer page in the [Expedy console](https://www.expedy.fr/console/v3/) controls what gets printed:
- **Print order when**, the status that triggers printing, `NEW`, `RECEIVED` or `ACCEPTED`
- **Then change status to**, the automatic status update applied after printing
- **Number of copies**, one ticket for the kitchen, one for the counter or the delivery bag
- The receipt header and footer, logo, company name, address and registration number
All of it is detailed in [Connect a receipt printer to HubRise](/integrations/hubrise/connecting-a-receipt-printer-to-hubrise).
> Depending on the connector or the point-of-sale software you use, this setup may be handled by your partner. Check with them before you start.
## Need help?
- [Browse all integrations](/integrations)
- [Open a support ticket](https://help.expedy.io/support/tickets/new)
---
url: https://docs.expedy.io/en/integrations/dropbox/connect-a-receipt-printer-to-dropbox
title: Print your Dropbox photos automatically
updated_at: 2026-10-21T08:51:25.523223+00:00
---
# Print your Dropbox photos automatically
[Dropbox](https://www.dropbox.com/) is a cloud file storage service. Through **Zapier**, every new image can go straight to a printer: a black and white copy on a thermal receipt printer, or a full colour print on a photo printer driven by a Raspberry Pi.
## Two very different ways to print an image
| | Receipt printer, thermal | Raspberry Pi or Cloud Print Box |
|---|---|---|
| Hardware | Expedy XPDY80, HSPOS, Star Micronics | Your own laser, inkjet or photo printer, Kodak or DNP and the like, on USB |
| Result | Black and white, no ink, nothing to buy beyond the paper roll | Full colour, photo quality |
| Formats | `.JPG` `.GIF` `.PNG`, wrapped in the `![]() ` tag | `.JPG` `.BMP` `.PNG` `.PDF`, sent as a bare URL |
| Width | 398 px at 58 mm, 602 px at 80 mm, 1002 px at 104 mm | The printer's own format |
| Setup | Nothing to install | USB port set to `LABEL` after a scan, printer driver installed |
## On a thermal receipt printer
Thermal printing uses no ink: the image is burned into the paper, so a print costs nothing beyond the roll. That is what makes it viable for a photo booth, an event or a loyalty coupon.
The trade-off is the rendering. The documented requirement is **flat black on a white background**, at the exact width of your paper, 5 to 15 KB, served over HTTPS. A colour photo taken straight from Dropbox will not come out as is: convert it to black and white and resize it first. Every constraint is listed in [Image and Logo](/expedy-print/receipt-layout/image-and-logo-printing).
In the Zap, the message is the `
` tag | `.JPG` `.BMP` `.PNG` `.PDF`, sent as a bare URL |
| Width | 398 px at 58 mm, 602 px at 80 mm, 1002 px at 104 mm | The printer's own format |
| Setup | Nothing to install | USB port set to `LABEL` after a scan, printer driver installed |
## On a thermal receipt printer
Thermal printing uses no ink: the image is burned into the paper, so a print costs nothing beyond the roll. That is what makes it viable for a photo booth, an event or a loyalty coupon.
The trade-off is the rendering. The documented requirement is **flat black on a white background**, at the exact width of your paper, 5 to 15 KB, served over HTTPS. A colour photo taken straight from Dropbox will not come out as is: convert it to black and white and resize it first. Every constraint is listed in [Image and Logo](/expedy-print/receipt-layout/image-and-logo-printing).
In the Zap, the message is the `![]() ` tag wrapping the image URL:
```text
` tag wrapping the image URL:
```text
![]() https://example.com/photo.png
```
## On a photo, laser or inkjet printer
For real photo output, the job goes to **your own printer**, connected by USB to a **Raspberry Pi** or a **Cloud Print Box adapter**. Laser, inkjet, label and dye-sublimation photo printers such as Kodak or DNP all work, as long as their driver is installed.
Run a **USB scan** on the device page, set that port to `LABEL`, and send the image URL **on its own, with no tag**:
```text
https://example.com/photo.jpg
```
See [Installation on Raspberry Pi](/usb-cloud-printer-adapter/rpi-installation/installation-on-raspberry-pi) and [PDF printing](/expedy-print/receipt-layout/print-pdf).
## Build the Zap
1. Pick **Dropbox** as the trigger app and the event that fires on a new image
2. Add **Expedy Print** as the action, then **Create a Print Job**
3. Connect your Expedy account with your **Expedy SID** and your **Expedy TOKEN**, both on the printer page of the [Expedy console](https://www.expedy.fr/console/v3/), in the **API Keys & UID** card
4. Enter the **Printer UID** of the machine that will print
5. In the message, put the `
https://example.com/photo.png
```
## On a photo, laser or inkjet printer
For real photo output, the job goes to **your own printer**, connected by USB to a **Raspberry Pi** or a **Cloud Print Box adapter**. Laser, inkjet, label and dye-sublimation photo printers such as Kodak or DNP all work, as long as their driver is installed.
Run a **USB scan** on the device page, set that port to `LABEL`, and send the image URL **on its own, with no tag**:
```text
https://example.com/photo.jpg
```
See [Installation on Raspberry Pi](/usb-cloud-printer-adapter/rpi-installation/installation-on-raspberry-pi) and [PDF printing](/expedy-print/receipt-layout/print-pdf).
## Build the Zap
1. Pick **Dropbox** as the trigger app and the event that fires on a new image
2. Add **Expedy Print** as the action, then **Create a Print Job**
3. Connect your Expedy account with your **Expedy SID** and your **Expedy TOKEN**, both on the printer page of the [Expedy console](https://www.expedy.fr/console/v3/), in the **API Keys & UID** card
4. Enter the **Printer UID** of the machine that will print
5. In the message, put the `![]() ` tag on a receipt printer, or the bare image URL on a photo printer
Step by step on the Zapier side: [How to integrate Expedy Print with Zapier](/integrations/zapier/how-to-integrate-expedy-print-with-zapier)
> Depending on the connector or the software you use, this setup may be handled by your partner or your agency. Check with them before you start.
## Need help?
- [Browse all integrations](/integrations)
- [Open a support ticket](https://help.expedy.io/support/tickets/new)
---
url: https://docs.expedy.io/en/integrations/eeatself/connect-a-receipt-printer-to-eeatself
title: Print eEatself orders on a receipt printer
updated_at: 2026-10-19T20:05:27.20597+00:00
---
# Print eEatself orders on a receipt printer
**eEatself** is an online ordering solution for hospitality. It connects to Expedy PRINT through **HubRise**: eEatself sends its orders to HubRise, HubRise forwards them to your cloud printer, and the ticket comes out within seconds.
## What you need
- An Expedy account with an active printer. Not added yet? Follow the guide for your machine, [Expedy XPDY80](/expedy-print/installation/add-an-expedy-xpdy80-cloud-printer-to-your-account), [HSPOS](/expedy-print/installation/add-an-hspos-cloud-printer-to-your-account), [Star Micronics](/expedy-print/installation/add-a-star-micronics-printer-to-your-account) or [Raspberry Pi](/expedy-print/installation/add-a-raspberry-pi-cloud-print-server-to-your-account)
- A [HubRise account](https://manager.hubrise.com/signup), which aggregates your sales channels
- A eEatself account linked to your HubRise location
## How it works
| Step | What happens |
|---|---|
| 1 | An order is placed on eEatself |
| 2 | eEatself pushes it to HubRise |
| 3 | Expedy PRINT receives it and prints a standardised ticket |
A single printer covers every channel connected to the same HubRise location, so you do not need one machine per platform.
## Connect it
The setup happens once, on the HubRise side, and is described step by step in the reference guide:
**[Connect a receipt printer to HubRise](/integrations/hubrise/connecting-a-receipt-printer-to-hubrise)**
Then link your eEatself account to the same HubRise location. That part is done from the eEatself back office, or by eEatself support.
## Receipt settings
Once connected, the printer page in the [Expedy console](https://www.expedy.fr/console/v3/) controls what gets printed:
- **Print order when**, the status that triggers printing, `NEW`, `RECEIVED` or `ACCEPTED`
- **Then change status to**, the automatic status update applied after printing
- **Number of copies**, one ticket for the kitchen, one for the counter or the delivery bag
- The receipt header and footer, logo, company name, address and registration number
All of it is detailed in [Connect a receipt printer to HubRise](/integrations/hubrise/connecting-a-receipt-printer-to-hubrise).
> Depending on the connector or the point-of-sale software you use, this setup may be handled by your partner. Check with them before you start.
## Need help?
- [Browse all integrations](/integrations)
- [Open a support ticket](https://help.expedy.io/support/tickets/new)
---
url: https://docs.expedy.io/en/integrations/formitable/connect-a-receipt-printer-to-formitable
title: Print from Formitable with Expedy PRINT
updated_at: 2026-10-20T15:08:21.827576+00:00
---
# Print from Formitable with Expedy PRINT
**Formitable** is an online booking tool. It reaches Expedy PRINT in two ways: through **Zapier**, with no code, or through the **Expedy REST API**, when you want full control over the ticket.
## What you need
- An Expedy account with an active printer. Not added yet? Follow the guide for your machine, [Expedy XPDY80](/expedy-print/installation/add-an-expedy-xpdy80-cloud-printer-to-your-account), [HSPOS](/expedy-print/installation/add-an-hspos-cloud-printer-to-your-account), [Star Micronics](/expedy-print/installation/add-a-star-micronics-printer-to-your-account) or [Raspberry Pi](/expedy-print/installation/add-a-raspberry-pi-cloud-print-server-to-your-account)
- Your **API SID**, **API TOKEN** and **API Printer UID**, all three on the printer page of the [Expedy console](https://www.expedy.fr/console/v3/), in the **API Keys & UID** card
## Option 1, through Zapier, no code
Formitable connects to Zapier, and Zapier ships a ready-made **Expedy Print** action. The recipe is always the same: an event in Formitable triggers **Create a Print Job** in Expedy Print, and you map the fields you want on the ticket.
Full walkthrough: **[How to integrate Expedy Print with Zapier](/integrations/zapier/how-to-integrate-expedy-print-with-zapier)**
## Option 2, through the REST API
If Formitable can issue an HTTP request, it can drive the printer directly.
```api
POST https://www.expedy.fr/api/v2/printers/{printer_uid}/print
```
Authentication uses an `Authorization` header carrying your `SID:TOKEN`, with no `Bearer` prefix. Parameters and a complete example are in [Create a Print Job](/expedy-print/api-print-v2/create-a-print-job).
## Formatting the ticket
Whichever route you take, the message accepts the Expedy layout tags:
| What you want | Where to look |
|---|---|
| Align, resize or emphasise text | [Text Layout](/expedy-print/receipt-layout/text-layout-tags) |
| Print a logo or an image | [Image and Logo](/expedy-print/receipt-layout/image-and-logo-printing) |
| Print a QR code | [QR Code](/expedy-print/receipt-layout/qr-code) |
| Print a barcode | [EAN13 Barcode](/expedy-print/receipt-layout/ean13-barcode) |
> Depending on the connector or the software you use, this setup may be handled by your partner or your agency. Check with them before you start.
## Need help?
- [Browse all integrations](/integrations)
- [Open a support ticket](https://help.expedy.io/support/tickets/new)
---
url: https://docs.expedy.io/en/integrations/menulog/connect-a-receipt-printer-to-menulog
title: Print Menulog orders on a receipt printer
updated_at: 2026-10-23T01:19:24.331812+00:00
---
# Print Menulog orders on a receipt printer
[Menulog](https://www.menulog.com.au/) is a meal delivery platform. It connects to Expedy PRINT through **HubRise**: Menulog sends its orders to HubRise, HubRise forwards them to your cloud printer, and the ticket comes out within seconds.
## What you need
- An Expedy account with an active printer. Not added yet? Follow the guide for your machine, [Expedy XPDY80](/expedy-print/installation/add-an-expedy-xpdy80-cloud-printer-to-your-account), [HSPOS](/expedy-print/installation/add-an-hspos-cloud-printer-to-your-account), [Star Micronics](/expedy-print/installation/add-a-star-micronics-printer-to-your-account) or [Raspberry Pi](/expedy-print/installation/add-a-raspberry-pi-cloud-print-server-to-your-account)
- A [HubRise account](https://manager.hubrise.com/signup), which aggregates your sales channels
- A Menulog account linked to your HubRise location
## How it works
| Step | What happens |
|---|---|
| 1 | An order is placed on Menulog |
| 2 | Menulog pushes it to HubRise |
| 3 | Expedy PRINT receives it and prints a standardised ticket |
A single printer covers every channel connected to the same HubRise location, so you do not need one machine per platform.
## Connect it
The setup happens once, on the HubRise side, and is described step by step in the reference guide:
**[Connect a receipt printer to HubRise](/integrations/hubrise/connecting-a-receipt-printer-to-hubrise)**
Then link your Menulog account to the same HubRise location. That part is done from the Menulog back office, or by Menulog support.
## Receipt settings
Once connected, the printer page in the [Expedy console](https://www.expedy.fr/console/v3/) controls what gets printed:
- **Print order when**, the status that triggers printing, `NEW`, `RECEIVED` or `ACCEPTED`
- **Then change status to**, the automatic status update applied after printing
- **Number of copies**, one ticket for the kitchen, one for the counter or the delivery bag
- The receipt header and footer, logo, company name, address and registration number
All of it is detailed in [Connect a receipt printer to HubRise](/integrations/hubrise/connecting-a-receipt-printer-to-hubrise).
> Depending on the connector or the point-of-sale software you use, this setup may be handled by your partner. Check with them before you start.
## Need help?
- [Browse all integrations](/integrations)
- [Open a support ticket](https://help.expedy.io/support/tickets/new)
---
url: https://docs.expedy.io/en/integrations/calendly/connect-a-receipt-printer-to-calendly
title: Print from Calendly with Expedy PRINT
updated_at: 2026-10-20T00:35:35.818686+00:00
---
# Print from Calendly with Expedy PRINT
[Calendly](https://calendly.com/) is an online scheduling tool. It reaches Expedy PRINT in two ways: through **Zapier**, with no code, or through the **Expedy REST API**, when you want full control over the ticket.
## What you need
- An Expedy account with an active printer. Not added yet? Follow the guide for your machine, [Expedy XPDY80](/expedy-print/installation/add-an-expedy-xpdy80-cloud-printer-to-your-account), [HSPOS](/expedy-print/installation/add-an-hspos-cloud-printer-to-your-account), [Star Micronics](/expedy-print/installation/add-a-star-micronics-printer-to-your-account) or [Raspberry Pi](/expedy-print/installation/add-a-raspberry-pi-cloud-print-server-to-your-account)
- Your **API SID**, **API TOKEN** and **API Printer UID**, all three on the printer page of the [Expedy console](https://www.expedy.fr/console/v3/), in the **API Keys & UID** card
## Option 1, through Zapier, no code
Calendly connects to Zapier, and Zapier ships a ready-made **Expedy Print** action. The recipe is always the same: an event in Calendly triggers **Create a Print Job** in Expedy Print, and you map the fields you want on the ticket.
Full walkthrough: **[How to integrate Expedy Print with Zapier](/integrations/zapier/how-to-integrate-expedy-print-with-zapier)**
## Option 2, through the REST API
If Calendly can issue an HTTP request, it can drive the printer directly.
```api
POST https://www.expedy.fr/api/v2/printers/{printer_uid}/print
```
Authentication uses an `Authorization` header carrying your `SID:TOKEN`, with no `Bearer` prefix. Parameters and a complete example are in [Create a Print Job](/expedy-print/api-print-v2/create-a-print-job).
## Formatting the ticket
Whichever route you take, the message accepts the Expedy layout tags:
| What you want | Where to look |
|---|---|
| Align, resize or emphasise text | [Text Layout](/expedy-print/receipt-layout/text-layout-tags) |
| Print a logo or an image | [Image and Logo](/expedy-print/receipt-layout/image-and-logo-printing) |
| Print a QR code | [QR Code](/expedy-print/receipt-layout/qr-code) |
| Print a barcode | [EAN13 Barcode](/expedy-print/receipt-layout/ean13-barcode) |
> Depending on the connector or the software you use, this setup may be handled by your partner or your agency. Check with them before you start.
## Need help?
- [Browse all integrations](/integrations)
- [Open a support ticket](https://help.expedy.io/support/tickets/new)
---
url: https://docs.expedy.io/en/integrations/shippo/connect-a-receipt-printer-to-shippo
title: Print your Shippo shipping labels automatically
updated_at: 2026-10-20T15:52:44.880334+00:00
---
# Print your Shippo shipping labels automatically
[Shippo](https://goshippo.com/) generates your carrier shipping labels. Through **Zapier**, the label PDF goes straight to your label printer the moment Shippo creates it, so nobody has to download it and print it by hand.
> An Expedy cloud receipt printer, XPDY80, HSPOS or Star Micronics, **cannot print a carrier label**: it is a receipt printer. Carrier labels always go through a **Raspberry Pi** or a **Cloud Print Box USB adapter** driving a label printer.
## What you need
- An Expedy account with an active **Raspberry Pi print server** or **Cloud Print Box USB adapter**. Not set up yet? See [Add a Raspberry Pi print server to your account](/expedy-print/installation/add-a-raspberry-pi-cloud-print-server-to-your-account)
- **Your own label printer**, connected by USB to that Raspberry Pi or adapter, with its port set to `LABEL`
- A Shippo account and a [Zapier](https://zapier.com/) account
- Your **API SID**, **API TOKEN** and **API Printer UID**, on the printer page of the [Expedy console](https://www.expedy.fr/console/v3/), in the **API Keys & UID** card
## Why a label printer
A carrier label is a PDF in a fixed format, most often 100 x 150 mm. A receipt printer cannot render it at the right size, so the job goes to a label printer driven by a Raspberry Pi or the Cloud Print Box.
On the printer page, run a **USB scan** and set the port that carries the label printer to `LABEL`, not `ESC/POS`. See [Installation on Raspberry Pi](/usb-cloud-printer-adapter/rpi-installation/installation-on-raspberry-pi).
## Build the Zap
1. In Zapier, create a Zap and pick **Shippo** as the trigger app
2. Choose the event that fires when a label is created
3. Add **Expedy Print** as the action, then **Create a Print Job**
4. Connect your Expedy account with your **Expedy SID** and your **Expedy TOKEN**
5. Enter the **Printer UID** of the label printer
6. In the message field, map the label PDF URL returned by Shippo
Step by step on the Zapier side: [How to integrate Expedy Print with Zapier](/integrations/zapier/how-to-integrate-expedy-print-with-zapier)
## What to send
A label printer takes the PDF URL **on its own, with no tag**:
```text
https://example.com/label.pdf
```
On an ESC/POS receipt printer the same URL has to be wrapped in the `` tag instead. Both forms are detailed in [PDF printing](/expedy-print/receipt-layout/print-pdf).
## Test it
Create a test label in Shippo and check that it comes out at the right size. If nothing prints:
- check the **Printer UID**, it must be the label printer, not the receipt printer
- check that the USB port is in `LABEL` mode after the scan
- check that the PDF URL is reachable without authentication, Expedy fetches it from its own servers
> Depending on the connector or the software you use, this setup may be handled by your partner or your agency. Check with them before you start.
## Need help?
- [Browse all integrations](/integrations)
- [Open a support ticket](https://help.expedy.io/support/tickets/new)
---
url: https://docs.expedy.io/en/integrations/instagram/connect-a-receipt-printer-to-instagram
title: Print your Instagram photos automatically
updated_at: 2026-10-20T15:42:20.822678+00:00
---
# Print your Instagram photos automatically
[Instagram](https://www.instagram.com/) is a photo sharing platform. Through **Zapier**, every new image can go straight to a printer: a black and white copy on a thermal receipt printer, or a full colour print on a photo printer driven by a Raspberry Pi.
## Two very different ways to print an image
| | Receipt printer, thermal | Raspberry Pi or Cloud Print Box |
|---|---|---|
| Hardware | Expedy XPDY80, HSPOS, Star Micronics | Your own laser, inkjet or photo printer, Kodak or DNP and the like, on USB |
| Result | Black and white, no ink, nothing to buy beyond the paper roll | Full colour, photo quality |
| Formats | `.JPG` `.GIF` `.PNG`, wrapped in the `
` tag on a receipt printer, or the bare image URL on a photo printer
Step by step on the Zapier side: [How to integrate Expedy Print with Zapier](/integrations/zapier/how-to-integrate-expedy-print-with-zapier)
> Depending on the connector or the software you use, this setup may be handled by your partner or your agency. Check with them before you start.
## Need help?
- [Browse all integrations](/integrations)
- [Open a support ticket](https://help.expedy.io/support/tickets/new)
---
url: https://docs.expedy.io/en/integrations/eeatself/connect-a-receipt-printer-to-eeatself
title: Print eEatself orders on a receipt printer
updated_at: 2026-10-19T20:05:27.20597+00:00
---
# Print eEatself orders on a receipt printer
**eEatself** is an online ordering solution for hospitality. It connects to Expedy PRINT through **HubRise**: eEatself sends its orders to HubRise, HubRise forwards them to your cloud printer, and the ticket comes out within seconds.
## What you need
- An Expedy account with an active printer. Not added yet? Follow the guide for your machine, [Expedy XPDY80](/expedy-print/installation/add-an-expedy-xpdy80-cloud-printer-to-your-account), [HSPOS](/expedy-print/installation/add-an-hspos-cloud-printer-to-your-account), [Star Micronics](/expedy-print/installation/add-a-star-micronics-printer-to-your-account) or [Raspberry Pi](/expedy-print/installation/add-a-raspberry-pi-cloud-print-server-to-your-account)
- A [HubRise account](https://manager.hubrise.com/signup), which aggregates your sales channels
- A eEatself account linked to your HubRise location
## How it works
| Step | What happens |
|---|---|
| 1 | An order is placed on eEatself |
| 2 | eEatself pushes it to HubRise |
| 3 | Expedy PRINT receives it and prints a standardised ticket |
A single printer covers every channel connected to the same HubRise location, so you do not need one machine per platform.
## Connect it
The setup happens once, on the HubRise side, and is described step by step in the reference guide:
**[Connect a receipt printer to HubRise](/integrations/hubrise/connecting-a-receipt-printer-to-hubrise)**
Then link your eEatself account to the same HubRise location. That part is done from the eEatself back office, or by eEatself support.
## Receipt settings
Once connected, the printer page in the [Expedy console](https://www.expedy.fr/console/v3/) controls what gets printed:
- **Print order when**, the status that triggers printing, `NEW`, `RECEIVED` or `ACCEPTED`
- **Then change status to**, the automatic status update applied after printing
- **Number of copies**, one ticket for the kitchen, one for the counter or the delivery bag
- The receipt header and footer, logo, company name, address and registration number
All of it is detailed in [Connect a receipt printer to HubRise](/integrations/hubrise/connecting-a-receipt-printer-to-hubrise).
> Depending on the connector or the point-of-sale software you use, this setup may be handled by your partner. Check with them before you start.
## Need help?
- [Browse all integrations](/integrations)
- [Open a support ticket](https://help.expedy.io/support/tickets/new)
---
url: https://docs.expedy.io/en/integrations/formitable/connect-a-receipt-printer-to-formitable
title: Print from Formitable with Expedy PRINT
updated_at: 2026-10-20T15:08:21.827576+00:00
---
# Print from Formitable with Expedy PRINT
**Formitable** is an online booking tool. It reaches Expedy PRINT in two ways: through **Zapier**, with no code, or through the **Expedy REST API**, when you want full control over the ticket.
## What you need
- An Expedy account with an active printer. Not added yet? Follow the guide for your machine, [Expedy XPDY80](/expedy-print/installation/add-an-expedy-xpdy80-cloud-printer-to-your-account), [HSPOS](/expedy-print/installation/add-an-hspos-cloud-printer-to-your-account), [Star Micronics](/expedy-print/installation/add-a-star-micronics-printer-to-your-account) or [Raspberry Pi](/expedy-print/installation/add-a-raspberry-pi-cloud-print-server-to-your-account)
- Your **API SID**, **API TOKEN** and **API Printer UID**, all three on the printer page of the [Expedy console](https://www.expedy.fr/console/v3/), in the **API Keys & UID** card
## Option 1, through Zapier, no code
Formitable connects to Zapier, and Zapier ships a ready-made **Expedy Print** action. The recipe is always the same: an event in Formitable triggers **Create a Print Job** in Expedy Print, and you map the fields you want on the ticket.
Full walkthrough: **[How to integrate Expedy Print with Zapier](/integrations/zapier/how-to-integrate-expedy-print-with-zapier)**
## Option 2, through the REST API
If Formitable can issue an HTTP request, it can drive the printer directly.
```api
POST https://www.expedy.fr/api/v2/printers/{printer_uid}/print
```
Authentication uses an `Authorization` header carrying your `SID:TOKEN`, with no `Bearer` prefix. Parameters and a complete example are in [Create a Print Job](/expedy-print/api-print-v2/create-a-print-job).
## Formatting the ticket
Whichever route you take, the message accepts the Expedy layout tags:
| What you want | Where to look |
|---|---|
| Align, resize or emphasise text | [Text Layout](/expedy-print/receipt-layout/text-layout-tags) |
| Print a logo or an image | [Image and Logo](/expedy-print/receipt-layout/image-and-logo-printing) |
| Print a QR code | [QR Code](/expedy-print/receipt-layout/qr-code) |
| Print a barcode | [EAN13 Barcode](/expedy-print/receipt-layout/ean13-barcode) |
> Depending on the connector or the software you use, this setup may be handled by your partner or your agency. Check with them before you start.
## Need help?
- [Browse all integrations](/integrations)
- [Open a support ticket](https://help.expedy.io/support/tickets/new)
---
url: https://docs.expedy.io/en/integrations/menulog/connect-a-receipt-printer-to-menulog
title: Print Menulog orders on a receipt printer
updated_at: 2026-10-23T01:19:24.331812+00:00
---
# Print Menulog orders on a receipt printer
[Menulog](https://www.menulog.com.au/) is a meal delivery platform. It connects to Expedy PRINT through **HubRise**: Menulog sends its orders to HubRise, HubRise forwards them to your cloud printer, and the ticket comes out within seconds.
## What you need
- An Expedy account with an active printer. Not added yet? Follow the guide for your machine, [Expedy XPDY80](/expedy-print/installation/add-an-expedy-xpdy80-cloud-printer-to-your-account), [HSPOS](/expedy-print/installation/add-an-hspos-cloud-printer-to-your-account), [Star Micronics](/expedy-print/installation/add-a-star-micronics-printer-to-your-account) or [Raspberry Pi](/expedy-print/installation/add-a-raspberry-pi-cloud-print-server-to-your-account)
- A [HubRise account](https://manager.hubrise.com/signup), which aggregates your sales channels
- A Menulog account linked to your HubRise location
## How it works
| Step | What happens |
|---|---|
| 1 | An order is placed on Menulog |
| 2 | Menulog pushes it to HubRise |
| 3 | Expedy PRINT receives it and prints a standardised ticket |
A single printer covers every channel connected to the same HubRise location, so you do not need one machine per platform.
## Connect it
The setup happens once, on the HubRise side, and is described step by step in the reference guide:
**[Connect a receipt printer to HubRise](/integrations/hubrise/connecting-a-receipt-printer-to-hubrise)**
Then link your Menulog account to the same HubRise location. That part is done from the Menulog back office, or by Menulog support.
## Receipt settings
Once connected, the printer page in the [Expedy console](https://www.expedy.fr/console/v3/) controls what gets printed:
- **Print order when**, the status that triggers printing, `NEW`, `RECEIVED` or `ACCEPTED`
- **Then change status to**, the automatic status update applied after printing
- **Number of copies**, one ticket for the kitchen, one for the counter or the delivery bag
- The receipt header and footer, logo, company name, address and registration number
All of it is detailed in [Connect a receipt printer to HubRise](/integrations/hubrise/connecting-a-receipt-printer-to-hubrise).
> Depending on the connector or the point-of-sale software you use, this setup may be handled by your partner. Check with them before you start.
## Need help?
- [Browse all integrations](/integrations)
- [Open a support ticket](https://help.expedy.io/support/tickets/new)
---
url: https://docs.expedy.io/en/integrations/calendly/connect-a-receipt-printer-to-calendly
title: Print from Calendly with Expedy PRINT
updated_at: 2026-10-20T00:35:35.818686+00:00
---
# Print from Calendly with Expedy PRINT
[Calendly](https://calendly.com/) is an online scheduling tool. It reaches Expedy PRINT in two ways: through **Zapier**, with no code, or through the **Expedy REST API**, when you want full control over the ticket.
## What you need
- An Expedy account with an active printer. Not added yet? Follow the guide for your machine, [Expedy XPDY80](/expedy-print/installation/add-an-expedy-xpdy80-cloud-printer-to-your-account), [HSPOS](/expedy-print/installation/add-an-hspos-cloud-printer-to-your-account), [Star Micronics](/expedy-print/installation/add-a-star-micronics-printer-to-your-account) or [Raspberry Pi](/expedy-print/installation/add-a-raspberry-pi-cloud-print-server-to-your-account)
- Your **API SID**, **API TOKEN** and **API Printer UID**, all three on the printer page of the [Expedy console](https://www.expedy.fr/console/v3/), in the **API Keys & UID** card
## Option 1, through Zapier, no code
Calendly connects to Zapier, and Zapier ships a ready-made **Expedy Print** action. The recipe is always the same: an event in Calendly triggers **Create a Print Job** in Expedy Print, and you map the fields you want on the ticket.
Full walkthrough: **[How to integrate Expedy Print with Zapier](/integrations/zapier/how-to-integrate-expedy-print-with-zapier)**
## Option 2, through the REST API
If Calendly can issue an HTTP request, it can drive the printer directly.
```api
POST https://www.expedy.fr/api/v2/printers/{printer_uid}/print
```
Authentication uses an `Authorization` header carrying your `SID:TOKEN`, with no `Bearer` prefix. Parameters and a complete example are in [Create a Print Job](/expedy-print/api-print-v2/create-a-print-job).
## Formatting the ticket
Whichever route you take, the message accepts the Expedy layout tags:
| What you want | Where to look |
|---|---|
| Align, resize or emphasise text | [Text Layout](/expedy-print/receipt-layout/text-layout-tags) |
| Print a logo or an image | [Image and Logo](/expedy-print/receipt-layout/image-and-logo-printing) |
| Print a QR code | [QR Code](/expedy-print/receipt-layout/qr-code) |
| Print a barcode | [EAN13 Barcode](/expedy-print/receipt-layout/ean13-barcode) |
> Depending on the connector or the software you use, this setup may be handled by your partner or your agency. Check with them before you start.
## Need help?
- [Browse all integrations](/integrations)
- [Open a support ticket](https://help.expedy.io/support/tickets/new)
---
url: https://docs.expedy.io/en/integrations/shippo/connect-a-receipt-printer-to-shippo
title: Print your Shippo shipping labels automatically
updated_at: 2026-10-20T15:52:44.880334+00:00
---
# Print your Shippo shipping labels automatically
[Shippo](https://goshippo.com/) generates your carrier shipping labels. Through **Zapier**, the label PDF goes straight to your label printer the moment Shippo creates it, so nobody has to download it and print it by hand.
> An Expedy cloud receipt printer, XPDY80, HSPOS or Star Micronics, **cannot print a carrier label**: it is a receipt printer. Carrier labels always go through a **Raspberry Pi** or a **Cloud Print Box USB adapter** driving a label printer.
## What you need
- An Expedy account with an active **Raspberry Pi print server** or **Cloud Print Box USB adapter**. Not set up yet? See [Add a Raspberry Pi print server to your account](/expedy-print/installation/add-a-raspberry-pi-cloud-print-server-to-your-account)
- **Your own label printer**, connected by USB to that Raspberry Pi or adapter, with its port set to `LABEL`
- A Shippo account and a [Zapier](https://zapier.com/) account
- Your **API SID**, **API TOKEN** and **API Printer UID**, on the printer page of the [Expedy console](https://www.expedy.fr/console/v3/), in the **API Keys & UID** card
## Why a label printer
A carrier label is a PDF in a fixed format, most often 100 x 150 mm. A receipt printer cannot render it at the right size, so the job goes to a label printer driven by a Raspberry Pi or the Cloud Print Box.
On the printer page, run a **USB scan** and set the port that carries the label printer to `LABEL`, not `ESC/POS`. See [Installation on Raspberry Pi](/usb-cloud-printer-adapter/rpi-installation/installation-on-raspberry-pi).
## Build the Zap
1. In Zapier, create a Zap and pick **Shippo** as the trigger app
2. Choose the event that fires when a label is created
3. Add **Expedy Print** as the action, then **Create a Print Job**
4. Connect your Expedy account with your **Expedy SID** and your **Expedy TOKEN**
5. Enter the **Printer UID** of the label printer
6. In the message field, map the label PDF URL returned by Shippo
Step by step on the Zapier side: [How to integrate Expedy Print with Zapier](/integrations/zapier/how-to-integrate-expedy-print-with-zapier)
## What to send
A label printer takes the PDF URL **on its own, with no tag**:
```text
https://example.com/label.pdf
```
On an ESC/POS receipt printer the same URL has to be wrapped in the `` tag instead. Both forms are detailed in [PDF printing](/expedy-print/receipt-layout/print-pdf).
## Test it
Create a test label in Shippo and check that it comes out at the right size. If nothing prints:
- check the **Printer UID**, it must be the label printer, not the receipt printer
- check that the USB port is in `LABEL` mode after the scan
- check that the PDF URL is reachable without authentication, Expedy fetches it from its own servers
> Depending on the connector or the software you use, this setup may be handled by your partner or your agency. Check with them before you start.
## Need help?
- [Browse all integrations](/integrations)
- [Open a support ticket](https://help.expedy.io/support/tickets/new)
---
url: https://docs.expedy.io/en/integrations/instagram/connect-a-receipt-printer-to-instagram
title: Print your Instagram photos automatically
updated_at: 2026-10-20T15:42:20.822678+00:00
---
# Print your Instagram photos automatically
[Instagram](https://www.instagram.com/) is a photo sharing platform. Through **Zapier**, every new image can go straight to a printer: a black and white copy on a thermal receipt printer, or a full colour print on a photo printer driven by a Raspberry Pi.
## Two very different ways to print an image
| | Receipt printer, thermal | Raspberry Pi or Cloud Print Box |
|---|---|---|
| Hardware | Expedy XPDY80, HSPOS, Star Micronics | Your own laser, inkjet or photo printer, Kodak or DNP and the like, on USB |
| Result | Black and white, no ink, nothing to buy beyond the paper roll | Full colour, photo quality |
| Formats | `.JPG` `.GIF` `.PNG`, wrapped in the `![]() ` tag | `.JPG` `.BMP` `.PNG` `.PDF`, sent as a bare URL |
| Width | 398 px at 58 mm, 602 px at 80 mm, 1002 px at 104 mm | The printer's own format |
| Setup | Nothing to install | USB port set to `LABEL` after a scan, printer driver installed |
## On a thermal receipt printer
Thermal printing uses no ink: the image is burned into the paper, so a print costs nothing beyond the roll. That is what makes it viable for a photo booth, an event or a loyalty coupon.
The trade-off is the rendering. The documented requirement is **flat black on a white background**, at the exact width of your paper, 5 to 15 KB, served over HTTPS. A colour photo taken straight from Instagram will not come out as is: convert it to black and white and resize it first. Every constraint is listed in [Image and Logo](/expedy-print/receipt-layout/image-and-logo-printing).
In the Zap, the message is the `
` tag | `.JPG` `.BMP` `.PNG` `.PDF`, sent as a bare URL |
| Width | 398 px at 58 mm, 602 px at 80 mm, 1002 px at 104 mm | The printer's own format |
| Setup | Nothing to install | USB port set to `LABEL` after a scan, printer driver installed |
## On a thermal receipt printer
Thermal printing uses no ink: the image is burned into the paper, so a print costs nothing beyond the roll. That is what makes it viable for a photo booth, an event or a loyalty coupon.
The trade-off is the rendering. The documented requirement is **flat black on a white background**, at the exact width of your paper, 5 to 15 KB, served over HTTPS. A colour photo taken straight from Instagram will not come out as is: convert it to black and white and resize it first. Every constraint is listed in [Image and Logo](/expedy-print/receipt-layout/image-and-logo-printing).
In the Zap, the message is the `![]() ` tag wrapping the image URL:
```text
` tag wrapping the image URL:
```text
![]() https://example.com/photo.png
```
## On a photo, laser or inkjet printer
For real photo output, the job goes to **your own printer**, connected by USB to a **Raspberry Pi** or a **Cloud Print Box adapter**. Laser, inkjet, label and dye-sublimation photo printers such as Kodak or DNP all work, as long as their driver is installed.
Run a **USB scan** on the device page, set that port to `LABEL`, and send the image URL **on its own, with no tag**:
```text
https://example.com/photo.jpg
```
See [Installation on Raspberry Pi](/usb-cloud-printer-adapter/rpi-installation/installation-on-raspberry-pi) and [PDF printing](/expedy-print/receipt-layout/print-pdf).
## Build the Zap
1. Pick **Instagram** as the trigger app and the event that fires on a new image
2. Add **Expedy Print** as the action, then **Create a Print Job**
3. Connect your Expedy account with your **Expedy SID** and your **Expedy TOKEN**, both on the printer page of the [Expedy console](https://www.expedy.fr/console/v3/), in the **API Keys & UID** card
4. Enter the **Printer UID** of the machine that will print
5. In the message, put the `
https://example.com/photo.png
```
## On a photo, laser or inkjet printer
For real photo output, the job goes to **your own printer**, connected by USB to a **Raspberry Pi** or a **Cloud Print Box adapter**. Laser, inkjet, label and dye-sublimation photo printers such as Kodak or DNP all work, as long as their driver is installed.
Run a **USB scan** on the device page, set that port to `LABEL`, and send the image URL **on its own, with no tag**:
```text
https://example.com/photo.jpg
```
See [Installation on Raspberry Pi](/usb-cloud-printer-adapter/rpi-installation/installation-on-raspberry-pi) and [PDF printing](/expedy-print/receipt-layout/print-pdf).
## Build the Zap
1. Pick **Instagram** as the trigger app and the event that fires on a new image
2. Add **Expedy Print** as the action, then **Create a Print Job**
3. Connect your Expedy account with your **Expedy SID** and your **Expedy TOKEN**, both on the printer page of the [Expedy console](https://www.expedy.fr/console/v3/), in the **API Keys & UID** card
4. Enter the **Printer UID** of the machine that will print
5. In the message, put the `![]() ` tag on a receipt printer, or the bare image URL on a photo printer
Step by step on the Zapier side: [How to integrate Expedy Print with Zapier](/integrations/zapier/how-to-integrate-expedy-print-with-zapier)
> Depending on the connector or the software you use, this setup may be handled by your partner or your agency. Check with them before you start.
## Need help?
- [Browse all integrations](/integrations)
- [Open a support ticket](https://help.expedy.io/support/tickets/new)
---
url: https://docs.expedy.io/en/integrations/hop-delivery/connect-a-receipt-printer-to-hop-delivery
title: Print Hop Delivery orders on a receipt printer
updated_at: 2026-10-18T15:52:47.542883+00:00
---
# Print Hop Delivery orders on a receipt printer
**Hop Delivery** is a meal delivery platform. It connects to Expedy PRINT through **HubRise**: Hop Delivery sends its orders to HubRise, HubRise forwards them to your cloud printer, and the ticket comes out within seconds.
## What you need
- An Expedy account with an active printer. Not added yet? Follow the guide for your machine, [Expedy XPDY80](/expedy-print/installation/add-an-expedy-xpdy80-cloud-printer-to-your-account), [HSPOS](/expedy-print/installation/add-an-hspos-cloud-printer-to-your-account), [Star Micronics](/expedy-print/installation/add-a-star-micronics-printer-to-your-account) or [Raspberry Pi](/expedy-print/installation/add-a-raspberry-pi-cloud-print-server-to-your-account)
- A [HubRise account](https://manager.hubrise.com/signup), which aggregates your sales channels
- A Hop Delivery account linked to your HubRise location
## How it works
| Step | What happens |
|---|---|
| 1 | An order is placed on Hop Delivery |
| 2 | Hop Delivery pushes it to HubRise |
| 3 | Expedy PRINT receives it and prints a standardised ticket |
A single printer covers every channel connected to the same HubRise location, so you do not need one machine per platform.
## Connect it
The setup happens once, on the HubRise side, and is described step by step in the reference guide:
**[Connect a receipt printer to HubRise](/integrations/hubrise/connecting-a-receipt-printer-to-hubrise)**
Then link your Hop Delivery account to the same HubRise location. That part is done from the Hop Delivery back office, or by Hop Delivery support.
## Receipt settings
Once connected, the printer page in the [Expedy console](https://www.expedy.fr/console/v3/) controls what gets printed:
- **Print order when**, the status that triggers printing, `NEW`, `RECEIVED` or `ACCEPTED`
- **Then change status to**, the automatic status update applied after printing
- **Number of copies**, one ticket for the kitchen, one for the counter or the delivery bag
- The receipt header and footer, logo, company name, address and registration number
All of it is detailed in [Connect a receipt printer to HubRise](/integrations/hubrise/connecting-a-receipt-printer-to-hubrise).
> Depending on the connector or the point-of-sale software you use, this setup may be handled by your partner. Check with them before you start.
## Need help?
- [Browse all integrations](/integrations)
- [Open a support ticket](https://help.expedy.io/support/tickets/new)
---
url: https://docs.expedy.io/en/integrations/talabat/connect-a-receipt-printer-to-talabat
title: Print Talabat orders on a receipt printer
updated_at: 2026-10-21T01:46:15.748963+00:00
---
# Print Talabat orders on a receipt printer
[Talabat](https://www.talabat.com/) is a meal delivery platform. It connects to Expedy PRINT through **HubRise**: Talabat sends its orders to HubRise, HubRise forwards them to your cloud printer, and the ticket comes out within seconds.
## What you need
- An Expedy account with an active printer. Not added yet? Follow the guide for your machine, [Expedy XPDY80](/expedy-print/installation/add-an-expedy-xpdy80-cloud-printer-to-your-account), [HSPOS](/expedy-print/installation/add-an-hspos-cloud-printer-to-your-account), [Star Micronics](/expedy-print/installation/add-a-star-micronics-printer-to-your-account) or [Raspberry Pi](/expedy-print/installation/add-a-raspberry-pi-cloud-print-server-to-your-account)
- A [HubRise account](https://manager.hubrise.com/signup), which aggregates your sales channels
- A Talabat account linked to your HubRise location
## How it works
| Step | What happens |
|---|---|
| 1 | An order is placed on Talabat |
| 2 | Talabat pushes it to HubRise |
| 3 | Expedy PRINT receives it and prints a standardised ticket |
A single printer covers every channel connected to the same HubRise location, so you do not need one machine per platform.
## Connect it
The setup happens once, on the HubRise side, and is described step by step in the reference guide:
**[Connect a receipt printer to HubRise](/integrations/hubrise/connecting-a-receipt-printer-to-hubrise)**
Then link your Talabat account to the same HubRise location. That part is done from the Talabat back office, or by Talabat support.
## Receipt settings
Once connected, the printer page in the [Expedy console](https://www.expedy.fr/console/v3/) controls what gets printed:
- **Print order when**, the status that triggers printing, `NEW`, `RECEIVED` or `ACCEPTED`
- **Then change status to**, the automatic status update applied after printing
- **Number of copies**, one ticket for the kitchen, one for the counter or the delivery bag
- The receipt header and footer, logo, company name, address and registration number
All of it is detailed in [Connect a receipt printer to HubRise](/integrations/hubrise/connecting-a-receipt-printer-to-hubrise).
> Depending on the connector or the point-of-sale software you use, this setup may be handled by your partner. Check with them before you start.
## Need help?
- [Browse all integrations](/integrations)
- [Open a support ticket](https://help.expedy.io/support/tickets/new)
---
url: https://docs.expedy.io/en/integrations/lightkitch/connect-a-receipt-printer-to-lightkitch
title: Receipt printing with LightKitch
updated_at: 2026-10-20T16:19:04.995451+00:00
---
# Receipt printing with LightKitch
[LightKitch](https://www.lightkitch.io/) is an order aggregation platform. With LightKitch, **the receipt printer is installed and configured by LightKitch**, not from your Expedy console. Get in touch with them to have your printer activated.
## Who does what
| Party | Responsibility |
|---|---|
| Expedy | Supplies the cloud printer, its connectivity (Ethernet, Wi-Fi or 4G SIM) and the console where you follow your print jobs |
| LightKitch | Pairs the printer with your account, sets the receipt layout and switches the service on |
## Getting your printer activated
1. Order your machine, or use the one you already have
2. Contact LightKitch and tell them you want to print your orders on an Expedy cloud printer
3. LightKitch handles the pairing and the receipt layout on their side
4. Once activated, orders print automatically, with nothing left to do on your part
> If your printer already appears in your Expedy account, give LightKitch its **API Printer UID**, shown on the printer page in the **API Keys & UID** card of the [Expedy console](https://www.expedy.fr/console/v3/).
## Once it is live
From the [Expedy console](https://www.expedy.fr/console/v3/) you can, at any time:
- Check that the machine is reachable, with **Check Status** on the printer page
- Review every job in **Print Jobs History**
- Follow your monthly usage and change plan, the **FREE** plan being capped at 50 print requests per month
Anything about the order content or the ticket layout goes through LightKitch, since the connection lives on their side.
## Need help?
- [Add your printer to your Expedy account](/expedy-print/installation/add-an-expedy-xpdy80-cloud-printer-to-your-account)
- [Browse all integrations](/integrations)
- Expedy hardware or account question: [open a support ticket](https://help.expedy.io/support/tickets/new)
---
url: https://docs.expedy.io/en/integrations/lemon-squeezy/connect-a-receipt-printer-to-lemon-squeezy
title: Print from Lemon Squeezy with Expedy PRINT
updated_at: 2026-10-22T19:42:50.440795+00:00
---
# Print from Lemon Squeezy with Expedy PRINT
[Lemon Squeezy](https://www.lemonsqueezy.com/) is an online cart and checkout platform. It reaches Expedy PRINT in two ways: through **Zapier**, with no code, or through the **Expedy REST API**, when you want full control over the ticket.
## What you need
- An Expedy account with an active printer. Not added yet? Follow the guide for your machine, [Expedy XPDY80](/expedy-print/installation/add-an-expedy-xpdy80-cloud-printer-to-your-account), [HSPOS](/expedy-print/installation/add-an-hspos-cloud-printer-to-your-account), [Star Micronics](/expedy-print/installation/add-a-star-micronics-printer-to-your-account) or [Raspberry Pi](/expedy-print/installation/add-a-raspberry-pi-cloud-print-server-to-your-account)
- Your **API SID**, **API TOKEN** and **API Printer UID**, all three on the printer page of the [Expedy console](https://www.expedy.fr/console/v3/), in the **API Keys & UID** card
## Option 1, through Zapier, no code
Lemon Squeezy connects to Zapier, and Zapier ships a ready-made **Expedy Print** action. The recipe is always the same: an event in Lemon Squeezy triggers **Create a Print Job** in Expedy Print, and you map the fields you want on the ticket.
Full walkthrough: **[How to integrate Expedy Print with Zapier](/integrations/zapier/how-to-integrate-expedy-print-with-zapier)**
## Option 2, through the REST API
If Lemon Squeezy can issue an HTTP request, it can drive the printer directly.
```api
POST https://www.expedy.fr/api/v2/printers/{printer_uid}/print
```
Authentication uses an `Authorization` header carrying your `SID:TOKEN`, with no `Bearer` prefix. Parameters and a complete example are in [Create a Print Job](/expedy-print/api-print-v2/create-a-print-job).
## Formatting the ticket
Whichever route you take, the message accepts the Expedy layout tags:
| What you want | Where to look |
|---|---|
| Align, resize or emphasise text | [Text Layout](/expedy-print/receipt-layout/text-layout-tags) |
| Print a logo or an image | [Image and Logo](/expedy-print/receipt-layout/image-and-logo-printing) |
| Print a QR code | [QR Code](/expedy-print/receipt-layout/qr-code) |
| Print a barcode | [EAN13 Barcode](/expedy-print/receipt-layout/ean13-barcode) |
> Depending on the connector or the software you use, this setup may be handled by your partner or your agency. Check with them before you start.
## Need help?
- [Browse all integrations](/integrations)
- [Open a support ticket](https://help.expedy.io/support/tickets/new)
---
url: https://docs.expedy.io/en/integrations/shipstation/connect-a-receipt-printer-to-shipstation
title: Print your ShipStation shipping labels automatically
updated_at: 2026-10-19T13:31:36.901692+00:00
---
# Print your ShipStation shipping labels automatically
[ShipStation](https://www.shipstation.com/) generates your carrier shipping labels. Through **Zapier**, the label PDF goes straight to your label printer the moment ShipStation creates it, so nobody has to download it and print it by hand.
> An Expedy cloud receipt printer, XPDY80, HSPOS or Star Micronics, **cannot print a carrier label**: it is a receipt printer. Carrier labels always go through a **Raspberry Pi** or a **Cloud Print Box USB adapter** driving a label printer.
## What you need
- An Expedy account with an active **Raspberry Pi print server** or **Cloud Print Box USB adapter**. Not set up yet? See [Add a Raspberry Pi print server to your account](/expedy-print/installation/add-a-raspberry-pi-cloud-print-server-to-your-account)
- **Your own label printer**, connected by USB to that Raspberry Pi or adapter, with its port set to `LABEL`
- A ShipStation account and a [Zapier](https://zapier.com/) account
- Your **API SID**, **API TOKEN** and **API Printer UID**, on the printer page of the [Expedy console](https://www.expedy.fr/console/v3/), in the **API Keys & UID** card
## Why a label printer
A carrier label is a PDF in a fixed format, most often 100 x 150 mm. A receipt printer cannot render it at the right size, so the job goes to a label printer driven by a Raspberry Pi or the Cloud Print Box.
On the printer page, run a **USB scan** and set the port that carries the label printer to `LABEL`, not `ESC/POS`. See [Installation on Raspberry Pi](/usb-cloud-printer-adapter/rpi-installation/installation-on-raspberry-pi).
## Build the Zap
1. In Zapier, create a Zap and pick **ShipStation** as the trigger app
2. Choose the event that fires when a label is created
3. Add **Expedy Print** as the action, then **Create a Print Job**
4. Connect your Expedy account with your **Expedy SID** and your **Expedy TOKEN**
5. Enter the **Printer UID** of the label printer
6. In the message field, map the label PDF URL returned by ShipStation
Step by step on the Zapier side: [How to integrate Expedy Print with Zapier](/integrations/zapier/how-to-integrate-expedy-print-with-zapier)
## What to send
A label printer takes the PDF URL **on its own, with no tag**:
```text
https://example.com/label.pdf
```
On an ESC/POS receipt printer the same URL has to be wrapped in the `` tag instead. Both forms are detailed in [PDF printing](/expedy-print/receipt-layout/print-pdf).
## Test it
Create a test label in ShipStation and check that it comes out at the right size. If nothing prints:
- check the **Printer UID**, it must be the label printer, not the receipt printer
- check that the USB port is in `LABEL` mode after the scan
- check that the PDF URL is reachable without authentication, Expedy fetches it from its own servers
> Depending on the connector or the software you use, this setup may be handled by your partner or your agency. Check with them before you start.
## Need help?
- [Browse all integrations](/integrations)
- [Open a support ticket](https://help.expedy.io/support/tickets/new)
---
url: https://docs.expedy.io/en/integrations/wolt/connect-a-receipt-printer-to-wolt
title: Print Wolt orders on a receipt printer
updated_at: 2026-10-19T11:08:04.24409+00:00
---
# Print Wolt orders on a receipt printer
[Wolt](https://wolt.com/) is a meal delivery platform. It connects to Expedy PRINT through **HubRise**: Wolt sends its orders to HubRise, HubRise forwards them to your cloud printer, and the ticket comes out within seconds.
## What you need
- An Expedy account with an active printer. Not added yet? Follow the guide for your machine, [Expedy XPDY80](/expedy-print/installation/add-an-expedy-xpdy80-cloud-printer-to-your-account), [HSPOS](/expedy-print/installation/add-an-hspos-cloud-printer-to-your-account), [Star Micronics](/expedy-print/installation/add-a-star-micronics-printer-to-your-account) or [Raspberry Pi](/expedy-print/installation/add-a-raspberry-pi-cloud-print-server-to-your-account)
- A [HubRise account](https://manager.hubrise.com/signup), which aggregates your sales channels
- A Wolt account linked to your HubRise location
## How it works
| Step | What happens |
|---|---|
| 1 | An order is placed on Wolt |
| 2 | Wolt pushes it to HubRise |
| 3 | Expedy PRINT receives it and prints a standardised ticket |
A single printer covers every channel connected to the same HubRise location, so you do not need one machine per platform.
## Connect it
The setup happens once, on the HubRise side, and is described step by step in the reference guide:
**[Connect a receipt printer to HubRise](/integrations/hubrise/connecting-a-receipt-printer-to-hubrise)**
Then link your Wolt account to the same HubRise location. That part is done from the Wolt back office, or by Wolt support.
## Receipt settings
Once connected, the printer page in the [Expedy console](https://www.expedy.fr/console/v3/) controls what gets printed:
- **Print order when**, the status that triggers printing, `NEW`, `RECEIVED` or `ACCEPTED`
- **Then change status to**, the automatic status update applied after printing
- **Number of copies**, one ticket for the kitchen, one for the counter or the delivery bag
- The receipt header and footer, logo, company name, address and registration number
All of it is detailed in [Connect a receipt printer to HubRise](/integrations/hubrise/connecting-a-receipt-printer-to-hubrise).
> Depending on the connector or the point-of-sale software you use, this setup may be handled by your partner. Check with them before you start.
## Need help?
- [Browse all integrations](/integrations)
- [Open a support ticket](https://help.expedy.io/support/tickets/new)
---
url: https://docs.expedy.io/en/integrations/pinterest/connect-a-receipt-printer-to-pinterest
title: Print your Pinterest photos automatically
updated_at: 2026-10-21T17:32:26.735686+00:00
---
# Print your Pinterest photos automatically
[Pinterest](https://www.pinterest.com/) is a photo sharing platform. Through **Zapier**, every new image can go straight to a printer: a black and white copy on a thermal receipt printer, or a full colour print on a photo printer driven by a Raspberry Pi.
## Two very different ways to print an image
| | Receipt printer, thermal | Raspberry Pi or Cloud Print Box |
|---|---|---|
| Hardware | Expedy XPDY80, HSPOS, Star Micronics | Your own laser, inkjet or photo printer, Kodak or DNP and the like, on USB |
| Result | Black and white, no ink, nothing to buy beyond the paper roll | Full colour, photo quality |
| Formats | `.JPG` `.GIF` `.PNG`, wrapped in the `
` tag on a receipt printer, or the bare image URL on a photo printer
Step by step on the Zapier side: [How to integrate Expedy Print with Zapier](/integrations/zapier/how-to-integrate-expedy-print-with-zapier)
> Depending on the connector or the software you use, this setup may be handled by your partner or your agency. Check with them before you start.
## Need help?
- [Browse all integrations](/integrations)
- [Open a support ticket](https://help.expedy.io/support/tickets/new)
---
url: https://docs.expedy.io/en/integrations/hop-delivery/connect-a-receipt-printer-to-hop-delivery
title: Print Hop Delivery orders on a receipt printer
updated_at: 2026-10-18T15:52:47.542883+00:00
---
# Print Hop Delivery orders on a receipt printer
**Hop Delivery** is a meal delivery platform. It connects to Expedy PRINT through **HubRise**: Hop Delivery sends its orders to HubRise, HubRise forwards them to your cloud printer, and the ticket comes out within seconds.
## What you need
- An Expedy account with an active printer. Not added yet? Follow the guide for your machine, [Expedy XPDY80](/expedy-print/installation/add-an-expedy-xpdy80-cloud-printer-to-your-account), [HSPOS](/expedy-print/installation/add-an-hspos-cloud-printer-to-your-account), [Star Micronics](/expedy-print/installation/add-a-star-micronics-printer-to-your-account) or [Raspberry Pi](/expedy-print/installation/add-a-raspberry-pi-cloud-print-server-to-your-account)
- A [HubRise account](https://manager.hubrise.com/signup), which aggregates your sales channels
- A Hop Delivery account linked to your HubRise location
## How it works
| Step | What happens |
|---|---|
| 1 | An order is placed on Hop Delivery |
| 2 | Hop Delivery pushes it to HubRise |
| 3 | Expedy PRINT receives it and prints a standardised ticket |
A single printer covers every channel connected to the same HubRise location, so you do not need one machine per platform.
## Connect it
The setup happens once, on the HubRise side, and is described step by step in the reference guide:
**[Connect a receipt printer to HubRise](/integrations/hubrise/connecting-a-receipt-printer-to-hubrise)**
Then link your Hop Delivery account to the same HubRise location. That part is done from the Hop Delivery back office, or by Hop Delivery support.
## Receipt settings
Once connected, the printer page in the [Expedy console](https://www.expedy.fr/console/v3/) controls what gets printed:
- **Print order when**, the status that triggers printing, `NEW`, `RECEIVED` or `ACCEPTED`
- **Then change status to**, the automatic status update applied after printing
- **Number of copies**, one ticket for the kitchen, one for the counter or the delivery bag
- The receipt header and footer, logo, company name, address and registration number
All of it is detailed in [Connect a receipt printer to HubRise](/integrations/hubrise/connecting-a-receipt-printer-to-hubrise).
> Depending on the connector or the point-of-sale software you use, this setup may be handled by your partner. Check with them before you start.
## Need help?
- [Browse all integrations](/integrations)
- [Open a support ticket](https://help.expedy.io/support/tickets/new)
---
url: https://docs.expedy.io/en/integrations/talabat/connect-a-receipt-printer-to-talabat
title: Print Talabat orders on a receipt printer
updated_at: 2026-10-21T01:46:15.748963+00:00
---
# Print Talabat orders on a receipt printer
[Talabat](https://www.talabat.com/) is a meal delivery platform. It connects to Expedy PRINT through **HubRise**: Talabat sends its orders to HubRise, HubRise forwards them to your cloud printer, and the ticket comes out within seconds.
## What you need
- An Expedy account with an active printer. Not added yet? Follow the guide for your machine, [Expedy XPDY80](/expedy-print/installation/add-an-expedy-xpdy80-cloud-printer-to-your-account), [HSPOS](/expedy-print/installation/add-an-hspos-cloud-printer-to-your-account), [Star Micronics](/expedy-print/installation/add-a-star-micronics-printer-to-your-account) or [Raspberry Pi](/expedy-print/installation/add-a-raspberry-pi-cloud-print-server-to-your-account)
- A [HubRise account](https://manager.hubrise.com/signup), which aggregates your sales channels
- A Talabat account linked to your HubRise location
## How it works
| Step | What happens |
|---|---|
| 1 | An order is placed on Talabat |
| 2 | Talabat pushes it to HubRise |
| 3 | Expedy PRINT receives it and prints a standardised ticket |
A single printer covers every channel connected to the same HubRise location, so you do not need one machine per platform.
## Connect it
The setup happens once, on the HubRise side, and is described step by step in the reference guide:
**[Connect a receipt printer to HubRise](/integrations/hubrise/connecting-a-receipt-printer-to-hubrise)**
Then link your Talabat account to the same HubRise location. That part is done from the Talabat back office, or by Talabat support.
## Receipt settings
Once connected, the printer page in the [Expedy console](https://www.expedy.fr/console/v3/) controls what gets printed:
- **Print order when**, the status that triggers printing, `NEW`, `RECEIVED` or `ACCEPTED`
- **Then change status to**, the automatic status update applied after printing
- **Number of copies**, one ticket for the kitchen, one for the counter or the delivery bag
- The receipt header and footer, logo, company name, address and registration number
All of it is detailed in [Connect a receipt printer to HubRise](/integrations/hubrise/connecting-a-receipt-printer-to-hubrise).
> Depending on the connector or the point-of-sale software you use, this setup may be handled by your partner. Check with them before you start.
## Need help?
- [Browse all integrations](/integrations)
- [Open a support ticket](https://help.expedy.io/support/tickets/new)
---
url: https://docs.expedy.io/en/integrations/lightkitch/connect-a-receipt-printer-to-lightkitch
title: Receipt printing with LightKitch
updated_at: 2026-10-20T16:19:04.995451+00:00
---
# Receipt printing with LightKitch
[LightKitch](https://www.lightkitch.io/) is an order aggregation platform. With LightKitch, **the receipt printer is installed and configured by LightKitch**, not from your Expedy console. Get in touch with them to have your printer activated.
## Who does what
| Party | Responsibility |
|---|---|
| Expedy | Supplies the cloud printer, its connectivity (Ethernet, Wi-Fi or 4G SIM) and the console where you follow your print jobs |
| LightKitch | Pairs the printer with your account, sets the receipt layout and switches the service on |
## Getting your printer activated
1. Order your machine, or use the one you already have
2. Contact LightKitch and tell them you want to print your orders on an Expedy cloud printer
3. LightKitch handles the pairing and the receipt layout on their side
4. Once activated, orders print automatically, with nothing left to do on your part
> If your printer already appears in your Expedy account, give LightKitch its **API Printer UID**, shown on the printer page in the **API Keys & UID** card of the [Expedy console](https://www.expedy.fr/console/v3/).
## Once it is live
From the [Expedy console](https://www.expedy.fr/console/v3/) you can, at any time:
- Check that the machine is reachable, with **Check Status** on the printer page
- Review every job in **Print Jobs History**
- Follow your monthly usage and change plan, the **FREE** plan being capped at 50 print requests per month
Anything about the order content or the ticket layout goes through LightKitch, since the connection lives on their side.
## Need help?
- [Add your printer to your Expedy account](/expedy-print/installation/add-an-expedy-xpdy80-cloud-printer-to-your-account)
- [Browse all integrations](/integrations)
- Expedy hardware or account question: [open a support ticket](https://help.expedy.io/support/tickets/new)
---
url: https://docs.expedy.io/en/integrations/lemon-squeezy/connect-a-receipt-printer-to-lemon-squeezy
title: Print from Lemon Squeezy with Expedy PRINT
updated_at: 2026-10-22T19:42:50.440795+00:00
---
# Print from Lemon Squeezy with Expedy PRINT
[Lemon Squeezy](https://www.lemonsqueezy.com/) is an online cart and checkout platform. It reaches Expedy PRINT in two ways: through **Zapier**, with no code, or through the **Expedy REST API**, when you want full control over the ticket.
## What you need
- An Expedy account with an active printer. Not added yet? Follow the guide for your machine, [Expedy XPDY80](/expedy-print/installation/add-an-expedy-xpdy80-cloud-printer-to-your-account), [HSPOS](/expedy-print/installation/add-an-hspos-cloud-printer-to-your-account), [Star Micronics](/expedy-print/installation/add-a-star-micronics-printer-to-your-account) or [Raspberry Pi](/expedy-print/installation/add-a-raspberry-pi-cloud-print-server-to-your-account)
- Your **API SID**, **API TOKEN** and **API Printer UID**, all three on the printer page of the [Expedy console](https://www.expedy.fr/console/v3/), in the **API Keys & UID** card
## Option 1, through Zapier, no code
Lemon Squeezy connects to Zapier, and Zapier ships a ready-made **Expedy Print** action. The recipe is always the same: an event in Lemon Squeezy triggers **Create a Print Job** in Expedy Print, and you map the fields you want on the ticket.
Full walkthrough: **[How to integrate Expedy Print with Zapier](/integrations/zapier/how-to-integrate-expedy-print-with-zapier)**
## Option 2, through the REST API
If Lemon Squeezy can issue an HTTP request, it can drive the printer directly.
```api
POST https://www.expedy.fr/api/v2/printers/{printer_uid}/print
```
Authentication uses an `Authorization` header carrying your `SID:TOKEN`, with no `Bearer` prefix. Parameters and a complete example are in [Create a Print Job](/expedy-print/api-print-v2/create-a-print-job).
## Formatting the ticket
Whichever route you take, the message accepts the Expedy layout tags:
| What you want | Where to look |
|---|---|
| Align, resize or emphasise text | [Text Layout](/expedy-print/receipt-layout/text-layout-tags) |
| Print a logo or an image | [Image and Logo](/expedy-print/receipt-layout/image-and-logo-printing) |
| Print a QR code | [QR Code](/expedy-print/receipt-layout/qr-code) |
| Print a barcode | [EAN13 Barcode](/expedy-print/receipt-layout/ean13-barcode) |
> Depending on the connector or the software you use, this setup may be handled by your partner or your agency. Check with them before you start.
## Need help?
- [Browse all integrations](/integrations)
- [Open a support ticket](https://help.expedy.io/support/tickets/new)
---
url: https://docs.expedy.io/en/integrations/shipstation/connect-a-receipt-printer-to-shipstation
title: Print your ShipStation shipping labels automatically
updated_at: 2026-10-19T13:31:36.901692+00:00
---
# Print your ShipStation shipping labels automatically
[ShipStation](https://www.shipstation.com/) generates your carrier shipping labels. Through **Zapier**, the label PDF goes straight to your label printer the moment ShipStation creates it, so nobody has to download it and print it by hand.
> An Expedy cloud receipt printer, XPDY80, HSPOS or Star Micronics, **cannot print a carrier label**: it is a receipt printer. Carrier labels always go through a **Raspberry Pi** or a **Cloud Print Box USB adapter** driving a label printer.
## What you need
- An Expedy account with an active **Raspberry Pi print server** or **Cloud Print Box USB adapter**. Not set up yet? See [Add a Raspberry Pi print server to your account](/expedy-print/installation/add-a-raspberry-pi-cloud-print-server-to-your-account)
- **Your own label printer**, connected by USB to that Raspberry Pi or adapter, with its port set to `LABEL`
- A ShipStation account and a [Zapier](https://zapier.com/) account
- Your **API SID**, **API TOKEN** and **API Printer UID**, on the printer page of the [Expedy console](https://www.expedy.fr/console/v3/), in the **API Keys & UID** card
## Why a label printer
A carrier label is a PDF in a fixed format, most often 100 x 150 mm. A receipt printer cannot render it at the right size, so the job goes to a label printer driven by a Raspberry Pi or the Cloud Print Box.
On the printer page, run a **USB scan** and set the port that carries the label printer to `LABEL`, not `ESC/POS`. See [Installation on Raspberry Pi](/usb-cloud-printer-adapter/rpi-installation/installation-on-raspberry-pi).
## Build the Zap
1. In Zapier, create a Zap and pick **ShipStation** as the trigger app
2. Choose the event that fires when a label is created
3. Add **Expedy Print** as the action, then **Create a Print Job**
4. Connect your Expedy account with your **Expedy SID** and your **Expedy TOKEN**
5. Enter the **Printer UID** of the label printer
6. In the message field, map the label PDF URL returned by ShipStation
Step by step on the Zapier side: [How to integrate Expedy Print with Zapier](/integrations/zapier/how-to-integrate-expedy-print-with-zapier)
## What to send
A label printer takes the PDF URL **on its own, with no tag**:
```text
https://example.com/label.pdf
```
On an ESC/POS receipt printer the same URL has to be wrapped in the `` tag instead. Both forms are detailed in [PDF printing](/expedy-print/receipt-layout/print-pdf).
## Test it
Create a test label in ShipStation and check that it comes out at the right size. If nothing prints:
- check the **Printer UID**, it must be the label printer, not the receipt printer
- check that the USB port is in `LABEL` mode after the scan
- check that the PDF URL is reachable without authentication, Expedy fetches it from its own servers
> Depending on the connector or the software you use, this setup may be handled by your partner or your agency. Check with them before you start.
## Need help?
- [Browse all integrations](/integrations)
- [Open a support ticket](https://help.expedy.io/support/tickets/new)
---
url: https://docs.expedy.io/en/integrations/wolt/connect-a-receipt-printer-to-wolt
title: Print Wolt orders on a receipt printer
updated_at: 2026-10-19T11:08:04.24409+00:00
---
# Print Wolt orders on a receipt printer
[Wolt](https://wolt.com/) is a meal delivery platform. It connects to Expedy PRINT through **HubRise**: Wolt sends its orders to HubRise, HubRise forwards them to your cloud printer, and the ticket comes out within seconds.
## What you need
- An Expedy account with an active printer. Not added yet? Follow the guide for your machine, [Expedy XPDY80](/expedy-print/installation/add-an-expedy-xpdy80-cloud-printer-to-your-account), [HSPOS](/expedy-print/installation/add-an-hspos-cloud-printer-to-your-account), [Star Micronics](/expedy-print/installation/add-a-star-micronics-printer-to-your-account) or [Raspberry Pi](/expedy-print/installation/add-a-raspberry-pi-cloud-print-server-to-your-account)
- A [HubRise account](https://manager.hubrise.com/signup), which aggregates your sales channels
- A Wolt account linked to your HubRise location
## How it works
| Step | What happens |
|---|---|
| 1 | An order is placed on Wolt |
| 2 | Wolt pushes it to HubRise |
| 3 | Expedy PRINT receives it and prints a standardised ticket |
A single printer covers every channel connected to the same HubRise location, so you do not need one machine per platform.
## Connect it
The setup happens once, on the HubRise side, and is described step by step in the reference guide:
**[Connect a receipt printer to HubRise](/integrations/hubrise/connecting-a-receipt-printer-to-hubrise)**
Then link your Wolt account to the same HubRise location. That part is done from the Wolt back office, or by Wolt support.
## Receipt settings
Once connected, the printer page in the [Expedy console](https://www.expedy.fr/console/v3/) controls what gets printed:
- **Print order when**, the status that triggers printing, `NEW`, `RECEIVED` or `ACCEPTED`
- **Then change status to**, the automatic status update applied after printing
- **Number of copies**, one ticket for the kitchen, one for the counter or the delivery bag
- The receipt header and footer, logo, company name, address and registration number
All of it is detailed in [Connect a receipt printer to HubRise](/integrations/hubrise/connecting-a-receipt-printer-to-hubrise).
> Depending on the connector or the point-of-sale software you use, this setup may be handled by your partner. Check with them before you start.
## Need help?
- [Browse all integrations](/integrations)
- [Open a support ticket](https://help.expedy.io/support/tickets/new)
---
url: https://docs.expedy.io/en/integrations/pinterest/connect-a-receipt-printer-to-pinterest
title: Print your Pinterest photos automatically
updated_at: 2026-10-21T17:32:26.735686+00:00
---
# Print your Pinterest photos automatically
[Pinterest](https://www.pinterest.com/) is a photo sharing platform. Through **Zapier**, every new image can go straight to a printer: a black and white copy on a thermal receipt printer, or a full colour print on a photo printer driven by a Raspberry Pi.
## Two very different ways to print an image
| | Receipt printer, thermal | Raspberry Pi or Cloud Print Box |
|---|---|---|
| Hardware | Expedy XPDY80, HSPOS, Star Micronics | Your own laser, inkjet or photo printer, Kodak or DNP and the like, on USB |
| Result | Black and white, no ink, nothing to buy beyond the paper roll | Full colour, photo quality |
| Formats | `.JPG` `.GIF` `.PNG`, wrapped in the `![]() ` tag | `.JPG` `.BMP` `.PNG` `.PDF`, sent as a bare URL |
| Width | 398 px at 58 mm, 602 px at 80 mm, 1002 px at 104 mm | The printer's own format |
| Setup | Nothing to install | USB port set to `LABEL` after a scan, printer driver installed |
## On a thermal receipt printer
Thermal printing uses no ink: the image is burned into the paper, so a print costs nothing beyond the roll. That is what makes it viable for a photo booth, an event or a loyalty coupon.
The trade-off is the rendering. The documented requirement is **flat black on a white background**, at the exact width of your paper, 5 to 15 KB, served over HTTPS. A colour photo taken straight from Pinterest will not come out as is: convert it to black and white and resize it first. Every constraint is listed in [Image and Logo](/expedy-print/receipt-layout/image-and-logo-printing).
In the Zap, the message is the `
` tag | `.JPG` `.BMP` `.PNG` `.PDF`, sent as a bare URL |
| Width | 398 px at 58 mm, 602 px at 80 mm, 1002 px at 104 mm | The printer's own format |
| Setup | Nothing to install | USB port set to `LABEL` after a scan, printer driver installed |
## On a thermal receipt printer
Thermal printing uses no ink: the image is burned into the paper, so a print costs nothing beyond the roll. That is what makes it viable for a photo booth, an event or a loyalty coupon.
The trade-off is the rendering. The documented requirement is **flat black on a white background**, at the exact width of your paper, 5 to 15 KB, served over HTTPS. A colour photo taken straight from Pinterest will not come out as is: convert it to black and white and resize it first. Every constraint is listed in [Image and Logo](/expedy-print/receipt-layout/image-and-logo-printing).
In the Zap, the message is the `![]() ` tag wrapping the image URL:
```text
` tag wrapping the image URL:
```text
![]() https://example.com/photo.png
```
## On a photo, laser or inkjet printer
For real photo output, the job goes to **your own printer**, connected by USB to a **Raspberry Pi** or a **Cloud Print Box adapter**. Laser, inkjet, label and dye-sublimation photo printers such as Kodak or DNP all work, as long as their driver is installed.
Run a **USB scan** on the device page, set that port to `LABEL`, and send the image URL **on its own, with no tag**:
```text
https://example.com/photo.jpg
```
See [Installation on Raspberry Pi](/usb-cloud-printer-adapter/rpi-installation/installation-on-raspberry-pi) and [PDF printing](/expedy-print/receipt-layout/print-pdf).
## Build the Zap
1. Pick **Pinterest** as the trigger app and the event that fires on a new image
2. Add **Expedy Print** as the action, then **Create a Print Job**
3. Connect your Expedy account with your **Expedy SID** and your **Expedy TOKEN**, both on the printer page of the [Expedy console](https://www.expedy.fr/console/v3/), in the **API Keys & UID** card
4. Enter the **Printer UID** of the machine that will print
5. In the message, put the `
https://example.com/photo.png
```
## On a photo, laser or inkjet printer
For real photo output, the job goes to **your own printer**, connected by USB to a **Raspberry Pi** or a **Cloud Print Box adapter**. Laser, inkjet, label and dye-sublimation photo printers such as Kodak or DNP all work, as long as their driver is installed.
Run a **USB scan** on the device page, set that port to `LABEL`, and send the image URL **on its own, with no tag**:
```text
https://example.com/photo.jpg
```
See [Installation on Raspberry Pi](/usb-cloud-printer-adapter/rpi-installation/installation-on-raspberry-pi) and [PDF printing](/expedy-print/receipt-layout/print-pdf).
## Build the Zap
1. Pick **Pinterest** as the trigger app and the event that fires on a new image
2. Add **Expedy Print** as the action, then **Create a Print Job**
3. Connect your Expedy account with your **Expedy SID** and your **Expedy TOKEN**, both on the printer page of the [Expedy console](https://www.expedy.fr/console/v3/), in the **API Keys & UID** card
4. Enter the **Printer UID** of the machine that will print
5. In the message, put the `![]() ` tag on a receipt printer, or the bare image URL on a photo printer
Step by step on the Zapier side: [How to integrate Expedy Print with Zapier](/integrations/zapier/how-to-integrate-expedy-print-with-zapier)
> Depending on the connector or the software you use, this setup may be handled by your partner or your agency. Check with them before you start.
## Need help?
- [Browse all integrations](/integrations)
- [Open a support ticket](https://help.expedy.io/support/tickets/new)
---
url: https://docs.expedy.io/en/integrations/zoho-inventory/connect-a-receipt-printer-to-zoho-inventory
title: Print from Zoho Inventory with Expedy PRINT
updated_at: 2026-10-20T12:07:52.646152+00:00
---
# Print from Zoho Inventory with Expedy PRINT
[Zoho Inventory](https://www.zoho.com/inventory/) is an inventory and order management tool. It reaches Expedy PRINT in two ways: through **Zapier**, with no code, or through the **Expedy REST API**, when you want full control over the ticket.
## What you need
- An Expedy account with an active printer. Not added yet? Follow the guide for your machine, [Expedy XPDY80](/expedy-print/installation/add-an-expedy-xpdy80-cloud-printer-to-your-account), [HSPOS](/expedy-print/installation/add-an-hspos-cloud-printer-to-your-account), [Star Micronics](/expedy-print/installation/add-a-star-micronics-printer-to-your-account) or [Raspberry Pi](/expedy-print/installation/add-a-raspberry-pi-cloud-print-server-to-your-account)
- Your **API SID**, **API TOKEN** and **API Printer UID**, all three on the printer page of the [Expedy console](https://www.expedy.fr/console/v3/), in the **API Keys & UID** card
## Option 1, through Zapier, no code
Zoho Inventory connects to Zapier, and Zapier ships a ready-made **Expedy Print** action. The recipe is always the same: an event in Zoho Inventory triggers **Create a Print Job** in Expedy Print, and you map the fields you want on the ticket.
Full walkthrough: **[How to integrate Expedy Print with Zapier](/integrations/zapier/how-to-integrate-expedy-print-with-zapier)**
## Option 2, through the REST API
If Zoho Inventory can issue an HTTP request, it can drive the printer directly.
```api
POST https://www.expedy.fr/api/v2/printers/{printer_uid}/print
```
Authentication uses an `Authorization` header carrying your `SID:TOKEN`, with no `Bearer` prefix. Parameters and a complete example are in [Create a Print Job](/expedy-print/api-print-v2/create-a-print-job).
## Formatting the ticket
Whichever route you take, the message accepts the Expedy layout tags:
| What you want | Where to look |
|---|---|
| Align, resize or emphasise text | [Text Layout](/expedy-print/receipt-layout/text-layout-tags) |
| Print a logo or an image | [Image and Logo](/expedy-print/receipt-layout/image-and-logo-printing) |
| Print a QR code | [QR Code](/expedy-print/receipt-layout/qr-code) |
| Print a barcode | [EAN13 Barcode](/expedy-print/receipt-layout/ean13-barcode) |
> Depending on the connector or the software you use, this setup may be handled by your partner or your agency. Check with them before you start.
## Need help?
- [Browse all integrations](/integrations)
- [Open a support ticket](https://help.expedy.io/support/tickets/new)
---
url: https://docs.expedy.io/en/integrations/integrately/connect-a-receipt-printer-to-integrately
title: Print from Integrately with Expedy PRINT
updated_at: 2026-10-23T01:05:37.675642+00:00
---
# Print from Integrately with Expedy PRINT
[Integrately](https://integrately.com/) is an automation platform. It reaches Expedy PRINT in two ways: through **Zapier**, with no code, or through the **Expedy REST API**, when you want full control over the ticket.
## What you need
- An Expedy account with an active printer. Not added yet? Follow the guide for your machine, [Expedy XPDY80](/expedy-print/installation/add-an-expedy-xpdy80-cloud-printer-to-your-account), [HSPOS](/expedy-print/installation/add-an-hspos-cloud-printer-to-your-account), [Star Micronics](/expedy-print/installation/add-a-star-micronics-printer-to-your-account) or [Raspberry Pi](/expedy-print/installation/add-a-raspberry-pi-cloud-print-server-to-your-account)
- Your **API SID**, **API TOKEN** and **API Printer UID**, all three on the printer page of the [Expedy console](https://www.expedy.fr/console/v3/), in the **API Keys & UID** card
## Option 1, through Zapier, no code
Integrately connects to Zapier, and Zapier ships a ready-made **Expedy Print** action. The recipe is always the same: an event in Integrately triggers **Create a Print Job** in Expedy Print, and you map the fields you want on the ticket.
Full walkthrough: **[How to integrate Expedy Print with Zapier](/integrations/zapier/how-to-integrate-expedy-print-with-zapier)**
## Option 2, through the REST API
If Integrately can issue an HTTP request, it can drive the printer directly.
```api
POST https://www.expedy.fr/api/v2/printers/{printer_uid}/print
```
Authentication uses an `Authorization` header carrying your `SID:TOKEN`, with no `Bearer` prefix. Parameters and a complete example are in [Create a Print Job](/expedy-print/api-print-v2/create-a-print-job).
## Formatting the ticket
Whichever route you take, the message accepts the Expedy layout tags:
| What you want | Where to look |
|---|---|
| Align, resize or emphasise text | [Text Layout](/expedy-print/receipt-layout/text-layout-tags) |
| Print a logo or an image | [Image and Logo](/expedy-print/receipt-layout/image-and-logo-printing) |
| Print a QR code | [QR Code](/expedy-print/receipt-layout/qr-code) |
| Print a barcode | [EAN13 Barcode](/expedy-print/receipt-layout/ean13-barcode) |
> Depending on the connector or the software you use, this setup may be handled by your partner or your agency. Check with them before you start.
## Need help?
- [Browse all integrations](/integrations)
- [Open a support ticket](https://help.expedy.io/support/tickets/new)
---
url: https://docs.expedy.io/en/integrations/glovo/connect-a-receipt-printer-to-glovo
title: Print Glovo orders on a receipt printer
updated_at: 2026-10-20T23:06:39.369057+00:00
---
# Print Glovo orders on a receipt printer
[Glovo](https://glovoapp.com/) is a meal delivery platform. It connects to Expedy PRINT through **HubRise**: Glovo sends its orders to HubRise, HubRise forwards them to your cloud printer, and the ticket comes out within seconds.
## What you need
- An Expedy account with an active printer. Not added yet? Follow the guide for your machine, [Expedy XPDY80](/expedy-print/installation/add-an-expedy-xpdy80-cloud-printer-to-your-account), [HSPOS](/expedy-print/installation/add-an-hspos-cloud-printer-to-your-account), [Star Micronics](/expedy-print/installation/add-a-star-micronics-printer-to-your-account) or [Raspberry Pi](/expedy-print/installation/add-a-raspberry-pi-cloud-print-server-to-your-account)
- A [HubRise account](https://manager.hubrise.com/signup), which aggregates your sales channels
- A Glovo account linked to your HubRise location
## How it works
| Step | What happens |
|---|---|
| 1 | An order is placed on Glovo |
| 2 | Glovo pushes it to HubRise |
| 3 | Expedy PRINT receives it and prints a standardised ticket |
A single printer covers every channel connected to the same HubRise location, so you do not need one machine per platform.
## Connect it
The setup happens once, on the HubRise side, and is described step by step in the reference guide:
**[Connect a receipt printer to HubRise](/integrations/hubrise/connecting-a-receipt-printer-to-hubrise)**
Then link your Glovo account to the same HubRise location. That part is done from the Glovo back office, or by Glovo support.
## Receipt settings
Once connected, the printer page in the [Expedy console](https://www.expedy.fr/console/v3/) controls what gets printed:
- **Print order when**, the status that triggers printing, `NEW`, `RECEIVED` or `ACCEPTED`
- **Then change status to**, the automatic status update applied after printing
- **Number of copies**, one ticket for the kitchen, one for the counter or the delivery bag
- The receipt header and footer, logo, company name, address and registration number
All of it is detailed in [Connect a receipt printer to HubRise](/integrations/hubrise/connecting-a-receipt-printer-to-hubrise).
> Depending on the connector or the point-of-sale software you use, this setup may be handled by your partner. Check with them before you start.
## Need help?
- [Browse all integrations](/integrations)
- [Open a support ticket](https://help.expedy.io/support/tickets/new)
---
url: https://docs.expedy.io/en/integrations/pabbly-connect/connect-a-receipt-printer-to-pabbly-connect
title: Print from Pabbly Connect with Expedy PRINT
updated_at: 2026-10-10T16:05:41.637365+00:00
---
# Print from Pabbly Connect with Expedy PRINT
[Pabbly Connect](https://www.pabbly.com/connect/) is an automation platform. It reaches Expedy PRINT in two ways: through **Zapier**, with no code, or through the **Expedy REST API**, when you want full control over the ticket.
## What you need
- An Expedy account with an active printer. Not added yet? Follow the guide for your machine, [Expedy XPDY80](/expedy-print/installation/add-an-expedy-xpdy80-cloud-printer-to-your-account), [HSPOS](/expedy-print/installation/add-an-hspos-cloud-printer-to-your-account), [Star Micronics](/expedy-print/installation/add-a-star-micronics-printer-to-your-account) or [Raspberry Pi](/expedy-print/installation/add-a-raspberry-pi-cloud-print-server-to-your-account)
- Your **API SID**, **API TOKEN** and **API Printer UID**, all three on the printer page of the [Expedy console](https://www.expedy.fr/console/v3/), in the **API Keys & UID** card
## Option 1, through Zapier, no code
Pabbly Connect connects to Zapier, and Zapier ships a ready-made **Expedy Print** action. The recipe is always the same: an event in Pabbly Connect triggers **Create a Print Job** in Expedy Print, and you map the fields you want on the ticket.
Full walkthrough: **[How to integrate Expedy Print with Zapier](/integrations/zapier/how-to-integrate-expedy-print-with-zapier)**
## Option 2, through the REST API
If Pabbly Connect can issue an HTTP request, it can drive the printer directly.
```api
POST https://www.expedy.fr/api/v2/printers/{printer_uid}/print
```
Authentication uses an `Authorization` header carrying your `SID:TOKEN`, with no `Bearer` prefix. Parameters and a complete example are in [Create a Print Job](/expedy-print/api-print-v2/create-a-print-job).
## Formatting the ticket
Whichever route you take, the message accepts the Expedy layout tags:
| What you want | Where to look |
|---|---|
| Align, resize or emphasise text | [Text Layout](/expedy-print/receipt-layout/text-layout-tags) |
| Print a logo or an image | [Image and Logo](/expedy-print/receipt-layout/image-and-logo-printing) |
| Print a QR code | [QR Code](/expedy-print/receipt-layout/qr-code) |
| Print a barcode | [EAN13 Barcode](/expedy-print/receipt-layout/ean13-barcode) |
> Depending on the connector or the software you use, this setup may be handled by your partner or your agency. Check with them before you start.
## Need help?
- [Browse all integrations](/integrations)
- [Open a support ticket](https://help.expedy.io/support/tickets/new)
---
url: https://docs.expedy.io/en/integrations/flickr/connect-a-receipt-printer-to-flickr
title: Print your Flickr photos automatically
updated_at: 2026-10-22T20:20:34.681788+00:00
---
# Print your Flickr photos automatically
[Flickr](https://www.flickr.com/) is a photo sharing platform. Through **Zapier**, every new image can go straight to a printer: a black and white copy on a thermal receipt printer, or a full colour print on a photo printer driven by a Raspberry Pi.
## Two very different ways to print an image
| | Receipt printer, thermal | Raspberry Pi or Cloud Print Box |
|---|---|---|
| Hardware | Expedy XPDY80, HSPOS, Star Micronics | Your own laser, inkjet or photo printer, Kodak or DNP and the like, on USB |
| Result | Black and white, no ink, nothing to buy beyond the paper roll | Full colour, photo quality |
| Formats | `.JPG` `.GIF` `.PNG`, wrapped in the `
` tag on a receipt printer, or the bare image URL on a photo printer
Step by step on the Zapier side: [How to integrate Expedy Print with Zapier](/integrations/zapier/how-to-integrate-expedy-print-with-zapier)
> Depending on the connector or the software you use, this setup may be handled by your partner or your agency. Check with them before you start.
## Need help?
- [Browse all integrations](/integrations)
- [Open a support ticket](https://help.expedy.io/support/tickets/new)
---
url: https://docs.expedy.io/en/integrations/zoho-inventory/connect-a-receipt-printer-to-zoho-inventory
title: Print from Zoho Inventory with Expedy PRINT
updated_at: 2026-10-20T12:07:52.646152+00:00
---
# Print from Zoho Inventory with Expedy PRINT
[Zoho Inventory](https://www.zoho.com/inventory/) is an inventory and order management tool. It reaches Expedy PRINT in two ways: through **Zapier**, with no code, or through the **Expedy REST API**, when you want full control over the ticket.
## What you need
- An Expedy account with an active printer. Not added yet? Follow the guide for your machine, [Expedy XPDY80](/expedy-print/installation/add-an-expedy-xpdy80-cloud-printer-to-your-account), [HSPOS](/expedy-print/installation/add-an-hspos-cloud-printer-to-your-account), [Star Micronics](/expedy-print/installation/add-a-star-micronics-printer-to-your-account) or [Raspberry Pi](/expedy-print/installation/add-a-raspberry-pi-cloud-print-server-to-your-account)
- Your **API SID**, **API TOKEN** and **API Printer UID**, all three on the printer page of the [Expedy console](https://www.expedy.fr/console/v3/), in the **API Keys & UID** card
## Option 1, through Zapier, no code
Zoho Inventory connects to Zapier, and Zapier ships a ready-made **Expedy Print** action. The recipe is always the same: an event in Zoho Inventory triggers **Create a Print Job** in Expedy Print, and you map the fields you want on the ticket.
Full walkthrough: **[How to integrate Expedy Print with Zapier](/integrations/zapier/how-to-integrate-expedy-print-with-zapier)**
## Option 2, through the REST API
If Zoho Inventory can issue an HTTP request, it can drive the printer directly.
```api
POST https://www.expedy.fr/api/v2/printers/{printer_uid}/print
```
Authentication uses an `Authorization` header carrying your `SID:TOKEN`, with no `Bearer` prefix. Parameters and a complete example are in [Create a Print Job](/expedy-print/api-print-v2/create-a-print-job).
## Formatting the ticket
Whichever route you take, the message accepts the Expedy layout tags:
| What you want | Where to look |
|---|---|
| Align, resize or emphasise text | [Text Layout](/expedy-print/receipt-layout/text-layout-tags) |
| Print a logo or an image | [Image and Logo](/expedy-print/receipt-layout/image-and-logo-printing) |
| Print a QR code | [QR Code](/expedy-print/receipt-layout/qr-code) |
| Print a barcode | [EAN13 Barcode](/expedy-print/receipt-layout/ean13-barcode) |
> Depending on the connector or the software you use, this setup may be handled by your partner or your agency. Check with them before you start.
## Need help?
- [Browse all integrations](/integrations)
- [Open a support ticket](https://help.expedy.io/support/tickets/new)
---
url: https://docs.expedy.io/en/integrations/integrately/connect-a-receipt-printer-to-integrately
title: Print from Integrately with Expedy PRINT
updated_at: 2026-10-23T01:05:37.675642+00:00
---
# Print from Integrately with Expedy PRINT
[Integrately](https://integrately.com/) is an automation platform. It reaches Expedy PRINT in two ways: through **Zapier**, with no code, or through the **Expedy REST API**, when you want full control over the ticket.
## What you need
- An Expedy account with an active printer. Not added yet? Follow the guide for your machine, [Expedy XPDY80](/expedy-print/installation/add-an-expedy-xpdy80-cloud-printer-to-your-account), [HSPOS](/expedy-print/installation/add-an-hspos-cloud-printer-to-your-account), [Star Micronics](/expedy-print/installation/add-a-star-micronics-printer-to-your-account) or [Raspberry Pi](/expedy-print/installation/add-a-raspberry-pi-cloud-print-server-to-your-account)
- Your **API SID**, **API TOKEN** and **API Printer UID**, all three on the printer page of the [Expedy console](https://www.expedy.fr/console/v3/), in the **API Keys & UID** card
## Option 1, through Zapier, no code
Integrately connects to Zapier, and Zapier ships a ready-made **Expedy Print** action. The recipe is always the same: an event in Integrately triggers **Create a Print Job** in Expedy Print, and you map the fields you want on the ticket.
Full walkthrough: **[How to integrate Expedy Print with Zapier](/integrations/zapier/how-to-integrate-expedy-print-with-zapier)**
## Option 2, through the REST API
If Integrately can issue an HTTP request, it can drive the printer directly.
```api
POST https://www.expedy.fr/api/v2/printers/{printer_uid}/print
```
Authentication uses an `Authorization` header carrying your `SID:TOKEN`, with no `Bearer` prefix. Parameters and a complete example are in [Create a Print Job](/expedy-print/api-print-v2/create-a-print-job).
## Formatting the ticket
Whichever route you take, the message accepts the Expedy layout tags:
| What you want | Where to look |
|---|---|
| Align, resize or emphasise text | [Text Layout](/expedy-print/receipt-layout/text-layout-tags) |
| Print a logo or an image | [Image and Logo](/expedy-print/receipt-layout/image-and-logo-printing) |
| Print a QR code | [QR Code](/expedy-print/receipt-layout/qr-code) |
| Print a barcode | [EAN13 Barcode](/expedy-print/receipt-layout/ean13-barcode) |
> Depending on the connector or the software you use, this setup may be handled by your partner or your agency. Check with them before you start.
## Need help?
- [Browse all integrations](/integrations)
- [Open a support ticket](https://help.expedy.io/support/tickets/new)
---
url: https://docs.expedy.io/en/integrations/glovo/connect-a-receipt-printer-to-glovo
title: Print Glovo orders on a receipt printer
updated_at: 2026-10-20T23:06:39.369057+00:00
---
# Print Glovo orders on a receipt printer
[Glovo](https://glovoapp.com/) is a meal delivery platform. It connects to Expedy PRINT through **HubRise**: Glovo sends its orders to HubRise, HubRise forwards them to your cloud printer, and the ticket comes out within seconds.
## What you need
- An Expedy account with an active printer. Not added yet? Follow the guide for your machine, [Expedy XPDY80](/expedy-print/installation/add-an-expedy-xpdy80-cloud-printer-to-your-account), [HSPOS](/expedy-print/installation/add-an-hspos-cloud-printer-to-your-account), [Star Micronics](/expedy-print/installation/add-a-star-micronics-printer-to-your-account) or [Raspberry Pi](/expedy-print/installation/add-a-raspberry-pi-cloud-print-server-to-your-account)
- A [HubRise account](https://manager.hubrise.com/signup), which aggregates your sales channels
- A Glovo account linked to your HubRise location
## How it works
| Step | What happens |
|---|---|
| 1 | An order is placed on Glovo |
| 2 | Glovo pushes it to HubRise |
| 3 | Expedy PRINT receives it and prints a standardised ticket |
A single printer covers every channel connected to the same HubRise location, so you do not need one machine per platform.
## Connect it
The setup happens once, on the HubRise side, and is described step by step in the reference guide:
**[Connect a receipt printer to HubRise](/integrations/hubrise/connecting-a-receipt-printer-to-hubrise)**
Then link your Glovo account to the same HubRise location. That part is done from the Glovo back office, or by Glovo support.
## Receipt settings
Once connected, the printer page in the [Expedy console](https://www.expedy.fr/console/v3/) controls what gets printed:
- **Print order when**, the status that triggers printing, `NEW`, `RECEIVED` or `ACCEPTED`
- **Then change status to**, the automatic status update applied after printing
- **Number of copies**, one ticket for the kitchen, one for the counter or the delivery bag
- The receipt header and footer, logo, company name, address and registration number
All of it is detailed in [Connect a receipt printer to HubRise](/integrations/hubrise/connecting-a-receipt-printer-to-hubrise).
> Depending on the connector or the point-of-sale software you use, this setup may be handled by your partner. Check with them before you start.
## Need help?
- [Browse all integrations](/integrations)
- [Open a support ticket](https://help.expedy.io/support/tickets/new)
---
url: https://docs.expedy.io/en/integrations/pabbly-connect/connect-a-receipt-printer-to-pabbly-connect
title: Print from Pabbly Connect with Expedy PRINT
updated_at: 2026-10-10T16:05:41.637365+00:00
---
# Print from Pabbly Connect with Expedy PRINT
[Pabbly Connect](https://www.pabbly.com/connect/) is an automation platform. It reaches Expedy PRINT in two ways: through **Zapier**, with no code, or through the **Expedy REST API**, when you want full control over the ticket.
## What you need
- An Expedy account with an active printer. Not added yet? Follow the guide for your machine, [Expedy XPDY80](/expedy-print/installation/add-an-expedy-xpdy80-cloud-printer-to-your-account), [HSPOS](/expedy-print/installation/add-an-hspos-cloud-printer-to-your-account), [Star Micronics](/expedy-print/installation/add-a-star-micronics-printer-to-your-account) or [Raspberry Pi](/expedy-print/installation/add-a-raspberry-pi-cloud-print-server-to-your-account)
- Your **API SID**, **API TOKEN** and **API Printer UID**, all three on the printer page of the [Expedy console](https://www.expedy.fr/console/v3/), in the **API Keys & UID** card
## Option 1, through Zapier, no code
Pabbly Connect connects to Zapier, and Zapier ships a ready-made **Expedy Print** action. The recipe is always the same: an event in Pabbly Connect triggers **Create a Print Job** in Expedy Print, and you map the fields you want on the ticket.
Full walkthrough: **[How to integrate Expedy Print with Zapier](/integrations/zapier/how-to-integrate-expedy-print-with-zapier)**
## Option 2, through the REST API
If Pabbly Connect can issue an HTTP request, it can drive the printer directly.
```api
POST https://www.expedy.fr/api/v2/printers/{printer_uid}/print
```
Authentication uses an `Authorization` header carrying your `SID:TOKEN`, with no `Bearer` prefix. Parameters and a complete example are in [Create a Print Job](/expedy-print/api-print-v2/create-a-print-job).
## Formatting the ticket
Whichever route you take, the message accepts the Expedy layout tags:
| What you want | Where to look |
|---|---|
| Align, resize or emphasise text | [Text Layout](/expedy-print/receipt-layout/text-layout-tags) |
| Print a logo or an image | [Image and Logo](/expedy-print/receipt-layout/image-and-logo-printing) |
| Print a QR code | [QR Code](/expedy-print/receipt-layout/qr-code) |
| Print a barcode | [EAN13 Barcode](/expedy-print/receipt-layout/ean13-barcode) |
> Depending on the connector or the software you use, this setup may be handled by your partner or your agency. Check with them before you start.
## Need help?
- [Browse all integrations](/integrations)
- [Open a support ticket](https://help.expedy.io/support/tickets/new)
---
url: https://docs.expedy.io/en/integrations/flickr/connect-a-receipt-printer-to-flickr
title: Print your Flickr photos automatically
updated_at: 2026-10-22T20:20:34.681788+00:00
---
# Print your Flickr photos automatically
[Flickr](https://www.flickr.com/) is a photo sharing platform. Through **Zapier**, every new image can go straight to a printer: a black and white copy on a thermal receipt printer, or a full colour print on a photo printer driven by a Raspberry Pi.
## Two very different ways to print an image
| | Receipt printer, thermal | Raspberry Pi or Cloud Print Box |
|---|---|---|
| Hardware | Expedy XPDY80, HSPOS, Star Micronics | Your own laser, inkjet or photo printer, Kodak or DNP and the like, on USB |
| Result | Black and white, no ink, nothing to buy beyond the paper roll | Full colour, photo quality |
| Formats | `.JPG` `.GIF` `.PNG`, wrapped in the `![]() ` tag | `.JPG` `.BMP` `.PNG` `.PDF`, sent as a bare URL |
| Width | 398 px at 58 mm, 602 px at 80 mm, 1002 px at 104 mm | The printer's own format |
| Setup | Nothing to install | USB port set to `LABEL` after a scan, printer driver installed |
## On a thermal receipt printer
Thermal printing uses no ink: the image is burned into the paper, so a print costs nothing beyond the roll. That is what makes it viable for a photo booth, an event or a loyalty coupon.
The trade-off is the rendering. The documented requirement is **flat black on a white background**, at the exact width of your paper, 5 to 15 KB, served over HTTPS. A colour photo taken straight from Flickr will not come out as is: convert it to black and white and resize it first. Every constraint is listed in [Image and Logo](/expedy-print/receipt-layout/image-and-logo-printing).
In the Zap, the message is the `
` tag | `.JPG` `.BMP` `.PNG` `.PDF`, sent as a bare URL |
| Width | 398 px at 58 mm, 602 px at 80 mm, 1002 px at 104 mm | The printer's own format |
| Setup | Nothing to install | USB port set to `LABEL` after a scan, printer driver installed |
## On a thermal receipt printer
Thermal printing uses no ink: the image is burned into the paper, so a print costs nothing beyond the roll. That is what makes it viable for a photo booth, an event or a loyalty coupon.
The trade-off is the rendering. The documented requirement is **flat black on a white background**, at the exact width of your paper, 5 to 15 KB, served over HTTPS. A colour photo taken straight from Flickr will not come out as is: convert it to black and white and resize it first. Every constraint is listed in [Image and Logo](/expedy-print/receipt-layout/image-and-logo-printing).
In the Zap, the message is the `![]() ` tag wrapping the image URL:
```text
` tag wrapping the image URL:
```text
![]() https://example.com/photo.png
```
## On a photo, laser or inkjet printer
For real photo output, the job goes to **your own printer**, connected by USB to a **Raspberry Pi** or a **Cloud Print Box adapter**. Laser, inkjet, label and dye-sublimation photo printers such as Kodak or DNP all work, as long as their driver is installed.
Run a **USB scan** on the device page, set that port to `LABEL`, and send the image URL **on its own, with no tag**:
```text
https://example.com/photo.jpg
```
See [Installation on Raspberry Pi](/usb-cloud-printer-adapter/rpi-installation/installation-on-raspberry-pi) and [PDF printing](/expedy-print/receipt-layout/print-pdf).
## Build the Zap
1. Pick **Flickr** as the trigger app and the event that fires on a new image
2. Add **Expedy Print** as the action, then **Create a Print Job**
3. Connect your Expedy account with your **Expedy SID** and your **Expedy TOKEN**, both on the printer page of the [Expedy console](https://www.expedy.fr/console/v3/), in the **API Keys & UID** card
4. Enter the **Printer UID** of the machine that will print
5. In the message, put the `
https://example.com/photo.png
```
## On a photo, laser or inkjet printer
For real photo output, the job goes to **your own printer**, connected by USB to a **Raspberry Pi** or a **Cloud Print Box adapter**. Laser, inkjet, label and dye-sublimation photo printers such as Kodak or DNP all work, as long as their driver is installed.
Run a **USB scan** on the device page, set that port to `LABEL`, and send the image URL **on its own, with no tag**:
```text
https://example.com/photo.jpg
```
See [Installation on Raspberry Pi](/usb-cloud-printer-adapter/rpi-installation/installation-on-raspberry-pi) and [PDF printing](/expedy-print/receipt-layout/print-pdf).
## Build the Zap
1. Pick **Flickr** as the trigger app and the event that fires on a new image
2. Add **Expedy Print** as the action, then **Create a Print Job**
3. Connect your Expedy account with your **Expedy SID** and your **Expedy TOKEN**, both on the printer page of the [Expedy console](https://www.expedy.fr/console/v3/), in the **API Keys & UID** card
4. Enter the **Printer UID** of the machine that will print
5. In the message, put the `![]() ` tag on a receipt printer, or the bare image URL on a photo printer
Step by step on the Zapier side: [How to integrate Expedy Print with Zapier](/integrations/zapier/how-to-integrate-expedy-print-with-zapier)
> Depending on the connector or the software you use, this setup may be handled by your partner or your agency. Check with them before you start.
## Need help?
- [Browse all integrations](/integrations)
- [Open a support ticket](https://help.expedy.io/support/tickets/new)
---
url: https://docs.expedy.io/en/integrations/bwares/connect-a-receipt-printer-to-bwares
title: Print BWares orders on a receipt printer
updated_at: 2026-10-22T00:32:00.829629+00:00
---
# Print BWares orders on a receipt printer
**BWares** is a self-ordering kiosk solution. It connects to Expedy PRINT through **HubRise**: BWares sends its orders to HubRise, HubRise forwards them to your cloud printer, and the ticket comes out within seconds.
## What you need
- An Expedy account with an active printer. Not added yet? Follow the guide for your machine, [Expedy XPDY80](/expedy-print/installation/add-an-expedy-xpdy80-cloud-printer-to-your-account), [HSPOS](/expedy-print/installation/add-an-hspos-cloud-printer-to-your-account), [Star Micronics](/expedy-print/installation/add-a-star-micronics-printer-to-your-account) or [Raspberry Pi](/expedy-print/installation/add-a-raspberry-pi-cloud-print-server-to-your-account)
- A [HubRise account](https://manager.hubrise.com/signup), which aggregates your sales channels
- A BWares account linked to your HubRise location
## How it works
| Step | What happens |
|---|---|
| 1 | An order is placed on BWares |
| 2 | BWares pushes it to HubRise |
| 3 | Expedy PRINT receives it and prints a standardised ticket |
A single printer covers every channel connected to the same HubRise location, so you do not need one machine per platform.
## Connect it
The setup happens once, on the HubRise side, and is described step by step in the reference guide:
**[Connect a receipt printer to HubRise](/integrations/hubrise/connecting-a-receipt-printer-to-hubrise)**
Then link your BWares account to the same HubRise location. That part is done from the BWares back office, or by BWares support.
## Receipt settings
Once connected, the printer page in the [Expedy console](https://www.expedy.fr/console/v3/) controls what gets printed:
- **Print order when**, the status that triggers printing, `NEW`, `RECEIVED` or `ACCEPTED`
- **Then change status to**, the automatic status update applied after printing
- **Number of copies**, one ticket for the kitchen, one for the counter or the delivery bag
- The receipt header and footer, logo, company name, address and registration number
All of it is detailed in [Connect a receipt printer to HubRise](/integrations/hubrise/connecting-a-receipt-printer-to-hubrise).
> Depending on the connector or the point-of-sale software you use, this setup may be handled by your partner. Check with them before you start.
## Need help?
- [Browse all integrations](/integrations)
- [Open a support ticket](https://help.expedy.io/support/tickets/new)
---
url: https://docs.expedy.io/en/integrations/wedely/connect-a-receipt-printer-to-wedely
title: Print WeDely orders on a receipt printer
updated_at: 2026-10-22T21:37:15.59884+00:00
---
# Print WeDely orders on a receipt printer
**WeDely** is a meal delivery platform. It connects to Expedy PRINT through **HubRise**: WeDely sends its orders to HubRise, HubRise forwards them to your cloud printer, and the ticket comes out within seconds.
## What you need
- An Expedy account with an active printer. Not added yet? Follow the guide for your machine, [Expedy XPDY80](/expedy-print/installation/add-an-expedy-xpdy80-cloud-printer-to-your-account), [HSPOS](/expedy-print/installation/add-an-hspos-cloud-printer-to-your-account), [Star Micronics](/expedy-print/installation/add-a-star-micronics-printer-to-your-account) or [Raspberry Pi](/expedy-print/installation/add-a-raspberry-pi-cloud-print-server-to-your-account)
- A [HubRise account](https://manager.hubrise.com/signup), which aggregates your sales channels
- A WeDely account linked to your HubRise location
## How it works
| Step | What happens |
|---|---|
| 1 | An order is placed on WeDely |
| 2 | WeDely pushes it to HubRise |
| 3 | Expedy PRINT receives it and prints a standardised ticket |
A single printer covers every channel connected to the same HubRise location, so you do not need one machine per platform.
## Connect it
The setup happens once, on the HubRise side, and is described step by step in the reference guide:
**[Connect a receipt printer to HubRise](/integrations/hubrise/connecting-a-receipt-printer-to-hubrise)**
Then link your WeDely account to the same HubRise location. That part is done from the WeDely back office, or by WeDely support.
## Receipt settings
Once connected, the printer page in the [Expedy console](https://www.expedy.fr/console/v3/) controls what gets printed:
- **Print order when**, the status that triggers printing, `NEW`, `RECEIVED` or `ACCEPTED`
- **Then change status to**, the automatic status update applied after printing
- **Number of copies**, one ticket for the kitchen, one for the counter or the delivery bag
- The receipt header and footer, logo, company name, address and registration number
All of it is detailed in [Connect a receipt printer to HubRise](/integrations/hubrise/connecting-a-receipt-printer-to-hubrise).
> Depending on the connector or the point-of-sale software you use, this setup may be handled by your partner. Check with them before you start.
## Need help?
- [Browse all integrations](/integrations)
- [Open a support ticket](https://help.expedy.io/support/tickets/new)
---
url: https://docs.expedy.io/en/integrations/ifttt/connect-a-receipt-printer-to-ifttt
title: Print from IFTTT with Expedy PRINT
updated_at: 2026-10-20T16:27:49.786765+00:00
---
# Print from IFTTT with Expedy PRINT
[IFTTT](https://ifttt.com/) is an automation platform. It reaches Expedy PRINT in two ways: through **Zapier**, with no code, or through the **Expedy REST API**, when you want full control over the ticket.
## What you need
- An Expedy account with an active printer. Not added yet? Follow the guide for your machine, [Expedy XPDY80](/expedy-print/installation/add-an-expedy-xpdy80-cloud-printer-to-your-account), [HSPOS](/expedy-print/installation/add-an-hspos-cloud-printer-to-your-account), [Star Micronics](/expedy-print/installation/add-a-star-micronics-printer-to-your-account) or [Raspberry Pi](/expedy-print/installation/add-a-raspberry-pi-cloud-print-server-to-your-account)
- Your **API SID**, **API TOKEN** and **API Printer UID**, all three on the printer page of the [Expedy console](https://www.expedy.fr/console/v3/), in the **API Keys & UID** card
## Option 1, through Zapier, no code
IFTTT connects to Zapier, and Zapier ships a ready-made **Expedy Print** action. The recipe is always the same: an event in IFTTT triggers **Create a Print Job** in Expedy Print, and you map the fields you want on the ticket.
Full walkthrough: **[How to integrate Expedy Print with Zapier](/integrations/zapier/how-to-integrate-expedy-print-with-zapier)**
## Option 2, through the REST API
If IFTTT can issue an HTTP request, it can drive the printer directly.
```api
POST https://www.expedy.fr/api/v2/printers/{printer_uid}/print
```
Authentication uses an `Authorization` header carrying your `SID:TOKEN`, with no `Bearer` prefix. Parameters and a complete example are in [Create a Print Job](/expedy-print/api-print-v2/create-a-print-job).
## Formatting the ticket
Whichever route you take, the message accepts the Expedy layout tags:
| What you want | Where to look |
|---|---|
| Align, resize or emphasise text | [Text Layout](/expedy-print/receipt-layout/text-layout-tags) |
| Print a logo or an image | [Image and Logo](/expedy-print/receipt-layout/image-and-logo-printing) |
| Print a QR code | [QR Code](/expedy-print/receipt-layout/qr-code) |
| Print a barcode | [EAN13 Barcode](/expedy-print/receipt-layout/ean13-barcode) |
> Depending on the connector or the software you use, this setup may be handled by your partner or your agency. Check with them before you start.
## Need help?
- [Browse all integrations](/integrations)
- [Open a support ticket](https://help.expedy.io/support/tickets/new)
---
url: https://docs.expedy.io/en/integrations/packlink-pro/connect-a-receipt-printer-to-packlink-pro
title: Print your Packlink PRO shipping labels automatically
updated_at: 2026-10-18T18:54:34.966006+00:00
---
# Print your Packlink PRO shipping labels automatically
**Packlink PRO** generates your carrier shipping labels. Through **Zapier**, the label PDF goes straight to your label printer the moment Packlink PRO creates it, so nobody has to download it and print it by hand.
> An Expedy cloud receipt printer, XPDY80, HSPOS or Star Micronics, **cannot print a carrier label**: it is a receipt printer. Carrier labels always go through a **Raspberry Pi** or a **Cloud Print Box USB adapter** driving a label printer.
## What you need
- An Expedy account with an active **Raspberry Pi print server** or **Cloud Print Box USB adapter**. Not set up yet? See [Add a Raspberry Pi print server to your account](/expedy-print/installation/add-a-raspberry-pi-cloud-print-server-to-your-account)
- **Your own label printer**, connected by USB to that Raspberry Pi or adapter, with its port set to `LABEL`
- A Packlink PRO account and a [Zapier](https://zapier.com/) account
- Your **API SID**, **API TOKEN** and **API Printer UID**, on the printer page of the [Expedy console](https://www.expedy.fr/console/v3/), in the **API Keys & UID** card
## Why a label printer
A carrier label is a PDF in a fixed format, most often 100 x 150 mm. A receipt printer cannot render it at the right size, so the job goes to a label printer driven by a Raspberry Pi or the Cloud Print Box.
On the printer page, run a **USB scan** and set the port that carries the label printer to `LABEL`, not `ESC/POS`. See [Installation on Raspberry Pi](/usb-cloud-printer-adapter/rpi-installation/installation-on-raspberry-pi).
## Build the Zap
1. In Zapier, create a Zap and pick **Packlink PRO** as the trigger app
2. Choose the event that fires when a label is created
3. Add **Expedy Print** as the action, then **Create a Print Job**
4. Connect your Expedy account with your **Expedy SID** and your **Expedy TOKEN**
5. Enter the **Printer UID** of the label printer
6. In the message field, map the label PDF URL returned by Packlink PRO
Step by step on the Zapier side: [How to integrate Expedy Print with Zapier](/integrations/zapier/how-to-integrate-expedy-print-with-zapier)
## What to send
A label printer takes the PDF URL **on its own, with no tag**:
```text
https://example.com/label.pdf
```
On an ESC/POS receipt printer the same URL has to be wrapped in the `` tag instead. Both forms are detailed in [PDF printing](/expedy-print/receipt-layout/print-pdf).
## Test it
Create a test label in Packlink PRO and check that it comes out at the right size. If nothing prints:
- check the **Printer UID**, it must be the label printer, not the receipt printer
- check that the USB port is in `LABEL` mode after the scan
- check that the PDF URL is reachable without authentication, Expedy fetches it from its own servers
> Depending on the connector or the software you use, this setup may be handled by your partner or your agency. Check with them before you start.
## Need help?
- [Browse all integrations](/integrations)
- [Open a support ticket](https://help.expedy.io/support/tickets/new)
---
url: https://docs.expedy.io/en/integrations/google-drive/connect-a-receipt-printer-to-google-drive
title: Print your Google Drive photos automatically
updated_at: 2026-10-20T11:12:46.418434+00:00
---
# Print your Google Drive photos automatically
[Google Drive](https://workspace.google.com/products/drive/) is a cloud file storage service. Through **Zapier**, every new image can go straight to a printer: a black and white copy on a thermal receipt printer, or a full colour print on a photo printer driven by a Raspberry Pi.
## Two very different ways to print an image
| | Receipt printer, thermal | Raspberry Pi or Cloud Print Box |
|---|---|---|
| Hardware | Expedy XPDY80, HSPOS, Star Micronics | Your own laser, inkjet or photo printer, Kodak or DNP and the like, on USB |
| Result | Black and white, no ink, nothing to buy beyond the paper roll | Full colour, photo quality |
| Formats | `.JPG` `.GIF` `.PNG`, wrapped in the `
` tag on a receipt printer, or the bare image URL on a photo printer
Step by step on the Zapier side: [How to integrate Expedy Print with Zapier](/integrations/zapier/how-to-integrate-expedy-print-with-zapier)
> Depending on the connector or the software you use, this setup may be handled by your partner or your agency. Check with them before you start.
## Need help?
- [Browse all integrations](/integrations)
- [Open a support ticket](https://help.expedy.io/support/tickets/new)
---
url: https://docs.expedy.io/en/integrations/bwares/connect-a-receipt-printer-to-bwares
title: Print BWares orders on a receipt printer
updated_at: 2026-10-22T00:32:00.829629+00:00
---
# Print BWares orders on a receipt printer
**BWares** is a self-ordering kiosk solution. It connects to Expedy PRINT through **HubRise**: BWares sends its orders to HubRise, HubRise forwards them to your cloud printer, and the ticket comes out within seconds.
## What you need
- An Expedy account with an active printer. Not added yet? Follow the guide for your machine, [Expedy XPDY80](/expedy-print/installation/add-an-expedy-xpdy80-cloud-printer-to-your-account), [HSPOS](/expedy-print/installation/add-an-hspos-cloud-printer-to-your-account), [Star Micronics](/expedy-print/installation/add-a-star-micronics-printer-to-your-account) or [Raspberry Pi](/expedy-print/installation/add-a-raspberry-pi-cloud-print-server-to-your-account)
- A [HubRise account](https://manager.hubrise.com/signup), which aggregates your sales channels
- A BWares account linked to your HubRise location
## How it works
| Step | What happens |
|---|---|
| 1 | An order is placed on BWares |
| 2 | BWares pushes it to HubRise |
| 3 | Expedy PRINT receives it and prints a standardised ticket |
A single printer covers every channel connected to the same HubRise location, so you do not need one machine per platform.
## Connect it
The setup happens once, on the HubRise side, and is described step by step in the reference guide:
**[Connect a receipt printer to HubRise](/integrations/hubrise/connecting-a-receipt-printer-to-hubrise)**
Then link your BWares account to the same HubRise location. That part is done from the BWares back office, or by BWares support.
## Receipt settings
Once connected, the printer page in the [Expedy console](https://www.expedy.fr/console/v3/) controls what gets printed:
- **Print order when**, the status that triggers printing, `NEW`, `RECEIVED` or `ACCEPTED`
- **Then change status to**, the automatic status update applied after printing
- **Number of copies**, one ticket for the kitchen, one for the counter or the delivery bag
- The receipt header and footer, logo, company name, address and registration number
All of it is detailed in [Connect a receipt printer to HubRise](/integrations/hubrise/connecting-a-receipt-printer-to-hubrise).
> Depending on the connector or the point-of-sale software you use, this setup may be handled by your partner. Check with them before you start.
## Need help?
- [Browse all integrations](/integrations)
- [Open a support ticket](https://help.expedy.io/support/tickets/new)
---
url: https://docs.expedy.io/en/integrations/wedely/connect-a-receipt-printer-to-wedely
title: Print WeDely orders on a receipt printer
updated_at: 2026-10-22T21:37:15.59884+00:00
---
# Print WeDely orders on a receipt printer
**WeDely** is a meal delivery platform. It connects to Expedy PRINT through **HubRise**: WeDely sends its orders to HubRise, HubRise forwards them to your cloud printer, and the ticket comes out within seconds.
## What you need
- An Expedy account with an active printer. Not added yet? Follow the guide for your machine, [Expedy XPDY80](/expedy-print/installation/add-an-expedy-xpdy80-cloud-printer-to-your-account), [HSPOS](/expedy-print/installation/add-an-hspos-cloud-printer-to-your-account), [Star Micronics](/expedy-print/installation/add-a-star-micronics-printer-to-your-account) or [Raspberry Pi](/expedy-print/installation/add-a-raspberry-pi-cloud-print-server-to-your-account)
- A [HubRise account](https://manager.hubrise.com/signup), which aggregates your sales channels
- A WeDely account linked to your HubRise location
## How it works
| Step | What happens |
|---|---|
| 1 | An order is placed on WeDely |
| 2 | WeDely pushes it to HubRise |
| 3 | Expedy PRINT receives it and prints a standardised ticket |
A single printer covers every channel connected to the same HubRise location, so you do not need one machine per platform.
## Connect it
The setup happens once, on the HubRise side, and is described step by step in the reference guide:
**[Connect a receipt printer to HubRise](/integrations/hubrise/connecting-a-receipt-printer-to-hubrise)**
Then link your WeDely account to the same HubRise location. That part is done from the WeDely back office, or by WeDely support.
## Receipt settings
Once connected, the printer page in the [Expedy console](https://www.expedy.fr/console/v3/) controls what gets printed:
- **Print order when**, the status that triggers printing, `NEW`, `RECEIVED` or `ACCEPTED`
- **Then change status to**, the automatic status update applied after printing
- **Number of copies**, one ticket for the kitchen, one for the counter or the delivery bag
- The receipt header and footer, logo, company name, address and registration number
All of it is detailed in [Connect a receipt printer to HubRise](/integrations/hubrise/connecting-a-receipt-printer-to-hubrise).
> Depending on the connector or the point-of-sale software you use, this setup may be handled by your partner. Check with them before you start.
## Need help?
- [Browse all integrations](/integrations)
- [Open a support ticket](https://help.expedy.io/support/tickets/new)
---
url: https://docs.expedy.io/en/integrations/ifttt/connect-a-receipt-printer-to-ifttt
title: Print from IFTTT with Expedy PRINT
updated_at: 2026-10-20T16:27:49.786765+00:00
---
# Print from IFTTT with Expedy PRINT
[IFTTT](https://ifttt.com/) is an automation platform. It reaches Expedy PRINT in two ways: through **Zapier**, with no code, or through the **Expedy REST API**, when you want full control over the ticket.
## What you need
- An Expedy account with an active printer. Not added yet? Follow the guide for your machine, [Expedy XPDY80](/expedy-print/installation/add-an-expedy-xpdy80-cloud-printer-to-your-account), [HSPOS](/expedy-print/installation/add-an-hspos-cloud-printer-to-your-account), [Star Micronics](/expedy-print/installation/add-a-star-micronics-printer-to-your-account) or [Raspberry Pi](/expedy-print/installation/add-a-raspberry-pi-cloud-print-server-to-your-account)
- Your **API SID**, **API TOKEN** and **API Printer UID**, all three on the printer page of the [Expedy console](https://www.expedy.fr/console/v3/), in the **API Keys & UID** card
## Option 1, through Zapier, no code
IFTTT connects to Zapier, and Zapier ships a ready-made **Expedy Print** action. The recipe is always the same: an event in IFTTT triggers **Create a Print Job** in Expedy Print, and you map the fields you want on the ticket.
Full walkthrough: **[How to integrate Expedy Print with Zapier](/integrations/zapier/how-to-integrate-expedy-print-with-zapier)**
## Option 2, through the REST API
If IFTTT can issue an HTTP request, it can drive the printer directly.
```api
POST https://www.expedy.fr/api/v2/printers/{printer_uid}/print
```
Authentication uses an `Authorization` header carrying your `SID:TOKEN`, with no `Bearer` prefix. Parameters and a complete example are in [Create a Print Job](/expedy-print/api-print-v2/create-a-print-job).
## Formatting the ticket
Whichever route you take, the message accepts the Expedy layout tags:
| What you want | Where to look |
|---|---|
| Align, resize or emphasise text | [Text Layout](/expedy-print/receipt-layout/text-layout-tags) |
| Print a logo or an image | [Image and Logo](/expedy-print/receipt-layout/image-and-logo-printing) |
| Print a QR code | [QR Code](/expedy-print/receipt-layout/qr-code) |
| Print a barcode | [EAN13 Barcode](/expedy-print/receipt-layout/ean13-barcode) |
> Depending on the connector or the software you use, this setup may be handled by your partner or your agency. Check with them before you start.
## Need help?
- [Browse all integrations](/integrations)
- [Open a support ticket](https://help.expedy.io/support/tickets/new)
---
url: https://docs.expedy.io/en/integrations/packlink-pro/connect-a-receipt-printer-to-packlink-pro
title: Print your Packlink PRO shipping labels automatically
updated_at: 2026-10-18T18:54:34.966006+00:00
---
# Print your Packlink PRO shipping labels automatically
**Packlink PRO** generates your carrier shipping labels. Through **Zapier**, the label PDF goes straight to your label printer the moment Packlink PRO creates it, so nobody has to download it and print it by hand.
> An Expedy cloud receipt printer, XPDY80, HSPOS or Star Micronics, **cannot print a carrier label**: it is a receipt printer. Carrier labels always go through a **Raspberry Pi** or a **Cloud Print Box USB adapter** driving a label printer.
## What you need
- An Expedy account with an active **Raspberry Pi print server** or **Cloud Print Box USB adapter**. Not set up yet? See [Add a Raspberry Pi print server to your account](/expedy-print/installation/add-a-raspberry-pi-cloud-print-server-to-your-account)
- **Your own label printer**, connected by USB to that Raspberry Pi or adapter, with its port set to `LABEL`
- A Packlink PRO account and a [Zapier](https://zapier.com/) account
- Your **API SID**, **API TOKEN** and **API Printer UID**, on the printer page of the [Expedy console](https://www.expedy.fr/console/v3/), in the **API Keys & UID** card
## Why a label printer
A carrier label is a PDF in a fixed format, most often 100 x 150 mm. A receipt printer cannot render it at the right size, so the job goes to a label printer driven by a Raspberry Pi or the Cloud Print Box.
On the printer page, run a **USB scan** and set the port that carries the label printer to `LABEL`, not `ESC/POS`. See [Installation on Raspberry Pi](/usb-cloud-printer-adapter/rpi-installation/installation-on-raspberry-pi).
## Build the Zap
1. In Zapier, create a Zap and pick **Packlink PRO** as the trigger app
2. Choose the event that fires when a label is created
3. Add **Expedy Print** as the action, then **Create a Print Job**
4. Connect your Expedy account with your **Expedy SID** and your **Expedy TOKEN**
5. Enter the **Printer UID** of the label printer
6. In the message field, map the label PDF URL returned by Packlink PRO
Step by step on the Zapier side: [How to integrate Expedy Print with Zapier](/integrations/zapier/how-to-integrate-expedy-print-with-zapier)
## What to send
A label printer takes the PDF URL **on its own, with no tag**:
```text
https://example.com/label.pdf
```
On an ESC/POS receipt printer the same URL has to be wrapped in the `` tag instead. Both forms are detailed in [PDF printing](/expedy-print/receipt-layout/print-pdf).
## Test it
Create a test label in Packlink PRO and check that it comes out at the right size. If nothing prints:
- check the **Printer UID**, it must be the label printer, not the receipt printer
- check that the USB port is in `LABEL` mode after the scan
- check that the PDF URL is reachable without authentication, Expedy fetches it from its own servers
> Depending on the connector or the software you use, this setup may be handled by your partner or your agency. Check with them before you start.
## Need help?
- [Browse all integrations](/integrations)
- [Open a support ticket](https://help.expedy.io/support/tickets/new)
---
url: https://docs.expedy.io/en/integrations/google-drive/connect-a-receipt-printer-to-google-drive
title: Print your Google Drive photos automatically
updated_at: 2026-10-20T11:12:46.418434+00:00
---
# Print your Google Drive photos automatically
[Google Drive](https://workspace.google.com/products/drive/) is a cloud file storage service. Through **Zapier**, every new image can go straight to a printer: a black and white copy on a thermal receipt printer, or a full colour print on a photo printer driven by a Raspberry Pi.
## Two very different ways to print an image
| | Receipt printer, thermal | Raspberry Pi or Cloud Print Box |
|---|---|---|
| Hardware | Expedy XPDY80, HSPOS, Star Micronics | Your own laser, inkjet or photo printer, Kodak or DNP and the like, on USB |
| Result | Black and white, no ink, nothing to buy beyond the paper roll | Full colour, photo quality |
| Formats | `.JPG` `.GIF` `.PNG`, wrapped in the `![]() ` tag | `.JPG` `.BMP` `.PNG` `.PDF`, sent as a bare URL |
| Width | 398 px at 58 mm, 602 px at 80 mm, 1002 px at 104 mm | The printer's own format |
| Setup | Nothing to install | USB port set to `LABEL` after a scan, printer driver installed |
## On a thermal receipt printer
Thermal printing uses no ink: the image is burned into the paper, so a print costs nothing beyond the roll. That is what makes it viable for a photo booth, an event or a loyalty coupon.
The trade-off is the rendering. The documented requirement is **flat black on a white background**, at the exact width of your paper, 5 to 15 KB, served over HTTPS. A colour photo taken straight from Google Drive will not come out as is: convert it to black and white and resize it first. Every constraint is listed in [Image and Logo](/expedy-print/receipt-layout/image-and-logo-printing).
In the Zap, the message is the `
` tag | `.JPG` `.BMP` `.PNG` `.PDF`, sent as a bare URL |
| Width | 398 px at 58 mm, 602 px at 80 mm, 1002 px at 104 mm | The printer's own format |
| Setup | Nothing to install | USB port set to `LABEL` after a scan, printer driver installed |
## On a thermal receipt printer
Thermal printing uses no ink: the image is burned into the paper, so a print costs nothing beyond the roll. That is what makes it viable for a photo booth, an event or a loyalty coupon.
The trade-off is the rendering. The documented requirement is **flat black on a white background**, at the exact width of your paper, 5 to 15 KB, served over HTTPS. A colour photo taken straight from Google Drive will not come out as is: convert it to black and white and resize it first. Every constraint is listed in [Image and Logo](/expedy-print/receipt-layout/image-and-logo-printing).
In the Zap, the message is the `![]() ` tag wrapping the image URL:
```text
` tag wrapping the image URL:
```text
![]() https://example.com/photo.png
```
## On a photo, laser or inkjet printer
For real photo output, the job goes to **your own printer**, connected by USB to a **Raspberry Pi** or a **Cloud Print Box adapter**. Laser, inkjet, label and dye-sublimation photo printers such as Kodak or DNP all work, as long as their driver is installed.
Run a **USB scan** on the device page, set that port to `LABEL`, and send the image URL **on its own, with no tag**:
```text
https://example.com/photo.jpg
```
See [Installation on Raspberry Pi](/usb-cloud-printer-adapter/rpi-installation/installation-on-raspberry-pi) and [PDF printing](/expedy-print/receipt-layout/print-pdf).
## Build the Zap
1. Pick **Google Drive** as the trigger app and the event that fires on a new image
2. Add **Expedy Print** as the action, then **Create a Print Job**
3. Connect your Expedy account with your **Expedy SID** and your **Expedy TOKEN**, both on the printer page of the [Expedy console](https://www.expedy.fr/console/v3/), in the **API Keys & UID** card
4. Enter the **Printer UID** of the machine that will print
5. In the message, put the `
https://example.com/photo.png
```
## On a photo, laser or inkjet printer
For real photo output, the job goes to **your own printer**, connected by USB to a **Raspberry Pi** or a **Cloud Print Box adapter**. Laser, inkjet, label and dye-sublimation photo printers such as Kodak or DNP all work, as long as their driver is installed.
Run a **USB scan** on the device page, set that port to `LABEL`, and send the image URL **on its own, with no tag**:
```text
https://example.com/photo.jpg
```
See [Installation on Raspberry Pi](/usb-cloud-printer-adapter/rpi-installation/installation-on-raspberry-pi) and [PDF printing](/expedy-print/receipt-layout/print-pdf).
## Build the Zap
1. Pick **Google Drive** as the trigger app and the event that fires on a new image
2. Add **Expedy Print** as the action, then **Create a Print Job**
3. Connect your Expedy account with your **Expedy SID** and your **Expedy TOKEN**, both on the printer page of the [Expedy console](https://www.expedy.fr/console/v3/), in the **API Keys & UID** card
4. Enter the **Printer UID** of the machine that will print
5. In the message, put the `![]() ` tag on a receipt printer, or the bare image URL on a photo printer
Step by step on the Zapier side: [How to integrate Expedy Print with Zapier](/integrations/zapier/how-to-integrate-expedy-print-with-zapier)
> Depending on the connector or the software you use, this setup may be handled by your partner or your agency. Check with them before you start.
## Need help?
- [Browse all integrations](/integrations)
- [Open a support ticket](https://help.expedy.io/support/tickets/new)
---
url: https://docs.expedy.io/en/integrations/baselinker/connect-a-receipt-printer-to-baselinker
title: Print from BaseLinker with Expedy PRINT
updated_at: 2026-10-22T07:08:43.576643+00:00
---
# Print from BaseLinker with Expedy PRINT
[BaseLinker](https://baselinker.com/) is an inventory and order management tool. It reaches Expedy PRINT in two ways: through **Zapier**, with no code, or through the **Expedy REST API**, when you want full control over the ticket.
## What you need
- An Expedy account with an active printer. Not added yet? Follow the guide for your machine, [Expedy XPDY80](/expedy-print/installation/add-an-expedy-xpdy80-cloud-printer-to-your-account), [HSPOS](/expedy-print/installation/add-an-hspos-cloud-printer-to-your-account), [Star Micronics](/expedy-print/installation/add-a-star-micronics-printer-to-your-account) or [Raspberry Pi](/expedy-print/installation/add-a-raspberry-pi-cloud-print-server-to-your-account)
- Your **API SID**, **API TOKEN** and **API Printer UID**, all three on the printer page of the [Expedy console](https://www.expedy.fr/console/v3/), in the **API Keys & UID** card
## Option 1, through Zapier, no code
BaseLinker connects to Zapier, and Zapier ships a ready-made **Expedy Print** action. The recipe is always the same: an event in BaseLinker triggers **Create a Print Job** in Expedy Print, and you map the fields you want on the ticket.
Full walkthrough: **[How to integrate Expedy Print with Zapier](/integrations/zapier/how-to-integrate-expedy-print-with-zapier)**
## Option 2, through the REST API
If BaseLinker can issue an HTTP request, it can drive the printer directly.
```api
POST https://www.expedy.fr/api/v2/printers/{printer_uid}/print
```
Authentication uses an `Authorization` header carrying your `SID:TOKEN`, with no `Bearer` prefix. Parameters and a complete example are in [Create a Print Job](/expedy-print/api-print-v2/create-a-print-job).
## Formatting the ticket
Whichever route you take, the message accepts the Expedy layout tags:
| What you want | Where to look |
|---|---|
| Align, resize or emphasise text | [Text Layout](/expedy-print/receipt-layout/text-layout-tags) |
| Print a logo or an image | [Image and Logo](/expedy-print/receipt-layout/image-and-logo-printing) |
| Print a QR code | [QR Code](/expedy-print/receipt-layout/qr-code) |
| Print a barcode | [EAN13 Barcode](/expedy-print/receipt-layout/ean13-barcode) |
> Depending on the connector or the software you use, this setup may be handled by your partner or your agency. Check with them before you start.
## Need help?
- [Browse all integrations](/integrations)
- [Open a support ticket](https://help.expedy.io/support/tickets/new)
---
url: https://docs.expedy.io/en/integrations/hubspot/connect-a-receipt-printer-to-hubspot
title: Print from HubSpot with Expedy PRINT
updated_at: 2026-10-19T19:11:57.127475+00:00
---
# Print from HubSpot with Expedy PRINT
[HubSpot](https://www.hubspot.com/) is a CRM. It reaches Expedy PRINT in two ways: through **Zapier**, with no code, or through the **Expedy REST API**, when you want full control over the ticket.
## What you need
- An Expedy account with an active printer. Not added yet? Follow the guide for your machine, [Expedy XPDY80](/expedy-print/installation/add-an-expedy-xpdy80-cloud-printer-to-your-account), [HSPOS](/expedy-print/installation/add-an-hspos-cloud-printer-to-your-account), [Star Micronics](/expedy-print/installation/add-a-star-micronics-printer-to-your-account) or [Raspberry Pi](/expedy-print/installation/add-a-raspberry-pi-cloud-print-server-to-your-account)
- Your **API SID**, **API TOKEN** and **API Printer UID**, all three on the printer page of the [Expedy console](https://www.expedy.fr/console/v3/), in the **API Keys & UID** card
## Option 1, through Zapier, no code
HubSpot connects to Zapier, and Zapier ships a ready-made **Expedy Print** action. The recipe is always the same: an event in HubSpot triggers **Create a Print Job** in Expedy Print, and you map the fields you want on the ticket.
Full walkthrough: **[How to integrate Expedy Print with Zapier](/integrations/zapier/how-to-integrate-expedy-print-with-zapier)**
## Option 2, through the REST API
If HubSpot can issue an HTTP request, it can drive the printer directly.
```api
POST https://www.expedy.fr/api/v2/printers/{printer_uid}/print
```
Authentication uses an `Authorization` header carrying your `SID:TOKEN`, with no `Bearer` prefix. Parameters and a complete example are in [Create a Print Job](/expedy-print/api-print-v2/create-a-print-job).
## Formatting the ticket
Whichever route you take, the message accepts the Expedy layout tags:
| What you want | Where to look |
|---|---|
| Align, resize or emphasise text | [Text Layout](/expedy-print/receipt-layout/text-layout-tags) |
| Print a logo or an image | [Image and Logo](/expedy-print/receipt-layout/image-and-logo-printing) |
| Print a QR code | [QR Code](/expedy-print/receipt-layout/qr-code) |
| Print a barcode | [EAN13 Barcode](/expedy-print/receipt-layout/ean13-barcode) |
> Depending on the connector or the software you use, this setup may be handled by your partner or your agency. Check with them before you start.
## Need help?
- [Browse all integrations](/integrations)
- [Open a support ticket](https://help.expedy.io/support/tickets/new)
---
url: https://docs.expedy.io/en/integrations/big-cartel/connect-a-receipt-printer-to-big-cartel
title: Print from Big Cartel with Expedy PRINT
updated_at: 2026-10-15T21:44:16.778325+00:00
---
# Print from Big Cartel with Expedy PRINT
[Big Cartel](https://www.bigcartel.com/) is an eCommerce platform. It reaches Expedy PRINT in two ways: through **Zapier**, with no code, or through the **Expedy REST API**, when you want full control over the ticket.
## What you need
- An Expedy account with an active printer. Not added yet? Follow the guide for your machine, [Expedy XPDY80](/expedy-print/installation/add-an-expedy-xpdy80-cloud-printer-to-your-account), [HSPOS](/expedy-print/installation/add-an-hspos-cloud-printer-to-your-account), [Star Micronics](/expedy-print/installation/add-a-star-micronics-printer-to-your-account) or [Raspberry Pi](/expedy-print/installation/add-a-raspberry-pi-cloud-print-server-to-your-account)
- Your **API SID**, **API TOKEN** and **API Printer UID**, all three on the printer page of the [Expedy console](https://www.expedy.fr/console/v3/), in the **API Keys & UID** card
## Option 1, through Zapier, no code
Big Cartel connects to Zapier, and Zapier ships a ready-made **Expedy Print** action. The recipe is always the same: an event in Big Cartel triggers **Create a Print Job** in Expedy Print, and you map the fields you want on the ticket.
Full walkthrough: **[How to integrate Expedy Print with Zapier](/integrations/zapier/how-to-integrate-expedy-print-with-zapier)**
## Option 2, through the REST API
If Big Cartel can issue an HTTP request, it can drive the printer directly.
```api
POST https://www.expedy.fr/api/v2/printers/{printer_uid}/print
```
Authentication uses an `Authorization` header carrying your `SID:TOKEN`, with no `Bearer` prefix. Parameters and a complete example are in [Create a Print Job](/expedy-print/api-print-v2/create-a-print-job).
## Formatting the ticket
Whichever route you take, the message accepts the Expedy layout tags:
| What you want | Where to look |
|---|---|
| Align, resize or emphasise text | [Text Layout](/expedy-print/receipt-layout/text-layout-tags) |
| Print a logo or an image | [Image and Logo](/expedy-print/receipt-layout/image-and-logo-printing) |
| Print a QR code | [QR Code](/expedy-print/receipt-layout/qr-code) |
| Print a barcode | [EAN13 Barcode](/expedy-print/receipt-layout/ean13-barcode) |
> Depending on the connector or the software you use, this setup may be handled by your partner or your agency. Check with them before you start.
## Need help?
- [Browse all integrations](/integrations)
- [Open a support ticket](https://help.expedy.io/support/tickets/new)
---
url: https://docs.expedy.io/en/integrations/jotform/connect-a-receipt-printer-to-jotform
title: Print from Jotform with Expedy PRINT
updated_at: 2026-10-22T09:47:43.774356+00:00
---
# Print from Jotform with Expedy PRINT
[Jotform](https://www.jotform.com/) is an online form builder. It reaches Expedy PRINT in two ways: through **Zapier**, with no code, or through the **Expedy REST API**, when you want full control over the ticket.
## What you need
- An Expedy account with an active printer. Not added yet? Follow the guide for your machine, [Expedy XPDY80](/expedy-print/installation/add-an-expedy-xpdy80-cloud-printer-to-your-account), [HSPOS](/expedy-print/installation/add-an-hspos-cloud-printer-to-your-account), [Star Micronics](/expedy-print/installation/add-a-star-micronics-printer-to-your-account) or [Raspberry Pi](/expedy-print/installation/add-a-raspberry-pi-cloud-print-server-to-your-account)
- Your **API SID**, **API TOKEN** and **API Printer UID**, all three on the printer page of the [Expedy console](https://www.expedy.fr/console/v3/), in the **API Keys & UID** card
## Option 1, through Zapier, no code
Jotform connects to Zapier, and Zapier ships a ready-made **Expedy Print** action. The recipe is always the same: an event in Jotform triggers **Create a Print Job** in Expedy Print, and you map the fields you want on the ticket.
Full walkthrough: **[How to integrate Expedy Print with Zapier](/integrations/zapier/how-to-integrate-expedy-print-with-zapier)**
## Option 2, through the REST API
If Jotform can issue an HTTP request, it can drive the printer directly.
```api
POST https://www.expedy.fr/api/v2/printers/{printer_uid}/print
```
Authentication uses an `Authorization` header carrying your `SID:TOKEN`, with no `Bearer` prefix. Parameters and a complete example are in [Create a Print Job](/expedy-print/api-print-v2/create-a-print-job).
## Formatting the ticket
Whichever route you take, the message accepts the Expedy layout tags:
| What you want | Where to look |
|---|---|
| Align, resize or emphasise text | [Text Layout](/expedy-print/receipt-layout/text-layout-tags) |
| Print a logo or an image | [Image and Logo](/expedy-print/receipt-layout/image-and-logo-printing) |
| Print a QR code | [QR Code](/expedy-print/receipt-layout/qr-code) |
| Print a barcode | [EAN13 Barcode](/expedy-print/receipt-layout/ean13-barcode) |
> Depending on the connector or the software you use, this setup may be handled by your partner or your agency. Check with them before you start.
## Need help?
- [Browse all integrations](/integrations)
- [Open a support ticket](https://help.expedy.io/support/tickets/new)
---
url: https://docs.expedy.io/en/integrations/airtable/connect-a-receipt-printer-to-airtable
title: Print from Airtable with Expedy PRINT
updated_at: 2026-10-20T17:34:30.73744+00:00
---
# Print from Airtable with Expedy PRINT
[Airtable](https://www.airtable.com/) is a collaborative data platform. It reaches Expedy PRINT in two ways: through **Zapier**, with no code, or through the **Expedy REST API**, when you want full control over the ticket.
## What you need
- An Expedy account with an active printer. Not added yet? Follow the guide for your machine, [Expedy XPDY80](/expedy-print/installation/add-an-expedy-xpdy80-cloud-printer-to-your-account), [HSPOS](/expedy-print/installation/add-an-hspos-cloud-printer-to-your-account), [Star Micronics](/expedy-print/installation/add-a-star-micronics-printer-to-your-account) or [Raspberry Pi](/expedy-print/installation/add-a-raspberry-pi-cloud-print-server-to-your-account)
- Your **API SID**, **API TOKEN** and **API Printer UID**, all three on the printer page of the [Expedy console](https://www.expedy.fr/console/v3/), in the **API Keys & UID** card
## Option 1, through Zapier, no code
Airtable connects to Zapier, and Zapier ships a ready-made **Expedy Print** action. The recipe is always the same: an event in Airtable triggers **Create a Print Job** in Expedy Print, and you map the fields you want on the ticket.
Full walkthrough: **[How to integrate Expedy Print with Zapier](/integrations/zapier/how-to-integrate-expedy-print-with-zapier)**
## Option 2, through the REST API
If Airtable can issue an HTTP request, it can drive the printer directly.
```api
POST https://www.expedy.fr/api/v2/printers/{printer_uid}/print
```
Authentication uses an `Authorization` header carrying your `SID:TOKEN`, with no `Bearer` prefix. Parameters and a complete example are in [Create a Print Job](/expedy-print/api-print-v2/create-a-print-job).
## Formatting the ticket
Whichever route you take, the message accepts the Expedy layout tags:
| What you want | Where to look |
|---|---|
| Align, resize or emphasise text | [Text Layout](/expedy-print/receipt-layout/text-layout-tags) |
| Print a logo or an image | [Image and Logo](/expedy-print/receipt-layout/image-and-logo-printing) |
| Print a QR code | [QR Code](/expedy-print/receipt-layout/qr-code) |
| Print a barcode | [EAN13 Barcode](/expedy-print/receipt-layout/ean13-barcode) |
> Depending on the connector or the software you use, this setup may be handled by your partner or your agency. Check with them before you start.
## Need help?
- [Browse all integrations](/integrations)
- [Open a support ticket](https://help.expedy.io/support/tickets/new)
---
url: https://docs.expedy.io/en/integrations/shipcloud/connect-a-receipt-printer-to-shipcloud
title: Print your shipcloud shipping labels automatically
updated_at: 2026-10-18T18:14:52.563976+00:00
---
# Print your shipcloud shipping labels automatically
[shipcloud](https://www.shipcloud.io/) generates your carrier shipping labels. Through **Zapier**, the label PDF goes straight to your label printer the moment shipcloud creates it, so nobody has to download it and print it by hand.
> An Expedy cloud receipt printer, XPDY80, HSPOS or Star Micronics, **cannot print a carrier label**: it is a receipt printer. Carrier labels always go through a **Raspberry Pi** or a **Cloud Print Box USB adapter** driving a label printer.
## What you need
- An Expedy account with an active **Raspberry Pi print server** or **Cloud Print Box USB adapter**. Not set up yet? See [Add a Raspberry Pi print server to your account](/expedy-print/installation/add-a-raspberry-pi-cloud-print-server-to-your-account)
- **Your own label printer**, connected by USB to that Raspberry Pi or adapter, with its port set to `LABEL`
- A shipcloud account and a [Zapier](https://zapier.com/) account
- Your **API SID**, **API TOKEN** and **API Printer UID**, on the printer page of the [Expedy console](https://www.expedy.fr/console/v3/), in the **API Keys & UID** card
## Why a label printer
A carrier label is a PDF in a fixed format, most often 100 x 150 mm. A receipt printer cannot render it at the right size, so the job goes to a label printer driven by a Raspberry Pi or the Cloud Print Box.
On the printer page, run a **USB scan** and set the port that carries the label printer to `LABEL`, not `ESC/POS`. See [Installation on Raspberry Pi](/usb-cloud-printer-adapter/rpi-installation/installation-on-raspberry-pi).
## Build the Zap
1. In Zapier, create a Zap and pick **shipcloud** as the trigger app
2. Choose the event that fires when a label is created
3. Add **Expedy Print** as the action, then **Create a Print Job**
4. Connect your Expedy account with your **Expedy SID** and your **Expedy TOKEN**
5. Enter the **Printer UID** of the label printer
6. In the message field, map the label PDF URL returned by shipcloud
Step by step on the Zapier side: [How to integrate Expedy Print with Zapier](/integrations/zapier/how-to-integrate-expedy-print-with-zapier)
## What to send
A label printer takes the PDF URL **on its own, with no tag**:
```text
https://example.com/label.pdf
```
On an ESC/POS receipt printer the same URL has to be wrapped in the `` tag instead. Both forms are detailed in [PDF printing](/expedy-print/receipt-layout/print-pdf).
## Test it
Create a test label in shipcloud and check that it comes out at the right size. If nothing prints:
- check the **Printer UID**, it must be the label printer, not the receipt printer
- check that the USB port is in `LABEL` mode after the scan
- check that the PDF URL is reachable without authentication, Expedy fetches it from its own servers
> Depending on the connector or the software you use, this setup may be handled by your partner or your agency. Check with them before you start.
## Need help?
- [Browse all integrations](/integrations)
- [Open a support ticket](https://help.expedy.io/support/tickets/new)
---
url: https://docs.expedy.io/en/integrations/retool/connect-a-receipt-printer-to-retool
title: Print from Retool with Expedy PRINT
updated_at: 2026-10-19T17:43:06.607749+00:00
---
# Print from Retool with Expedy PRINT
[Retool](https://retool.com/) is a no-code app building platform. It reaches Expedy PRINT in two ways: through **Zapier**, with no code, or through the **Expedy REST API**, when you want full control over the ticket.
## What you need
- An Expedy account with an active printer. Not added yet? Follow the guide for your machine, [Expedy XPDY80](/expedy-print/installation/add-an-expedy-xpdy80-cloud-printer-to-your-account), [HSPOS](/expedy-print/installation/add-an-hspos-cloud-printer-to-your-account), [Star Micronics](/expedy-print/installation/add-a-star-micronics-printer-to-your-account) or [Raspberry Pi](/expedy-print/installation/add-a-raspberry-pi-cloud-print-server-to-your-account)
- Your **API SID**, **API TOKEN** and **API Printer UID**, all three on the printer page of the [Expedy console](https://www.expedy.fr/console/v3/), in the **API Keys & UID** card
## Option 1, through Zapier, no code
Retool connects to Zapier, and Zapier ships a ready-made **Expedy Print** action. The recipe is always the same: an event in Retool triggers **Create a Print Job** in Expedy Print, and you map the fields you want on the ticket.
Full walkthrough: **[How to integrate Expedy Print with Zapier](/integrations/zapier/how-to-integrate-expedy-print-with-zapier)**
## Option 2, through the REST API
If Retool can issue an HTTP request, it can drive the printer directly.
```api
POST https://www.expedy.fr/api/v2/printers/{printer_uid}/print
```
Authentication uses an `Authorization` header carrying your `SID:TOKEN`, with no `Bearer` prefix. Parameters and a complete example are in [Create a Print Job](/expedy-print/api-print-v2/create-a-print-job).
## Formatting the ticket
Whichever route you take, the message accepts the Expedy layout tags:
| What you want | Where to look |
|---|---|
| Align, resize or emphasise text | [Text Layout](/expedy-print/receipt-layout/text-layout-tags) |
| Print a logo or an image | [Image and Logo](/expedy-print/receipt-layout/image-and-logo-printing) |
| Print a QR code | [QR Code](/expedy-print/receipt-layout/qr-code) |
| Print a barcode | [EAN13 Barcode](/expedy-print/receipt-layout/ean13-barcode) |
> Depending on the connector or the software you use, this setup may be handled by your partner or your agency. Check with them before you start.
## Need help?
- [Browse all integrations](/integrations)
- [Open a support ticket](https://help.expedy.io/support/tickets/new)
---
url: https://docs.expedy.io/en/integrations/order-desk/connect-a-receipt-printer-to-order-desk
title: Print from Order Desk with Expedy PRINT
updated_at: 2026-10-15T15:13:46.53303+00:00
---
# Print from Order Desk with Expedy PRINT
**Order Desk** is an order aggregation platform. It reaches Expedy PRINT in two ways: through **Zapier**, with no code, or through the **Expedy REST API**, when you want full control over the ticket.
## What you need
- An Expedy account with an active printer. Not added yet? Follow the guide for your machine, [Expedy XPDY80](/expedy-print/installation/add-an-expedy-xpdy80-cloud-printer-to-your-account), [HSPOS](/expedy-print/installation/add-an-hspos-cloud-printer-to-your-account), [Star Micronics](/expedy-print/installation/add-a-star-micronics-printer-to-your-account) or [Raspberry Pi](/expedy-print/installation/add-a-raspberry-pi-cloud-print-server-to-your-account)
- Your **API SID**, **API TOKEN** and **API Printer UID**, all three on the printer page of the [Expedy console](https://www.expedy.fr/console/v3/), in the **API Keys & UID** card
## Option 1, through Zapier, no code
Order Desk connects to Zapier, and Zapier ships a ready-made **Expedy Print** action. The recipe is always the same: an event in Order Desk triggers **Create a Print Job** in Expedy Print, and you map the fields you want on the ticket.
Full walkthrough: **[How to integrate Expedy Print with Zapier](/integrations/zapier/how-to-integrate-expedy-print-with-zapier)**
## Option 2, through the REST API
If Order Desk can issue an HTTP request, it can drive the printer directly.
```api
POST https://www.expedy.fr/api/v2/printers/{printer_uid}/print
```
Authentication uses an `Authorization` header carrying your `SID:TOKEN`, with no `Bearer` prefix. Parameters and a complete example are in [Create a Print Job](/expedy-print/api-print-v2/create-a-print-job).
## Formatting the ticket
Whichever route you take, the message accepts the Expedy layout tags:
| What you want | Where to look |
|---|---|
| Align, resize or emphasise text | [Text Layout](/expedy-print/receipt-layout/text-layout-tags) |
| Print a logo or an image | [Image and Logo](/expedy-print/receipt-layout/image-and-logo-printing) |
| Print a QR code | [QR Code](/expedy-print/receipt-layout/qr-code) |
| Print a barcode | [EAN13 Barcode](/expedy-print/receipt-layout/ean13-barcode) |
> Depending on the connector or the software you use, this setup may be handled by your partner or your agency. Check with them before you start.
## Need help?
- [Browse all integrations](/integrations)
- [Open a support ticket](https://help.expedy.io/support/tickets/new)
---
url: https://docs.expedy.io/en/integrations/la-toque-magique/connect-a-receipt-printer-to-la-toque-magique
title: Receipt printing with La Toque Magique
updated_at: 2026-10-20T17:38:14.395008+00:00
---
# Receipt printing with La Toque Magique
**La Toque Magique** is an order aggregation platform. With La Toque Magique, **the receipt printer is installed and configured by La Toque Magique**, not from your Expedy console. Get in touch with them to have your printer activated.
## Who does what
| Party | Responsibility |
|---|---|
| Expedy | Supplies the cloud printer, its connectivity (Ethernet, Wi-Fi or 4G SIM) and the console where you follow your print jobs |
| La Toque Magique | Pairs the printer with your account, sets the receipt layout and switches the service on |
## Getting your printer activated
1. Order your machine, or use the one you already have
2. Contact La Toque Magique and tell them you want to print your orders on an Expedy cloud printer
3. La Toque Magique handles the pairing and the receipt layout on their side
4. Once activated, orders print automatically, with nothing left to do on your part
> If your printer already appears in your Expedy account, give La Toque Magique its **API Printer UID**, shown on the printer page in the **API Keys & UID** card of the [Expedy console](https://www.expedy.fr/console/v3/).
## Once it is live
From the [Expedy console](https://www.expedy.fr/console/v3/) you can, at any time:
- Check that the machine is reachable, with **Check Status** on the printer page
- Review every job in **Print Jobs History**
- Follow your monthly usage and change plan, the **FREE** plan being capped at 50 print requests per month
Anything about the order content or the ticket layout goes through La Toque Magique, since the connection lives on their side.
## Need help?
- [Add your printer to your Expedy account](/expedy-print/installation/add-an-expedy-xpdy80-cloud-printer-to-your-account)
- [Browse all integrations](/integrations)
- Expedy hardware or account question: [open a support ticket](https://help.expedy.io/support/tickets/new)
---
url: https://docs.expedy.io/en/integrations/shift4shop/connect-a-receipt-printer-to-shift4shop
title: Print from Shift4Shop with Expedy PRINT
updated_at: 2026-10-18T01:32:51.249985+00:00
---
# Print from Shift4Shop with Expedy PRINT
[Shift4Shop](https://www.shift4shop.com/) is an eCommerce platform. It reaches Expedy PRINT in two ways: through **Zapier**, with no code, or through the **Expedy REST API**, when you want full control over the ticket.
## What you need
- An Expedy account with an active printer. Not added yet? Follow the guide for your machine, [Expedy XPDY80](/expedy-print/installation/add-an-expedy-xpdy80-cloud-printer-to-your-account), [HSPOS](/expedy-print/installation/add-an-hspos-cloud-printer-to-your-account), [Star Micronics](/expedy-print/installation/add-a-star-micronics-printer-to-your-account) or [Raspberry Pi](/expedy-print/installation/add-a-raspberry-pi-cloud-print-server-to-your-account)
- Your **API SID**, **API TOKEN** and **API Printer UID**, all three on the printer page of the [Expedy console](https://www.expedy.fr/console/v3/), in the **API Keys & UID** card
## Option 1, through Zapier, no code
Shift4Shop connects to Zapier, and Zapier ships a ready-made **Expedy Print** action. The recipe is always the same: an event in Shift4Shop triggers **Create a Print Job** in Expedy Print, and you map the fields you want on the ticket.
Full walkthrough: **[How to integrate Expedy Print with Zapier](/integrations/zapier/how-to-integrate-expedy-print-with-zapier)**
## Option 2, through the REST API
If Shift4Shop can issue an HTTP request, it can drive the printer directly.
```api
POST https://www.expedy.fr/api/v2/printers/{printer_uid}/print
```
Authentication uses an `Authorization` header carrying your `SID:TOKEN`, with no `Bearer` prefix. Parameters and a complete example are in [Create a Print Job](/expedy-print/api-print-v2/create-a-print-job).
## Formatting the ticket
Whichever route you take, the message accepts the Expedy layout tags:
| What you want | Where to look |
|---|---|
| Align, resize or emphasise text | [Text Layout](/expedy-print/receipt-layout/text-layout-tags) |
| Print a logo or an image | [Image and Logo](/expedy-print/receipt-layout/image-and-logo-printing) |
| Print a QR code | [QR Code](/expedy-print/receipt-layout/qr-code) |
| Print a barcode | [EAN13 Barcode](/expedy-print/receipt-layout/ean13-barcode) |
> Depending on the connector or the software you use, this setup may be handled by your partner or your agency. Check with them before you start.
## Need help?
- [Browse all integrations](/integrations)
- [Open a support ticket](https://help.expedy.io/support/tickets/new)
---
url: https://docs.expedy.io/en/integrations/tally/connect-a-receipt-printer-to-tally
title: Print from Tally with Expedy PRINT
updated_at: 2026-10-20T08:07:47.151093+00:00
---
# Print from Tally with Expedy PRINT
[Tally](https://tally.so/) is an online form builder. It reaches Expedy PRINT in two ways: through **Zapier**, with no code, or through the **Expedy REST API**, when you want full control over the ticket.
## What you need
- An Expedy account with an active printer. Not added yet? Follow the guide for your machine, [Expedy XPDY80](/expedy-print/installation/add-an-expedy-xpdy80-cloud-printer-to-your-account), [HSPOS](/expedy-print/installation/add-an-hspos-cloud-printer-to-your-account), [Star Micronics](/expedy-print/installation/add-a-star-micronics-printer-to-your-account) or [Raspberry Pi](/expedy-print/installation/add-a-raspberry-pi-cloud-print-server-to-your-account)
- Your **API SID**, **API TOKEN** and **API Printer UID**, all three on the printer page of the [Expedy console](https://www.expedy.fr/console/v3/), in the **API Keys & UID** card
## Option 1, through Zapier, no code
Tally connects to Zapier, and Zapier ships a ready-made **Expedy Print** action. The recipe is always the same: an event in Tally triggers **Create a Print Job** in Expedy Print, and you map the fields you want on the ticket.
Full walkthrough: **[How to integrate Expedy Print with Zapier](/integrations/zapier/how-to-integrate-expedy-print-with-zapier)**
## Option 2, through the REST API
If Tally can issue an HTTP request, it can drive the printer directly.
```api
POST https://www.expedy.fr/api/v2/printers/{printer_uid}/print
```
Authentication uses an `Authorization` header carrying your `SID:TOKEN`, with no `Bearer` prefix. Parameters and a complete example are in [Create a Print Job](/expedy-print/api-print-v2/create-a-print-job).
## Formatting the ticket
Whichever route you take, the message accepts the Expedy layout tags:
| What you want | Where to look |
|---|---|
| Align, resize or emphasise text | [Text Layout](/expedy-print/receipt-layout/text-layout-tags) |
| Print a logo or an image | [Image and Logo](/expedy-print/receipt-layout/image-and-logo-printing) |
| Print a QR code | [QR Code](/expedy-print/receipt-layout/qr-code) |
| Print a barcode | [EAN13 Barcode](/expedy-print/receipt-layout/ean13-barcode) |
> Depending on the connector or the software you use, this setup may be handled by your partner or your agency. Check with them before you start.
## Need help?
- [Browse all integrations](/integrations)
- [Open a support ticket](https://help.expedy.io/support/tickets/new)
---
url: https://docs.expedy.io/en/integrations/orderout/connect-a-receipt-printer-to-orderout
title: Print from OrderOut with Expedy PRINT
updated_at: 2026-10-19T19:56:22.662912+00:00
---
# Print from OrderOut with Expedy PRINT
**OrderOut** is an order aggregation platform. It reaches Expedy PRINT in two ways: through **Zapier**, with no code, or through the **Expedy REST API**, when you want full control over the ticket.
## What you need
- An Expedy account with an active printer. Not added yet? Follow the guide for your machine, [Expedy XPDY80](/expedy-print/installation/add-an-expedy-xpdy80-cloud-printer-to-your-account), [HSPOS](/expedy-print/installation/add-an-hspos-cloud-printer-to-your-account), [Star Micronics](/expedy-print/installation/add-a-star-micronics-printer-to-your-account) or [Raspberry Pi](/expedy-print/installation/add-a-raspberry-pi-cloud-print-server-to-your-account)
- Your **API SID**, **API TOKEN** and **API Printer UID**, all three on the printer page of the [Expedy console](https://www.expedy.fr/console/v3/), in the **API Keys & UID** card
## Option 1, through Zapier, no code
OrderOut connects to Zapier, and Zapier ships a ready-made **Expedy Print** action. The recipe is always the same: an event in OrderOut triggers **Create a Print Job** in Expedy Print, and you map the fields you want on the ticket.
Full walkthrough: **[How to integrate Expedy Print with Zapier](/integrations/zapier/how-to-integrate-expedy-print-with-zapier)**
## Option 2, through the REST API
If OrderOut can issue an HTTP request, it can drive the printer directly.
```api
POST https://www.expedy.fr/api/v2/printers/{printer_uid}/print
```
Authentication uses an `Authorization` header carrying your `SID:TOKEN`, with no `Bearer` prefix. Parameters and a complete example are in [Create a Print Job](/expedy-print/api-print-v2/create-a-print-job).
## Formatting the ticket
Whichever route you take, the message accepts the Expedy layout tags:
| What you want | Where to look |
|---|---|
| Align, resize or emphasise text | [Text Layout](/expedy-print/receipt-layout/text-layout-tags) |
| Print a logo or an image | [Image and Logo](/expedy-print/receipt-layout/image-and-logo-printing) |
| Print a QR code | [QR Code](/expedy-print/receipt-layout/qr-code) |
| Print a barcode | [EAN13 Barcode](/expedy-print/receipt-layout/ean13-barcode) |
> Depending on the connector or the software you use, this setup may be handled by your partner or your agency. Check with them before you start.
## Need help?
- [Browse all integrations](/integrations)
- [Open a support ticket](https://help.expedy.io/support/tickets/new)
---
url: https://docs.expedy.io/en/integrations/delivery-hero/connect-a-receipt-printer-to-delivery-hero
title: Print Delivery Hero orders on a receipt printer
updated_at: 2026-10-20T22:57:29.190159+00:00
---
# Print Delivery Hero orders on a receipt printer
[Delivery Hero](https://www.deliveryhero.com/) is a meal delivery platform. It connects to Expedy PRINT through **HubRise**: Delivery Hero sends its orders to HubRise, HubRise forwards them to your cloud printer, and the ticket comes out within seconds.
## What you need
- An Expedy account with an active printer. Not added yet? Follow the guide for your machine, [Expedy XPDY80](/expedy-print/installation/add-an-expedy-xpdy80-cloud-printer-to-your-account), [HSPOS](/expedy-print/installation/add-an-hspos-cloud-printer-to-your-account), [Star Micronics](/expedy-print/installation/add-a-star-micronics-printer-to-your-account) or [Raspberry Pi](/expedy-print/installation/add-a-raspberry-pi-cloud-print-server-to-your-account)
- A [HubRise account](https://manager.hubrise.com/signup), which aggregates your sales channels
- A Delivery Hero account linked to your HubRise location
## How it works
| Step | What happens |
|---|---|
| 1 | An order is placed on Delivery Hero |
| 2 | Delivery Hero pushes it to HubRise |
| 3 | Expedy PRINT receives it and prints a standardised ticket |
A single printer covers every channel connected to the same HubRise location, so you do not need one machine per platform.
## Connect it
The setup happens once, on the HubRise side, and is described step by step in the reference guide:
**[Connect a receipt printer to HubRise](/integrations/hubrise/connecting-a-receipt-printer-to-hubrise)**
Then link your Delivery Hero account to the same HubRise location. That part is done from the Delivery Hero back office, or by Delivery Hero support.
## Receipt settings
Once connected, the printer page in the [Expedy console](https://www.expedy.fr/console/v3/) controls what gets printed:
- **Print order when**, the status that triggers printing, `NEW`, `RECEIVED` or `ACCEPTED`
- **Then change status to**, the automatic status update applied after printing
- **Number of copies**, one ticket for the kitchen, one for the counter or the delivery bag
- The receipt header and footer, logo, company name, address and registration number
All of it is detailed in [Connect a receipt printer to HubRise](/integrations/hubrise/connecting-a-receipt-printer-to-hubrise).
> Depending on the connector or the point-of-sale software you use, this setup may be handled by your partner. Check with them before you start.
## Need help?
- [Browse all integrations](/integrations)
- [Open a support ticket](https://help.expedy.io/support/tickets/new)
---
url: https://docs.expedy.io/en/integrations/easyship/connect-a-receipt-printer-to-easyship
title: Print your Easyship shipping labels automatically
updated_at: 2026-10-21T03:39:05.240891+00:00
---
# Print your Easyship shipping labels automatically
[Easyship](https://www.easyship.com/) generates your carrier shipping labels. Through **Zapier**, the label PDF goes straight to your label printer the moment Easyship creates it, so nobody has to download it and print it by hand.
> An Expedy cloud receipt printer, XPDY80, HSPOS or Star Micronics, **cannot print a carrier label**: it is a receipt printer. Carrier labels always go through a **Raspberry Pi** or a **Cloud Print Box USB adapter** driving a label printer.
## What you need
- An Expedy account with an active **Raspberry Pi print server** or **Cloud Print Box USB adapter**. Not set up yet? See [Add a Raspberry Pi print server to your account](/expedy-print/installation/add-a-raspberry-pi-cloud-print-server-to-your-account)
- **Your own label printer**, connected by USB to that Raspberry Pi or adapter, with its port set to `LABEL`
- A Easyship account and a [Zapier](https://zapier.com/) account
- Your **API SID**, **API TOKEN** and **API Printer UID**, on the printer page of the [Expedy console](https://www.expedy.fr/console/v3/), in the **API Keys & UID** card
## Why a label printer
A carrier label is a PDF in a fixed format, most often 100 x 150 mm. A receipt printer cannot render it at the right size, so the job goes to a label printer driven by a Raspberry Pi or the Cloud Print Box.
On the printer page, run a **USB scan** and set the port that carries the label printer to `LABEL`, not `ESC/POS`. See [Installation on Raspberry Pi](/usb-cloud-printer-adapter/rpi-installation/installation-on-raspberry-pi).
## Build the Zap
1. In Zapier, create a Zap and pick **Easyship** as the trigger app
2. Choose the event that fires when a label is created
3. Add **Expedy Print** as the action, then **Create a Print Job**
4. Connect your Expedy account with your **Expedy SID** and your **Expedy TOKEN**
5. Enter the **Printer UID** of the label printer
6. In the message field, map the label PDF URL returned by Easyship
Step by step on the Zapier side: [How to integrate Expedy Print with Zapier](/integrations/zapier/how-to-integrate-expedy-print-with-zapier)
## What to send
A label printer takes the PDF URL **on its own, with no tag**:
```text
https://example.com/label.pdf
```
On an ESC/POS receipt printer the same URL has to be wrapped in the `` tag instead. Both forms are detailed in [PDF printing](/expedy-print/receipt-layout/print-pdf).
## Test it
Create a test label in Easyship and check that it comes out at the right size. If nothing prints:
- check the **Printer UID**, it must be the label printer, not the receipt printer
- check that the USB port is in `LABEL` mode after the scan
- check that the PDF URL is reachable without authentication, Expedy fetches it from its own servers
> Depending on the connector or the software you use, this setup may be handled by your partner or your agency. Check with them before you start.
## Need help?
- [Browse all integrations](/integrations)
- [Open a support ticket](https://help.expedy.io/support/tickets/new)
---
url: https://docs.expedy.io/en/integrations/restaur-app/connect-a-receipt-printer-to-restaur-app
title: Print Restaur'App orders on a receipt printer
updated_at: 2026-10-18T16:05:54.203965+00:00
---
# Print Restaur'App orders on a receipt printer
**Restaur'App** is an online ordering solution for hospitality. It connects to Expedy PRINT through **HubRise**: Restaur'App sends its orders to HubRise, HubRise forwards them to your cloud printer, and the ticket comes out within seconds.
## What you need
- An Expedy account with an active printer. Not added yet? Follow the guide for your machine, [Expedy XPDY80](/expedy-print/installation/add-an-expedy-xpdy80-cloud-printer-to-your-account), [HSPOS](/expedy-print/installation/add-an-hspos-cloud-printer-to-your-account), [Star Micronics](/expedy-print/installation/add-a-star-micronics-printer-to-your-account) or [Raspberry Pi](/expedy-print/installation/add-a-raspberry-pi-cloud-print-server-to-your-account)
- A [HubRise account](https://manager.hubrise.com/signup), which aggregates your sales channels
- A Restaur'App account linked to your HubRise location
## How it works
| Step | What happens |
|---|---|
| 1 | An order is placed on Restaur'App |
| 2 | Restaur'App pushes it to HubRise |
| 3 | Expedy PRINT receives it and prints a standardised ticket |
A single printer covers every channel connected to the same HubRise location, so you do not need one machine per platform.
## Connect it
The setup happens once, on the HubRise side, and is described step by step in the reference guide:
**[Connect a receipt printer to HubRise](/integrations/hubrise/connecting-a-receipt-printer-to-hubrise)**
Then link your Restaur'App account to the same HubRise location. That part is done from the Restaur'App back office, or by Restaur'App support.
## Receipt settings
Once connected, the printer page in the [Expedy console](https://www.expedy.fr/console/v3/) controls what gets printed:
- **Print order when**, the status that triggers printing, `NEW`, `RECEIVED` or `ACCEPTED`
- **Then change status to**, the automatic status update applied after printing
- **Number of copies**, one ticket for the kitchen, one for the counter or the delivery bag
- The receipt header and footer, logo, company name, address and registration number
All of it is detailed in [Connect a receipt printer to HubRise](/integrations/hubrise/connecting-a-receipt-printer-to-hubrise).
> Depending on the connector or the point-of-sale software you use, this setup may be handled by your partner. Check with them before you start.
## Need help?
- [Browse all integrations](/integrations)
- [Open a support ticket](https://help.expedy.io/support/tickets/new)
---
url: https://docs.expedy.io/en/integrations/zuplyit/connect-a-receipt-printer-to-zuplyit
title: Print Zuplyit orders on a receipt printer
updated_at: 2026-10-20T17:12:59.016487+00:00
---
# Print Zuplyit orders on a receipt printer
**Zuplyit** is an online ordering solution for hospitality. It connects to Expedy PRINT through **HubRise**: Zuplyit sends its orders to HubRise, HubRise forwards them to your cloud printer, and the ticket comes out within seconds.
## What you need
- An Expedy account with an active printer. Not added yet? Follow the guide for your machine, [Expedy XPDY80](/expedy-print/installation/add-an-expedy-xpdy80-cloud-printer-to-your-account), [HSPOS](/expedy-print/installation/add-an-hspos-cloud-printer-to-your-account), [Star Micronics](/expedy-print/installation/add-a-star-micronics-printer-to-your-account) or [Raspberry Pi](/expedy-print/installation/add-a-raspberry-pi-cloud-print-server-to-your-account)
- A [HubRise account](https://manager.hubrise.com/signup), which aggregates your sales channels
- A Zuplyit account linked to your HubRise location
## How it works
| Step | What happens |
|---|---|
| 1 | An order is placed on Zuplyit |
| 2 | Zuplyit pushes it to HubRise |
| 3 | Expedy PRINT receives it and prints a standardised ticket |
A single printer covers every channel connected to the same HubRise location, so you do not need one machine per platform.
## Connect it
The setup happens once, on the HubRise side, and is described step by step in the reference guide:
**[Connect a receipt printer to HubRise](/integrations/hubrise/connecting-a-receipt-printer-to-hubrise)**
Then link your Zuplyit account to the same HubRise location. That part is done from the Zuplyit back office, or by Zuplyit support.
## Receipt settings
Once connected, the printer page in the [Expedy console](https://www.expedy.fr/console/v3/) controls what gets printed:
- **Print order when**, the status that triggers printing, `NEW`, `RECEIVED` or `ACCEPTED`
- **Then change status to**, the automatic status update applied after printing
- **Number of copies**, one ticket for the kitchen, one for the counter or the delivery bag
- The receipt header and footer, logo, company name, address and registration number
All of it is detailed in [Connect a receipt printer to HubRise](/integrations/hubrise/connecting-a-receipt-printer-to-hubrise).
> Depending on the connector or the point-of-sale software you use, this setup may be handled by your partner. Check with them before you start.
## Need help?
- [Browse all integrations](/integrations)
- [Open a support ticket](https://help.expedy.io/support/tickets/new)
---
url: https://docs.expedy.io/en/integrations/locatouch/connect-a-receipt-printer-to-locatouch
title: Print Loca'Touch orders on a receipt printer
updated_at: 2026-10-20T22:18:03.519288+00:00
---
# Print Loca'Touch orders on a receipt printer
**Loca'Touch** is a self-ordering kiosk solution. It connects to Expedy PRINT through **HubRise**: Loca'Touch sends its orders to HubRise, HubRise forwards them to your cloud printer, and the ticket comes out within seconds.
## What you need
- An Expedy account with an active printer. Not added yet? Follow the guide for your machine, [Expedy XPDY80](/expedy-print/installation/add-an-expedy-xpdy80-cloud-printer-to-your-account), [HSPOS](/expedy-print/installation/add-an-hspos-cloud-printer-to-your-account), [Star Micronics](/expedy-print/installation/add-a-star-micronics-printer-to-your-account) or [Raspberry Pi](/expedy-print/installation/add-a-raspberry-pi-cloud-print-server-to-your-account)
- A [HubRise account](https://manager.hubrise.com/signup), which aggregates your sales channels
- A Loca'Touch account linked to your HubRise location
## How it works
| Step | What happens |
|---|---|
| 1 | An order is placed on Loca'Touch |
| 2 | Loca'Touch pushes it to HubRise |
| 3 | Expedy PRINT receives it and prints a standardised ticket |
A single printer covers every channel connected to the same HubRise location, so you do not need one machine per platform.
## Connect it
The setup happens once, on the HubRise side, and is described step by step in the reference guide:
**[Connect a receipt printer to HubRise](/integrations/hubrise/connecting-a-receipt-printer-to-hubrise)**
Then link your Loca'Touch account to the same HubRise location. That part is done from the Loca'Touch back office, or by Loca'Touch support.
## Receipt settings
Once connected, the printer page in the [Expedy console](https://www.expedy.fr/console/v3/) controls what gets printed:
- **Print order when**, the status that triggers printing, `NEW`, `RECEIVED` or `ACCEPTED`
- **Then change status to**, the automatic status update applied after printing
- **Number of copies**, one ticket for the kitchen, one for the counter or the delivery bag
- The receipt header and footer, logo, company name, address and registration number
All of it is detailed in [Connect a receipt printer to HubRise](/integrations/hubrise/connecting-a-receipt-printer-to-hubrise).
> Depending on the connector or the point-of-sale software you use, this setup may be handled by your partner. Check with them before you start.
## Need help?
- [Browse all integrations](/integrations)
- [Open a support ticket](https://help.expedy.io/support/tickets/new)
---
url: https://docs.expedy.io/en/integrations/flipdish/connect-a-receipt-printer-to-flipdish
title: Print from Flipdish with Expedy PRINT
updated_at: 2026-10-21T07:27:46.758277+00:00
---
# Print from Flipdish with Expedy PRINT
[Flipdish](https://www.flipdish.com/) is an online ordering platform. It reaches Expedy PRINT in two ways: through **Zapier**, with no code, or through the **Expedy REST API**, when you want full control over the ticket.
## What you need
- An Expedy account with an active printer. Not added yet? Follow the guide for your machine, [Expedy XPDY80](/expedy-print/installation/add-an-expedy-xpdy80-cloud-printer-to-your-account), [HSPOS](/expedy-print/installation/add-an-hspos-cloud-printer-to-your-account), [Star Micronics](/expedy-print/installation/add-a-star-micronics-printer-to-your-account) or [Raspberry Pi](/expedy-print/installation/add-a-raspberry-pi-cloud-print-server-to-your-account)
- Your **API SID**, **API TOKEN** and **API Printer UID**, all three on the printer page of the [Expedy console](https://www.expedy.fr/console/v3/), in the **API Keys & UID** card
## Option 1, through Zapier, no code
Flipdish connects to Zapier, and Zapier ships a ready-made **Expedy Print** action. The recipe is always the same: an event in Flipdish triggers **Create a Print Job** in Expedy Print, and you map the fields you want on the ticket.
Full walkthrough: **[How to integrate Expedy Print with Zapier](/integrations/zapier/how-to-integrate-expedy-print-with-zapier)**
## Option 2, through the REST API
If Flipdish can issue an HTTP request, it can drive the printer directly.
```api
POST https://www.expedy.fr/api/v2/printers/{printer_uid}/print
```
Authentication uses an `Authorization` header carrying your `SID:TOKEN`, with no `Bearer` prefix. Parameters and a complete example are in [Create a Print Job](/expedy-print/api-print-v2/create-a-print-job).
## Formatting the ticket
Whichever route you take, the message accepts the Expedy layout tags:
| What you want | Where to look |
|---|---|
| Align, resize or emphasise text | [Text Layout](/expedy-print/receipt-layout/text-layout-tags) |
| Print a logo or an image | [Image and Logo](/expedy-print/receipt-layout/image-and-logo-printing) |
| Print a QR code | [QR Code](/expedy-print/receipt-layout/qr-code) |
| Print a barcode | [EAN13 Barcode](/expedy-print/receipt-layout/ean13-barcode) |
> Depending on the connector or the software you use, this setup may be handled by your partner or your agency. Check with them before you start.
## Need help?
- [Browse all integrations](/integrations)
- [Open a support ticket](https://help.expedy.io/support/tickets/new)
---
url: https://docs.expedy.io/en/integrations/grazecart/connect-a-receipt-printer-to-grazecart
title: Print from GrazeCart with Expedy PRINT
updated_at: 2026-10-22T11:02:18.835923+00:00
---
# Print from GrazeCart with Expedy PRINT
[GrazeCart](https://www.grazecart.com/) is an ordering and catering platform. It reaches Expedy PRINT in two ways: through **Zapier**, with no code, or through the **Expedy REST API**, when you want full control over the ticket.
## What you need
- An Expedy account with an active printer. Not added yet? Follow the guide for your machine, [Expedy XPDY80](/expedy-print/installation/add-an-expedy-xpdy80-cloud-printer-to-your-account), [HSPOS](/expedy-print/installation/add-an-hspos-cloud-printer-to-your-account), [Star Micronics](/expedy-print/installation/add-a-star-micronics-printer-to-your-account) or [Raspberry Pi](/expedy-print/installation/add-a-raspberry-pi-cloud-print-server-to-your-account)
- Your **API SID**, **API TOKEN** and **API Printer UID**, all three on the printer page of the [Expedy console](https://www.expedy.fr/console/v3/), in the **API Keys & UID** card
## Option 1, through Zapier, no code
GrazeCart connects to Zapier, and Zapier ships a ready-made **Expedy Print** action. The recipe is always the same: an event in GrazeCart triggers **Create a Print Job** in Expedy Print, and you map the fields you want on the ticket.
Full walkthrough: **[How to integrate Expedy Print with Zapier](/integrations/zapier/how-to-integrate-expedy-print-with-zapier)**
## Option 2, through the REST API
If GrazeCart can issue an HTTP request, it can drive the printer directly.
```api
POST https://www.expedy.fr/api/v2/printers/{printer_uid}/print
```
Authentication uses an `Authorization` header carrying your `SID:TOKEN`, with no `Bearer` prefix. Parameters and a complete example are in [Create a Print Job](/expedy-print/api-print-v2/create-a-print-job).
## Formatting the ticket
Whichever route you take, the message accepts the Expedy layout tags:
| What you want | Where to look |
|---|---|
| Align, resize or emphasise text | [Text Layout](/expedy-print/receipt-layout/text-layout-tags) |
| Print a logo or an image | [Image and Logo](/expedy-print/receipt-layout/image-and-logo-printing) |
| Print a QR code | [QR Code](/expedy-print/receipt-layout/qr-code) |
| Print a barcode | [EAN13 Barcode](/expedy-print/receipt-layout/ean13-barcode) |
> Depending on the connector or the software you use, this setup may be handled by your partner or your agency. Check with them before you start.
## Need help?
- [Browse all integrations](/integrations)
- [Open a support ticket](https://help.expedy.io/support/tickets/new)
---
url: https://docs.expedy.io/en/integrations/barmade/connect-a-receipt-printer-to-barmade
title: Receipt printing with Barmade
updated_at: 2026-10-22T00:12:20.409494+00:00
---
# Receipt printing with Barmade
[Barmade](https://barmade.fr/) is an online ordering solution for hospitality. With Barmade, **the receipt printer is installed and configured by Barmade**, not from your Expedy console. Get in touch with them to have your printer activated.
## Who does what
| Party | Responsibility |
|---|---|
| Expedy | Supplies the cloud printer, its connectivity (Ethernet, Wi-Fi or 4G SIM) and the console where you follow your print jobs |
| Barmade | Pairs the printer with your account, sets the receipt layout and switches the service on |
## Getting your printer activated
1. Order your machine, or use the one you already have
2. Contact Barmade and tell them you want to print your orders on an Expedy cloud printer
3. Barmade handles the pairing and the receipt layout on their side
4. Once activated, orders print automatically, with nothing left to do on your part
> If your printer already appears in your Expedy account, give Barmade its **API Printer UID**, shown on the printer page in the **API Keys & UID** card of the [Expedy console](https://www.expedy.fr/console/v3/).
## Once it is live
From the [Expedy console](https://www.expedy.fr/console/v3/) you can, at any time:
- Check that the machine is reachable, with **Check Status** on the printer page
- Review every job in **Print Jobs History**
- Follow your monthly usage and change plan, the **FREE** plan being capped at 50 print requests per month
Anything about the order content or the ticket layout goes through Barmade, since the connection lives on their side.
## Need help?
- [Add your printer to your Expedy account](/expedy-print/installation/add-an-expedy-xpdy80-cloud-printer-to-your-account)
- [Browse all integrations](/integrations)
- Expedy hardware or account question: [open a support ticket](https://help.expedy.io/support/tickets/new)
---
url: https://docs.expedy.io/en/integrations/albato/connect-a-receipt-printer-to-albato
title: Print from Albato with Expedy PRINT
updated_at: 2026-10-20T06:57:23.287538+00:00
---
# Print from Albato with Expedy PRINT
[Albato](https://albato.com/) is an automation platform. It reaches Expedy PRINT in two ways: through **Zapier**, with no code, or through the **Expedy REST API**, when you want full control over the ticket.
## What you need
- An Expedy account with an active printer. Not added yet? Follow the guide for your machine, [Expedy XPDY80](/expedy-print/installation/add-an-expedy-xpdy80-cloud-printer-to-your-account), [HSPOS](/expedy-print/installation/add-an-hspos-cloud-printer-to-your-account), [Star Micronics](/expedy-print/installation/add-a-star-micronics-printer-to-your-account) or [Raspberry Pi](/expedy-print/installation/add-a-raspberry-pi-cloud-print-server-to-your-account)
- Your **API SID**, **API TOKEN** and **API Printer UID**, all three on the printer page of the [Expedy console](https://www.expedy.fr/console/v3/), in the **API Keys & UID** card
## Option 1, through Zapier, no code
Albato connects to Zapier, and Zapier ships a ready-made **Expedy Print** action. The recipe is always the same: an event in Albato triggers **Create a Print Job** in Expedy Print, and you map the fields you want on the ticket.
Full walkthrough: **[How to integrate Expedy Print with Zapier](/integrations/zapier/how-to-integrate-expedy-print-with-zapier)**
## Option 2, through the REST API
If Albato can issue an HTTP request, it can drive the printer directly.
```api
POST https://www.expedy.fr/api/v2/printers/{printer_uid}/print
```
Authentication uses an `Authorization` header carrying your `SID:TOKEN`, with no `Bearer` prefix. Parameters and a complete example are in [Create a Print Job](/expedy-print/api-print-v2/create-a-print-job).
## Formatting the ticket
Whichever route you take, the message accepts the Expedy layout tags:
| What you want | Where to look |
|---|---|
| Align, resize or emphasise text | [Text Layout](/expedy-print/receipt-layout/text-layout-tags) |
| Print a logo or an image | [Image and Logo](/expedy-print/receipt-layout/image-and-logo-printing) |
| Print a QR code | [QR Code](/expedy-print/receipt-layout/qr-code) |
| Print a barcode | [EAN13 Barcode](/expedy-print/receipt-layout/ean13-barcode) |
> Depending on the connector or the software you use, this setup may be handled by your partner or your agency. Check with them before you start.
## Need help?
- [Browse all integrations](/integrations)
- [Open a support ticket](https://help.expedy.io/support/tickets/new)
---
url: https://docs.expedy.io/en/integrations/wix/connect-a-receipt-printer-to-wix
title: Print from Wix with Expedy PRINT
updated_at: 2026-10-22T05:52:40.383559+00:00
---
# Print from Wix with Expedy PRINT
[Wix](https://www.wix.com/) is an online ordering platform. It reaches Expedy PRINT in two ways: through **Zapier**, with no code, or through the **Expedy REST API**, when you want full control over the ticket.
## What you need
- An Expedy account with an active printer. Not added yet? Follow the guide for your machine, [Expedy XPDY80](/expedy-print/installation/add-an-expedy-xpdy80-cloud-printer-to-your-account), [HSPOS](/expedy-print/installation/add-an-hspos-cloud-printer-to-your-account), [Star Micronics](/expedy-print/installation/add-a-star-micronics-printer-to-your-account) or [Raspberry Pi](/expedy-print/installation/add-a-raspberry-pi-cloud-print-server-to-your-account)
- Your **API SID**, **API TOKEN** and **API Printer UID**, all three on the printer page of the [Expedy console](https://www.expedy.fr/console/v3/), in the **API Keys & UID** card
## Option 1, through Zapier, no code
Wix connects to Zapier, and Zapier ships a ready-made **Expedy Print** action. The recipe is always the same: an event in Wix triggers **Create a Print Job** in Expedy Print, and you map the fields you want on the ticket.
Full walkthrough: **[How to integrate Expedy Print with Zapier](/integrations/zapier/how-to-integrate-expedy-print-with-zapier)**
## Option 2, through the REST API
If Wix can issue an HTTP request, it can drive the printer directly.
```api
POST https://www.expedy.fr/api/v2/printers/{printer_uid}/print
```
Authentication uses an `Authorization` header carrying your `SID:TOKEN`, with no `Bearer` prefix. Parameters and a complete example are in [Create a Print Job](/expedy-print/api-print-v2/create-a-print-job).
## Formatting the ticket
Whichever route you take, the message accepts the Expedy layout tags:
| What you want | Where to look |
|---|---|
| Align, resize or emphasise text | [Text Layout](/expedy-print/receipt-layout/text-layout-tags) |
| Print a logo or an image | [Image and Logo](/expedy-print/receipt-layout/image-and-logo-printing) |
| Print a QR code | [QR Code](/expedy-print/receipt-layout/qr-code) |
| Print a barcode | [EAN13 Barcode](/expedy-print/receipt-layout/ean13-barcode) |
> Depending on the connector or the software you use, this setup may be handled by your partner or your agency. Check with them before you start.
## Need help?
- [Browse all integrations](/integrations)
- [Open a support ticket](https://help.expedy.io/support/tickets/new)
---
url: https://docs.expedy.io/en/integrations/xano/connect-a-receipt-printer-to-xano
title: Print from Xano with Expedy PRINT
updated_at: 2026-10-20T15:36:13.497592+00:00
---
# Print from Xano with Expedy PRINT
[Xano](https://www.xano.com/) is a no-code app building platform. It reaches Expedy PRINT in two ways: through **Zapier**, with no code, or through the **Expedy REST API**, when you want full control over the ticket.
## What you need
- An Expedy account with an active printer. Not added yet? Follow the guide for your machine, [Expedy XPDY80](/expedy-print/installation/add-an-expedy-xpdy80-cloud-printer-to-your-account), [HSPOS](/expedy-print/installation/add-an-hspos-cloud-printer-to-your-account), [Star Micronics](/expedy-print/installation/add-a-star-micronics-printer-to-your-account) or [Raspberry Pi](/expedy-print/installation/add-a-raspberry-pi-cloud-print-server-to-your-account)
- Your **API SID**, **API TOKEN** and **API Printer UID**, all three on the printer page of the [Expedy console](https://www.expedy.fr/console/v3/), in the **API Keys & UID** card
## Option 1, through Zapier, no code
Xano connects to Zapier, and Zapier ships a ready-made **Expedy Print** action. The recipe is always the same: an event in Xano triggers **Create a Print Job** in Expedy Print, and you map the fields you want on the ticket.
Full walkthrough: **[How to integrate Expedy Print with Zapier](/integrations/zapier/how-to-integrate-expedy-print-with-zapier)**
## Option 2, through the REST API
If Xano can issue an HTTP request, it can drive the printer directly.
```api
POST https://www.expedy.fr/api/v2/printers/{printer_uid}/print
```
Authentication uses an `Authorization` header carrying your `SID:TOKEN`, with no `Bearer` prefix. Parameters and a complete example are in [Create a Print Job](/expedy-print/api-print-v2/create-a-print-job).
## Formatting the ticket
Whichever route you take, the message accepts the Expedy layout tags:
| What you want | Where to look |
|---|---|
| Align, resize or emphasise text | [Text Layout](/expedy-print/receipt-layout/text-layout-tags) |
| Print a logo or an image | [Image and Logo](/expedy-print/receipt-layout/image-and-logo-printing) |
| Print a QR code | [QR Code](/expedy-print/receipt-layout/qr-code) |
| Print a barcode | [EAN13 Barcode](/expedy-print/receipt-layout/ean13-barcode) |
> Depending on the connector or the software you use, this setup may be handled by your partner or your agency. Check with them before you start.
## Need help?
- [Browse all integrations](/integrations)
- [Open a support ticket](https://help.expedy.io/support/tickets/new)
---
url: https://docs.expedy.io/en/integrations/ekm/connect-a-receipt-printer-to-ekm
title: Print from EKM with Expedy PRINT
updated_at: 2026-10-22T03:35:46.700487+00:00
---
# Print from EKM with Expedy PRINT
[EKM](https://www.ekm.com/) is an eCommerce platform. It reaches Expedy PRINT in two ways: through **Zapier**, with no code, or through the **Expedy REST API**, when you want full control over the ticket.
## What you need
- An Expedy account with an active printer. Not added yet? Follow the guide for your machine, [Expedy XPDY80](/expedy-print/installation/add-an-expedy-xpdy80-cloud-printer-to-your-account), [HSPOS](/expedy-print/installation/add-an-hspos-cloud-printer-to-your-account), [Star Micronics](/expedy-print/installation/add-a-star-micronics-printer-to-your-account) or [Raspberry Pi](/expedy-print/installation/add-a-raspberry-pi-cloud-print-server-to-your-account)
- Your **API SID**, **API TOKEN** and **API Printer UID**, all three on the printer page of the [Expedy console](https://www.expedy.fr/console/v3/), in the **API Keys & UID** card
## Option 1, through Zapier, no code
EKM connects to Zapier, and Zapier ships a ready-made **Expedy Print** action. The recipe is always the same: an event in EKM triggers **Create a Print Job** in Expedy Print, and you map the fields you want on the ticket.
Full walkthrough: **[How to integrate Expedy Print with Zapier](/integrations/zapier/how-to-integrate-expedy-print-with-zapier)**
## Option 2, through the REST API
If EKM can issue an HTTP request, it can drive the printer directly.
```api
POST https://www.expedy.fr/api/v2/printers/{printer_uid}/print
```
Authentication uses an `Authorization` header carrying your `SID:TOKEN`, with no `Bearer` prefix. Parameters and a complete example are in [Create a Print Job](/expedy-print/api-print-v2/create-a-print-job).
## Formatting the ticket
Whichever route you take, the message accepts the Expedy layout tags:
| What you want | Where to look |
|---|---|
| Align, resize or emphasise text | [Text Layout](/expedy-print/receipt-layout/text-layout-tags) |
| Print a logo or an image | [Image and Logo](/expedy-print/receipt-layout/image-and-logo-printing) |
| Print a QR code | [QR Code](/expedy-print/receipt-layout/qr-code) |
| Print a barcode | [EAN13 Barcode](/expedy-print/receipt-layout/ean13-barcode) |
> Depending on the connector or the software you use, this setup may be handled by your partner or your agency. Check with them before you start.
## Need help?
- [Browse all integrations](/integrations)
- [Open a support ticket](https://help.expedy.io/support/tickets/new)
---
url: https://docs.expedy.io/en/integrations/ordermate/connect-a-receipt-printer-to-ordermate
title: Print from Ordermate with Expedy PRINT
updated_at: 2026-10-23T06:25:40.588311+00:00
---
# Print from Ordermate with Expedy PRINT
**Ordermate** is a point-of-sale solution. It reaches Expedy PRINT in two ways: through **Zapier**, with no code, or through the **Expedy REST API**, when you want full control over the ticket.
## What you need
- An Expedy account with an active printer. Not added yet? Follow the guide for your machine, [Expedy XPDY80](/expedy-print/installation/add-an-expedy-xpdy80-cloud-printer-to-your-account), [HSPOS](/expedy-print/installation/add-an-hspos-cloud-printer-to-your-account), [Star Micronics](/expedy-print/installation/add-a-star-micronics-printer-to-your-account) or [Raspberry Pi](/expedy-print/installation/add-a-raspberry-pi-cloud-print-server-to-your-account)
- Your **API SID**, **API TOKEN** and **API Printer UID**, all three on the printer page of the [Expedy console](https://www.expedy.fr/console/v3/), in the **API Keys & UID** card
## Option 1, through Zapier, no code
Ordermate connects to Zapier, and Zapier ships a ready-made **Expedy Print** action. The recipe is always the same: an event in Ordermate triggers **Create a Print Job** in Expedy Print, and you map the fields you want on the ticket.
Full walkthrough: **[How to integrate Expedy Print with Zapier](/integrations/zapier/how-to-integrate-expedy-print-with-zapier)**
## Option 2, through the REST API
If Ordermate can issue an HTTP request, it can drive the printer directly.
```api
POST https://www.expedy.fr/api/v2/printers/{printer_uid}/print
```
Authentication uses an `Authorization` header carrying your `SID:TOKEN`, with no `Bearer` prefix. Parameters and a complete example are in [Create a Print Job](/expedy-print/api-print-v2/create-a-print-job).
## Formatting the ticket
Whichever route you take, the message accepts the Expedy layout tags:
| What you want | Where to look |
|---|---|
| Align, resize or emphasise text | [Text Layout](/expedy-print/receipt-layout/text-layout-tags) |
| Print a logo or an image | [Image and Logo](/expedy-print/receipt-layout/image-and-logo-printing) |
| Print a QR code | [QR Code](/expedy-print/receipt-layout/qr-code) |
| Print a barcode | [EAN13 Barcode](/expedy-print/receipt-layout/ean13-barcode) |
> Depending on the connector or the software you use, this setup may be handled by your partner or your agency. Check with them before you start.
## Need help?
- [Browse all integrations](/integrations)
- [Open a support ticket](https://help.expedy.io/support/tickets/new)
---
url: https://docs.expedy.io/en/integrations/zenorder/connect-a-receipt-printer-to-zenorder
title: Receipt printing with Zenorder
updated_at: 2026-10-22T21:56:09.496313+00:00
---
# Receipt printing with Zenorder
[Zenorder](https://www.zenorder.fr/) is an online ordering solution for hospitality. With Zenorder, **the receipt printer is installed and configured by Zenorder**, not from your Expedy console. Get in touch with them to have your printer activated.
## Who does what
| Party | Responsibility |
|---|---|
| Expedy | Supplies the cloud printer, its connectivity (Ethernet, Wi-Fi or 4G SIM) and the console where you follow your print jobs |
| Zenorder | Pairs the printer with your account, sets the receipt layout and switches the service on |
## Getting your printer activated
1. Order your machine, or use the one you already have
2. Contact Zenorder and tell them you want to print your orders on an Expedy cloud printer
3. Zenorder handles the pairing and the receipt layout on their side
4. Once activated, orders print automatically, with nothing left to do on your part
> If your printer already appears in your Expedy account, give Zenorder its **API Printer UID**, shown on the printer page in the **API Keys & UID** card of the [Expedy console](https://www.expedy.fr/console/v3/).
## Once it is live
From the [Expedy console](https://www.expedy.fr/console/v3/) you can, at any time:
- Check that the machine is reachable, with **Check Status** on the printer page
- Review every job in **Print Jobs History**
- Follow your monthly usage and change plan, the **FREE** plan being capped at 50 print requests per month
Anything about the order content or the ticket layout goes through Zenorder, since the connection lives on their side.
## Need help?
- [Add your printer to your Expedy account](/expedy-print/installation/add-an-expedy-xpdy80-cloud-printer-to-your-account)
- [Browse all integrations](/integrations)
- Expedy hardware or account question: [open a support ticket](https://help.expedy.io/support/tickets/new)
---
url: https://docs.expedy.io/en/integrations/make/connect-a-receipt-printer-to-make
title: Print from Make with Expedy PRINT
updated_at: 2026-10-20T20:20:36.519653+00:00
---
# Print from Make with Expedy PRINT
[Make](https://www.make.com) is an automation platform. It reaches Expedy PRINT in two ways: through **Zapier**, with no code, or through the **Expedy REST API**, when you want full control over the ticket.
## What you need
- An Expedy account with an active printer. Not added yet? Follow the guide for your machine, [Expedy XPDY80](/expedy-print/installation/add-an-expedy-xpdy80-cloud-printer-to-your-account), [HSPOS](/expedy-print/installation/add-an-hspos-cloud-printer-to-your-account), [Star Micronics](/expedy-print/installation/add-a-star-micronics-printer-to-your-account) or [Raspberry Pi](/expedy-print/installation/add-a-raspberry-pi-cloud-print-server-to-your-account)
- Your **API SID**, **API TOKEN** and **API Printer UID**, all three on the printer page of the [Expedy console](https://www.expedy.fr/console/v3/), in the **API Keys & UID** card
## Option 1, through Zapier, no code
Make connects to Zapier, and Zapier ships a ready-made **Expedy Print** action. The recipe is always the same: an event in Make triggers **Create a Print Job** in Expedy Print, and you map the fields you want on the ticket.
Full walkthrough: **[How to integrate Expedy Print with Zapier](/integrations/zapier/how-to-integrate-expedy-print-with-zapier)**
## Option 2, through the REST API
If Make can issue an HTTP request, it can drive the printer directly.
```api
POST https://www.expedy.fr/api/v2/printers/{printer_uid}/print
```
Authentication uses an `Authorization` header carrying your `SID:TOKEN`, with no `Bearer` prefix. Parameters and a complete example are in [Create a Print Job](/expedy-print/api-print-v2/create-a-print-job).
## Formatting the ticket
Whichever route you take, the message accepts the Expedy layout tags:
| What you want | Where to look |
|---|---|
| Align, resize or emphasise text | [Text Layout](/expedy-print/receipt-layout/text-layout-tags) |
| Print a logo or an image | [Image and Logo](/expedy-print/receipt-layout/image-and-logo-printing) |
| Print a QR code | [QR Code](/expedy-print/receipt-layout/qr-code) |
| Print a barcode | [EAN13 Barcode](/expedy-print/receipt-layout/ean13-barcode) |
> Depending on the connector or the software you use, this setup may be handled by your partner or your agency. Check with them before you start.
## Need help?
- [Browse all integrations](/integrations)
- [Open a support ticket](https://help.expedy.io/support/tickets/new)
---
url: https://docs.expedy.io/en/integrations/store-factory/connect-a-receipt-printer-to-store-factory
title: Print Store Factory orders on a receipt printer
updated_at: 2026-10-20T17:29:17.313787+00:00
---
# Print Store Factory orders on a receipt printer
**Store Factory** is an online ordering solution for hospitality. It connects to Expedy PRINT through **HubRise**: Store Factory sends its orders to HubRise, HubRise forwards them to your cloud printer, and the ticket comes out within seconds.
## What you need
- An Expedy account with an active printer. Not added yet? Follow the guide for your machine, [Expedy XPDY80](/expedy-print/installation/add-an-expedy-xpdy80-cloud-printer-to-your-account), [HSPOS](/expedy-print/installation/add-an-hspos-cloud-printer-to-your-account), [Star Micronics](/expedy-print/installation/add-a-star-micronics-printer-to-your-account) or [Raspberry Pi](/expedy-print/installation/add-a-raspberry-pi-cloud-print-server-to-your-account)
- A [HubRise account](https://manager.hubrise.com/signup), which aggregates your sales channels
- A Store Factory account linked to your HubRise location
## How it works
| Step | What happens |
|---|---|
| 1 | An order is placed on Store Factory |
| 2 | Store Factory pushes it to HubRise |
| 3 | Expedy PRINT receives it and prints a standardised ticket |
A single printer covers every channel connected to the same HubRise location, so you do not need one machine per platform.
## Connect it
The setup happens once, on the HubRise side, and is described step by step in the reference guide:
**[Connect a receipt printer to HubRise](/integrations/hubrise/connecting-a-receipt-printer-to-hubrise)**
Then link your Store Factory account to the same HubRise location. That part is done from the Store Factory back office, or by Store Factory support.
## Receipt settings
Once connected, the printer page in the [Expedy console](https://www.expedy.fr/console/v3/) controls what gets printed:
- **Print order when**, the status that triggers printing, `NEW`, `RECEIVED` or `ACCEPTED`
- **Then change status to**, the automatic status update applied after printing
- **Number of copies**, one ticket for the kitchen, one for the counter or the delivery bag
- The receipt header and footer, logo, company name, address and registration number
All of it is detailed in [Connect a receipt printer to HubRise](/integrations/hubrise/connecting-a-receipt-printer-to-hubrise).
> Depending on the connector or the point-of-sale software you use, this setup may be handled by your partner. Check with them before you start.
## Need help?
- [Browse all integrations](/integrations)
- [Open a support ticket](https://help.expedy.io/support/tickets/new)
---
url: https://docs.expedy.io/en/integrations/obypay/connect-a-receipt-printer-to-obypay
title: Print Obypay orders on a receipt printer
updated_at: 2026-10-20T03:20:07.653503+00:00
---
# Print Obypay orders on a receipt printer
[Obypay](https://www.obypay.com/) is an online ordering solution for hospitality. It connects to Expedy PRINT through **HubRise**: Obypay sends its orders to HubRise, HubRise forwards them to your cloud printer, and the ticket comes out within seconds.
## What you need
- An Expedy account with an active printer. Not added yet? Follow the guide for your machine, [Expedy XPDY80](/expedy-print/installation/add-an-expedy-xpdy80-cloud-printer-to-your-account), [HSPOS](/expedy-print/installation/add-an-hspos-cloud-printer-to-your-account), [Star Micronics](/expedy-print/installation/add-a-star-micronics-printer-to-your-account) or [Raspberry Pi](/expedy-print/installation/add-a-raspberry-pi-cloud-print-server-to-your-account)
- A [HubRise account](https://manager.hubrise.com/signup), which aggregates your sales channels
- A Obypay account linked to your HubRise location
## How it works
| Step | What happens |
|---|---|
| 1 | An order is placed on Obypay |
| 2 | Obypay pushes it to HubRise |
| 3 | Expedy PRINT receives it and prints a standardised ticket |
A single printer covers every channel connected to the same HubRise location, so you do not need one machine per platform.
## Connect it
The setup happens once, on the HubRise side, and is described step by step in the reference guide:
**[Connect a receipt printer to HubRise](/integrations/hubrise/connecting-a-receipt-printer-to-hubrise)**
Then link your Obypay account to the same HubRise location. That part is done from the Obypay back office, or by Obypay support.
## Receipt settings
Once connected, the printer page in the [Expedy console](https://www.expedy.fr/console/v3/) controls what gets printed:
- **Print order when**, the status that triggers printing, `NEW`, `RECEIVED` or `ACCEPTED`
- **Then change status to**, the automatic status update applied after printing
- **Number of copies**, one ticket for the kitchen, one for the counter or the delivery bag
- The receipt header and footer, logo, company name, address and registration number
All of it is detailed in [Connect a receipt printer to HubRise](/integrations/hubrise/connecting-a-receipt-printer-to-hubrise).
> Depending on the connector or the point-of-sale software you use, this setup may be handled by your partner. Check with them before you start.
## Need help?
- [Browse all integrations](/integrations)
- [Open a support ticket](https://help.expedy.io/support/tickets/new)
---
url: https://docs.expedy.io/en/integrations/smood/connect-a-receipt-printer-to-smood
title: Print Smood orders on a receipt printer
updated_at: 2026-10-21T01:01:06.071118+00:00
---
# Print Smood orders on a receipt printer
[Smood](https://www.smood.ch/) is a meal delivery platform. It connects to Expedy PRINT through **HubRise**: Smood sends its orders to HubRise, HubRise forwards them to your cloud printer, and the ticket comes out within seconds.
## What you need
- An Expedy account with an active printer. Not added yet? Follow the guide for your machine, [Expedy XPDY80](/expedy-print/installation/add-an-expedy-xpdy80-cloud-printer-to-your-account), [HSPOS](/expedy-print/installation/add-an-hspos-cloud-printer-to-your-account), [Star Micronics](/expedy-print/installation/add-a-star-micronics-printer-to-your-account) or [Raspberry Pi](/expedy-print/installation/add-a-raspberry-pi-cloud-print-server-to-your-account)
- A [HubRise account](https://manager.hubrise.com/signup), which aggregates your sales channels
- A Smood account linked to your HubRise location
## How it works
| Step | What happens |
|---|---|
| 1 | An order is placed on Smood |
| 2 | Smood pushes it to HubRise |
| 3 | Expedy PRINT receives it and prints a standardised ticket |
A single printer covers every channel connected to the same HubRise location, so you do not need one machine per platform.
## Connect it
The setup happens once, on the HubRise side, and is described step by step in the reference guide:
**[Connect a receipt printer to HubRise](/integrations/hubrise/connecting-a-receipt-printer-to-hubrise)**
Then link your Smood account to the same HubRise location. That part is done from the Smood back office, or by Smood support.
## Receipt settings
Once connected, the printer page in the [Expedy console](https://www.expedy.fr/console/v3/) controls what gets printed:
- **Print order when**, the status that triggers printing, `NEW`, `RECEIVED` or `ACCEPTED`
- **Then change status to**, the automatic status update applied after printing
- **Number of copies**, one ticket for the kitchen, one for the counter or the delivery bag
- The receipt header and footer, logo, company name, address and registration number
All of it is detailed in [Connect a receipt printer to HubRise](/integrations/hubrise/connecting-a-receipt-printer-to-hubrise).
> Depending on the connector or the point-of-sale software you use, this setup may be handled by your partner. Check with them before you start.
## Need help?
- [Browse all integrations](/integrations)
- [Open a support ticket](https://help.expedy.io/support/tickets/new)
---
url: https://docs.expedy.io/en/integrations/bigcommerce/connect-a-receipt-printer-to-bigcommerce
title: Print from BigCommerce with Expedy PRINT
updated_at: 2026-10-23T08:26:03.866644+00:00
---
# Print from BigCommerce with Expedy PRINT
[BigCommerce](https://www.bigcommerce.com/) is an online ordering platform. It reaches Expedy PRINT in two ways: through **Zapier**, with no code, or through the **Expedy REST API**, when you want full control over the ticket.
## What you need
- An Expedy account with an active printer. Not added yet? Follow the guide for your machine, [Expedy XPDY80](/expedy-print/installation/add-an-expedy-xpdy80-cloud-printer-to-your-account), [HSPOS](/expedy-print/installation/add-an-hspos-cloud-printer-to-your-account), [Star Micronics](/expedy-print/installation/add-a-star-micronics-printer-to-your-account) or [Raspberry Pi](/expedy-print/installation/add-a-raspberry-pi-cloud-print-server-to-your-account)
- Your **API SID**, **API TOKEN** and **API Printer UID**, all three on the printer page of the [Expedy console](https://www.expedy.fr/console/v3/), in the **API Keys & UID** card
## Option 1, through Zapier, no code
BigCommerce connects to Zapier, and Zapier ships a ready-made **Expedy Print** action. The recipe is always the same: an event in BigCommerce triggers **Create a Print Job** in Expedy Print, and you map the fields you want on the ticket.
Full walkthrough: **[How to integrate Expedy Print with Zapier](/integrations/zapier/how-to-integrate-expedy-print-with-zapier)**
## Option 2, through the REST API
If BigCommerce can issue an HTTP request, it can drive the printer directly.
```api
POST https://www.expedy.fr/api/v2/printers/{printer_uid}/print
```
Authentication uses an `Authorization` header carrying your `SID:TOKEN`, with no `Bearer` prefix. Parameters and a complete example are in [Create a Print Job](/expedy-print/api-print-v2/create-a-print-job).
## Formatting the ticket
Whichever route you take, the message accepts the Expedy layout tags:
| What you want | Where to look |
|---|---|
| Align, resize or emphasise text | [Text Layout](/expedy-print/receipt-layout/text-layout-tags) |
| Print a logo or an image | [Image and Logo](/expedy-print/receipt-layout/image-and-logo-printing) |
| Print a QR code | [QR Code](/expedy-print/receipt-layout/qr-code) |
| Print a barcode | [EAN13 Barcode](/expedy-print/receipt-layout/ean13-barcode) |
> Depending on the connector or the software you use, this setup may be handled by your partner or your agency. Check with them before you start.
## Need help?
- [Browse all integrations](/integrations)
- [Open a support ticket](https://help.expedy.io/support/tickets/new)
---
url: https://docs.expedy.io/en/integrations/bubble/connect-a-receipt-printer-to-bubble
title: Print from Bubble with Expedy PRINT
updated_at: 2026-10-21T01:12:12.249794+00:00
---
# Print from Bubble with Expedy PRINT
[Bubble](https://bubble.io/) is a no-code app building platform. It reaches Expedy PRINT in two ways: through **Zapier**, with no code, or through the **Expedy REST API**, when you want full control over the ticket.
## What you need
- An Expedy account with an active printer. Not added yet? Follow the guide for your machine, [Expedy XPDY80](/expedy-print/installation/add-an-expedy-xpdy80-cloud-printer-to-your-account), [HSPOS](/expedy-print/installation/add-an-hspos-cloud-printer-to-your-account), [Star Micronics](/expedy-print/installation/add-a-star-micronics-printer-to-your-account) or [Raspberry Pi](/expedy-print/installation/add-a-raspberry-pi-cloud-print-server-to-your-account)
- Your **API SID**, **API TOKEN** and **API Printer UID**, all three on the printer page of the [Expedy console](https://www.expedy.fr/console/v3/), in the **API Keys & UID** card
## Option 1, through Zapier, no code
Bubble connects to Zapier, and Zapier ships a ready-made **Expedy Print** action. The recipe is always the same: an event in Bubble triggers **Create a Print Job** in Expedy Print, and you map the fields you want on the ticket.
Full walkthrough: **[How to integrate Expedy Print with Zapier](/integrations/zapier/how-to-integrate-expedy-print-with-zapier)**
## Option 2, through the REST API
If Bubble can issue an HTTP request, it can drive the printer directly.
```api
POST https://www.expedy.fr/api/v2/printers/{printer_uid}/print
```
Authentication uses an `Authorization` header carrying your `SID:TOKEN`, with no `Bearer` prefix. Parameters and a complete example are in [Create a Print Job](/expedy-print/api-print-v2/create-a-print-job).
## Formatting the ticket
Whichever route you take, the message accepts the Expedy layout tags:
| What you want | Where to look |
|---|---|
| Align, resize or emphasise text | [Text Layout](/expedy-print/receipt-layout/text-layout-tags) |
| Print a logo or an image | [Image and Logo](/expedy-print/receipt-layout/image-and-logo-printing) |
| Print a QR code | [QR Code](/expedy-print/receipt-layout/qr-code) |
| Print a barcode | [EAN13 Barcode](/expedy-print/receipt-layout/ean13-barcode) |
> Depending on the connector or the software you use, this setup may be handled by your partner or your agency. Check with them before you start.
## Need help?
- [Browse all integrations](/integrations)
- [Open a support ticket](https://help.expedy.io/support/tickets/new)
---
url: https://docs.expedy.io/en/integrations/thuisbezorgd/connect-a-receipt-printer-to-thuisbezorgd
title: Print Thuisbezorgd orders on a receipt printer
updated_at: 2026-10-21T02:05:14.541567+00:00
---
# Print Thuisbezorgd orders on a receipt printer
[Thuisbezorgd](https://www.thuisbezorgd.nl/) is a meal delivery platform. It connects to Expedy PRINT through **HubRise**: Thuisbezorgd sends its orders to HubRise, HubRise forwards them to your cloud printer, and the ticket comes out within seconds.
## What you need
- An Expedy account with an active printer. Not added yet? Follow the guide for your machine, [Expedy XPDY80](/expedy-print/installation/add-an-expedy-xpdy80-cloud-printer-to-your-account), [HSPOS](/expedy-print/installation/add-an-hspos-cloud-printer-to-your-account), [Star Micronics](/expedy-print/installation/add-a-star-micronics-printer-to-your-account) or [Raspberry Pi](/expedy-print/installation/add-a-raspberry-pi-cloud-print-server-to-your-account)
- A [HubRise account](https://manager.hubrise.com/signup), which aggregates your sales channels
- A Thuisbezorgd account linked to your HubRise location
## How it works
| Step | What happens |
|---|---|
| 1 | An order is placed on Thuisbezorgd |
| 2 | Thuisbezorgd pushes it to HubRise |
| 3 | Expedy PRINT receives it and prints a standardised ticket |
A single printer covers every channel connected to the same HubRise location, so you do not need one machine per platform.
## Connect it
The setup happens once, on the HubRise side, and is described step by step in the reference guide:
**[Connect a receipt printer to HubRise](/integrations/hubrise/connecting-a-receipt-printer-to-hubrise)**
Then link your Thuisbezorgd account to the same HubRise location. That part is done from the Thuisbezorgd back office, or by Thuisbezorgd support.
## Receipt settings
Once connected, the printer page in the [Expedy console](https://www.expedy.fr/console/v3/) controls what gets printed:
- **Print order when**, the status that triggers printing, `NEW`, `RECEIVED` or `ACCEPTED`
- **Then change status to**, the automatic status update applied after printing
- **Number of copies**, one ticket for the kitchen, one for the counter or the delivery bag
- The receipt header and footer, logo, company name, address and registration number
All of it is detailed in [Connect a receipt printer to HubRise](/integrations/hubrise/connecting-a-receipt-printer-to-hubrise).
> Depending on the connector or the point-of-sale software you use, this setup may be handled by your partner. Check with them before you start.
## Need help?
- [Browse all integrations](/integrations)
- [Open a support ticket](https://help.expedy.io/support/tickets/new)
---
url: https://docs.expedy.io/en/integrations/uber-eats/connect-a-receipt-printer-to-uber-eats
title: Print Uber Eats orders on a receipt printer
updated_at: 2026-10-20T11:14:20.77663+00:00
---
# Print Uber Eats orders on a receipt printer
[Uber Eats](https://www.ubereats.com/) is a meal delivery platform. It connects to Expedy PRINT through **HubRise**: Uber Eats sends its orders to HubRise, HubRise forwards them to your cloud printer, and the ticket comes out within seconds.
## What you need
- An Expedy account with an active printer. Not added yet? Follow the guide for your machine, [Expedy XPDY80](/expedy-print/installation/add-an-expedy-xpdy80-cloud-printer-to-your-account), [HSPOS](/expedy-print/installation/add-an-hspos-cloud-printer-to-your-account), [Star Micronics](/expedy-print/installation/add-a-star-micronics-printer-to-your-account) or [Raspberry Pi](/expedy-print/installation/add-a-raspberry-pi-cloud-print-server-to-your-account)
- A [HubRise account](https://manager.hubrise.com/signup), which aggregates your sales channels
- A Uber Eats account linked to your HubRise location
## How it works
| Step | What happens |
|---|---|
| 1 | An order is placed on Uber Eats |
| 2 | Uber Eats pushes it to HubRise |
| 3 | Expedy PRINT receives it and prints a standardised ticket |
A single printer covers every channel connected to the same HubRise location, so you do not need one machine per platform.
## Connect it
The setup happens once, on the HubRise side, and is described step by step in the reference guide:
**[Connect a receipt printer to HubRise](/integrations/hubrise/connecting-a-receipt-printer-to-hubrise)**
Then link your Uber Eats account to the same HubRise location. That part is done from the Uber Eats back office, or by Uber Eats support.
## Receipt settings
Once connected, the printer page in the [Expedy console](https://www.expedy.fr/console/v3/) controls what gets printed:
- **Print order when**, the status that triggers printing, `NEW`, `RECEIVED` or `ACCEPTED`
- **Then change status to**, the automatic status update applied after printing
- **Number of copies**, one ticket for the kitchen, one for the counter or the delivery bag
- The receipt header and footer, logo, company name, address and registration number
All of it is detailed in [Connect a receipt printer to HubRise](/integrations/hubrise/connecting-a-receipt-printer-to-hubrise).
> Depending on the connector or the point-of-sale software you use, this setup may be handled by your partner. Check with them before you start.
## Need help?
- [Browse all integrations](/integrations)
- [Open a support ticket](https://help.expedy.io/support/tickets/new)
---
url: https://docs.expedy.io/en/integrations/gonnaorder/connect-a-receipt-printer-to-gonnaorder
title: Print GonnaOrder orders on a receipt printer
updated_at: 2026-10-20T11:55:18.74047+00:00
---
# Print GonnaOrder orders on a receipt printer
[GonnaOrder](https://www.gonnaorder.com/) is an online ordering solution for hospitality. It connects to Expedy PRINT through **HubRise**: GonnaOrder sends its orders to HubRise, HubRise forwards them to your cloud printer, and the ticket comes out within seconds.
## What you need
- An Expedy account with an active printer. Not added yet? Follow the guide for your machine, [Expedy XPDY80](/expedy-print/installation/add-an-expedy-xpdy80-cloud-printer-to-your-account), [HSPOS](/expedy-print/installation/add-an-hspos-cloud-printer-to-your-account), [Star Micronics](/expedy-print/installation/add-a-star-micronics-printer-to-your-account) or [Raspberry Pi](/expedy-print/installation/add-a-raspberry-pi-cloud-print-server-to-your-account)
- A [HubRise account](https://manager.hubrise.com/signup), which aggregates your sales channels
- A GonnaOrder account linked to your HubRise location
## How it works
| Step | What happens |
|---|---|
| 1 | An order is placed on GonnaOrder |
| 2 | GonnaOrder pushes it to HubRise |
| 3 | Expedy PRINT receives it and prints a standardised ticket |
A single printer covers every channel connected to the same HubRise location, so you do not need one machine per platform.
## Connect it
The setup happens once, on the HubRise side, and is described step by step in the reference guide:
**[Connect a receipt printer to HubRise](/integrations/hubrise/connecting-a-receipt-printer-to-hubrise)**
Then link your GonnaOrder account to the same HubRise location. That part is done from the GonnaOrder back office, or by GonnaOrder support.
## Receipt settings
Once connected, the printer page in the [Expedy console](https://www.expedy.fr/console/v3/) controls what gets printed:
- **Print order when**, the status that triggers printing, `NEW`, `RECEIVED` or `ACCEPTED`
- **Then change status to**, the automatic status update applied after printing
- **Number of copies**, one ticket for the kitchen, one for the counter or the delivery bag
- The receipt header and footer, logo, company name, address and registration number
All of it is detailed in [Connect a receipt printer to HubRise](/integrations/hubrise/connecting-a-receipt-printer-to-hubrise).
> Depending on the connector or the point-of-sale software you use, this setup may be handled by your partner. Check with them before you start.
## Need help?
- [Browse all integrations](/integrations)
- [Open a support ticket](https://help.expedy.io/support/tickets/new)
---
url: https://docs.expedy.io/en/integrations/orderlemon/connect-a-receipt-printer-to-orderlemon
title: Receipt printing with OrderLemon
updated_at: 2026-10-22T22:07:19.171393+00:00
---
# Receipt printing with OrderLemon
[OrderLemon](https://orderlemon.com/) is an online ordering solution for hospitality. With OrderLemon, **the receipt printer is installed and configured by OrderLemon**, not from your Expedy console. Get in touch with them to have your printer activated.
## Who does what
| Party | Responsibility |
|---|---|
| Expedy | Supplies the cloud printer, its connectivity (Ethernet, Wi-Fi or 4G SIM) and the console where you follow your print jobs |
| OrderLemon | Pairs the printer with your account, sets the receipt layout and switches the service on |
## Getting your printer activated
1. Order your machine, or use the one you already have
2. Contact OrderLemon and tell them you want to print your orders on an Expedy cloud printer
3. OrderLemon handles the pairing and the receipt layout on their side
4. Once activated, orders print automatically, with nothing left to do on your part
> If your printer already appears in your Expedy account, give OrderLemon its **API Printer UID**, shown on the printer page in the **API Keys & UID** card of the [Expedy console](https://www.expedy.fr/console/v3/).
## Once it is live
From the [Expedy console](https://www.expedy.fr/console/v3/) you can, at any time:
- Check that the machine is reachable, with **Check Status** on the printer page
- Review every job in **Print Jobs History**
- Follow your monthly usage and change plan, the **FREE** plan being capped at 50 print requests per month
Anything about the order content or the ticket layout goes through OrderLemon, since the connection lives on their side.
## Need help?
- [Add your printer to your Expedy account](/expedy-print/installation/add-an-expedy-xpdy80-cloud-printer-to-your-account)
- [Browse all integrations](/integrations)
- Expedy hardware or account question: [open a support ticket](https://help.expedy.io/support/tickets/new)
---
url: https://docs.expedy.io/en/integrations/shipmondo/connect-a-receipt-printer-to-shipmondo
title: Print your Shipmondo shipping labels automatically
updated_at: 2026-10-23T00:34:10.956184+00:00
---
# Print your Shipmondo shipping labels automatically
[Shipmondo](https://www.shipmondo.com/) generates your carrier shipping labels. Through **Zapier**, the label PDF goes straight to your label printer the moment Shipmondo creates it, so nobody has to download it and print it by hand.
> An Expedy cloud receipt printer, XPDY80, HSPOS or Star Micronics, **cannot print a carrier label**: it is a receipt printer. Carrier labels always go through a **Raspberry Pi** or a **Cloud Print Box USB adapter** driving a label printer.
## What you need
- An Expedy account with an active **Raspberry Pi print server** or **Cloud Print Box USB adapter**. Not set up yet? See [Add a Raspberry Pi print server to your account](/expedy-print/installation/add-a-raspberry-pi-cloud-print-server-to-your-account)
- **Your own label printer**, connected by USB to that Raspberry Pi or adapter, with its port set to `LABEL`
- A Shipmondo account and a [Zapier](https://zapier.com/) account
- Your **API SID**, **API TOKEN** and **API Printer UID**, on the printer page of the [Expedy console](https://www.expedy.fr/console/v3/), in the **API Keys & UID** card
## Why a label printer
A carrier label is a PDF in a fixed format, most often 100 x 150 mm. A receipt printer cannot render it at the right size, so the job goes to a label printer driven by a Raspberry Pi or the Cloud Print Box.
On the printer page, run a **USB scan** and set the port that carries the label printer to `LABEL`, not `ESC/POS`. See [Installation on Raspberry Pi](/usb-cloud-printer-adapter/rpi-installation/installation-on-raspberry-pi).
## Build the Zap
1. In Zapier, create a Zap and pick **Shipmondo** as the trigger app
2. Choose the event that fires when a label is created
3. Add **Expedy Print** as the action, then **Create a Print Job**
4. Connect your Expedy account with your **Expedy SID** and your **Expedy TOKEN**
5. Enter the **Printer UID** of the label printer
6. In the message field, map the label PDF URL returned by Shipmondo
Step by step on the Zapier side: [How to integrate Expedy Print with Zapier](/integrations/zapier/how-to-integrate-expedy-print-with-zapier)
## What to send
A label printer takes the PDF URL **on its own, with no tag**:
```text
https://example.com/label.pdf
```
On an ESC/POS receipt printer the same URL has to be wrapped in the `` tag instead. Both forms are detailed in [PDF printing](/expedy-print/receipt-layout/print-pdf).
## Test it
Create a test label in Shipmondo and check that it comes out at the right size. If nothing prints:
- check the **Printer UID**, it must be the label printer, not the receipt printer
- check that the USB port is in `LABEL` mode after the scan
- check that the PDF URL is reachable without authentication, Expedy fetches it from its own servers
> Depending on the connector or the software you use, this setup may be handled by your partner or your agency. Check with them before you start.
## Need help?
- [Browse all integrations](/integrations)
- [Open a support ticket](https://help.expedy.io/support/tickets/new)
---
url: https://docs.expedy.io/en/integrations/acuity-scheduling/connect-a-receipt-printer-to-acuity-scheduling
title: Print from Acuity Scheduling with Expedy PRINT
updated_at: 2026-10-21T16:04:32.881821+00:00
---
# Print from Acuity Scheduling with Expedy PRINT
[Acuity Scheduling](https://acuityscheduling.com/) is an online booking tool. It reaches Expedy PRINT in two ways: through **Zapier**, with no code, or through the **Expedy REST API**, when you want full control over the ticket.
## What you need
- An Expedy account with an active printer. Not added yet? Follow the guide for your machine, [Expedy XPDY80](/expedy-print/installation/add-an-expedy-xpdy80-cloud-printer-to-your-account), [HSPOS](/expedy-print/installation/add-an-hspos-cloud-printer-to-your-account), [Star Micronics](/expedy-print/installation/add-a-star-micronics-printer-to-your-account) or [Raspberry Pi](/expedy-print/installation/add-a-raspberry-pi-cloud-print-server-to-your-account)
- Your **API SID**, **API TOKEN** and **API Printer UID**, all three on the printer page of the [Expedy console](https://www.expedy.fr/console/v3/), in the **API Keys & UID** card
## Option 1, through Zapier, no code
Acuity Scheduling connects to Zapier, and Zapier ships a ready-made **Expedy Print** action. The recipe is always the same: an event in Acuity Scheduling triggers **Create a Print Job** in Expedy Print, and you map the fields you want on the ticket.
Full walkthrough: **[How to integrate Expedy Print with Zapier](/integrations/zapier/how-to-integrate-expedy-print-with-zapier)**
## Option 2, through the REST API
If Acuity Scheduling can issue an HTTP request, it can drive the printer directly.
```api
POST https://www.expedy.fr/api/v2/printers/{printer_uid}/print
```
Authentication uses an `Authorization` header carrying your `SID:TOKEN`, with no `Bearer` prefix. Parameters and a complete example are in [Create a Print Job](/expedy-print/api-print-v2/create-a-print-job).
## Formatting the ticket
Whichever route you take, the message accepts the Expedy layout tags:
| What you want | Where to look |
|---|---|
| Align, resize or emphasise text | [Text Layout](/expedy-print/receipt-layout/text-layout-tags) |
| Print a logo or an image | [Image and Logo](/expedy-print/receipt-layout/image-and-logo-printing) |
| Print a QR code | [QR Code](/expedy-print/receipt-layout/qr-code) |
| Print a barcode | [EAN13 Barcode](/expedy-print/receipt-layout/ean13-barcode) |
> Depending on the connector or the software you use, this setup may be handled by your partner or your agency. Check with them before you start.
## Need help?
- [Browse all integrations](/integrations)
- [Open a support ticket](https://help.expedy.io/support/tickets/new)
---
url: https://docs.expedy.io/en/integrations/eventbrite/connect-a-receipt-printer-to-eventbrite
title: Print from Eventbrite with Expedy PRINT
updated_at: 2026-10-21T16:57:08.126075+00:00
---
# Print from Eventbrite with Expedy PRINT
[Eventbrite](https://www.eventbrite.com/) is an event ticketing platform. It reaches Expedy PRINT in two ways: through **Zapier**, with no code, or through the **Expedy REST API**, when you want full control over the ticket.
## What you need
- An Expedy account with an active printer. Not added yet? Follow the guide for your machine, [Expedy XPDY80](/expedy-print/installation/add-an-expedy-xpdy80-cloud-printer-to-your-account), [HSPOS](/expedy-print/installation/add-an-hspos-cloud-printer-to-your-account), [Star Micronics](/expedy-print/installation/add-a-star-micronics-printer-to-your-account) or [Raspberry Pi](/expedy-print/installation/add-a-raspberry-pi-cloud-print-server-to-your-account)
- Your **API SID**, **API TOKEN** and **API Printer UID**, all three on the printer page of the [Expedy console](https://www.expedy.fr/console/v3/), in the **API Keys & UID** card
## Option 1, through Zapier, no code
Eventbrite connects to Zapier, and Zapier ships a ready-made **Expedy Print** action. The recipe is always the same: an event in Eventbrite triggers **Create a Print Job** in Expedy Print, and you map the fields you want on the ticket.
Full walkthrough: **[How to integrate Expedy Print with Zapier](/integrations/zapier/how-to-integrate-expedy-print-with-zapier)**
## Option 2, through the REST API
If Eventbrite can issue an HTTP request, it can drive the printer directly.
```api
POST https://www.expedy.fr/api/v2/printers/{printer_uid}/print
```
Authentication uses an `Authorization` header carrying your `SID:TOKEN`, with no `Bearer` prefix. Parameters and a complete example are in [Create a Print Job](/expedy-print/api-print-v2/create-a-print-job).
## Formatting the ticket
Whichever route you take, the message accepts the Expedy layout tags:
| What you want | Where to look |
|---|---|
| Align, resize or emphasise text | [Text Layout](/expedy-print/receipt-layout/text-layout-tags) |
| Print a logo or an image | [Image and Logo](/expedy-print/receipt-layout/image-and-logo-printing) |
| Print a QR code | [QR Code](/expedy-print/receipt-layout/qr-code) |
| Print a barcode | [EAN13 Barcode](/expedy-print/receipt-layout/ean13-barcode) |
> Depending on the connector or the software you use, this setup may be handled by your partner or your agency. Check with them before you start.
## Need help?
- [Browse all integrations](/integrations)
- [Open a support ticket](https://help.expedy.io/support/tickets/new)
---
url: https://docs.expedy.io/en/integrations/pipedrive/connect-a-receipt-printer-to-pipedrive
title: Print from Pipedrive with Expedy PRINT
updated_at: 2026-10-20T14:33:23.702326+00:00
---
# Print from Pipedrive with Expedy PRINT
[Pipedrive](https://www.pipedrive.com/) is a CRM. It reaches Expedy PRINT in two ways: through **Zapier**, with no code, or through the **Expedy REST API**, when you want full control over the ticket.
## What you need
- An Expedy account with an active printer. Not added yet? Follow the guide for your machine, [Expedy XPDY80](/expedy-print/installation/add-an-expedy-xpdy80-cloud-printer-to-your-account), [HSPOS](/expedy-print/installation/add-an-hspos-cloud-printer-to-your-account), [Star Micronics](/expedy-print/installation/add-a-star-micronics-printer-to-your-account) or [Raspberry Pi](/expedy-print/installation/add-a-raspberry-pi-cloud-print-server-to-your-account)
- Your **API SID**, **API TOKEN** and **API Printer UID**, all three on the printer page of the [Expedy console](https://www.expedy.fr/console/v3/), in the **API Keys & UID** card
## Option 1, through Zapier, no code
Pipedrive connects to Zapier, and Zapier ships a ready-made **Expedy Print** action. The recipe is always the same: an event in Pipedrive triggers **Create a Print Job** in Expedy Print, and you map the fields you want on the ticket.
Full walkthrough: **[How to integrate Expedy Print with Zapier](/integrations/zapier/how-to-integrate-expedy-print-with-zapier)**
## Option 2, through the REST API
If Pipedrive can issue an HTTP request, it can drive the printer directly.
```api
POST https://www.expedy.fr/api/v2/printers/{printer_uid}/print
```
Authentication uses an `Authorization` header carrying your `SID:TOKEN`, with no `Bearer` prefix. Parameters and a complete example are in [Create a Print Job](/expedy-print/api-print-v2/create-a-print-job).
## Formatting the ticket
Whichever route you take, the message accepts the Expedy layout tags:
| What you want | Where to look |
|---|---|
| Align, resize or emphasise text | [Text Layout](/expedy-print/receipt-layout/text-layout-tags) |
| Print a logo or an image | [Image and Logo](/expedy-print/receipt-layout/image-and-logo-printing) |
| Print a QR code | [QR Code](/expedy-print/receipt-layout/qr-code) |
| Print a barcode | [EAN13 Barcode](/expedy-print/receipt-layout/ean13-barcode) |
> Depending on the connector or the software you use, this setup may be handled by your partner or your agency. Check with them before you start.
## Need help?
- [Browse all integrations](/integrations)
- [Open a support ticket](https://help.expedy.io/support/tickets/new)
---
url: https://docs.expedy.io/en/integrations/restaurant-internet/connect-a-receipt-printer-to-restaurant-internet
title: Print Restaurant-internet orders on a receipt printer
updated_at: 2026-10-17T08:04:57.372146+00:00
---
# Print Restaurant-internet orders on a receipt printer
**Restaurant-internet** is an online ordering solution for hospitality. It connects to Expedy PRINT through **HubRise**: Restaurant-internet sends its orders to HubRise, HubRise forwards them to your cloud printer, and the ticket comes out within seconds.
## What you need
- An Expedy account with an active printer. Not added yet? Follow the guide for your machine, [Expedy XPDY80](/expedy-print/installation/add-an-expedy-xpdy80-cloud-printer-to-your-account), [HSPOS](/expedy-print/installation/add-an-hspos-cloud-printer-to-your-account), [Star Micronics](/expedy-print/installation/add-a-star-micronics-printer-to-your-account) or [Raspberry Pi](/expedy-print/installation/add-a-raspberry-pi-cloud-print-server-to-your-account)
- A [HubRise account](https://manager.hubrise.com/signup), which aggregates your sales channels
- A Restaurant-internet account linked to your HubRise location
## How it works
| Step | What happens |
|---|---|
| 1 | An order is placed on Restaurant-internet |
| 2 | Restaurant-internet pushes it to HubRise |
| 3 | Expedy PRINT receives it and prints a standardised ticket |
A single printer covers every channel connected to the same HubRise location, so you do not need one machine per platform.
## Connect it
The setup happens once, on the HubRise side, and is described step by step in the reference guide:
**[Connect a receipt printer to HubRise](/integrations/hubrise/connecting-a-receipt-printer-to-hubrise)**
Then link your Restaurant-internet account to the same HubRise location. That part is done from the Restaurant-internet back office, or by Restaurant-internet support.
## Receipt settings
Once connected, the printer page in the [Expedy console](https://www.expedy.fr/console/v3/) controls what gets printed:
- **Print order when**, the status that triggers printing, `NEW`, `RECEIVED` or `ACCEPTED`
- **Then change status to**, the automatic status update applied after printing
- **Number of copies**, one ticket for the kitchen, one for the counter or the delivery bag
- The receipt header and footer, logo, company name, address and registration number
All of it is detailed in [Connect a receipt printer to HubRise](/integrations/hubrise/connecting-a-receipt-printer-to-hubrise).
> Depending on the connector or the point-of-sale software you use, this setup may be handled by your partner. Check with them before you start.
## Need help?
- [Browse all integrations](/integrations)
- [Open a support ticket](https://help.expedy.io/support/tickets/new)
---
url: https://docs.expedy.io/en/integrations/shopline/connect-a-receipt-printer-to-shopline
title: Print from SHOPLINE with Expedy PRINT
updated_at: 2026-10-22T19:24:00.908277+00:00
---
# Print from SHOPLINE with Expedy PRINT
**SHOPLINE** is an eCommerce platform. It reaches Expedy PRINT in two ways: through **Zapier**, with no code, or through the **Expedy REST API**, when you want full control over the ticket.
## What you need
- An Expedy account with an active printer. Not added yet? Follow the guide for your machine, [Expedy XPDY80](/expedy-print/installation/add-an-expedy-xpdy80-cloud-printer-to-your-account), [HSPOS](/expedy-print/installation/add-an-hspos-cloud-printer-to-your-account), [Star Micronics](/expedy-print/installation/add-a-star-micronics-printer-to-your-account) or [Raspberry Pi](/expedy-print/installation/add-a-raspberry-pi-cloud-print-server-to-your-account)
- Your **API SID**, **API TOKEN** and **API Printer UID**, all three on the printer page of the [Expedy console](https://www.expedy.fr/console/v3/), in the **API Keys & UID** card
## Option 1, through Zapier, no code
SHOPLINE connects to Zapier, and Zapier ships a ready-made **Expedy Print** action. The recipe is always the same: an event in SHOPLINE triggers **Create a Print Job** in Expedy Print, and you map the fields you want on the ticket.
Full walkthrough: **[How to integrate Expedy Print with Zapier](/integrations/zapier/how-to-integrate-expedy-print-with-zapier)**
## Option 2, through the REST API
If SHOPLINE can issue an HTTP request, it can drive the printer directly.
```api
POST https://www.expedy.fr/api/v2/printers/{printer_uid}/print
```
Authentication uses an `Authorization` header carrying your `SID:TOKEN`, with no `Bearer` prefix. Parameters and a complete example are in [Create a Print Job](/expedy-print/api-print-v2/create-a-print-job).
## Formatting the ticket
Whichever route you take, the message accepts the Expedy layout tags:
| What you want | Where to look |
|---|---|
| Align, resize or emphasise text | [Text Layout](/expedy-print/receipt-layout/text-layout-tags) |
| Print a logo or an image | [Image and Logo](/expedy-print/receipt-layout/image-and-logo-printing) |
| Print a QR code | [QR Code](/expedy-print/receipt-layout/qr-code) |
| Print a barcode | [EAN13 Barcode](/expedy-print/receipt-layout/ean13-barcode) |
> Depending on the connector or the software you use, this setup may be handled by your partner or your agency. Check with them before you start.
## Need help?
- [Browse all integrations](/integrations)
- [Open a support ticket](https://help.expedy.io/support/tickets/new)
---
url: https://docs.expedy.io/en/integrations/eddress/connect-a-receipt-printer-to-eddress
title: Print eddress orders on a receipt printer
updated_at: 2026-10-19T21:33:57.089554+00:00
---
# Print eddress orders on a receipt printer
[eddress](https://eddress.co/) is an online ordering solution for hospitality. It connects to Expedy PRINT through **HubRise**: eddress sends its orders to HubRise, HubRise forwards them to your cloud printer, and the ticket comes out within seconds.
## What you need
- An Expedy account with an active printer. Not added yet? Follow the guide for your machine, [Expedy XPDY80](/expedy-print/installation/add-an-expedy-xpdy80-cloud-printer-to-your-account), [HSPOS](/expedy-print/installation/add-an-hspos-cloud-printer-to-your-account), [Star Micronics](/expedy-print/installation/add-a-star-micronics-printer-to-your-account) or [Raspberry Pi](/expedy-print/installation/add-a-raspberry-pi-cloud-print-server-to-your-account)
- A [HubRise account](https://manager.hubrise.com/signup), which aggregates your sales channels
- A eddress account linked to your HubRise location
## How it works
| Step | What happens |
|---|---|
| 1 | An order is placed on eddress |
| 2 | eddress pushes it to HubRise |
| 3 | Expedy PRINT receives it and prints a standardised ticket |
A single printer covers every channel connected to the same HubRise location, so you do not need one machine per platform.
## Connect it
The setup happens once, on the HubRise side, and is described step by step in the reference guide:
**[Connect a receipt printer to HubRise](/integrations/hubrise/connecting-a-receipt-printer-to-hubrise)**
Then link your eddress account to the same HubRise location. That part is done from the eddress back office, or by eddress support.
## Receipt settings
Once connected, the printer page in the [Expedy console](https://www.expedy.fr/console/v3/) controls what gets printed:
- **Print order when**, the status that triggers printing, `NEW`, `RECEIVED` or `ACCEPTED`
- **Then change status to**, the automatic status update applied after printing
- **Number of copies**, one ticket for the kitchen, one for the counter or the delivery bag
- The receipt header and footer, logo, company name, address and registration number
All of it is detailed in [Connect a receipt printer to HubRise](/integrations/hubrise/connecting-a-receipt-printer-to-hubrise).
> Depending on the connector or the point-of-sale software you use, this setup may be handled by your partner. Check with them before you start.
## Need help?
- [Browse all integrations](/integrations)
- [Open a support ticket](https://help.expedy.io/support/tickets/new)
---
url: https://docs.expedy.io/en/integrations/doordash/connect-a-receipt-printer-to-doordash
title: Print DoorDash orders on a receipt printer
updated_at: 2026-10-21T19:40:10.317096+00:00
---
# Print DoorDash orders on a receipt printer
[DoorDash](https://www.doordash.com/) is a meal delivery platform. It connects to Expedy PRINT through **HubRise**: DoorDash sends its orders to HubRise, HubRise forwards them to your cloud printer, and the ticket comes out within seconds.
## What you need
- An Expedy account with an active printer. Not added yet? Follow the guide for your machine, [Expedy XPDY80](/expedy-print/installation/add-an-expedy-xpdy80-cloud-printer-to-your-account), [HSPOS](/expedy-print/installation/add-an-hspos-cloud-printer-to-your-account), [Star Micronics](/expedy-print/installation/add-a-star-micronics-printer-to-your-account) or [Raspberry Pi](/expedy-print/installation/add-a-raspberry-pi-cloud-print-server-to-your-account)
- A [HubRise account](https://manager.hubrise.com/signup), which aggregates your sales channels
- A DoorDash account linked to your HubRise location
## How it works
| Step | What happens |
|---|---|
| 1 | An order is placed on DoorDash |
| 2 | DoorDash pushes it to HubRise |
| 3 | Expedy PRINT receives it and prints a standardised ticket |
A single printer covers every channel connected to the same HubRise location, so you do not need one machine per platform.
## Connect it
The setup happens once, on the HubRise side, and is described step by step in the reference guide:
**[Connect a receipt printer to HubRise](/integrations/hubrise/connecting-a-receipt-printer-to-hubrise)**
Then link your DoorDash account to the same HubRise location. That part is done from the DoorDash back office, or by DoorDash support.
## Receipt settings
Once connected, the printer page in the [Expedy console](https://www.expedy.fr/console/v3/) controls what gets printed:
- **Print order when**, the status that triggers printing, `NEW`, `RECEIVED` or `ACCEPTED`
- **Then change status to**, the automatic status update applied after printing
- **Number of copies**, one ticket for the kitchen, one for the counter or the delivery bag
- The receipt header and footer, logo, company name, address and registration number
All of it is detailed in [Connect a receipt printer to HubRise](/integrations/hubrise/connecting-a-receipt-printer-to-hubrise).
> Depending on the connector or the point-of-sale software you use, this setup may be handled by your partner. Check with them before you start.
## Need help?
- [Browse all integrations](/integrations)
- [Open a support ticket](https://help.expedy.io/support/tickets/new)
---
url: https://docs.expedy.io/en/integrations/deliveroo/connect-a-receipt-printer-to-deliveroo
title: Print Deliveroo orders on a receipt printer
updated_at: 2026-10-22T01:29:22.051637+00:00
---
# Print Deliveroo orders on a receipt printer
[Deliveroo](https://deliveroo.com/) is a meal delivery platform. It connects to Expedy PRINT through **HubRise**: Deliveroo sends its orders to HubRise, HubRise forwards them to your cloud printer, and the ticket comes out within seconds.
## What you need
- An Expedy account with an active printer. Not added yet? Follow the guide for your machine, [Expedy XPDY80](/expedy-print/installation/add-an-expedy-xpdy80-cloud-printer-to-your-account), [HSPOS](/expedy-print/installation/add-an-hspos-cloud-printer-to-your-account), [Star Micronics](/expedy-print/installation/add-a-star-micronics-printer-to-your-account) or [Raspberry Pi](/expedy-print/installation/add-a-raspberry-pi-cloud-print-server-to-your-account)
- A [HubRise account](https://manager.hubrise.com/signup), which aggregates your sales channels
- A Deliveroo account linked to your HubRise location
## How it works
| Step | What happens |
|---|---|
| 1 | An order is placed on Deliveroo |
| 2 | Deliveroo pushes it to HubRise |
| 3 | Expedy PRINT receives it and prints a standardised ticket |
A single printer covers every channel connected to the same HubRise location, so you do not need one machine per platform.
## Connect it
The setup happens once, on the HubRise side, and is described step by step in the reference guide:
**[Connect a receipt printer to HubRise](/integrations/hubrise/connecting-a-receipt-printer-to-hubrise)**
Then link your Deliveroo account to the same HubRise location. That part is done from the Deliveroo back office, or by Deliveroo support.
## Receipt settings
Once connected, the printer page in the [Expedy console](https://www.expedy.fr/console/v3/) controls what gets printed:
- **Print order when**, the status that triggers printing, `NEW`, `RECEIVED` or `ACCEPTED`
- **Then change status to**, the automatic status update applied after printing
- **Number of copies**, one ticket for the kitchen, one for the counter or the delivery bag
- The receipt header and footer, logo, company name, address and registration number
All of it is detailed in [Connect a receipt printer to HubRise](/integrations/hubrise/connecting-a-receipt-printer-to-hubrise).
> Depending on the connector or the point-of-sale software you use, this setup may be handled by your partner. Check with them before you start.
## Need help?
- [Browse all integrations](/integrations)
- [Open a support ticket](https://help.expedy.io/support/tickets/new)
---
url: https://docs.expedy.io/en/integrations/app4/connect-a-receipt-printer-to-app4
title: Print App4 orders on a receipt printer
updated_at: 2026-10-21T22:47:39.06307+00:00
---
# Print App4 orders on a receipt printer
[App4](https://www.app4.co.uk/) is an online ordering solution for hospitality. It connects to Expedy PRINT through **HubRise**: App4 sends its orders to HubRise, HubRise forwards them to your cloud printer, and the ticket comes out within seconds.
## What you need
- An Expedy account with an active printer. Not added yet? Follow the guide for your machine, [Expedy XPDY80](/expedy-print/installation/add-an-expedy-xpdy80-cloud-printer-to-your-account), [HSPOS](/expedy-print/installation/add-an-hspos-cloud-printer-to-your-account), [Star Micronics](/expedy-print/installation/add-a-star-micronics-printer-to-your-account) or [Raspberry Pi](/expedy-print/installation/add-a-raspberry-pi-cloud-print-server-to-your-account)
- A [HubRise account](https://manager.hubrise.com/signup), which aggregates your sales channels
- A App4 account linked to your HubRise location
## How it works
| Step | What happens |
|---|---|
| 1 | An order is placed on App4 |
| 2 | App4 pushes it to HubRise |
| 3 | Expedy PRINT receives it and prints a standardised ticket |
A single printer covers every channel connected to the same HubRise location, so you do not need one machine per platform.
## Connect it
The setup happens once, on the HubRise side, and is described step by step in the reference guide:
**[Connect a receipt printer to HubRise](/integrations/hubrise/connecting-a-receipt-printer-to-hubrise)**
Then link your App4 account to the same HubRise location. That part is done from the App4 back office, or by App4 support.
## Receipt settings
Once connected, the printer page in the [Expedy console](https://www.expedy.fr/console/v3/) controls what gets printed:
- **Print order when**, the status that triggers printing, `NEW`, `RECEIVED` or `ACCEPTED`
- **Then change status to**, the automatic status update applied after printing
- **Number of copies**, one ticket for the kitchen, one for the counter or the delivery bag
- The receipt header and footer, logo, company name, address and registration number
All of it is detailed in [Connect a receipt printer to HubRise](/integrations/hubrise/connecting-a-receipt-printer-to-hubrise).
> Depending on the connector or the point-of-sale software you use, this setup may be handled by your partner. Check with them before you start.
## Need help?
- [Browse all integrations](/integrations)
- [Open a support ticket](https://help.expedy.io/support/tickets/new)
---
url: https://docs.expedy.io/en/integrations/n8n/connect-a-receipt-printer-to-n8n
title: Print from n8n with Expedy PRINT
updated_at: 2026-10-13T08:18:32.27594+00:00
---
# Print from n8n with Expedy PRINT
[n8n](https://n8n.io/) is an automation platform. It reaches Expedy PRINT in two ways: through **Zapier**, with no code, or through the **Expedy REST API**, when you want full control over the ticket.
## What you need
- An Expedy account with an active printer. Not added yet? Follow the guide for your machine, [Expedy XPDY80](/expedy-print/installation/add-an-expedy-xpdy80-cloud-printer-to-your-account), [HSPOS](/expedy-print/installation/add-an-hspos-cloud-printer-to-your-account), [Star Micronics](/expedy-print/installation/add-a-star-micronics-printer-to-your-account) or [Raspberry Pi](/expedy-print/installation/add-a-raspberry-pi-cloud-print-server-to-your-account)
- Your **API SID**, **API TOKEN** and **API Printer UID**, all three on the printer page of the [Expedy console](https://www.expedy.fr/console/v3/), in the **API Keys & UID** card
## Option 1, through Zapier, no code
n8n connects to Zapier, and Zapier ships a ready-made **Expedy Print** action. The recipe is always the same: an event in n8n triggers **Create a Print Job** in Expedy Print, and you map the fields you want on the ticket.
Full walkthrough: **[How to integrate Expedy Print with Zapier](/integrations/zapier/how-to-integrate-expedy-print-with-zapier)**
## Option 2, through the REST API
If n8n can issue an HTTP request, it can drive the printer directly.
```api
POST https://www.expedy.fr/api/v2/printers/{printer_uid}/print
```
Authentication uses an `Authorization` header carrying your `SID:TOKEN`, with no `Bearer` prefix. Parameters and a complete example are in [Create a Print Job](/expedy-print/api-print-v2/create-a-print-job).
## Formatting the ticket
Whichever route you take, the message accepts the Expedy layout tags:
| What you want | Where to look |
|---|---|
| Align, resize or emphasise text | [Text Layout](/expedy-print/receipt-layout/text-layout-tags) |
| Print a logo or an image | [Image and Logo](/expedy-print/receipt-layout/image-and-logo-printing) |
| Print a QR code | [QR Code](/expedy-print/receipt-layout/qr-code) |
| Print a barcode | [EAN13 Barcode](/expedy-print/receipt-layout/ean13-barcode) |
> Depending on the connector or the software you use, this setup may be handled by your partner or your agency. Check with them before you start.
## Need help?
- [Browse all integrations](/integrations)
- [Open a support ticket](https://help.expedy.io/support/tickets/new)
---
url: https://docs.expedy.io/en/integrations/pipedream/connect-a-receipt-printer-to-pipedream
title: Print from Pipedream with Expedy PRINT
updated_at: 2026-10-18T15:44:50.876372+00:00
---
# Print from Pipedream with Expedy PRINT
[Pipedream](https://pipedream.com/) is an automation platform. It reaches Expedy PRINT in two ways: through **Zapier**, with no code, or through the **Expedy REST API**, when you want full control over the ticket.
## What you need
- An Expedy account with an active printer. Not added yet? Follow the guide for your machine, [Expedy XPDY80](/expedy-print/installation/add-an-expedy-xpdy80-cloud-printer-to-your-account), [HSPOS](/expedy-print/installation/add-an-hspos-cloud-printer-to-your-account), [Star Micronics](/expedy-print/installation/add-a-star-micronics-printer-to-your-account) or [Raspberry Pi](/expedy-print/installation/add-a-raspberry-pi-cloud-print-server-to-your-account)
- Your **API SID**, **API TOKEN** and **API Printer UID**, all three on the printer page of the [Expedy console](https://www.expedy.fr/console/v3/), in the **API Keys & UID** card
## Option 1, through Zapier, no code
Pipedream connects to Zapier, and Zapier ships a ready-made **Expedy Print** action. The recipe is always the same: an event in Pipedream triggers **Create a Print Job** in Expedy Print, and you map the fields you want on the ticket.
Full walkthrough: **[How to integrate Expedy Print with Zapier](/integrations/zapier/how-to-integrate-expedy-print-with-zapier)**
## Option 2, through the REST API
If Pipedream can issue an HTTP request, it can drive the printer directly.
```api
POST https://www.expedy.fr/api/v2/printers/{printer_uid}/print
```
Authentication uses an `Authorization` header carrying your `SID:TOKEN`, with no `Bearer` prefix. Parameters and a complete example are in [Create a Print Job](/expedy-print/api-print-v2/create-a-print-job).
## Formatting the ticket
Whichever route you take, the message accepts the Expedy layout tags:
| What you want | Where to look |
|---|---|
| Align, resize or emphasise text | [Text Layout](/expedy-print/receipt-layout/text-layout-tags) |
| Print a logo or an image | [Image and Logo](/expedy-print/receipt-layout/image-and-logo-printing) |
| Print a QR code | [QR Code](/expedy-print/receipt-layout/qr-code) |
| Print a barcode | [EAN13 Barcode](/expedy-print/receipt-layout/ean13-barcode) |
> Depending on the connector or the software you use, this setup may be handled by your partner or your agency. Check with them before you start.
## Need help?
- [Browse all integrations](/integrations)
- [Open a support ticket](https://help.expedy.io/support/tickets/new)
---
url: https://docs.expedy.io/en/integrations/jumpseller/connect-a-receipt-printer-to-jumpseller
title: Print from Jumpseller with Expedy PRINT
updated_at: 2026-10-19T23:13:42.919122+00:00
---
# Print from Jumpseller with Expedy PRINT
[Jumpseller](https://jumpseller.com/) is an eCommerce platform. It reaches Expedy PRINT in two ways: through **Zapier**, with no code, or through the **Expedy REST API**, when you want full control over the ticket.
## What you need
- An Expedy account with an active printer. Not added yet? Follow the guide for your machine, [Expedy XPDY80](/expedy-print/installation/add-an-expedy-xpdy80-cloud-printer-to-your-account), [HSPOS](/expedy-print/installation/add-an-hspos-cloud-printer-to-your-account), [Star Micronics](/expedy-print/installation/add-a-star-micronics-printer-to-your-account) or [Raspberry Pi](/expedy-print/installation/add-a-raspberry-pi-cloud-print-server-to-your-account)
- Your **API SID**, **API TOKEN** and **API Printer UID**, all three on the printer page of the [Expedy console](https://www.expedy.fr/console/v3/), in the **API Keys & UID** card
## Option 1, through Zapier, no code
Jumpseller connects to Zapier, and Zapier ships a ready-made **Expedy Print** action. The recipe is always the same: an event in Jumpseller triggers **Create a Print Job** in Expedy Print, and you map the fields you want on the ticket.
Full walkthrough: **[How to integrate Expedy Print with Zapier](/integrations/zapier/how-to-integrate-expedy-print-with-zapier)**
## Option 2, through the REST API
If Jumpseller can issue an HTTP request, it can drive the printer directly.
```api
POST https://www.expedy.fr/api/v2/printers/{printer_uid}/print
```
Authentication uses an `Authorization` header carrying your `SID:TOKEN`, with no `Bearer` prefix. Parameters and a complete example are in [Create a Print Job](/expedy-print/api-print-v2/create-a-print-job).
## Formatting the ticket
Whichever route you take, the message accepts the Expedy layout tags:
| What you want | Where to look |
|---|---|
| Align, resize or emphasise text | [Text Layout](/expedy-print/receipt-layout/text-layout-tags) |
| Print a logo or an image | [Image and Logo](/expedy-print/receipt-layout/image-and-logo-printing) |
| Print a QR code | [QR Code](/expedy-print/receipt-layout/qr-code) |
| Print a barcode | [EAN13 Barcode](/expedy-print/receipt-layout/ean13-barcode) |
> Depending on the connector or the software you use, this setup may be handled by your partner or your agency. Check with them before you start.
## Need help?
- [Browse all integrations](/integrations)
- [Open a support ticket](https://help.expedy.io/support/tickets/new)
---
url: https://docs.expedy.io/en/integrations/samcart/connect-a-receipt-printer-to-samcart
title: Print from SamCart with Expedy PRINT
updated_at: 2026-10-21T04:26:11.343822+00:00
---
# Print from SamCart with Expedy PRINT
[SamCart](https://www.samcart.com/) is an online cart and checkout platform. It reaches Expedy PRINT in two ways: through **Zapier**, with no code, or through the **Expedy REST API**, when you want full control over the ticket.
## What you need
- An Expedy account with an active printer. Not added yet? Follow the guide for your machine, [Expedy XPDY80](/expedy-print/installation/add-an-expedy-xpdy80-cloud-printer-to-your-account), [HSPOS](/expedy-print/installation/add-an-hspos-cloud-printer-to-your-account), [Star Micronics](/expedy-print/installation/add-a-star-micronics-printer-to-your-account) or [Raspberry Pi](/expedy-print/installation/add-a-raspberry-pi-cloud-print-server-to-your-account)
- Your **API SID**, **API TOKEN** and **API Printer UID**, all three on the printer page of the [Expedy console](https://www.expedy.fr/console/v3/), in the **API Keys & UID** card
## Option 1, through Zapier, no code
SamCart connects to Zapier, and Zapier ships a ready-made **Expedy Print** action. The recipe is always the same: an event in SamCart triggers **Create a Print Job** in Expedy Print, and you map the fields you want on the ticket.
Full walkthrough: **[How to integrate Expedy Print with Zapier](/integrations/zapier/how-to-integrate-expedy-print-with-zapier)**
## Option 2, through the REST API
If SamCart can issue an HTTP request, it can drive the printer directly.
```api
POST https://www.expedy.fr/api/v2/printers/{printer_uid}/print
```
Authentication uses an `Authorization` header carrying your `SID:TOKEN`, with no `Bearer` prefix. Parameters and a complete example are in [Create a Print Job](/expedy-print/api-print-v2/create-a-print-job).
## Formatting the ticket
Whichever route you take, the message accepts the Expedy layout tags:
| What you want | Where to look |
|---|---|
| Align, resize or emphasise text | [Text Layout](/expedy-print/receipt-layout/text-layout-tags) |
| Print a logo or an image | [Image and Logo](/expedy-print/receipt-layout/image-and-logo-printing) |
| Print a QR code | [QR Code](/expedy-print/receipt-layout/qr-code) |
| Print a barcode | [EAN13 Barcode](/expedy-print/receipt-layout/ean13-barcode) |
> Depending on the connector or the software you use, this setup may be handled by your partner or your agency. Check with them before you start.
## Need help?
- [Browse all integrations](/integrations)
- [Open a support ticket](https://help.expedy.io/support/tickets/new)
---
url: https://docs.expedy.io/en/integrations/lieferando/connect-a-receipt-printer-to-lieferando
title: Print Lieferando orders on a receipt printer
updated_at: 2026-10-22T01:11:30.607999+00:00
---
# Print Lieferando orders on a receipt printer
[Lieferando](https://www.lieferando.de/) is a meal delivery platform. It connects to Expedy PRINT through **HubRise**: Lieferando sends its orders to HubRise, HubRise forwards them to your cloud printer, and the ticket comes out within seconds.
## What you need
- An Expedy account with an active printer. Not added yet? Follow the guide for your machine, [Expedy XPDY80](/expedy-print/installation/add-an-expedy-xpdy80-cloud-printer-to-your-account), [HSPOS](/expedy-print/installation/add-an-hspos-cloud-printer-to-your-account), [Star Micronics](/expedy-print/installation/add-a-star-micronics-printer-to-your-account) or [Raspberry Pi](/expedy-print/installation/add-a-raspberry-pi-cloud-print-server-to-your-account)
- A [HubRise account](https://manager.hubrise.com/signup), which aggregates your sales channels
- A Lieferando account linked to your HubRise location
## How it works
| Step | What happens |
|---|---|
| 1 | An order is placed on Lieferando |
| 2 | Lieferando pushes it to HubRise |
| 3 | Expedy PRINT receives it and prints a standardised ticket |
A single printer covers every channel connected to the same HubRise location, so you do not need one machine per platform.
## Connect it
The setup happens once, on the HubRise side, and is described step by step in the reference guide:
**[Connect a receipt printer to HubRise](/integrations/hubrise/connecting-a-receipt-printer-to-hubrise)**
Then link your Lieferando account to the same HubRise location. That part is done from the Lieferando back office, or by Lieferando support.
## Receipt settings
Once connected, the printer page in the [Expedy console](https://www.expedy.fr/console/v3/) controls what gets printed:
- **Print order when**, the status that triggers printing, `NEW`, `RECEIVED` or `ACCEPTED`
- **Then change status to**, the automatic status update applied after printing
- **Number of copies**, one ticket for the kitchen, one for the counter or the delivery bag
- The receipt header and footer, logo, company name, address and registration number
All of it is detailed in [Connect a receipt printer to HubRise](/integrations/hubrise/connecting-a-receipt-printer-to-hubrise).
> Depending on the connector or the point-of-sale software you use, this setup may be handled by your partner. Check with them before you start.
## Need help?
- [Browse all integrations](/integrations)
- [Open a support ticket](https://help.expedy.io/support/tickets/new)
---
url: https://docs.expedy.io/en/integrations/power-automate/connect-a-receipt-printer-to-power-automate
title: Print from Microsoft Power Automate with Expedy PRINT
updated_at: 2026-10-20T06:18:59.611354+00:00
---
# Print from Microsoft Power Automate with Expedy PRINT
[Microsoft Power Automate](https://www.microsoft.com/power-platform/products/power-automate) is an automation platform. It reaches Expedy PRINT in two ways: through **Zapier**, with no code, or through the **Expedy REST API**, when you want full control over the ticket.
## What you need
- An Expedy account with an active printer. Not added yet? Follow the guide for your machine, [Expedy XPDY80](/expedy-print/installation/add-an-expedy-xpdy80-cloud-printer-to-your-account), [HSPOS](/expedy-print/installation/add-an-hspos-cloud-printer-to-your-account), [Star Micronics](/expedy-print/installation/add-a-star-micronics-printer-to-your-account) or [Raspberry Pi](/expedy-print/installation/add-a-raspberry-pi-cloud-print-server-to-your-account)
- Your **API SID**, **API TOKEN** and **API Printer UID**, all three on the printer page of the [Expedy console](https://www.expedy.fr/console/v3/), in the **API Keys & UID** card
## Option 1, through Zapier, no code
Microsoft Power Automate connects to Zapier, and Zapier ships a ready-made **Expedy Print** action. The recipe is always the same: an event in Microsoft Power Automate triggers **Create a Print Job** in Expedy Print, and you map the fields you want on the ticket.
Full walkthrough: **[How to integrate Expedy Print with Zapier](/integrations/zapier/how-to-integrate-expedy-print-with-zapier)**
## Option 2, through the REST API
If Microsoft Power Automate can issue an HTTP request, it can drive the printer directly.
```api
POST https://www.expedy.fr/api/v2/printers/{printer_uid}/print
```
Authentication uses an `Authorization` header carrying your `SID:TOKEN`, with no `Bearer` prefix. Parameters and a complete example are in [Create a Print Job](/expedy-print/api-print-v2/create-a-print-job).
## Formatting the ticket
Whichever route you take, the message accepts the Expedy layout tags:
| What you want | Where to look |
|---|---|
| Align, resize or emphasise text | [Text Layout](/expedy-print/receipt-layout/text-layout-tags) |
| Print a logo or an image | [Image and Logo](/expedy-print/receipt-layout/image-and-logo-printing) |
| Print a QR code | [QR Code](/expedy-print/receipt-layout/qr-code) |
| Print a barcode | [EAN13 Barcode](/expedy-print/receipt-layout/ean13-barcode) |
> Depending on the connector or the software you use, this setup may be handled by your partner or your agency. Check with them before you start.
## Need help?
- [Browse all integrations](/integrations)
- [Open a support ticket](https://help.expedy.io/support/tickets/new)
---
url: https://docs.expedy.io/en/integrations/inflow-inventory/connect-a-receipt-printer-to-inflow-inventory
title: Print from inFlow Inventory with Expedy PRINT
updated_at: 2026-10-23T03:16:24.63605+00:00
---
# Print from inFlow Inventory with Expedy PRINT
[inFlow Inventory](https://www.inflowinventory.com/) is an inventory and order management tool. It reaches Expedy PRINT in two ways: through **Zapier**, with no code, or through the **Expedy REST API**, when you want full control over the ticket.
## What you need
- An Expedy account with an active printer. Not added yet? Follow the guide for your machine, [Expedy XPDY80](/expedy-print/installation/add-an-expedy-xpdy80-cloud-printer-to-your-account), [HSPOS](/expedy-print/installation/add-an-hspos-cloud-printer-to-your-account), [Star Micronics](/expedy-print/installation/add-a-star-micronics-printer-to-your-account) or [Raspberry Pi](/expedy-print/installation/add-a-raspberry-pi-cloud-print-server-to-your-account)
- Your **API SID**, **API TOKEN** and **API Printer UID**, all three on the printer page of the [Expedy console](https://www.expedy.fr/console/v3/), in the **API Keys & UID** card
## Option 1, through Zapier, no code
inFlow Inventory connects to Zapier, and Zapier ships a ready-made **Expedy Print** action. The recipe is always the same: an event in inFlow Inventory triggers **Create a Print Job** in Expedy Print, and you map the fields you want on the ticket.
Full walkthrough: **[How to integrate Expedy Print with Zapier](/integrations/zapier/how-to-integrate-expedy-print-with-zapier)**
## Option 2, through the REST API
If inFlow Inventory can issue an HTTP request, it can drive the printer directly.
```api
POST https://www.expedy.fr/api/v2/printers/{printer_uid}/print
```
Authentication uses an `Authorization` header carrying your `SID:TOKEN`, with no `Bearer` prefix. Parameters and a complete example are in [Create a Print Job](/expedy-print/api-print-v2/create-a-print-job).
## Formatting the ticket
Whichever route you take, the message accepts the Expedy layout tags:
| What you want | Where to look |
|---|---|
| Align, resize or emphasise text | [Text Layout](/expedy-print/receipt-layout/text-layout-tags) |
| Print a logo or an image | [Image and Logo](/expedy-print/receipt-layout/image-and-logo-printing) |
| Print a QR code | [QR Code](/expedy-print/receipt-layout/qr-code) |
| Print a barcode | [EAN13 Barcode](/expedy-print/receipt-layout/ean13-barcode) |
> Depending on the connector or the software you use, this setup may be handled by your partner or your agency. Check with them before you start.
## Need help?
- [Browse all integrations](/integrations)
- [Open a support ticket](https://help.expedy.io/support/tickets/new)
---
url: https://docs.expedy.io/en/integrations/smilein/connect-a-receipt-printer-to-smilein
title: Print smilein orders on a receipt printer
updated_at: 2026-10-21T17:23:47.37314+00:00
---
# Print smilein orders on a receipt printer
**smilein** is an online ordering solution for hospitality. It connects to Expedy PRINT through **HubRise**: smilein sends its orders to HubRise, HubRise forwards them to your cloud printer, and the ticket comes out within seconds.
## What you need
- An Expedy account with an active printer. Not added yet? Follow the guide for your machine, [Expedy XPDY80](/expedy-print/installation/add-an-expedy-xpdy80-cloud-printer-to-your-account), [HSPOS](/expedy-print/installation/add-an-hspos-cloud-printer-to-your-account), [Star Micronics](/expedy-print/installation/add-a-star-micronics-printer-to-your-account) or [Raspberry Pi](/expedy-print/installation/add-a-raspberry-pi-cloud-print-server-to-your-account)
- A [HubRise account](https://manager.hubrise.com/signup), which aggregates your sales channels
- A smilein account linked to your HubRise location
## How it works
| Step | What happens |
|---|---|
| 1 | An order is placed on smilein |
| 2 | smilein pushes it to HubRise |
| 3 | Expedy PRINT receives it and prints a standardised ticket |
A single printer covers every channel connected to the same HubRise location, so you do not need one machine per platform.
## Connect it
The setup happens once, on the HubRise side, and is described step by step in the reference guide:
**[Connect a receipt printer to HubRise](/integrations/hubrise/connecting-a-receipt-printer-to-hubrise)**
Then link your smilein account to the same HubRise location. That part is done from the smilein back office, or by smilein support.
## Receipt settings
Once connected, the printer page in the [Expedy console](https://www.expedy.fr/console/v3/) controls what gets printed:
- **Print order when**, the status that triggers printing, `NEW`, `RECEIVED` or `ACCEPTED`
- **Then change status to**, the automatic status update applied after printing
- **Number of copies**, one ticket for the kitchen, one for the counter or the delivery bag
- The receipt header and footer, logo, company name, address and registration number
All of it is detailed in [Connect a receipt printer to HubRise](/integrations/hubrise/connecting-a-receipt-printer-to-hubrise).
> Depending on the connector or the point-of-sale software you use, this setup may be handled by your partner. Check with them before you start.
## Need help?
- [Browse all integrations](/integrations)
- [Open a support ticket](https://help.expedy.io/support/tickets/new)
---
url: https://docs.expedy.io/en/integrations/latenode/connect-a-receipt-printer-to-latenode
title: Print from Latenode with Expedy PRINT
updated_at: 2026-10-20T21:21:46.318222+00:00
---
# Print from Latenode with Expedy PRINT
[Latenode](https://latenode.com/) is an automation platform. It reaches Expedy PRINT in two ways: through **Zapier**, with no code, or through the **Expedy REST API**, when you want full control over the ticket.
## What you need
- An Expedy account with an active printer. Not added yet? Follow the guide for your machine, [Expedy XPDY80](/expedy-print/installation/add-an-expedy-xpdy80-cloud-printer-to-your-account), [HSPOS](/expedy-print/installation/add-an-hspos-cloud-printer-to-your-account), [Star Micronics](/expedy-print/installation/add-a-star-micronics-printer-to-your-account) or [Raspberry Pi](/expedy-print/installation/add-a-raspberry-pi-cloud-print-server-to-your-account)
- Your **API SID**, **API TOKEN** and **API Printer UID**, all three on the printer page of the [Expedy console](https://www.expedy.fr/console/v3/), in the **API Keys & UID** card
## Option 1, through Zapier, no code
Latenode connects to Zapier, and Zapier ships a ready-made **Expedy Print** action. The recipe is always the same: an event in Latenode triggers **Create a Print Job** in Expedy Print, and you map the fields you want on the ticket.
Full walkthrough: **[How to integrate Expedy Print with Zapier](/integrations/zapier/how-to-integrate-expedy-print-with-zapier)**
## Option 2, through the REST API
If Latenode can issue an HTTP request, it can drive the printer directly.
```api
POST https://www.expedy.fr/api/v2/printers/{printer_uid}/print
```
Authentication uses an `Authorization` header carrying your `SID:TOKEN`, with no `Bearer` prefix. Parameters and a complete example are in [Create a Print Job](/expedy-print/api-print-v2/create-a-print-job).
## Formatting the ticket
Whichever route you take, the message accepts the Expedy layout tags:
| What you want | Where to look |
|---|---|
| Align, resize or emphasise text | [Text Layout](/expedy-print/receipt-layout/text-layout-tags) |
| Print a logo or an image | [Image and Logo](/expedy-print/receipt-layout/image-and-logo-printing) |
| Print a QR code | [QR Code](/expedy-print/receipt-layout/qr-code) |
| Print a barcode | [EAN13 Barcode](/expedy-print/receipt-layout/ean13-barcode) |
> Depending on the connector or the software you use, this setup may be handled by your partner or your agency. Check with them before you start.
## Need help?
- [Browse all integrations](/integrations)
- [Open a support ticket](https://help.expedy.io/support/tickets/new)
---
url: https://docs.expedy.io/en/integrations/salla/connect-a-receipt-printer-to-salla
title: Print from Salla with Expedy PRINT
updated_at: 2026-10-22T05:36:19.269549+00:00
---
# Print from Salla with Expedy PRINT
**Salla** is an eCommerce platform. It reaches Expedy PRINT in two ways: through **Zapier**, with no code, or through the **Expedy REST API**, when you want full control over the ticket.
## What you need
- An Expedy account with an active printer. Not added yet? Follow the guide for your machine, [Expedy XPDY80](/expedy-print/installation/add-an-expedy-xpdy80-cloud-printer-to-your-account), [HSPOS](/expedy-print/installation/add-an-hspos-cloud-printer-to-your-account), [Star Micronics](/expedy-print/installation/add-a-star-micronics-printer-to-your-account) or [Raspberry Pi](/expedy-print/installation/add-a-raspberry-pi-cloud-print-server-to-your-account)
- Your **API SID**, **API TOKEN** and **API Printer UID**, all three on the printer page of the [Expedy console](https://www.expedy.fr/console/v3/), in the **API Keys & UID** card
## Option 1, through Zapier, no code
Salla connects to Zapier, and Zapier ships a ready-made **Expedy Print** action. The recipe is always the same: an event in Salla triggers **Create a Print Job** in Expedy Print, and you map the fields you want on the ticket.
Full walkthrough: **[How to integrate Expedy Print with Zapier](/integrations/zapier/how-to-integrate-expedy-print-with-zapier)**
## Option 2, through the REST API
If Salla can issue an HTTP request, it can drive the printer directly.
```api
POST https://www.expedy.fr/api/v2/printers/{printer_uid}/print
```
Authentication uses an `Authorization` header carrying your `SID:TOKEN`, with no `Bearer` prefix. Parameters and a complete example are in [Create a Print Job](/expedy-print/api-print-v2/create-a-print-job).
## Formatting the ticket
Whichever route you take, the message accepts the Expedy layout tags:
| What you want | Where to look |
|---|---|
| Align, resize or emphasise text | [Text Layout](/expedy-print/receipt-layout/text-layout-tags) |
| Print a logo or an image | [Image and Logo](/expedy-print/receipt-layout/image-and-logo-printing) |
| Print a QR code | [QR Code](/expedy-print/receipt-layout/qr-code) |
| Print a barcode | [EAN13 Barcode](/expedy-print/receipt-layout/ean13-barcode) |
> Depending on the connector or the software you use, this setup may be handled by your partner or your agency. Check with them before you start.
## Need help?
- [Browse all integrations](/integrations)
- [Open a support ticket](https://help.expedy.io/support/tickets/new)
---
url: https://docs.expedy.io/en/integrations/bowo/connect-a-receipt-printer-to-bowo
title: Receipt printing with Bowo
updated_at: 2026-10-11T14:53:10.908333+00:00
---
# Receipt printing with Bowo
[Bowo](https://www.bowo.fr/) is an online ordering solution for hospitality. With Bowo, **the receipt printer is installed and configured by Bowo**, not from your Expedy console. Get in touch with them to have your printer activated.
## Who does what
| Party | Responsibility |
|---|---|
| Expedy | Supplies the cloud printer, its connectivity (Ethernet, Wi-Fi or 4G SIM) and the console where you follow your print jobs |
| Bowo | Pairs the printer with your account, sets the receipt layout and switches the service on |
## Getting your printer activated
1. Order your machine, or use the one you already have
2. Contact Bowo and tell them you want to print your orders on an Expedy cloud printer
3. Bowo handles the pairing and the receipt layout on their side
4. Once activated, orders print automatically, with nothing left to do on your part
> If your printer already appears in your Expedy account, give Bowo its **API Printer UID**, shown on the printer page in the **API Keys & UID** card of the [Expedy console](https://www.expedy.fr/console/v3/).
## Once it is live
From the [Expedy console](https://www.expedy.fr/console/v3/) you can, at any time:
- Check that the machine is reachable, with **Check Status** on the printer page
- Review every job in **Print Jobs History**
- Follow your monthly usage and change plan, the **FREE** plan being capped at 50 print requests per month
Anything about the order content or the ticket layout goes through Bowo, since the connection lives on their side.
## Need help?
- [Add your printer to your Expedy account](/expedy-print/installation/add-an-expedy-xpdy80-cloud-printer-to-your-account)
- [Browse all integrations](/integrations)
- Expedy hardware or account question: [open a support ticket](https://help.expedy.io/support/tickets/new)
---
url: https://docs.expedy.io/en/integrations/restajet/connect-a-receipt-printer-to-restajet
title: Print RestaJet orders on a receipt printer
updated_at: 2026-10-20T02:13:58.263559+00:00
---
# Print RestaJet orders on a receipt printer
**RestaJet** is an online ordering solution for hospitality. It connects to Expedy PRINT through **HubRise**: RestaJet sends its orders to HubRise, HubRise forwards them to your cloud printer, and the ticket comes out within seconds.
## What you need
- An Expedy account with an active printer. Not added yet? Follow the guide for your machine, [Expedy XPDY80](/expedy-print/installation/add-an-expedy-xpdy80-cloud-printer-to-your-account), [HSPOS](/expedy-print/installation/add-an-hspos-cloud-printer-to-your-account), [Star Micronics](/expedy-print/installation/add-a-star-micronics-printer-to-your-account) or [Raspberry Pi](/expedy-print/installation/add-a-raspberry-pi-cloud-print-server-to-your-account)
- A [HubRise account](https://manager.hubrise.com/signup), which aggregates your sales channels
- A RestaJet account linked to your HubRise location
## How it works
| Step | What happens |
|---|---|
| 1 | An order is placed on RestaJet |
| 2 | RestaJet pushes it to HubRise |
| 3 | Expedy PRINT receives it and prints a standardised ticket |
A single printer covers every channel connected to the same HubRise location, so you do not need one machine per platform.
## Connect it
The setup happens once, on the HubRise side, and is described step by step in the reference guide:
**[Connect a receipt printer to HubRise](/integrations/hubrise/connecting-a-receipt-printer-to-hubrise)**
Then link your RestaJet account to the same HubRise location. That part is done from the RestaJet back office, or by RestaJet support.
## Receipt settings
Once connected, the printer page in the [Expedy console](https://www.expedy.fr/console/v3/) controls what gets printed:
- **Print order when**, the status that triggers printing, `NEW`, `RECEIVED` or `ACCEPTED`
- **Then change status to**, the automatic status update applied after printing
- **Number of copies**, one ticket for the kitchen, one for the counter or the delivery bag
- The receipt header and footer, logo, company name, address and registration number
All of it is detailed in [Connect a receipt printer to HubRise](/integrations/hubrise/connecting-a-receipt-printer-to-hubrise).
> Depending on the connector or the point-of-sale software you use, this setup may be handled by your partner. Check with them before you start.
## Need help?
- [Browse all integrations](/integrations)
- [Open a support ticket](https://help.expedy.io/support/tickets/new)
---
url: https://docs.expedy.io/en/integrations/skip-the-dishes/connect-a-receipt-printer-to-skip-the-dishes
title: Print Skip The Dishes orders on a receipt printer
updated_at: 2026-10-16T02:32:09.638348+00:00
---
# Print Skip The Dishes orders on a receipt printer
[Skip The Dishes](https://www.skipthedishes.com/) is a meal delivery platform. It connects to Expedy PRINT through **HubRise**: Skip The Dishes sends its orders to HubRise, HubRise forwards them to your cloud printer, and the ticket comes out within seconds.
## What you need
- An Expedy account with an active printer. Not added yet? Follow the guide for your machine, [Expedy XPDY80](/expedy-print/installation/add-an-expedy-xpdy80-cloud-printer-to-your-account), [HSPOS](/expedy-print/installation/add-an-hspos-cloud-printer-to-your-account), [Star Micronics](/expedy-print/installation/add-a-star-micronics-printer-to-your-account) or [Raspberry Pi](/expedy-print/installation/add-a-raspberry-pi-cloud-print-server-to-your-account)
- A [HubRise account](https://manager.hubrise.com/signup), which aggregates your sales channels
- A Skip The Dishes account linked to your HubRise location
## How it works
| Step | What happens |
|---|---|
| 1 | An order is placed on Skip The Dishes |
| 2 | Skip The Dishes pushes it to HubRise |
| 3 | Expedy PRINT receives it and prints a standardised ticket |
A single printer covers every channel connected to the same HubRise location, so you do not need one machine per platform.
## Connect it
The setup happens once, on the HubRise side, and is described step by step in the reference guide:
**[Connect a receipt printer to HubRise](/integrations/hubrise/connecting-a-receipt-printer-to-hubrise)**
Then link your Skip The Dishes account to the same HubRise location. That part is done from the Skip The Dishes back office, or by Skip The Dishes support.
## Receipt settings
Once connected, the printer page in the [Expedy console](https://www.expedy.fr/console/v3/) controls what gets printed:
- **Print order when**, the status that triggers printing, `NEW`, `RECEIVED` or `ACCEPTED`
- **Then change status to**, the automatic status update applied after printing
- **Number of copies**, one ticket for the kitchen, one for the counter or the delivery bag
- The receipt header and footer, logo, company name, address and registration number
All of it is detailed in [Connect a receipt printer to HubRise](/integrations/hubrise/connecting-a-receipt-printer-to-hubrise).
> Depending on the connector or the point-of-sale software you use, this setup may be handled by your partner. Check with them before you start.
## Need help?
- [Browse all integrations](/integrations)
- [Open a support ticket](https://help.expedy.io/support/tickets/new)
---
url: https://docs.expedy.io/en/integrations/pyszne/connect-a-receipt-printer-to-pyszne
title: Print Pyszne orders on a receipt printer
updated_at: 2026-10-20T04:09:02.479356+00:00
---
# Print Pyszne orders on a receipt printer
[Pyszne](https://www.pyszne.pl/) is a meal delivery platform. It connects to Expedy PRINT through **HubRise**: Pyszne sends its orders to HubRise, HubRise forwards them to your cloud printer, and the ticket comes out within seconds.
## What you need
- An Expedy account with an active printer. Not added yet? Follow the guide for your machine, [Expedy XPDY80](/expedy-print/installation/add-an-expedy-xpdy80-cloud-printer-to-your-account), [HSPOS](/expedy-print/installation/add-an-hspos-cloud-printer-to-your-account), [Star Micronics](/expedy-print/installation/add-a-star-micronics-printer-to-your-account) or [Raspberry Pi](/expedy-print/installation/add-a-raspberry-pi-cloud-print-server-to-your-account)
- A [HubRise account](https://manager.hubrise.com/signup), which aggregates your sales channels
- A Pyszne account linked to your HubRise location
## How it works
| Step | What happens |
|---|---|
| 1 | An order is placed on Pyszne |
| 2 | Pyszne pushes it to HubRise |
| 3 | Expedy PRINT receives it and prints a standardised ticket |
A single printer covers every channel connected to the same HubRise location, so you do not need one machine per platform.
## Connect it
The setup happens once, on the HubRise side, and is described step by step in the reference guide:
**[Connect a receipt printer to HubRise](/integrations/hubrise/connecting-a-receipt-printer-to-hubrise)**
Then link your Pyszne account to the same HubRise location. That part is done from the Pyszne back office, or by Pyszne support.
## Receipt settings
Once connected, the printer page in the [Expedy console](https://www.expedy.fr/console/v3/) controls what gets printed:
- **Print order when**, the status that triggers printing, `NEW`, `RECEIVED` or `ACCEPTED`
- **Then change status to**, the automatic status update applied after printing
- **Number of copies**, one ticket for the kitchen, one for the counter or the delivery bag
- The receipt header and footer, logo, company name, address and registration number
All of it is detailed in [Connect a receipt printer to HubRise](/integrations/hubrise/connecting-a-receipt-printer-to-hubrise).
> Depending on the connector or the point-of-sale software you use, this setup may be handled by your partner. Check with them before you start.
## Need help?
- [Browse all integrations](/integrations)
- [Open a support ticket](https://help.expedy.io/support/tickets/new)
---
url: https://docs.expedy.io/en/integrations/mynober/connect-a-receipt-printer-to-mynober
title: Print MynOber orders on a receipt printer
updated_at: 2026-10-20T22:01:12.883706+00:00
---
# Print MynOber orders on a receipt printer
**MynOber** is an online ordering solution for hospitality. It connects to Expedy PRINT through **HubRise**: MynOber sends its orders to HubRise, HubRise forwards them to your cloud printer, and the ticket comes out within seconds.
## What you need
- An Expedy account with an active printer. Not added yet? Follow the guide for your machine, [Expedy XPDY80](/expedy-print/installation/add-an-expedy-xpdy80-cloud-printer-to-your-account), [HSPOS](/expedy-print/installation/add-an-hspos-cloud-printer-to-your-account), [Star Micronics](/expedy-print/installation/add-a-star-micronics-printer-to-your-account) or [Raspberry Pi](/expedy-print/installation/add-a-raspberry-pi-cloud-print-server-to-your-account)
- A [HubRise account](https://manager.hubrise.com/signup), which aggregates your sales channels
- A MynOber account linked to your HubRise location
## How it works
| Step | What happens |
|---|---|
| 1 | An order is placed on MynOber |
| 2 | MynOber pushes it to HubRise |
| 3 | Expedy PRINT receives it and prints a standardised ticket |
A single printer covers every channel connected to the same HubRise location, so you do not need one machine per platform.
## Connect it
The setup happens once, on the HubRise side, and is described step by step in the reference guide:
**[Connect a receipt printer to HubRise](/integrations/hubrise/connecting-a-receipt-printer-to-hubrise)**
Then link your MynOber account to the same HubRise location. That part is done from the MynOber back office, or by MynOber support.
## Receipt settings
Once connected, the printer page in the [Expedy console](https://www.expedy.fr/console/v3/) controls what gets printed:
- **Print order when**, the status that triggers printing, `NEW`, `RECEIVED` or `ACCEPTED`
- **Then change status to**, the automatic status update applied after printing
- **Number of copies**, one ticket for the kitchen, one for the counter or the delivery bag
- The receipt header and footer, logo, company name, address and registration number
All of it is detailed in [Connect a receipt printer to HubRise](/integrations/hubrise/connecting-a-receipt-printer-to-hubrise).
> Depending on the connector or the point-of-sale software you use, this setup may be handled by your partner. Check with them before you start.
## Need help?
- [Browse all integrations](/integrations)
- [Open a support ticket](https://help.expedy.io/support/tickets/new)
---
url: https://docs.expedy.io/en/integrations/tablati/connect-a-receipt-printer-to-tablati
title: Print Tablati orders on a receipt printer
updated_at: 2026-10-20T22:03:35.036113+00:00
---
# Print Tablati orders on a receipt printer
**Tablati** is an online ordering solution for hospitality. It connects to Expedy PRINT through **HubRise**: Tablati sends its orders to HubRise, HubRise forwards them to your cloud printer, and the ticket comes out within seconds.
## What you need
- An Expedy account with an active printer. Not added yet? Follow the guide for your machine, [Expedy XPDY80](/expedy-print/installation/add-an-expedy-xpdy80-cloud-printer-to-your-account), [HSPOS](/expedy-print/installation/add-an-hspos-cloud-printer-to-your-account), [Star Micronics](/expedy-print/installation/add-a-star-micronics-printer-to-your-account) or [Raspberry Pi](/expedy-print/installation/add-a-raspberry-pi-cloud-print-server-to-your-account)
- A [HubRise account](https://manager.hubrise.com/signup), which aggregates your sales channels
- A Tablati account linked to your HubRise location
## How it works
| Step | What happens |
|---|---|
| 1 | An order is placed on Tablati |
| 2 | Tablati pushes it to HubRise |
| 3 | Expedy PRINT receives it and prints a standardised ticket |
A single printer covers every channel connected to the same HubRise location, so you do not need one machine per platform.
## Connect it
The setup happens once, on the HubRise side, and is described step by step in the reference guide:
**[Connect a receipt printer to HubRise](/integrations/hubrise/connecting-a-receipt-printer-to-hubrise)**
Then link your Tablati account to the same HubRise location. That part is done from the Tablati back office, or by Tablati support.
## Receipt settings
Once connected, the printer page in the [Expedy console](https://www.expedy.fr/console/v3/) controls what gets printed:
- **Print order when**, the status that triggers printing, `NEW`, `RECEIVED` or `ACCEPTED`
- **Then change status to**, the automatic status update applied after printing
- **Number of copies**, one ticket for the kitchen, one for the counter or the delivery bag
- The receipt header and footer, logo, company name, address and registration number
All of it is detailed in [Connect a receipt printer to HubRise](/integrations/hubrise/connecting-a-receipt-printer-to-hubrise).
> Depending on the connector or the point-of-sale software you use, this setup may be handled by your partner. Check with them before you start.
## Need help?
- [Browse all integrations](/integrations)
- [Open a support ticket](https://help.expedy.io/support/tickets/new)
---
url: https://docs.expedy.io/en/integrations/smartresto/connect-a-receipt-printer-to-smartresto
title: Print SmartResto.Net orders on a receipt printer
updated_at: 2026-10-20T16:56:55.843286+00:00
---
# Print SmartResto.Net orders on a receipt printer
**SmartResto.Net** is an online ordering solution for hospitality. It connects to Expedy PRINT through **HubRise**: SmartResto.Net sends its orders to HubRise, HubRise forwards them to your cloud printer, and the ticket comes out within seconds.
## What you need
- An Expedy account with an active printer. Not added yet? Follow the guide for your machine, [Expedy XPDY80](/expedy-print/installation/add-an-expedy-xpdy80-cloud-printer-to-your-account), [HSPOS](/expedy-print/installation/add-an-hspos-cloud-printer-to-your-account), [Star Micronics](/expedy-print/installation/add-a-star-micronics-printer-to-your-account) or [Raspberry Pi](/expedy-print/installation/add-a-raspberry-pi-cloud-print-server-to-your-account)
- A [HubRise account](https://manager.hubrise.com/signup), which aggregates your sales channels
- A SmartResto.Net account linked to your HubRise location
## How it works
| Step | What happens |
|---|---|
| 1 | An order is placed on SmartResto.Net |
| 2 | SmartResto.Net pushes it to HubRise |
| 3 | Expedy PRINT receives it and prints a standardised ticket |
A single printer covers every channel connected to the same HubRise location, so you do not need one machine per platform.
## Connect it
The setup happens once, on the HubRise side, and is described step by step in the reference guide:
**[Connect a receipt printer to HubRise](/integrations/hubrise/connecting-a-receipt-printer-to-hubrise)**
Then link your SmartResto.Net account to the same HubRise location. That part is done from the SmartResto.Net back office, or by SmartResto.Net support.
## Receipt settings
Once connected, the printer page in the [Expedy console](https://www.expedy.fr/console/v3/) controls what gets printed:
- **Print order when**, the status that triggers printing, `NEW`, `RECEIVED` or `ACCEPTED`
- **Then change status to**, the automatic status update applied after printing
- **Number of copies**, one ticket for the kitchen, one for the counter or the delivery bag
- The receipt header and footer, logo, company name, address and registration number
All of it is detailed in [Connect a receipt printer to HubRise](/integrations/hubrise/connecting-a-receipt-printer-to-hubrise).
> Depending on the connector or the point-of-sale software you use, this setup may be handled by your partner. Check with them before you start.
## Need help?
- [Browse all integrations](/integrations)
- [Open a support ticket](https://help.expedy.io/support/tickets/new)
---
url: https://docs.expedy.io/en/integrations/just-eat-takeaway/connect-a-receipt-printer-to-just-eat-takeaway
title: Print Just Eat Takeaway orders on a receipt printer
updated_at: 2026-10-20T05:07:02.335476+00:00
---
# Print Just Eat Takeaway orders on a receipt printer
[Just Eat Takeaway](https://www.justeattakeaway.com/) is a meal delivery platform. It connects to Expedy PRINT through **HubRise**: Just Eat Takeaway sends its orders to HubRise, HubRise forwards them to your cloud printer, and the ticket comes out within seconds.
## What you need
- An Expedy account with an active printer. Not added yet? Follow the guide for your machine, [Expedy XPDY80](/expedy-print/installation/add-an-expedy-xpdy80-cloud-printer-to-your-account), [HSPOS](/expedy-print/installation/add-an-hspos-cloud-printer-to-your-account), [Star Micronics](/expedy-print/installation/add-a-star-micronics-printer-to-your-account) or [Raspberry Pi](/expedy-print/installation/add-a-raspberry-pi-cloud-print-server-to-your-account)
- A [HubRise account](https://manager.hubrise.com/signup), which aggregates your sales channels
- A Just Eat Takeaway account linked to your HubRise location
## How it works
| Step | What happens |
|---|---|
| 1 | An order is placed on Just Eat Takeaway |
| 2 | Just Eat Takeaway pushes it to HubRise |
| 3 | Expedy PRINT receives it and prints a standardised ticket |
A single printer covers every channel connected to the same HubRise location, so you do not need one machine per platform.
## Connect it
The setup happens once, on the HubRise side, and is described step by step in the reference guide:
**[Connect a receipt printer to HubRise](/integrations/hubrise/connecting-a-receipt-printer-to-hubrise)**
Then link your Just Eat Takeaway account to the same HubRise location. That part is done from the Just Eat Takeaway back office, or by Just Eat Takeaway support.
## Receipt settings
Once connected, the printer page in the [Expedy console](https://www.expedy.fr/console/v3/) controls what gets printed:
- **Print order when**, the status that triggers printing, `NEW`, `RECEIVED` or `ACCEPTED`
- **Then change status to**, the automatic status update applied after printing
- **Number of copies**, one ticket for the kitchen, one for the counter or the delivery bag
- The receipt header and footer, logo, company name, address and registration number
All of it is detailed in [Connect a receipt printer to HubRise](/integrations/hubrise/connecting-a-receipt-printer-to-hubrise).
> Depending on the connector or the point-of-sale software you use, this setup may be handled by your partner. Check with them before you start.
## Need help?
- [Browse all integrations](/integrations)
- [Open a support ticket](https://help.expedy.io/support/tickets/new)
---
url: https://docs.expedy.io/en/integrations/activepieces/connect-a-receipt-printer-to-activepieces
title: Print from Activepieces with Expedy PRINT
updated_at: 2026-10-20T00:26:56.353987+00:00
---
# Print from Activepieces with Expedy PRINT
[Activepieces](https://www.activepieces.com/) is an automation platform. It reaches Expedy PRINT in two ways: through **Zapier**, with no code, or through the **Expedy REST API**, when you want full control over the ticket.
## What you need
- An Expedy account with an active printer. Not added yet? Follow the guide for your machine, [Expedy XPDY80](/expedy-print/installation/add-an-expedy-xpdy80-cloud-printer-to-your-account), [HSPOS](/expedy-print/installation/add-an-hspos-cloud-printer-to-your-account), [Star Micronics](/expedy-print/installation/add-a-star-micronics-printer-to-your-account) or [Raspberry Pi](/expedy-print/installation/add-a-raspberry-pi-cloud-print-server-to-your-account)
- Your **API SID**, **API TOKEN** and **API Printer UID**, all three on the printer page of the [Expedy console](https://www.expedy.fr/console/v3/), in the **API Keys & UID** card
## Option 1, through Zapier, no code
Activepieces connects to Zapier, and Zapier ships a ready-made **Expedy Print** action. The recipe is always the same: an event in Activepieces triggers **Create a Print Job** in Expedy Print, and you map the fields you want on the ticket.
Full walkthrough: **[How to integrate Expedy Print with Zapier](/integrations/zapier/how-to-integrate-expedy-print-with-zapier)**
## Option 2, through the REST API
If Activepieces can issue an HTTP request, it can drive the printer directly.
```api
POST https://www.expedy.fr/api/v2/printers/{printer_uid}/print
```
Authentication uses an `Authorization` header carrying your `SID:TOKEN`, with no `Bearer` prefix. Parameters and a complete example are in [Create a Print Job](/expedy-print/api-print-v2/create-a-print-job).
## Formatting the ticket
Whichever route you take, the message accepts the Expedy layout tags:
| What you want | Where to look |
|---|---|
| Align, resize or emphasise text | [Text Layout](/expedy-print/receipt-layout/text-layout-tags) |
| Print a logo or an image | [Image and Logo](/expedy-print/receipt-layout/image-and-logo-printing) |
| Print a QR code | [QR Code](/expedy-print/receipt-layout/qr-code) |
| Print a barcode | [EAN13 Barcode](/expedy-print/receipt-layout/ean13-barcode) |
> Depending on the connector or the software you use, this setup may be handled by your partner or your agency. Check with them before you start.
## Need help?
- [Browse all integrations](/integrations)
- [Open a support ticket](https://help.expedy.io/support/tickets/new)
---
url: https://docs.expedy.io/en/integrations/ebay/connect-a-receipt-printer-to-ebay
title: Print from eBay with Expedy PRINT
updated_at: 2026-10-20T19:44:14.111119+00:00
---
# Print from eBay with Expedy PRINT
[eBay](https://www.ebay.com/) is an online marketplace. It reaches Expedy PRINT in two ways: through **Zapier**, with no code, or through the **Expedy REST API**, when you want full control over the ticket.
## What you need
- An Expedy account with an active printer. Not added yet? Follow the guide for your machine, [Expedy XPDY80](/expedy-print/installation/add-an-expedy-xpdy80-cloud-printer-to-your-account), [HSPOS](/expedy-print/installation/add-an-hspos-cloud-printer-to-your-account), [Star Micronics](/expedy-print/installation/add-a-star-micronics-printer-to-your-account) or [Raspberry Pi](/expedy-print/installation/add-a-raspberry-pi-cloud-print-server-to-your-account)
- Your **API SID**, **API TOKEN** and **API Printer UID**, all three on the printer page of the [Expedy console](https://www.expedy.fr/console/v3/), in the **API Keys & UID** card
## Option 1, through Zapier, no code
eBay connects to Zapier, and Zapier ships a ready-made **Expedy Print** action. The recipe is always the same: an event in eBay triggers **Create a Print Job** in Expedy Print, and you map the fields you want on the ticket.
Full walkthrough: **[How to integrate Expedy Print with Zapier](/integrations/zapier/how-to-integrate-expedy-print-with-zapier)**
## Option 2, through the REST API
If eBay can issue an HTTP request, it can drive the printer directly.
```api
POST https://www.expedy.fr/api/v2/printers/{printer_uid}/print
```
Authentication uses an `Authorization` header carrying your `SID:TOKEN`, with no `Bearer` prefix. Parameters and a complete example are in [Create a Print Job](/expedy-print/api-print-v2/create-a-print-job).
## Formatting the ticket
Whichever route you take, the message accepts the Expedy layout tags:
| What you want | Where to look |
|---|---|
| Align, resize or emphasise text | [Text Layout](/expedy-print/receipt-layout/text-layout-tags) |
| Print a logo or an image | [Image and Logo](/expedy-print/receipt-layout/image-and-logo-printing) |
| Print a QR code | [QR Code](/expedy-print/receipt-layout/qr-code) |
| Print a barcode | [EAN13 Barcode](/expedy-print/receipt-layout/ean13-barcode) |
> Depending on the connector or the software you use, this setup may be handled by your partner or your agency. Check with them before you start.
## Need help?
- [Browse all integrations](/integrations)
- [Open a support ticket](https://help.expedy.io/support/tickets/new)
---
url: https://docs.expedy.io/en/integrations/squarespace-commerce/connect-a-receipt-printer-to-squarespace-commerce
title: Print from Squarespace Commerce with Expedy PRINT
updated_at: 2026-10-10T01:29:45.459672+00:00
---
# Print from Squarespace Commerce with Expedy PRINT
[Squarespace Commerce](https://www.squarespace.com/) is an online ordering platform. It reaches Expedy PRINT in two ways: through **Zapier**, with no code, or through the **Expedy REST API**, when you want full control over the ticket.
## What you need
- An Expedy account with an active printer. Not added yet? Follow the guide for your machine, [Expedy XPDY80](/expedy-print/installation/add-an-expedy-xpdy80-cloud-printer-to-your-account), [HSPOS](/expedy-print/installation/add-an-hspos-cloud-printer-to-your-account), [Star Micronics](/expedy-print/installation/add-a-star-micronics-printer-to-your-account) or [Raspberry Pi](/expedy-print/installation/add-a-raspberry-pi-cloud-print-server-to-your-account)
- Your **API SID**, **API TOKEN** and **API Printer UID**, all three on the printer page of the [Expedy console](https://www.expedy.fr/console/v3/), in the **API Keys & UID** card
## Option 1, through Zapier, no code
Squarespace Commerce connects to Zapier, and Zapier ships a ready-made **Expedy Print** action. The recipe is always the same: an event in Squarespace Commerce triggers **Create a Print Job** in Expedy Print, and you map the fields you want on the ticket.
Full walkthrough: **[How to integrate Expedy Print with Zapier](/integrations/zapier/how-to-integrate-expedy-print-with-zapier)**
## Option 2, through the REST API
If Squarespace Commerce can issue an HTTP request, it can drive the printer directly.
```api
POST https://www.expedy.fr/api/v2/printers/{printer_uid}/print
```
Authentication uses an `Authorization` header carrying your `SID:TOKEN`, with no `Bearer` prefix. Parameters and a complete example are in [Create a Print Job](/expedy-print/api-print-v2/create-a-print-job).
## Formatting the ticket
Whichever route you take, the message accepts the Expedy layout tags:
| What you want | Where to look |
|---|---|
| Align, resize or emphasise text | [Text Layout](/expedy-print/receipt-layout/text-layout-tags) |
| Print a logo or an image | [Image and Logo](/expedy-print/receipt-layout/image-and-logo-printing) |
| Print a QR code | [QR Code](/expedy-print/receipt-layout/qr-code) |
| Print a barcode | [EAN13 Barcode](/expedy-print/receipt-layout/ean13-barcode) |
> Depending on the connector or the software you use, this setup may be handled by your partner or your agency. Check with them before you start.
## Need help?
- [Browse all integrations](/integrations)
- [Open a support ticket](https://help.expedy.io/support/tickets/new)
---
url: https://docs.expedy.io/en/integrations/prestashop/prestashop-module-cloud-print-orders-automatically
title: PrestaShop Module: Automatic Order Printing
updated_at: 2026-10-22T14:06:26.669039+00:00
---
# PrestaShop Module: Automatic Order Printing
> **Before you start**: you need an Expedy account and an active printer on it. Not added yet? Follow the guide for your machine, [Expedy XPDY80](/expedy-print/installation/add-an-expedy-xpdy80-cloud-printer-to-your-account), [HSPOS](/expedy-print/installation/add-an-hspos-cloud-printer-to-your-account), [Star Micronics](/expedy-print/installation/add-a-star-micronics-printer-to-your-account) or [Raspberry Pi](/expedy-print/installation/add-a-raspberry-pi-cloud-print-server-to-your-account).
Print new orders automatically as soon as they are placed (or once payment is accepted). No computer, tablet, smartphone, local print server, or driver to install. Your printer connects directly to your PrestaShop store through the Expedy Cloud Print Server over Wi-Fi, Ethernet, or a 3G/4G SIM card.
> This documentation covers **ExpedyPRINT v2**, our current module rebuilt on the ExpedyPRINT API v2. We do not provide support for versions prior to v2.
> ⚠️ Your PrestaShop store must have **SSL enabled** and must **not** run in dev or debug mode. These modes can block API requests and prevent print jobs from being sent.
**Compatible printers:**
- Any ESC/POS or ESC/P printer paired with a [Cloud Print Box adapter](https://www.expedy.io/product)
- [Expedy Cloud Print printers](https://www.expedy.io/product)
> Need to check compatibility with another printer? [Create a support ticket](https://help.expedy.io/support/tickets/new).
---
## Requirements
| | Minimum |
|---|---|
| PrestaShop | 1.6 (tested up to 8.x) |
| PHP | 7.2 |
You also need a free [Expedy](https://www.expedy.io) account with an **API SID**, an **API token**, and at least one cloud printer registered on the account.
---
## Download
Download the latest **`expedyprint.zip`** from the GitHub releases page:
👉 **[github.com/ExpedyDev/expedyprint-prestashop-addon/releases](https://github.com/ExpedyDev/expedyprint-prestashop-addon/releases/)**
Each release ships the ready-to-install zip and its changelog. That single file is all you need.
The full source code is open and available here:
👉 **[github.com/ExpedyDev/expedyprint-prestashop-addon](https://github.com/ExpedyDev/expedyprint-prestashop-addon)**
---
## Installation
1. Download **`expedyprint.zip`** from the [latest release](https://github.com/ExpedyDev/expedyprint-prestashop-addon/releases/).
2. In your PrestaShop back office, open **Modules → Module Manager**.
3. Click **Upload a module** and select the `expedyprint.zip` you downloaded. The module installs automatically.
4. Once installed, click **Configure**.
No drivers, no command line, no extra software.
---
## Configuration
Open **Modules → Module Manager → ExpedyPRINT → Configure**. The settings dashboard is organised into clearly labelled panels, and the connection, printer, and preview tools all work without saving the form first.
### 1. API connection
Paste your **API SID** and **API token**, then click **Test connection**.
| Setting | Description |
|---------|-------------|
| **API SID** | Your account identifier, available in the [Expedy console](https://www.expedy.fr/console/v3/) under **API**. |
| **API token** | Your secret key, available in the same **API** section. Treat it like a password. It is stored securely and write-only, so it is never displayed back. Leave the field blank when saving to keep the token already stored. |
On a successful test, the printer list is fetched from your account and the printer dropdown is populated automatically.
### 2. Printer
| Setting | Description |
|---------|-------------|
| **Printer** | Pick your printer from the dropdown loaded from your account (it shows the name, paper width, and UID). |
| **Backup printer UID** | Optional. A second printer that receives the same ticket, useful for redundancy. |
| **Paper width** | 58 mm or 80 mm, matching your printer's paper roll. |
Use **Send test print** to print a sample ticket to the selected printer and confirm everything is wired up.
### 3. Printing trigger
| Setting | Description |
|---------|-------------|
| **Print the ticket** | Choose when printing happens: as soon as an order is placed, or when the order status becomes "Payment accepted". |
| **Number of copies** | 1 to 5 copies per order. |
| **Cut the paper after each ticket** | Automatically cuts the paper at the end of each print job, on printers that support it. |
### 4. Receipt content
Choose how products and amounts are shown and which blocks are printed:
- **Product display:** product name and attributes, product reference and attributes, name only, or reference only.
- **Amounts:** line amounts including tax, excluding tax, or no line amounts. Amounts print without a currency symbol for maximum thermal-printer compatibility.
- **Totals:** print the total incl. tax, the total excl. tax, and/or the tax detail.
- **EAN-13 barcodes:** print the product barcode on each line.
- **Number of items, payment method, delivery/carrier method, customer note:** toggle each block on or off.
### 5. Store header and footer
Optional logo URL (HTTPS, GIF/JPG/PNG, max width 570px), store title, company name, address, postcode, city, phone, and company ID, all printed on the ticket.
### 6. Receipt wording
Every label printed on the ticket (Order, Product, Price, and so on) is fully editable, in any language you like.
### 7. Advanced: multistore mapping
Route store pickups to a specific printer using the format `store_id:printer_uid||store_id:printer_uid`. For example, orders for your London store can print automatically on one printer while Edinburgh orders go to another, fully automated, with no manual sorting.
---
## Order ticket preview
At the bottom of the settings page, the **Preview an order ticket** tool renders the exact ticket for any existing order. Just enter the order ID and click **Preview**. No printer required.
---
## How it works
The module watches your order events and, when the trigger you configured is reached, builds the receipt and sends it to your printer through the ExpedyPRINT cloud API.
An order prints once: an idempotency flag prevents the same order from printing twice. If a print attempt fails, the order is not flagged, so it can retry on the next status change. Every attempt, success or failure, is recorded in **Advanced Parameters → Logs** (source `expedyprint`).
---
## Compatible modules
ExpedyPRINT can read data from other PrestaShop modules to print extra information such as pickup or delivery type, date, and time slot, plus product options. Supported integrations include:
- Delivery and pickup slots: `prestatilldrive`, `prestadrive`, `prestatillhomedelivery`, `fspickupatstorecarrier`, `preferreddeliverytime`
- Product options and custom fields: `configurator`, `an_productfields`, `idxrcustomproduct`
> This list is non-exhaustive. We cannot guarantee correct printing if your PrestaShop installation is heavily customised or uses modules that alter core order functions.
---
## Build your own integration
To print from your own application or another platform, use the official Node.js SDK and API examples:
👉 **[github.com/ExpedyDev/expedy-sdk-node](https://github.com/ExpedyDev/expedy-sdk-node)**
It shows how to authenticate, list your printers, and send print jobs through the ExpedyPRINT API v2.
---
## Customisation and support
The module is open source under the Open Software License (OSL 3.0), so you can freely modify the code to fit your needs. Expedy no longer offers custom development or bespoke customisation services.
- ExpedyPRINT service, account, and API: **[www.expedy.io](https://www.expedy.io)**
- Questions or help: **[create a support ticket](https://help.expedy.io/support/tickets/new)**
- Bugs and feature requests for this module: open an [issue](https://github.com/ExpedyDev/expedyprint-prestashop-addon/issues) on the repository
> Support is provided for ExpedyPRINT v2 only. Versions prior to v2 are no longer supported.
---
url: https://docs.expedy.io/en/integrations/weweb/connect-a-receipt-printer-to-weweb
title: Print from WeWeb with Expedy PRINT
updated_at: 2026-10-19T19:40:57.607484+00:00
---
# Print from WeWeb with Expedy PRINT
[WeWeb](https://www.weweb.io/) is a no-code app building platform. It reaches Expedy PRINT in two ways: through **Zapier**, with no code, or through the **Expedy REST API**, when you want full control over the ticket.
## What you need
- An Expedy account with an active printer. Not added yet? Follow the guide for your machine, [Expedy XPDY80](/expedy-print/installation/add-an-expedy-xpdy80-cloud-printer-to-your-account), [HSPOS](/expedy-print/installation/add-an-hspos-cloud-printer-to-your-account), [Star Micronics](/expedy-print/installation/add-a-star-micronics-printer-to-your-account) or [Raspberry Pi](/expedy-print/installation/add-a-raspberry-pi-cloud-print-server-to-your-account)
- Your **API SID**, **API TOKEN** and **API Printer UID**, all three on the printer page of the [Expedy console](https://www.expedy.fr/console/v3/), in the **API Keys & UID** card
## Option 1, through Zapier, no code
WeWeb connects to Zapier, and Zapier ships a ready-made **Expedy Print** action. The recipe is always the same: an event in WeWeb triggers **Create a Print Job** in Expedy Print, and you map the fields you want on the ticket.
Full walkthrough: **[How to integrate Expedy Print with Zapier](/integrations/zapier/how-to-integrate-expedy-print-with-zapier)**
## Option 2, through the REST API
If WeWeb can issue an HTTP request, it can drive the printer directly.
```api
POST https://www.expedy.fr/api/v2/printers/{printer_uid}/print
```
Authentication uses an `Authorization` header carrying your `SID:TOKEN`, with no `Bearer` prefix. Parameters and a complete example are in [Create a Print Job](/expedy-print/api-print-v2/create-a-print-job).
## Formatting the ticket
Whichever route you take, the message accepts the Expedy layout tags:
| What you want | Where to look |
|---|---|
| Align, resize or emphasise text | [Text Layout](/expedy-print/receipt-layout/text-layout-tags) |
| Print a logo or an image | [Image and Logo](/expedy-print/receipt-layout/image-and-logo-printing) |
| Print a QR code | [QR Code](/expedy-print/receipt-layout/qr-code) |
| Print a barcode | [EAN13 Barcode](/expedy-print/receipt-layout/ean13-barcode) |
> Depending on the connector or the software you use, this setup may be handled by your partner or your agency. Check with them before you start.
## Need help?
- [Browse all integrations](/integrations)
- [Open a support ticket](https://help.expedy.io/support/tickets/new)
---
url: https://docs.expedy.io/en/integrations/ecwid/connect-a-receipt-printer-to-ecwid
title: Print from Ecwid by Lightspeed with Expedy PRINT
updated_at: 2026-10-20T18:51:54.12279+00:00
---
# Print from Ecwid by Lightspeed with Expedy PRINT
[Ecwid by Lightspeed](https://www.ecwid.com/) is an online ordering platform. It reaches Expedy PRINT in two ways: through **Zapier**, with no code, or through the **Expedy REST API**, when you want full control over the ticket.
## What you need
- An Expedy account with an active printer. Not added yet? Follow the guide for your machine, [Expedy XPDY80](/expedy-print/installation/add-an-expedy-xpdy80-cloud-printer-to-your-account), [HSPOS](/expedy-print/installation/add-an-hspos-cloud-printer-to-your-account), [Star Micronics](/expedy-print/installation/add-a-star-micronics-printer-to-your-account) or [Raspberry Pi](/expedy-print/installation/add-a-raspberry-pi-cloud-print-server-to-your-account)
- Your **API SID**, **API TOKEN** and **API Printer UID**, all three on the printer page of the [Expedy console](https://www.expedy.fr/console/v3/), in the **API Keys & UID** card
## Option 1, through Zapier, no code
Ecwid by Lightspeed connects to Zapier, and Zapier ships a ready-made **Expedy Print** action. The recipe is always the same: an event in Ecwid by Lightspeed triggers **Create a Print Job** in Expedy Print, and you map the fields you want on the ticket.
Full walkthrough: **[How to integrate Expedy Print with Zapier](/integrations/zapier/how-to-integrate-expedy-print-with-zapier)**
## Option 2, through the REST API
If Ecwid by Lightspeed can issue an HTTP request, it can drive the printer directly.
```api
POST https://www.expedy.fr/api/v2/printers/{printer_uid}/print
```
Authentication uses an `Authorization` header carrying your `SID:TOKEN`, with no `Bearer` prefix. Parameters and a complete example are in [Create a Print Job](/expedy-print/api-print-v2/create-a-print-job).
## Formatting the ticket
Whichever route you take, the message accepts the Expedy layout tags:
| What you want | Where to look |
|---|---|
| Align, resize or emphasise text | [Text Layout](/expedy-print/receipt-layout/text-layout-tags) |
| Print a logo or an image | [Image and Logo](/expedy-print/receipt-layout/image-and-logo-printing) |
| Print a QR code | [QR Code](/expedy-print/receipt-layout/qr-code) |
| Print a barcode | [EAN13 Barcode](/expedy-print/receipt-layout/ean13-barcode) |
> Depending on the connector or the software you use, this setup may be handled by your partner or your agency. Check with them before you start.
## Need help?
- [Browse all integrations](/integrations)
- [Open a support ticket](https://help.expedy.io/support/tickets/new)
---
url: https://docs.expedy.io/en/integrations/tumblr/connect-a-receipt-printer-to-tumblr
title: Print your Tumblr photos automatically
updated_at: 2026-10-20T12:56:31.355889+00:00
---
# Print your Tumblr photos automatically
[Tumblr](https://www.tumblr.com/) is a photo sharing platform. Through **Zapier**, every new image can go straight to a printer: a black and white copy on a thermal receipt printer, or a full colour print on a photo printer driven by a Raspberry Pi.
## Two very different ways to print an image
| | Receipt printer, thermal | Raspberry Pi or Cloud Print Box |
|---|---|---|
| Hardware | Expedy XPDY80, HSPOS, Star Micronics | Your own laser, inkjet or photo printer, Kodak or DNP and the like, on USB |
| Result | Black and white, no ink, nothing to buy beyond the paper roll | Full colour, photo quality |
| Formats | `.JPG` `.GIF` `.PNG`, wrapped in the `
` tag on a receipt printer, or the bare image URL on a photo printer
Step by step on the Zapier side: [How to integrate Expedy Print with Zapier](/integrations/zapier/how-to-integrate-expedy-print-with-zapier)
> Depending on the connector or the software you use, this setup may be handled by your partner or your agency. Check with them before you start.
## Need help?
- [Browse all integrations](/integrations)
- [Open a support ticket](https://help.expedy.io/support/tickets/new)
---
url: https://docs.expedy.io/en/integrations/baselinker/connect-a-receipt-printer-to-baselinker
title: Print from BaseLinker with Expedy PRINT
updated_at: 2026-10-22T07:08:43.576643+00:00
---
# Print from BaseLinker with Expedy PRINT
[BaseLinker](https://baselinker.com/) is an inventory and order management tool. It reaches Expedy PRINT in two ways: through **Zapier**, with no code, or through the **Expedy REST API**, when you want full control over the ticket.
## What you need
- An Expedy account with an active printer. Not added yet? Follow the guide for your machine, [Expedy XPDY80](/expedy-print/installation/add-an-expedy-xpdy80-cloud-printer-to-your-account), [HSPOS](/expedy-print/installation/add-an-hspos-cloud-printer-to-your-account), [Star Micronics](/expedy-print/installation/add-a-star-micronics-printer-to-your-account) or [Raspberry Pi](/expedy-print/installation/add-a-raspberry-pi-cloud-print-server-to-your-account)
- Your **API SID**, **API TOKEN** and **API Printer UID**, all three on the printer page of the [Expedy console](https://www.expedy.fr/console/v3/), in the **API Keys & UID** card
## Option 1, through Zapier, no code
BaseLinker connects to Zapier, and Zapier ships a ready-made **Expedy Print** action. The recipe is always the same: an event in BaseLinker triggers **Create a Print Job** in Expedy Print, and you map the fields you want on the ticket.
Full walkthrough: **[How to integrate Expedy Print with Zapier](/integrations/zapier/how-to-integrate-expedy-print-with-zapier)**
## Option 2, through the REST API
If BaseLinker can issue an HTTP request, it can drive the printer directly.
```api
POST https://www.expedy.fr/api/v2/printers/{printer_uid}/print
```
Authentication uses an `Authorization` header carrying your `SID:TOKEN`, with no `Bearer` prefix. Parameters and a complete example are in [Create a Print Job](/expedy-print/api-print-v2/create-a-print-job).
## Formatting the ticket
Whichever route you take, the message accepts the Expedy layout tags:
| What you want | Where to look |
|---|---|
| Align, resize or emphasise text | [Text Layout](/expedy-print/receipt-layout/text-layout-tags) |
| Print a logo or an image | [Image and Logo](/expedy-print/receipt-layout/image-and-logo-printing) |
| Print a QR code | [QR Code](/expedy-print/receipt-layout/qr-code) |
| Print a barcode | [EAN13 Barcode](/expedy-print/receipt-layout/ean13-barcode) |
> Depending on the connector or the software you use, this setup may be handled by your partner or your agency. Check with them before you start.
## Need help?
- [Browse all integrations](/integrations)
- [Open a support ticket](https://help.expedy.io/support/tickets/new)
---
url: https://docs.expedy.io/en/integrations/hubspot/connect-a-receipt-printer-to-hubspot
title: Print from HubSpot with Expedy PRINT
updated_at: 2026-10-19T19:11:57.127475+00:00
---
# Print from HubSpot with Expedy PRINT
[HubSpot](https://www.hubspot.com/) is a CRM. It reaches Expedy PRINT in two ways: through **Zapier**, with no code, or through the **Expedy REST API**, when you want full control over the ticket.
## What you need
- An Expedy account with an active printer. Not added yet? Follow the guide for your machine, [Expedy XPDY80](/expedy-print/installation/add-an-expedy-xpdy80-cloud-printer-to-your-account), [HSPOS](/expedy-print/installation/add-an-hspos-cloud-printer-to-your-account), [Star Micronics](/expedy-print/installation/add-a-star-micronics-printer-to-your-account) or [Raspberry Pi](/expedy-print/installation/add-a-raspberry-pi-cloud-print-server-to-your-account)
- Your **API SID**, **API TOKEN** and **API Printer UID**, all three on the printer page of the [Expedy console](https://www.expedy.fr/console/v3/), in the **API Keys & UID** card
## Option 1, through Zapier, no code
HubSpot connects to Zapier, and Zapier ships a ready-made **Expedy Print** action. The recipe is always the same: an event in HubSpot triggers **Create a Print Job** in Expedy Print, and you map the fields you want on the ticket.
Full walkthrough: **[How to integrate Expedy Print with Zapier](/integrations/zapier/how-to-integrate-expedy-print-with-zapier)**
## Option 2, through the REST API
If HubSpot can issue an HTTP request, it can drive the printer directly.
```api
POST https://www.expedy.fr/api/v2/printers/{printer_uid}/print
```
Authentication uses an `Authorization` header carrying your `SID:TOKEN`, with no `Bearer` prefix. Parameters and a complete example are in [Create a Print Job](/expedy-print/api-print-v2/create-a-print-job).
## Formatting the ticket
Whichever route you take, the message accepts the Expedy layout tags:
| What you want | Where to look |
|---|---|
| Align, resize or emphasise text | [Text Layout](/expedy-print/receipt-layout/text-layout-tags) |
| Print a logo or an image | [Image and Logo](/expedy-print/receipt-layout/image-and-logo-printing) |
| Print a QR code | [QR Code](/expedy-print/receipt-layout/qr-code) |
| Print a barcode | [EAN13 Barcode](/expedy-print/receipt-layout/ean13-barcode) |
> Depending on the connector or the software you use, this setup may be handled by your partner or your agency. Check with them before you start.
## Need help?
- [Browse all integrations](/integrations)
- [Open a support ticket](https://help.expedy.io/support/tickets/new)
---
url: https://docs.expedy.io/en/integrations/big-cartel/connect-a-receipt-printer-to-big-cartel
title: Print from Big Cartel with Expedy PRINT
updated_at: 2026-10-15T21:44:16.778325+00:00
---
# Print from Big Cartel with Expedy PRINT
[Big Cartel](https://www.bigcartel.com/) is an eCommerce platform. It reaches Expedy PRINT in two ways: through **Zapier**, with no code, or through the **Expedy REST API**, when you want full control over the ticket.
## What you need
- An Expedy account with an active printer. Not added yet? Follow the guide for your machine, [Expedy XPDY80](/expedy-print/installation/add-an-expedy-xpdy80-cloud-printer-to-your-account), [HSPOS](/expedy-print/installation/add-an-hspos-cloud-printer-to-your-account), [Star Micronics](/expedy-print/installation/add-a-star-micronics-printer-to-your-account) or [Raspberry Pi](/expedy-print/installation/add-a-raspberry-pi-cloud-print-server-to-your-account)
- Your **API SID**, **API TOKEN** and **API Printer UID**, all three on the printer page of the [Expedy console](https://www.expedy.fr/console/v3/), in the **API Keys & UID** card
## Option 1, through Zapier, no code
Big Cartel connects to Zapier, and Zapier ships a ready-made **Expedy Print** action. The recipe is always the same: an event in Big Cartel triggers **Create a Print Job** in Expedy Print, and you map the fields you want on the ticket.
Full walkthrough: **[How to integrate Expedy Print with Zapier](/integrations/zapier/how-to-integrate-expedy-print-with-zapier)**
## Option 2, through the REST API
If Big Cartel can issue an HTTP request, it can drive the printer directly.
```api
POST https://www.expedy.fr/api/v2/printers/{printer_uid}/print
```
Authentication uses an `Authorization` header carrying your `SID:TOKEN`, with no `Bearer` prefix. Parameters and a complete example are in [Create a Print Job](/expedy-print/api-print-v2/create-a-print-job).
## Formatting the ticket
Whichever route you take, the message accepts the Expedy layout tags:
| What you want | Where to look |
|---|---|
| Align, resize or emphasise text | [Text Layout](/expedy-print/receipt-layout/text-layout-tags) |
| Print a logo or an image | [Image and Logo](/expedy-print/receipt-layout/image-and-logo-printing) |
| Print a QR code | [QR Code](/expedy-print/receipt-layout/qr-code) |
| Print a barcode | [EAN13 Barcode](/expedy-print/receipt-layout/ean13-barcode) |
> Depending on the connector or the software you use, this setup may be handled by your partner or your agency. Check with them before you start.
## Need help?
- [Browse all integrations](/integrations)
- [Open a support ticket](https://help.expedy.io/support/tickets/new)
---
url: https://docs.expedy.io/en/integrations/jotform/connect-a-receipt-printer-to-jotform
title: Print from Jotform with Expedy PRINT
updated_at: 2026-10-22T09:47:43.774356+00:00
---
# Print from Jotform with Expedy PRINT
[Jotform](https://www.jotform.com/) is an online form builder. It reaches Expedy PRINT in two ways: through **Zapier**, with no code, or through the **Expedy REST API**, when you want full control over the ticket.
## What you need
- An Expedy account with an active printer. Not added yet? Follow the guide for your machine, [Expedy XPDY80](/expedy-print/installation/add-an-expedy-xpdy80-cloud-printer-to-your-account), [HSPOS](/expedy-print/installation/add-an-hspos-cloud-printer-to-your-account), [Star Micronics](/expedy-print/installation/add-a-star-micronics-printer-to-your-account) or [Raspberry Pi](/expedy-print/installation/add-a-raspberry-pi-cloud-print-server-to-your-account)
- Your **API SID**, **API TOKEN** and **API Printer UID**, all three on the printer page of the [Expedy console](https://www.expedy.fr/console/v3/), in the **API Keys & UID** card
## Option 1, through Zapier, no code
Jotform connects to Zapier, and Zapier ships a ready-made **Expedy Print** action. The recipe is always the same: an event in Jotform triggers **Create a Print Job** in Expedy Print, and you map the fields you want on the ticket.
Full walkthrough: **[How to integrate Expedy Print with Zapier](/integrations/zapier/how-to-integrate-expedy-print-with-zapier)**
## Option 2, through the REST API
If Jotform can issue an HTTP request, it can drive the printer directly.
```api
POST https://www.expedy.fr/api/v2/printers/{printer_uid}/print
```
Authentication uses an `Authorization` header carrying your `SID:TOKEN`, with no `Bearer` prefix. Parameters and a complete example are in [Create a Print Job](/expedy-print/api-print-v2/create-a-print-job).
## Formatting the ticket
Whichever route you take, the message accepts the Expedy layout tags:
| What you want | Where to look |
|---|---|
| Align, resize or emphasise text | [Text Layout](/expedy-print/receipt-layout/text-layout-tags) |
| Print a logo or an image | [Image and Logo](/expedy-print/receipt-layout/image-and-logo-printing) |
| Print a QR code | [QR Code](/expedy-print/receipt-layout/qr-code) |
| Print a barcode | [EAN13 Barcode](/expedy-print/receipt-layout/ean13-barcode) |
> Depending on the connector or the software you use, this setup may be handled by your partner or your agency. Check with them before you start.
## Need help?
- [Browse all integrations](/integrations)
- [Open a support ticket](https://help.expedy.io/support/tickets/new)
---
url: https://docs.expedy.io/en/integrations/airtable/connect-a-receipt-printer-to-airtable
title: Print from Airtable with Expedy PRINT
updated_at: 2026-10-20T17:34:30.73744+00:00
---
# Print from Airtable with Expedy PRINT
[Airtable](https://www.airtable.com/) is a collaborative data platform. It reaches Expedy PRINT in two ways: through **Zapier**, with no code, or through the **Expedy REST API**, when you want full control over the ticket.
## What you need
- An Expedy account with an active printer. Not added yet? Follow the guide for your machine, [Expedy XPDY80](/expedy-print/installation/add-an-expedy-xpdy80-cloud-printer-to-your-account), [HSPOS](/expedy-print/installation/add-an-hspos-cloud-printer-to-your-account), [Star Micronics](/expedy-print/installation/add-a-star-micronics-printer-to-your-account) or [Raspberry Pi](/expedy-print/installation/add-a-raspberry-pi-cloud-print-server-to-your-account)
- Your **API SID**, **API TOKEN** and **API Printer UID**, all three on the printer page of the [Expedy console](https://www.expedy.fr/console/v3/), in the **API Keys & UID** card
## Option 1, through Zapier, no code
Airtable connects to Zapier, and Zapier ships a ready-made **Expedy Print** action. The recipe is always the same: an event in Airtable triggers **Create a Print Job** in Expedy Print, and you map the fields you want on the ticket.
Full walkthrough: **[How to integrate Expedy Print with Zapier](/integrations/zapier/how-to-integrate-expedy-print-with-zapier)**
## Option 2, through the REST API
If Airtable can issue an HTTP request, it can drive the printer directly.
```api
POST https://www.expedy.fr/api/v2/printers/{printer_uid}/print
```
Authentication uses an `Authorization` header carrying your `SID:TOKEN`, with no `Bearer` prefix. Parameters and a complete example are in [Create a Print Job](/expedy-print/api-print-v2/create-a-print-job).
## Formatting the ticket
Whichever route you take, the message accepts the Expedy layout tags:
| What you want | Where to look |
|---|---|
| Align, resize or emphasise text | [Text Layout](/expedy-print/receipt-layout/text-layout-tags) |
| Print a logo or an image | [Image and Logo](/expedy-print/receipt-layout/image-and-logo-printing) |
| Print a QR code | [QR Code](/expedy-print/receipt-layout/qr-code) |
| Print a barcode | [EAN13 Barcode](/expedy-print/receipt-layout/ean13-barcode) |
> Depending on the connector or the software you use, this setup may be handled by your partner or your agency. Check with them before you start.
## Need help?
- [Browse all integrations](/integrations)
- [Open a support ticket](https://help.expedy.io/support/tickets/new)
---
url: https://docs.expedy.io/en/integrations/shipcloud/connect-a-receipt-printer-to-shipcloud
title: Print your shipcloud shipping labels automatically
updated_at: 2026-10-18T18:14:52.563976+00:00
---
# Print your shipcloud shipping labels automatically
[shipcloud](https://www.shipcloud.io/) generates your carrier shipping labels. Through **Zapier**, the label PDF goes straight to your label printer the moment shipcloud creates it, so nobody has to download it and print it by hand.
> An Expedy cloud receipt printer, XPDY80, HSPOS or Star Micronics, **cannot print a carrier label**: it is a receipt printer. Carrier labels always go through a **Raspberry Pi** or a **Cloud Print Box USB adapter** driving a label printer.
## What you need
- An Expedy account with an active **Raspberry Pi print server** or **Cloud Print Box USB adapter**. Not set up yet? See [Add a Raspberry Pi print server to your account](/expedy-print/installation/add-a-raspberry-pi-cloud-print-server-to-your-account)
- **Your own label printer**, connected by USB to that Raspberry Pi or adapter, with its port set to `LABEL`
- A shipcloud account and a [Zapier](https://zapier.com/) account
- Your **API SID**, **API TOKEN** and **API Printer UID**, on the printer page of the [Expedy console](https://www.expedy.fr/console/v3/), in the **API Keys & UID** card
## Why a label printer
A carrier label is a PDF in a fixed format, most often 100 x 150 mm. A receipt printer cannot render it at the right size, so the job goes to a label printer driven by a Raspberry Pi or the Cloud Print Box.
On the printer page, run a **USB scan** and set the port that carries the label printer to `LABEL`, not `ESC/POS`. See [Installation on Raspberry Pi](/usb-cloud-printer-adapter/rpi-installation/installation-on-raspberry-pi).
## Build the Zap
1. In Zapier, create a Zap and pick **shipcloud** as the trigger app
2. Choose the event that fires when a label is created
3. Add **Expedy Print** as the action, then **Create a Print Job**
4. Connect your Expedy account with your **Expedy SID** and your **Expedy TOKEN**
5. Enter the **Printer UID** of the label printer
6. In the message field, map the label PDF URL returned by shipcloud
Step by step on the Zapier side: [How to integrate Expedy Print with Zapier](/integrations/zapier/how-to-integrate-expedy-print-with-zapier)
## What to send
A label printer takes the PDF URL **on its own, with no tag**:
```text
https://example.com/label.pdf
```
On an ESC/POS receipt printer the same URL has to be wrapped in the `` tag instead. Both forms are detailed in [PDF printing](/expedy-print/receipt-layout/print-pdf).
## Test it
Create a test label in shipcloud and check that it comes out at the right size. If nothing prints:
- check the **Printer UID**, it must be the label printer, not the receipt printer
- check that the USB port is in `LABEL` mode after the scan
- check that the PDF URL is reachable without authentication, Expedy fetches it from its own servers
> Depending on the connector or the software you use, this setup may be handled by your partner or your agency. Check with them before you start.
## Need help?
- [Browse all integrations](/integrations)
- [Open a support ticket](https://help.expedy.io/support/tickets/new)
---
url: https://docs.expedy.io/en/integrations/retool/connect-a-receipt-printer-to-retool
title: Print from Retool with Expedy PRINT
updated_at: 2026-10-19T17:43:06.607749+00:00
---
# Print from Retool with Expedy PRINT
[Retool](https://retool.com/) is a no-code app building platform. It reaches Expedy PRINT in two ways: through **Zapier**, with no code, or through the **Expedy REST API**, when you want full control over the ticket.
## What you need
- An Expedy account with an active printer. Not added yet? Follow the guide for your machine, [Expedy XPDY80](/expedy-print/installation/add-an-expedy-xpdy80-cloud-printer-to-your-account), [HSPOS](/expedy-print/installation/add-an-hspos-cloud-printer-to-your-account), [Star Micronics](/expedy-print/installation/add-a-star-micronics-printer-to-your-account) or [Raspberry Pi](/expedy-print/installation/add-a-raspberry-pi-cloud-print-server-to-your-account)
- Your **API SID**, **API TOKEN** and **API Printer UID**, all three on the printer page of the [Expedy console](https://www.expedy.fr/console/v3/), in the **API Keys & UID** card
## Option 1, through Zapier, no code
Retool connects to Zapier, and Zapier ships a ready-made **Expedy Print** action. The recipe is always the same: an event in Retool triggers **Create a Print Job** in Expedy Print, and you map the fields you want on the ticket.
Full walkthrough: **[How to integrate Expedy Print with Zapier](/integrations/zapier/how-to-integrate-expedy-print-with-zapier)**
## Option 2, through the REST API
If Retool can issue an HTTP request, it can drive the printer directly.
```api
POST https://www.expedy.fr/api/v2/printers/{printer_uid}/print
```
Authentication uses an `Authorization` header carrying your `SID:TOKEN`, with no `Bearer` prefix. Parameters and a complete example are in [Create a Print Job](/expedy-print/api-print-v2/create-a-print-job).
## Formatting the ticket
Whichever route you take, the message accepts the Expedy layout tags:
| What you want | Where to look |
|---|---|
| Align, resize or emphasise text | [Text Layout](/expedy-print/receipt-layout/text-layout-tags) |
| Print a logo or an image | [Image and Logo](/expedy-print/receipt-layout/image-and-logo-printing) |
| Print a QR code | [QR Code](/expedy-print/receipt-layout/qr-code) |
| Print a barcode | [EAN13 Barcode](/expedy-print/receipt-layout/ean13-barcode) |
> Depending on the connector or the software you use, this setup may be handled by your partner or your agency. Check with them before you start.
## Need help?
- [Browse all integrations](/integrations)
- [Open a support ticket](https://help.expedy.io/support/tickets/new)
---
url: https://docs.expedy.io/en/integrations/order-desk/connect-a-receipt-printer-to-order-desk
title: Print from Order Desk with Expedy PRINT
updated_at: 2026-10-15T15:13:46.53303+00:00
---
# Print from Order Desk with Expedy PRINT
**Order Desk** is an order aggregation platform. It reaches Expedy PRINT in two ways: through **Zapier**, with no code, or through the **Expedy REST API**, when you want full control over the ticket.
## What you need
- An Expedy account with an active printer. Not added yet? Follow the guide for your machine, [Expedy XPDY80](/expedy-print/installation/add-an-expedy-xpdy80-cloud-printer-to-your-account), [HSPOS](/expedy-print/installation/add-an-hspos-cloud-printer-to-your-account), [Star Micronics](/expedy-print/installation/add-a-star-micronics-printer-to-your-account) or [Raspberry Pi](/expedy-print/installation/add-a-raspberry-pi-cloud-print-server-to-your-account)
- Your **API SID**, **API TOKEN** and **API Printer UID**, all three on the printer page of the [Expedy console](https://www.expedy.fr/console/v3/), in the **API Keys & UID** card
## Option 1, through Zapier, no code
Order Desk connects to Zapier, and Zapier ships a ready-made **Expedy Print** action. The recipe is always the same: an event in Order Desk triggers **Create a Print Job** in Expedy Print, and you map the fields you want on the ticket.
Full walkthrough: **[How to integrate Expedy Print with Zapier](/integrations/zapier/how-to-integrate-expedy-print-with-zapier)**
## Option 2, through the REST API
If Order Desk can issue an HTTP request, it can drive the printer directly.
```api
POST https://www.expedy.fr/api/v2/printers/{printer_uid}/print
```
Authentication uses an `Authorization` header carrying your `SID:TOKEN`, with no `Bearer` prefix. Parameters and a complete example are in [Create a Print Job](/expedy-print/api-print-v2/create-a-print-job).
## Formatting the ticket
Whichever route you take, the message accepts the Expedy layout tags:
| What you want | Where to look |
|---|---|
| Align, resize or emphasise text | [Text Layout](/expedy-print/receipt-layout/text-layout-tags) |
| Print a logo or an image | [Image and Logo](/expedy-print/receipt-layout/image-and-logo-printing) |
| Print a QR code | [QR Code](/expedy-print/receipt-layout/qr-code) |
| Print a barcode | [EAN13 Barcode](/expedy-print/receipt-layout/ean13-barcode) |
> Depending on the connector or the software you use, this setup may be handled by your partner or your agency. Check with them before you start.
## Need help?
- [Browse all integrations](/integrations)
- [Open a support ticket](https://help.expedy.io/support/tickets/new)
---
url: https://docs.expedy.io/en/integrations/la-toque-magique/connect-a-receipt-printer-to-la-toque-magique
title: Receipt printing with La Toque Magique
updated_at: 2026-10-20T17:38:14.395008+00:00
---
# Receipt printing with La Toque Magique
**La Toque Magique** is an order aggregation platform. With La Toque Magique, **the receipt printer is installed and configured by La Toque Magique**, not from your Expedy console. Get in touch with them to have your printer activated.
## Who does what
| Party | Responsibility |
|---|---|
| Expedy | Supplies the cloud printer, its connectivity (Ethernet, Wi-Fi or 4G SIM) and the console where you follow your print jobs |
| La Toque Magique | Pairs the printer with your account, sets the receipt layout and switches the service on |
## Getting your printer activated
1. Order your machine, or use the one you already have
2. Contact La Toque Magique and tell them you want to print your orders on an Expedy cloud printer
3. La Toque Magique handles the pairing and the receipt layout on their side
4. Once activated, orders print automatically, with nothing left to do on your part
> If your printer already appears in your Expedy account, give La Toque Magique its **API Printer UID**, shown on the printer page in the **API Keys & UID** card of the [Expedy console](https://www.expedy.fr/console/v3/).
## Once it is live
From the [Expedy console](https://www.expedy.fr/console/v3/) you can, at any time:
- Check that the machine is reachable, with **Check Status** on the printer page
- Review every job in **Print Jobs History**
- Follow your monthly usage and change plan, the **FREE** plan being capped at 50 print requests per month
Anything about the order content or the ticket layout goes through La Toque Magique, since the connection lives on their side.
## Need help?
- [Add your printer to your Expedy account](/expedy-print/installation/add-an-expedy-xpdy80-cloud-printer-to-your-account)
- [Browse all integrations](/integrations)
- Expedy hardware or account question: [open a support ticket](https://help.expedy.io/support/tickets/new)
---
url: https://docs.expedy.io/en/integrations/shift4shop/connect-a-receipt-printer-to-shift4shop
title: Print from Shift4Shop with Expedy PRINT
updated_at: 2026-10-18T01:32:51.249985+00:00
---
# Print from Shift4Shop with Expedy PRINT
[Shift4Shop](https://www.shift4shop.com/) is an eCommerce platform. It reaches Expedy PRINT in two ways: through **Zapier**, with no code, or through the **Expedy REST API**, when you want full control over the ticket.
## What you need
- An Expedy account with an active printer. Not added yet? Follow the guide for your machine, [Expedy XPDY80](/expedy-print/installation/add-an-expedy-xpdy80-cloud-printer-to-your-account), [HSPOS](/expedy-print/installation/add-an-hspos-cloud-printer-to-your-account), [Star Micronics](/expedy-print/installation/add-a-star-micronics-printer-to-your-account) or [Raspberry Pi](/expedy-print/installation/add-a-raspberry-pi-cloud-print-server-to-your-account)
- Your **API SID**, **API TOKEN** and **API Printer UID**, all three on the printer page of the [Expedy console](https://www.expedy.fr/console/v3/), in the **API Keys & UID** card
## Option 1, through Zapier, no code
Shift4Shop connects to Zapier, and Zapier ships a ready-made **Expedy Print** action. The recipe is always the same: an event in Shift4Shop triggers **Create a Print Job** in Expedy Print, and you map the fields you want on the ticket.
Full walkthrough: **[How to integrate Expedy Print with Zapier](/integrations/zapier/how-to-integrate-expedy-print-with-zapier)**
## Option 2, through the REST API
If Shift4Shop can issue an HTTP request, it can drive the printer directly.
```api
POST https://www.expedy.fr/api/v2/printers/{printer_uid}/print
```
Authentication uses an `Authorization` header carrying your `SID:TOKEN`, with no `Bearer` prefix. Parameters and a complete example are in [Create a Print Job](/expedy-print/api-print-v2/create-a-print-job).
## Formatting the ticket
Whichever route you take, the message accepts the Expedy layout tags:
| What you want | Where to look |
|---|---|
| Align, resize or emphasise text | [Text Layout](/expedy-print/receipt-layout/text-layout-tags) |
| Print a logo or an image | [Image and Logo](/expedy-print/receipt-layout/image-and-logo-printing) |
| Print a QR code | [QR Code](/expedy-print/receipt-layout/qr-code) |
| Print a barcode | [EAN13 Barcode](/expedy-print/receipt-layout/ean13-barcode) |
> Depending on the connector or the software you use, this setup may be handled by your partner or your agency. Check with them before you start.
## Need help?
- [Browse all integrations](/integrations)
- [Open a support ticket](https://help.expedy.io/support/tickets/new)
---
url: https://docs.expedy.io/en/integrations/tally/connect-a-receipt-printer-to-tally
title: Print from Tally with Expedy PRINT
updated_at: 2026-10-20T08:07:47.151093+00:00
---
# Print from Tally with Expedy PRINT
[Tally](https://tally.so/) is an online form builder. It reaches Expedy PRINT in two ways: through **Zapier**, with no code, or through the **Expedy REST API**, when you want full control over the ticket.
## What you need
- An Expedy account with an active printer. Not added yet? Follow the guide for your machine, [Expedy XPDY80](/expedy-print/installation/add-an-expedy-xpdy80-cloud-printer-to-your-account), [HSPOS](/expedy-print/installation/add-an-hspos-cloud-printer-to-your-account), [Star Micronics](/expedy-print/installation/add-a-star-micronics-printer-to-your-account) or [Raspberry Pi](/expedy-print/installation/add-a-raspberry-pi-cloud-print-server-to-your-account)
- Your **API SID**, **API TOKEN** and **API Printer UID**, all three on the printer page of the [Expedy console](https://www.expedy.fr/console/v3/), in the **API Keys & UID** card
## Option 1, through Zapier, no code
Tally connects to Zapier, and Zapier ships a ready-made **Expedy Print** action. The recipe is always the same: an event in Tally triggers **Create a Print Job** in Expedy Print, and you map the fields you want on the ticket.
Full walkthrough: **[How to integrate Expedy Print with Zapier](/integrations/zapier/how-to-integrate-expedy-print-with-zapier)**
## Option 2, through the REST API
If Tally can issue an HTTP request, it can drive the printer directly.
```api
POST https://www.expedy.fr/api/v2/printers/{printer_uid}/print
```
Authentication uses an `Authorization` header carrying your `SID:TOKEN`, with no `Bearer` prefix. Parameters and a complete example are in [Create a Print Job](/expedy-print/api-print-v2/create-a-print-job).
## Formatting the ticket
Whichever route you take, the message accepts the Expedy layout tags:
| What you want | Where to look |
|---|---|
| Align, resize or emphasise text | [Text Layout](/expedy-print/receipt-layout/text-layout-tags) |
| Print a logo or an image | [Image and Logo](/expedy-print/receipt-layout/image-and-logo-printing) |
| Print a QR code | [QR Code](/expedy-print/receipt-layout/qr-code) |
| Print a barcode | [EAN13 Barcode](/expedy-print/receipt-layout/ean13-barcode) |
> Depending on the connector or the software you use, this setup may be handled by your partner or your agency. Check with them before you start.
## Need help?
- [Browse all integrations](/integrations)
- [Open a support ticket](https://help.expedy.io/support/tickets/new)
---
url: https://docs.expedy.io/en/integrations/orderout/connect-a-receipt-printer-to-orderout
title: Print from OrderOut with Expedy PRINT
updated_at: 2026-10-19T19:56:22.662912+00:00
---
# Print from OrderOut with Expedy PRINT
**OrderOut** is an order aggregation platform. It reaches Expedy PRINT in two ways: through **Zapier**, with no code, or through the **Expedy REST API**, when you want full control over the ticket.
## What you need
- An Expedy account with an active printer. Not added yet? Follow the guide for your machine, [Expedy XPDY80](/expedy-print/installation/add-an-expedy-xpdy80-cloud-printer-to-your-account), [HSPOS](/expedy-print/installation/add-an-hspos-cloud-printer-to-your-account), [Star Micronics](/expedy-print/installation/add-a-star-micronics-printer-to-your-account) or [Raspberry Pi](/expedy-print/installation/add-a-raspberry-pi-cloud-print-server-to-your-account)
- Your **API SID**, **API TOKEN** and **API Printer UID**, all three on the printer page of the [Expedy console](https://www.expedy.fr/console/v3/), in the **API Keys & UID** card
## Option 1, through Zapier, no code
OrderOut connects to Zapier, and Zapier ships a ready-made **Expedy Print** action. The recipe is always the same: an event in OrderOut triggers **Create a Print Job** in Expedy Print, and you map the fields you want on the ticket.
Full walkthrough: **[How to integrate Expedy Print with Zapier](/integrations/zapier/how-to-integrate-expedy-print-with-zapier)**
## Option 2, through the REST API
If OrderOut can issue an HTTP request, it can drive the printer directly.
```api
POST https://www.expedy.fr/api/v2/printers/{printer_uid}/print
```
Authentication uses an `Authorization` header carrying your `SID:TOKEN`, with no `Bearer` prefix. Parameters and a complete example are in [Create a Print Job](/expedy-print/api-print-v2/create-a-print-job).
## Formatting the ticket
Whichever route you take, the message accepts the Expedy layout tags:
| What you want | Where to look |
|---|---|
| Align, resize or emphasise text | [Text Layout](/expedy-print/receipt-layout/text-layout-tags) |
| Print a logo or an image | [Image and Logo](/expedy-print/receipt-layout/image-and-logo-printing) |
| Print a QR code | [QR Code](/expedy-print/receipt-layout/qr-code) |
| Print a barcode | [EAN13 Barcode](/expedy-print/receipt-layout/ean13-barcode) |
> Depending on the connector or the software you use, this setup may be handled by your partner or your agency. Check with them before you start.
## Need help?
- [Browse all integrations](/integrations)
- [Open a support ticket](https://help.expedy.io/support/tickets/new)
---
url: https://docs.expedy.io/en/integrations/delivery-hero/connect-a-receipt-printer-to-delivery-hero
title: Print Delivery Hero orders on a receipt printer
updated_at: 2026-10-20T22:57:29.190159+00:00
---
# Print Delivery Hero orders on a receipt printer
[Delivery Hero](https://www.deliveryhero.com/) is a meal delivery platform. It connects to Expedy PRINT through **HubRise**: Delivery Hero sends its orders to HubRise, HubRise forwards them to your cloud printer, and the ticket comes out within seconds.
## What you need
- An Expedy account with an active printer. Not added yet? Follow the guide for your machine, [Expedy XPDY80](/expedy-print/installation/add-an-expedy-xpdy80-cloud-printer-to-your-account), [HSPOS](/expedy-print/installation/add-an-hspos-cloud-printer-to-your-account), [Star Micronics](/expedy-print/installation/add-a-star-micronics-printer-to-your-account) or [Raspberry Pi](/expedy-print/installation/add-a-raspberry-pi-cloud-print-server-to-your-account)
- A [HubRise account](https://manager.hubrise.com/signup), which aggregates your sales channels
- A Delivery Hero account linked to your HubRise location
## How it works
| Step | What happens |
|---|---|
| 1 | An order is placed on Delivery Hero |
| 2 | Delivery Hero pushes it to HubRise |
| 3 | Expedy PRINT receives it and prints a standardised ticket |
A single printer covers every channel connected to the same HubRise location, so you do not need one machine per platform.
## Connect it
The setup happens once, on the HubRise side, and is described step by step in the reference guide:
**[Connect a receipt printer to HubRise](/integrations/hubrise/connecting-a-receipt-printer-to-hubrise)**
Then link your Delivery Hero account to the same HubRise location. That part is done from the Delivery Hero back office, or by Delivery Hero support.
## Receipt settings
Once connected, the printer page in the [Expedy console](https://www.expedy.fr/console/v3/) controls what gets printed:
- **Print order when**, the status that triggers printing, `NEW`, `RECEIVED` or `ACCEPTED`
- **Then change status to**, the automatic status update applied after printing
- **Number of copies**, one ticket for the kitchen, one for the counter or the delivery bag
- The receipt header and footer, logo, company name, address and registration number
All of it is detailed in [Connect a receipt printer to HubRise](/integrations/hubrise/connecting-a-receipt-printer-to-hubrise).
> Depending on the connector or the point-of-sale software you use, this setup may be handled by your partner. Check with them before you start.
## Need help?
- [Browse all integrations](/integrations)
- [Open a support ticket](https://help.expedy.io/support/tickets/new)
---
url: https://docs.expedy.io/en/integrations/easyship/connect-a-receipt-printer-to-easyship
title: Print your Easyship shipping labels automatically
updated_at: 2026-10-21T03:39:05.240891+00:00
---
# Print your Easyship shipping labels automatically
[Easyship](https://www.easyship.com/) generates your carrier shipping labels. Through **Zapier**, the label PDF goes straight to your label printer the moment Easyship creates it, so nobody has to download it and print it by hand.
> An Expedy cloud receipt printer, XPDY80, HSPOS or Star Micronics, **cannot print a carrier label**: it is a receipt printer. Carrier labels always go through a **Raspberry Pi** or a **Cloud Print Box USB adapter** driving a label printer.
## What you need
- An Expedy account with an active **Raspberry Pi print server** or **Cloud Print Box USB adapter**. Not set up yet? See [Add a Raspberry Pi print server to your account](/expedy-print/installation/add-a-raspberry-pi-cloud-print-server-to-your-account)
- **Your own label printer**, connected by USB to that Raspberry Pi or adapter, with its port set to `LABEL`
- A Easyship account and a [Zapier](https://zapier.com/) account
- Your **API SID**, **API TOKEN** and **API Printer UID**, on the printer page of the [Expedy console](https://www.expedy.fr/console/v3/), in the **API Keys & UID** card
## Why a label printer
A carrier label is a PDF in a fixed format, most often 100 x 150 mm. A receipt printer cannot render it at the right size, so the job goes to a label printer driven by a Raspberry Pi or the Cloud Print Box.
On the printer page, run a **USB scan** and set the port that carries the label printer to `LABEL`, not `ESC/POS`. See [Installation on Raspberry Pi](/usb-cloud-printer-adapter/rpi-installation/installation-on-raspberry-pi).
## Build the Zap
1. In Zapier, create a Zap and pick **Easyship** as the trigger app
2. Choose the event that fires when a label is created
3. Add **Expedy Print** as the action, then **Create a Print Job**
4. Connect your Expedy account with your **Expedy SID** and your **Expedy TOKEN**
5. Enter the **Printer UID** of the label printer
6. In the message field, map the label PDF URL returned by Easyship
Step by step on the Zapier side: [How to integrate Expedy Print with Zapier](/integrations/zapier/how-to-integrate-expedy-print-with-zapier)
## What to send
A label printer takes the PDF URL **on its own, with no tag**:
```text
https://example.com/label.pdf
```
On an ESC/POS receipt printer the same URL has to be wrapped in the `` tag instead. Both forms are detailed in [PDF printing](/expedy-print/receipt-layout/print-pdf).
## Test it
Create a test label in Easyship and check that it comes out at the right size. If nothing prints:
- check the **Printer UID**, it must be the label printer, not the receipt printer
- check that the USB port is in `LABEL` mode after the scan
- check that the PDF URL is reachable without authentication, Expedy fetches it from its own servers
> Depending on the connector or the software you use, this setup may be handled by your partner or your agency. Check with them before you start.
## Need help?
- [Browse all integrations](/integrations)
- [Open a support ticket](https://help.expedy.io/support/tickets/new)
---
url: https://docs.expedy.io/en/integrations/restaur-app/connect-a-receipt-printer-to-restaur-app
title: Print Restaur'App orders on a receipt printer
updated_at: 2026-10-18T16:05:54.203965+00:00
---
# Print Restaur'App orders on a receipt printer
**Restaur'App** is an online ordering solution for hospitality. It connects to Expedy PRINT through **HubRise**: Restaur'App sends its orders to HubRise, HubRise forwards them to your cloud printer, and the ticket comes out within seconds.
## What you need
- An Expedy account with an active printer. Not added yet? Follow the guide for your machine, [Expedy XPDY80](/expedy-print/installation/add-an-expedy-xpdy80-cloud-printer-to-your-account), [HSPOS](/expedy-print/installation/add-an-hspos-cloud-printer-to-your-account), [Star Micronics](/expedy-print/installation/add-a-star-micronics-printer-to-your-account) or [Raspberry Pi](/expedy-print/installation/add-a-raspberry-pi-cloud-print-server-to-your-account)
- A [HubRise account](https://manager.hubrise.com/signup), which aggregates your sales channels
- A Restaur'App account linked to your HubRise location
## How it works
| Step | What happens |
|---|---|
| 1 | An order is placed on Restaur'App |
| 2 | Restaur'App pushes it to HubRise |
| 3 | Expedy PRINT receives it and prints a standardised ticket |
A single printer covers every channel connected to the same HubRise location, so you do not need one machine per platform.
## Connect it
The setup happens once, on the HubRise side, and is described step by step in the reference guide:
**[Connect a receipt printer to HubRise](/integrations/hubrise/connecting-a-receipt-printer-to-hubrise)**
Then link your Restaur'App account to the same HubRise location. That part is done from the Restaur'App back office, or by Restaur'App support.
## Receipt settings
Once connected, the printer page in the [Expedy console](https://www.expedy.fr/console/v3/) controls what gets printed:
- **Print order when**, the status that triggers printing, `NEW`, `RECEIVED` or `ACCEPTED`
- **Then change status to**, the automatic status update applied after printing
- **Number of copies**, one ticket for the kitchen, one for the counter or the delivery bag
- The receipt header and footer, logo, company name, address and registration number
All of it is detailed in [Connect a receipt printer to HubRise](/integrations/hubrise/connecting-a-receipt-printer-to-hubrise).
> Depending on the connector or the point-of-sale software you use, this setup may be handled by your partner. Check with them before you start.
## Need help?
- [Browse all integrations](/integrations)
- [Open a support ticket](https://help.expedy.io/support/tickets/new)
---
url: https://docs.expedy.io/en/integrations/zuplyit/connect-a-receipt-printer-to-zuplyit
title: Print Zuplyit orders on a receipt printer
updated_at: 2026-10-20T17:12:59.016487+00:00
---
# Print Zuplyit orders on a receipt printer
**Zuplyit** is an online ordering solution for hospitality. It connects to Expedy PRINT through **HubRise**: Zuplyit sends its orders to HubRise, HubRise forwards them to your cloud printer, and the ticket comes out within seconds.
## What you need
- An Expedy account with an active printer. Not added yet? Follow the guide for your machine, [Expedy XPDY80](/expedy-print/installation/add-an-expedy-xpdy80-cloud-printer-to-your-account), [HSPOS](/expedy-print/installation/add-an-hspos-cloud-printer-to-your-account), [Star Micronics](/expedy-print/installation/add-a-star-micronics-printer-to-your-account) or [Raspberry Pi](/expedy-print/installation/add-a-raspberry-pi-cloud-print-server-to-your-account)
- A [HubRise account](https://manager.hubrise.com/signup), which aggregates your sales channels
- A Zuplyit account linked to your HubRise location
## How it works
| Step | What happens |
|---|---|
| 1 | An order is placed on Zuplyit |
| 2 | Zuplyit pushes it to HubRise |
| 3 | Expedy PRINT receives it and prints a standardised ticket |
A single printer covers every channel connected to the same HubRise location, so you do not need one machine per platform.
## Connect it
The setup happens once, on the HubRise side, and is described step by step in the reference guide:
**[Connect a receipt printer to HubRise](/integrations/hubrise/connecting-a-receipt-printer-to-hubrise)**
Then link your Zuplyit account to the same HubRise location. That part is done from the Zuplyit back office, or by Zuplyit support.
## Receipt settings
Once connected, the printer page in the [Expedy console](https://www.expedy.fr/console/v3/) controls what gets printed:
- **Print order when**, the status that triggers printing, `NEW`, `RECEIVED` or `ACCEPTED`
- **Then change status to**, the automatic status update applied after printing
- **Number of copies**, one ticket for the kitchen, one for the counter or the delivery bag
- The receipt header and footer, logo, company name, address and registration number
All of it is detailed in [Connect a receipt printer to HubRise](/integrations/hubrise/connecting-a-receipt-printer-to-hubrise).
> Depending on the connector or the point-of-sale software you use, this setup may be handled by your partner. Check with them before you start.
## Need help?
- [Browse all integrations](/integrations)
- [Open a support ticket](https://help.expedy.io/support/tickets/new)
---
url: https://docs.expedy.io/en/integrations/locatouch/connect-a-receipt-printer-to-locatouch
title: Print Loca'Touch orders on a receipt printer
updated_at: 2026-10-20T22:18:03.519288+00:00
---
# Print Loca'Touch orders on a receipt printer
**Loca'Touch** is a self-ordering kiosk solution. It connects to Expedy PRINT through **HubRise**: Loca'Touch sends its orders to HubRise, HubRise forwards them to your cloud printer, and the ticket comes out within seconds.
## What you need
- An Expedy account with an active printer. Not added yet? Follow the guide for your machine, [Expedy XPDY80](/expedy-print/installation/add-an-expedy-xpdy80-cloud-printer-to-your-account), [HSPOS](/expedy-print/installation/add-an-hspos-cloud-printer-to-your-account), [Star Micronics](/expedy-print/installation/add-a-star-micronics-printer-to-your-account) or [Raspberry Pi](/expedy-print/installation/add-a-raspberry-pi-cloud-print-server-to-your-account)
- A [HubRise account](https://manager.hubrise.com/signup), which aggregates your sales channels
- A Loca'Touch account linked to your HubRise location
## How it works
| Step | What happens |
|---|---|
| 1 | An order is placed on Loca'Touch |
| 2 | Loca'Touch pushes it to HubRise |
| 3 | Expedy PRINT receives it and prints a standardised ticket |
A single printer covers every channel connected to the same HubRise location, so you do not need one machine per platform.
## Connect it
The setup happens once, on the HubRise side, and is described step by step in the reference guide:
**[Connect a receipt printer to HubRise](/integrations/hubrise/connecting-a-receipt-printer-to-hubrise)**
Then link your Loca'Touch account to the same HubRise location. That part is done from the Loca'Touch back office, or by Loca'Touch support.
## Receipt settings
Once connected, the printer page in the [Expedy console](https://www.expedy.fr/console/v3/) controls what gets printed:
- **Print order when**, the status that triggers printing, `NEW`, `RECEIVED` or `ACCEPTED`
- **Then change status to**, the automatic status update applied after printing
- **Number of copies**, one ticket for the kitchen, one for the counter or the delivery bag
- The receipt header and footer, logo, company name, address and registration number
All of it is detailed in [Connect a receipt printer to HubRise](/integrations/hubrise/connecting-a-receipt-printer-to-hubrise).
> Depending on the connector or the point-of-sale software you use, this setup may be handled by your partner. Check with them before you start.
## Need help?
- [Browse all integrations](/integrations)
- [Open a support ticket](https://help.expedy.io/support/tickets/new)
---
url: https://docs.expedy.io/en/integrations/flipdish/connect-a-receipt-printer-to-flipdish
title: Print from Flipdish with Expedy PRINT
updated_at: 2026-10-21T07:27:46.758277+00:00
---
# Print from Flipdish with Expedy PRINT
[Flipdish](https://www.flipdish.com/) is an online ordering platform. It reaches Expedy PRINT in two ways: through **Zapier**, with no code, or through the **Expedy REST API**, when you want full control over the ticket.
## What you need
- An Expedy account with an active printer. Not added yet? Follow the guide for your machine, [Expedy XPDY80](/expedy-print/installation/add-an-expedy-xpdy80-cloud-printer-to-your-account), [HSPOS](/expedy-print/installation/add-an-hspos-cloud-printer-to-your-account), [Star Micronics](/expedy-print/installation/add-a-star-micronics-printer-to-your-account) or [Raspberry Pi](/expedy-print/installation/add-a-raspberry-pi-cloud-print-server-to-your-account)
- Your **API SID**, **API TOKEN** and **API Printer UID**, all three on the printer page of the [Expedy console](https://www.expedy.fr/console/v3/), in the **API Keys & UID** card
## Option 1, through Zapier, no code
Flipdish connects to Zapier, and Zapier ships a ready-made **Expedy Print** action. The recipe is always the same: an event in Flipdish triggers **Create a Print Job** in Expedy Print, and you map the fields you want on the ticket.
Full walkthrough: **[How to integrate Expedy Print with Zapier](/integrations/zapier/how-to-integrate-expedy-print-with-zapier)**
## Option 2, through the REST API
If Flipdish can issue an HTTP request, it can drive the printer directly.
```api
POST https://www.expedy.fr/api/v2/printers/{printer_uid}/print
```
Authentication uses an `Authorization` header carrying your `SID:TOKEN`, with no `Bearer` prefix. Parameters and a complete example are in [Create a Print Job](/expedy-print/api-print-v2/create-a-print-job).
## Formatting the ticket
Whichever route you take, the message accepts the Expedy layout tags:
| What you want | Where to look |
|---|---|
| Align, resize or emphasise text | [Text Layout](/expedy-print/receipt-layout/text-layout-tags) |
| Print a logo or an image | [Image and Logo](/expedy-print/receipt-layout/image-and-logo-printing) |
| Print a QR code | [QR Code](/expedy-print/receipt-layout/qr-code) |
| Print a barcode | [EAN13 Barcode](/expedy-print/receipt-layout/ean13-barcode) |
> Depending on the connector or the software you use, this setup may be handled by your partner or your agency. Check with them before you start.
## Need help?
- [Browse all integrations](/integrations)
- [Open a support ticket](https://help.expedy.io/support/tickets/new)
---
url: https://docs.expedy.io/en/integrations/grazecart/connect-a-receipt-printer-to-grazecart
title: Print from GrazeCart with Expedy PRINT
updated_at: 2026-10-22T11:02:18.835923+00:00
---
# Print from GrazeCart with Expedy PRINT
[GrazeCart](https://www.grazecart.com/) is an ordering and catering platform. It reaches Expedy PRINT in two ways: through **Zapier**, with no code, or through the **Expedy REST API**, when you want full control over the ticket.
## What you need
- An Expedy account with an active printer. Not added yet? Follow the guide for your machine, [Expedy XPDY80](/expedy-print/installation/add-an-expedy-xpdy80-cloud-printer-to-your-account), [HSPOS](/expedy-print/installation/add-an-hspos-cloud-printer-to-your-account), [Star Micronics](/expedy-print/installation/add-a-star-micronics-printer-to-your-account) or [Raspberry Pi](/expedy-print/installation/add-a-raspberry-pi-cloud-print-server-to-your-account)
- Your **API SID**, **API TOKEN** and **API Printer UID**, all three on the printer page of the [Expedy console](https://www.expedy.fr/console/v3/), in the **API Keys & UID** card
## Option 1, through Zapier, no code
GrazeCart connects to Zapier, and Zapier ships a ready-made **Expedy Print** action. The recipe is always the same: an event in GrazeCart triggers **Create a Print Job** in Expedy Print, and you map the fields you want on the ticket.
Full walkthrough: **[How to integrate Expedy Print with Zapier](/integrations/zapier/how-to-integrate-expedy-print-with-zapier)**
## Option 2, through the REST API
If GrazeCart can issue an HTTP request, it can drive the printer directly.
```api
POST https://www.expedy.fr/api/v2/printers/{printer_uid}/print
```
Authentication uses an `Authorization` header carrying your `SID:TOKEN`, with no `Bearer` prefix. Parameters and a complete example are in [Create a Print Job](/expedy-print/api-print-v2/create-a-print-job).
## Formatting the ticket
Whichever route you take, the message accepts the Expedy layout tags:
| What you want | Where to look |
|---|---|
| Align, resize or emphasise text | [Text Layout](/expedy-print/receipt-layout/text-layout-tags) |
| Print a logo or an image | [Image and Logo](/expedy-print/receipt-layout/image-and-logo-printing) |
| Print a QR code | [QR Code](/expedy-print/receipt-layout/qr-code) |
| Print a barcode | [EAN13 Barcode](/expedy-print/receipt-layout/ean13-barcode) |
> Depending on the connector or the software you use, this setup may be handled by your partner or your agency. Check with them before you start.
## Need help?
- [Browse all integrations](/integrations)
- [Open a support ticket](https://help.expedy.io/support/tickets/new)
---
url: https://docs.expedy.io/en/integrations/barmade/connect-a-receipt-printer-to-barmade
title: Receipt printing with Barmade
updated_at: 2026-10-22T00:12:20.409494+00:00
---
# Receipt printing with Barmade
[Barmade](https://barmade.fr/) is an online ordering solution for hospitality. With Barmade, **the receipt printer is installed and configured by Barmade**, not from your Expedy console. Get in touch with them to have your printer activated.
## Who does what
| Party | Responsibility |
|---|---|
| Expedy | Supplies the cloud printer, its connectivity (Ethernet, Wi-Fi or 4G SIM) and the console where you follow your print jobs |
| Barmade | Pairs the printer with your account, sets the receipt layout and switches the service on |
## Getting your printer activated
1. Order your machine, or use the one you already have
2. Contact Barmade and tell them you want to print your orders on an Expedy cloud printer
3. Barmade handles the pairing and the receipt layout on their side
4. Once activated, orders print automatically, with nothing left to do on your part
> If your printer already appears in your Expedy account, give Barmade its **API Printer UID**, shown on the printer page in the **API Keys & UID** card of the [Expedy console](https://www.expedy.fr/console/v3/).
## Once it is live
From the [Expedy console](https://www.expedy.fr/console/v3/) you can, at any time:
- Check that the machine is reachable, with **Check Status** on the printer page
- Review every job in **Print Jobs History**
- Follow your monthly usage and change plan, the **FREE** plan being capped at 50 print requests per month
Anything about the order content or the ticket layout goes through Barmade, since the connection lives on their side.
## Need help?
- [Add your printer to your Expedy account](/expedy-print/installation/add-an-expedy-xpdy80-cloud-printer-to-your-account)
- [Browse all integrations](/integrations)
- Expedy hardware or account question: [open a support ticket](https://help.expedy.io/support/tickets/new)
---
url: https://docs.expedy.io/en/integrations/albato/connect-a-receipt-printer-to-albato
title: Print from Albato with Expedy PRINT
updated_at: 2026-10-20T06:57:23.287538+00:00
---
# Print from Albato with Expedy PRINT
[Albato](https://albato.com/) is an automation platform. It reaches Expedy PRINT in two ways: through **Zapier**, with no code, or through the **Expedy REST API**, when you want full control over the ticket.
## What you need
- An Expedy account with an active printer. Not added yet? Follow the guide for your machine, [Expedy XPDY80](/expedy-print/installation/add-an-expedy-xpdy80-cloud-printer-to-your-account), [HSPOS](/expedy-print/installation/add-an-hspos-cloud-printer-to-your-account), [Star Micronics](/expedy-print/installation/add-a-star-micronics-printer-to-your-account) or [Raspberry Pi](/expedy-print/installation/add-a-raspberry-pi-cloud-print-server-to-your-account)
- Your **API SID**, **API TOKEN** and **API Printer UID**, all three on the printer page of the [Expedy console](https://www.expedy.fr/console/v3/), in the **API Keys & UID** card
## Option 1, through Zapier, no code
Albato connects to Zapier, and Zapier ships a ready-made **Expedy Print** action. The recipe is always the same: an event in Albato triggers **Create a Print Job** in Expedy Print, and you map the fields you want on the ticket.
Full walkthrough: **[How to integrate Expedy Print with Zapier](/integrations/zapier/how-to-integrate-expedy-print-with-zapier)**
## Option 2, through the REST API
If Albato can issue an HTTP request, it can drive the printer directly.
```api
POST https://www.expedy.fr/api/v2/printers/{printer_uid}/print
```
Authentication uses an `Authorization` header carrying your `SID:TOKEN`, with no `Bearer` prefix. Parameters and a complete example are in [Create a Print Job](/expedy-print/api-print-v2/create-a-print-job).
## Formatting the ticket
Whichever route you take, the message accepts the Expedy layout tags:
| What you want | Where to look |
|---|---|
| Align, resize or emphasise text | [Text Layout](/expedy-print/receipt-layout/text-layout-tags) |
| Print a logo or an image | [Image and Logo](/expedy-print/receipt-layout/image-and-logo-printing) |
| Print a QR code | [QR Code](/expedy-print/receipt-layout/qr-code) |
| Print a barcode | [EAN13 Barcode](/expedy-print/receipt-layout/ean13-barcode) |
> Depending on the connector or the software you use, this setup may be handled by your partner or your agency. Check with them before you start.
## Need help?
- [Browse all integrations](/integrations)
- [Open a support ticket](https://help.expedy.io/support/tickets/new)
---
url: https://docs.expedy.io/en/integrations/wix/connect-a-receipt-printer-to-wix
title: Print from Wix with Expedy PRINT
updated_at: 2026-10-22T05:52:40.383559+00:00
---
# Print from Wix with Expedy PRINT
[Wix](https://www.wix.com/) is an online ordering platform. It reaches Expedy PRINT in two ways: through **Zapier**, with no code, or through the **Expedy REST API**, when you want full control over the ticket.
## What you need
- An Expedy account with an active printer. Not added yet? Follow the guide for your machine, [Expedy XPDY80](/expedy-print/installation/add-an-expedy-xpdy80-cloud-printer-to-your-account), [HSPOS](/expedy-print/installation/add-an-hspos-cloud-printer-to-your-account), [Star Micronics](/expedy-print/installation/add-a-star-micronics-printer-to-your-account) or [Raspberry Pi](/expedy-print/installation/add-a-raspberry-pi-cloud-print-server-to-your-account)
- Your **API SID**, **API TOKEN** and **API Printer UID**, all three on the printer page of the [Expedy console](https://www.expedy.fr/console/v3/), in the **API Keys & UID** card
## Option 1, through Zapier, no code
Wix connects to Zapier, and Zapier ships a ready-made **Expedy Print** action. The recipe is always the same: an event in Wix triggers **Create a Print Job** in Expedy Print, and you map the fields you want on the ticket.
Full walkthrough: **[How to integrate Expedy Print with Zapier](/integrations/zapier/how-to-integrate-expedy-print-with-zapier)**
## Option 2, through the REST API
If Wix can issue an HTTP request, it can drive the printer directly.
```api
POST https://www.expedy.fr/api/v2/printers/{printer_uid}/print
```
Authentication uses an `Authorization` header carrying your `SID:TOKEN`, with no `Bearer` prefix. Parameters and a complete example are in [Create a Print Job](/expedy-print/api-print-v2/create-a-print-job).
## Formatting the ticket
Whichever route you take, the message accepts the Expedy layout tags:
| What you want | Where to look |
|---|---|
| Align, resize or emphasise text | [Text Layout](/expedy-print/receipt-layout/text-layout-tags) |
| Print a logo or an image | [Image and Logo](/expedy-print/receipt-layout/image-and-logo-printing) |
| Print a QR code | [QR Code](/expedy-print/receipt-layout/qr-code) |
| Print a barcode | [EAN13 Barcode](/expedy-print/receipt-layout/ean13-barcode) |
> Depending on the connector or the software you use, this setup may be handled by your partner or your agency. Check with them before you start.
## Need help?
- [Browse all integrations](/integrations)
- [Open a support ticket](https://help.expedy.io/support/tickets/new)
---
url: https://docs.expedy.io/en/integrations/xano/connect-a-receipt-printer-to-xano
title: Print from Xano with Expedy PRINT
updated_at: 2026-10-20T15:36:13.497592+00:00
---
# Print from Xano with Expedy PRINT
[Xano](https://www.xano.com/) is a no-code app building platform. It reaches Expedy PRINT in two ways: through **Zapier**, with no code, or through the **Expedy REST API**, when you want full control over the ticket.
## What you need
- An Expedy account with an active printer. Not added yet? Follow the guide for your machine, [Expedy XPDY80](/expedy-print/installation/add-an-expedy-xpdy80-cloud-printer-to-your-account), [HSPOS](/expedy-print/installation/add-an-hspos-cloud-printer-to-your-account), [Star Micronics](/expedy-print/installation/add-a-star-micronics-printer-to-your-account) or [Raspberry Pi](/expedy-print/installation/add-a-raspberry-pi-cloud-print-server-to-your-account)
- Your **API SID**, **API TOKEN** and **API Printer UID**, all three on the printer page of the [Expedy console](https://www.expedy.fr/console/v3/), in the **API Keys & UID** card
## Option 1, through Zapier, no code
Xano connects to Zapier, and Zapier ships a ready-made **Expedy Print** action. The recipe is always the same: an event in Xano triggers **Create a Print Job** in Expedy Print, and you map the fields you want on the ticket.
Full walkthrough: **[How to integrate Expedy Print with Zapier](/integrations/zapier/how-to-integrate-expedy-print-with-zapier)**
## Option 2, through the REST API
If Xano can issue an HTTP request, it can drive the printer directly.
```api
POST https://www.expedy.fr/api/v2/printers/{printer_uid}/print
```
Authentication uses an `Authorization` header carrying your `SID:TOKEN`, with no `Bearer` prefix. Parameters and a complete example are in [Create a Print Job](/expedy-print/api-print-v2/create-a-print-job).
## Formatting the ticket
Whichever route you take, the message accepts the Expedy layout tags:
| What you want | Where to look |
|---|---|
| Align, resize or emphasise text | [Text Layout](/expedy-print/receipt-layout/text-layout-tags) |
| Print a logo or an image | [Image and Logo](/expedy-print/receipt-layout/image-and-logo-printing) |
| Print a QR code | [QR Code](/expedy-print/receipt-layout/qr-code) |
| Print a barcode | [EAN13 Barcode](/expedy-print/receipt-layout/ean13-barcode) |
> Depending on the connector or the software you use, this setup may be handled by your partner or your agency. Check with them before you start.
## Need help?
- [Browse all integrations](/integrations)
- [Open a support ticket](https://help.expedy.io/support/tickets/new)
---
url: https://docs.expedy.io/en/integrations/ekm/connect-a-receipt-printer-to-ekm
title: Print from EKM with Expedy PRINT
updated_at: 2026-10-22T03:35:46.700487+00:00
---
# Print from EKM with Expedy PRINT
[EKM](https://www.ekm.com/) is an eCommerce platform. It reaches Expedy PRINT in two ways: through **Zapier**, with no code, or through the **Expedy REST API**, when you want full control over the ticket.
## What you need
- An Expedy account with an active printer. Not added yet? Follow the guide for your machine, [Expedy XPDY80](/expedy-print/installation/add-an-expedy-xpdy80-cloud-printer-to-your-account), [HSPOS](/expedy-print/installation/add-an-hspos-cloud-printer-to-your-account), [Star Micronics](/expedy-print/installation/add-a-star-micronics-printer-to-your-account) or [Raspberry Pi](/expedy-print/installation/add-a-raspberry-pi-cloud-print-server-to-your-account)
- Your **API SID**, **API TOKEN** and **API Printer UID**, all three on the printer page of the [Expedy console](https://www.expedy.fr/console/v3/), in the **API Keys & UID** card
## Option 1, through Zapier, no code
EKM connects to Zapier, and Zapier ships a ready-made **Expedy Print** action. The recipe is always the same: an event in EKM triggers **Create a Print Job** in Expedy Print, and you map the fields you want on the ticket.
Full walkthrough: **[How to integrate Expedy Print with Zapier](/integrations/zapier/how-to-integrate-expedy-print-with-zapier)**
## Option 2, through the REST API
If EKM can issue an HTTP request, it can drive the printer directly.
```api
POST https://www.expedy.fr/api/v2/printers/{printer_uid}/print
```
Authentication uses an `Authorization` header carrying your `SID:TOKEN`, with no `Bearer` prefix. Parameters and a complete example are in [Create a Print Job](/expedy-print/api-print-v2/create-a-print-job).
## Formatting the ticket
Whichever route you take, the message accepts the Expedy layout tags:
| What you want | Where to look |
|---|---|
| Align, resize or emphasise text | [Text Layout](/expedy-print/receipt-layout/text-layout-tags) |
| Print a logo or an image | [Image and Logo](/expedy-print/receipt-layout/image-and-logo-printing) |
| Print a QR code | [QR Code](/expedy-print/receipt-layout/qr-code) |
| Print a barcode | [EAN13 Barcode](/expedy-print/receipt-layout/ean13-barcode) |
> Depending on the connector or the software you use, this setup may be handled by your partner or your agency. Check with them before you start.
## Need help?
- [Browse all integrations](/integrations)
- [Open a support ticket](https://help.expedy.io/support/tickets/new)
---
url: https://docs.expedy.io/en/integrations/ordermate/connect-a-receipt-printer-to-ordermate
title: Print from Ordermate with Expedy PRINT
updated_at: 2026-10-23T06:25:40.588311+00:00
---
# Print from Ordermate with Expedy PRINT
**Ordermate** is a point-of-sale solution. It reaches Expedy PRINT in two ways: through **Zapier**, with no code, or through the **Expedy REST API**, when you want full control over the ticket.
## What you need
- An Expedy account with an active printer. Not added yet? Follow the guide for your machine, [Expedy XPDY80](/expedy-print/installation/add-an-expedy-xpdy80-cloud-printer-to-your-account), [HSPOS](/expedy-print/installation/add-an-hspos-cloud-printer-to-your-account), [Star Micronics](/expedy-print/installation/add-a-star-micronics-printer-to-your-account) or [Raspberry Pi](/expedy-print/installation/add-a-raspberry-pi-cloud-print-server-to-your-account)
- Your **API SID**, **API TOKEN** and **API Printer UID**, all three on the printer page of the [Expedy console](https://www.expedy.fr/console/v3/), in the **API Keys & UID** card
## Option 1, through Zapier, no code
Ordermate connects to Zapier, and Zapier ships a ready-made **Expedy Print** action. The recipe is always the same: an event in Ordermate triggers **Create a Print Job** in Expedy Print, and you map the fields you want on the ticket.
Full walkthrough: **[How to integrate Expedy Print with Zapier](/integrations/zapier/how-to-integrate-expedy-print-with-zapier)**
## Option 2, through the REST API
If Ordermate can issue an HTTP request, it can drive the printer directly.
```api
POST https://www.expedy.fr/api/v2/printers/{printer_uid}/print
```
Authentication uses an `Authorization` header carrying your `SID:TOKEN`, with no `Bearer` prefix. Parameters and a complete example are in [Create a Print Job](/expedy-print/api-print-v2/create-a-print-job).
## Formatting the ticket
Whichever route you take, the message accepts the Expedy layout tags:
| What you want | Where to look |
|---|---|
| Align, resize or emphasise text | [Text Layout](/expedy-print/receipt-layout/text-layout-tags) |
| Print a logo or an image | [Image and Logo](/expedy-print/receipt-layout/image-and-logo-printing) |
| Print a QR code | [QR Code](/expedy-print/receipt-layout/qr-code) |
| Print a barcode | [EAN13 Barcode](/expedy-print/receipt-layout/ean13-barcode) |
> Depending on the connector or the software you use, this setup may be handled by your partner or your agency. Check with them before you start.
## Need help?
- [Browse all integrations](/integrations)
- [Open a support ticket](https://help.expedy.io/support/tickets/new)
---
url: https://docs.expedy.io/en/integrations/zenorder/connect-a-receipt-printer-to-zenorder
title: Receipt printing with Zenorder
updated_at: 2026-10-22T21:56:09.496313+00:00
---
# Receipt printing with Zenorder
[Zenorder](https://www.zenorder.fr/) is an online ordering solution for hospitality. With Zenorder, **the receipt printer is installed and configured by Zenorder**, not from your Expedy console. Get in touch with them to have your printer activated.
## Who does what
| Party | Responsibility |
|---|---|
| Expedy | Supplies the cloud printer, its connectivity (Ethernet, Wi-Fi or 4G SIM) and the console where you follow your print jobs |
| Zenorder | Pairs the printer with your account, sets the receipt layout and switches the service on |
## Getting your printer activated
1. Order your machine, or use the one you already have
2. Contact Zenorder and tell them you want to print your orders on an Expedy cloud printer
3. Zenorder handles the pairing and the receipt layout on their side
4. Once activated, orders print automatically, with nothing left to do on your part
> If your printer already appears in your Expedy account, give Zenorder its **API Printer UID**, shown on the printer page in the **API Keys & UID** card of the [Expedy console](https://www.expedy.fr/console/v3/).
## Once it is live
From the [Expedy console](https://www.expedy.fr/console/v3/) you can, at any time:
- Check that the machine is reachable, with **Check Status** on the printer page
- Review every job in **Print Jobs History**
- Follow your monthly usage and change plan, the **FREE** plan being capped at 50 print requests per month
Anything about the order content or the ticket layout goes through Zenorder, since the connection lives on their side.
## Need help?
- [Add your printer to your Expedy account](/expedy-print/installation/add-an-expedy-xpdy80-cloud-printer-to-your-account)
- [Browse all integrations](/integrations)
- Expedy hardware or account question: [open a support ticket](https://help.expedy.io/support/tickets/new)
---
url: https://docs.expedy.io/en/integrations/make/connect-a-receipt-printer-to-make
title: Print from Make with Expedy PRINT
updated_at: 2026-10-20T20:20:36.519653+00:00
---
# Print from Make with Expedy PRINT
[Make](https://www.make.com) is an automation platform. It reaches Expedy PRINT in two ways: through **Zapier**, with no code, or through the **Expedy REST API**, when you want full control over the ticket.
## What you need
- An Expedy account with an active printer. Not added yet? Follow the guide for your machine, [Expedy XPDY80](/expedy-print/installation/add-an-expedy-xpdy80-cloud-printer-to-your-account), [HSPOS](/expedy-print/installation/add-an-hspos-cloud-printer-to-your-account), [Star Micronics](/expedy-print/installation/add-a-star-micronics-printer-to-your-account) or [Raspberry Pi](/expedy-print/installation/add-a-raspberry-pi-cloud-print-server-to-your-account)
- Your **API SID**, **API TOKEN** and **API Printer UID**, all three on the printer page of the [Expedy console](https://www.expedy.fr/console/v3/), in the **API Keys & UID** card
## Option 1, through Zapier, no code
Make connects to Zapier, and Zapier ships a ready-made **Expedy Print** action. The recipe is always the same: an event in Make triggers **Create a Print Job** in Expedy Print, and you map the fields you want on the ticket.
Full walkthrough: **[How to integrate Expedy Print with Zapier](/integrations/zapier/how-to-integrate-expedy-print-with-zapier)**
## Option 2, through the REST API
If Make can issue an HTTP request, it can drive the printer directly.
```api
POST https://www.expedy.fr/api/v2/printers/{printer_uid}/print
```
Authentication uses an `Authorization` header carrying your `SID:TOKEN`, with no `Bearer` prefix. Parameters and a complete example are in [Create a Print Job](/expedy-print/api-print-v2/create-a-print-job).
## Formatting the ticket
Whichever route you take, the message accepts the Expedy layout tags:
| What you want | Where to look |
|---|---|
| Align, resize or emphasise text | [Text Layout](/expedy-print/receipt-layout/text-layout-tags) |
| Print a logo or an image | [Image and Logo](/expedy-print/receipt-layout/image-and-logo-printing) |
| Print a QR code | [QR Code](/expedy-print/receipt-layout/qr-code) |
| Print a barcode | [EAN13 Barcode](/expedy-print/receipt-layout/ean13-barcode) |
> Depending on the connector or the software you use, this setup may be handled by your partner or your agency. Check with them before you start.
## Need help?
- [Browse all integrations](/integrations)
- [Open a support ticket](https://help.expedy.io/support/tickets/new)
---
url: https://docs.expedy.io/en/integrations/store-factory/connect-a-receipt-printer-to-store-factory
title: Print Store Factory orders on a receipt printer
updated_at: 2026-10-20T17:29:17.313787+00:00
---
# Print Store Factory orders on a receipt printer
**Store Factory** is an online ordering solution for hospitality. It connects to Expedy PRINT through **HubRise**: Store Factory sends its orders to HubRise, HubRise forwards them to your cloud printer, and the ticket comes out within seconds.
## What you need
- An Expedy account with an active printer. Not added yet? Follow the guide for your machine, [Expedy XPDY80](/expedy-print/installation/add-an-expedy-xpdy80-cloud-printer-to-your-account), [HSPOS](/expedy-print/installation/add-an-hspos-cloud-printer-to-your-account), [Star Micronics](/expedy-print/installation/add-a-star-micronics-printer-to-your-account) or [Raspberry Pi](/expedy-print/installation/add-a-raspberry-pi-cloud-print-server-to-your-account)
- A [HubRise account](https://manager.hubrise.com/signup), which aggregates your sales channels
- A Store Factory account linked to your HubRise location
## How it works
| Step | What happens |
|---|---|
| 1 | An order is placed on Store Factory |
| 2 | Store Factory pushes it to HubRise |
| 3 | Expedy PRINT receives it and prints a standardised ticket |
A single printer covers every channel connected to the same HubRise location, so you do not need one machine per platform.
## Connect it
The setup happens once, on the HubRise side, and is described step by step in the reference guide:
**[Connect a receipt printer to HubRise](/integrations/hubrise/connecting-a-receipt-printer-to-hubrise)**
Then link your Store Factory account to the same HubRise location. That part is done from the Store Factory back office, or by Store Factory support.
## Receipt settings
Once connected, the printer page in the [Expedy console](https://www.expedy.fr/console/v3/) controls what gets printed:
- **Print order when**, the status that triggers printing, `NEW`, `RECEIVED` or `ACCEPTED`
- **Then change status to**, the automatic status update applied after printing
- **Number of copies**, one ticket for the kitchen, one for the counter or the delivery bag
- The receipt header and footer, logo, company name, address and registration number
All of it is detailed in [Connect a receipt printer to HubRise](/integrations/hubrise/connecting-a-receipt-printer-to-hubrise).
> Depending on the connector or the point-of-sale software you use, this setup may be handled by your partner. Check with them before you start.
## Need help?
- [Browse all integrations](/integrations)
- [Open a support ticket](https://help.expedy.io/support/tickets/new)
---
url: https://docs.expedy.io/en/integrations/obypay/connect-a-receipt-printer-to-obypay
title: Print Obypay orders on a receipt printer
updated_at: 2026-10-20T03:20:07.653503+00:00
---
# Print Obypay orders on a receipt printer
[Obypay](https://www.obypay.com/) is an online ordering solution for hospitality. It connects to Expedy PRINT through **HubRise**: Obypay sends its orders to HubRise, HubRise forwards them to your cloud printer, and the ticket comes out within seconds.
## What you need
- An Expedy account with an active printer. Not added yet? Follow the guide for your machine, [Expedy XPDY80](/expedy-print/installation/add-an-expedy-xpdy80-cloud-printer-to-your-account), [HSPOS](/expedy-print/installation/add-an-hspos-cloud-printer-to-your-account), [Star Micronics](/expedy-print/installation/add-a-star-micronics-printer-to-your-account) or [Raspberry Pi](/expedy-print/installation/add-a-raspberry-pi-cloud-print-server-to-your-account)
- A [HubRise account](https://manager.hubrise.com/signup), which aggregates your sales channels
- A Obypay account linked to your HubRise location
## How it works
| Step | What happens |
|---|---|
| 1 | An order is placed on Obypay |
| 2 | Obypay pushes it to HubRise |
| 3 | Expedy PRINT receives it and prints a standardised ticket |
A single printer covers every channel connected to the same HubRise location, so you do not need one machine per platform.
## Connect it
The setup happens once, on the HubRise side, and is described step by step in the reference guide:
**[Connect a receipt printer to HubRise](/integrations/hubrise/connecting-a-receipt-printer-to-hubrise)**
Then link your Obypay account to the same HubRise location. That part is done from the Obypay back office, or by Obypay support.
## Receipt settings
Once connected, the printer page in the [Expedy console](https://www.expedy.fr/console/v3/) controls what gets printed:
- **Print order when**, the status that triggers printing, `NEW`, `RECEIVED` or `ACCEPTED`
- **Then change status to**, the automatic status update applied after printing
- **Number of copies**, one ticket for the kitchen, one for the counter or the delivery bag
- The receipt header and footer, logo, company name, address and registration number
All of it is detailed in [Connect a receipt printer to HubRise](/integrations/hubrise/connecting-a-receipt-printer-to-hubrise).
> Depending on the connector or the point-of-sale software you use, this setup may be handled by your partner. Check with them before you start.
## Need help?
- [Browse all integrations](/integrations)
- [Open a support ticket](https://help.expedy.io/support/tickets/new)
---
url: https://docs.expedy.io/en/integrations/smood/connect-a-receipt-printer-to-smood
title: Print Smood orders on a receipt printer
updated_at: 2026-10-21T01:01:06.071118+00:00
---
# Print Smood orders on a receipt printer
[Smood](https://www.smood.ch/) is a meal delivery platform. It connects to Expedy PRINT through **HubRise**: Smood sends its orders to HubRise, HubRise forwards them to your cloud printer, and the ticket comes out within seconds.
## What you need
- An Expedy account with an active printer. Not added yet? Follow the guide for your machine, [Expedy XPDY80](/expedy-print/installation/add-an-expedy-xpdy80-cloud-printer-to-your-account), [HSPOS](/expedy-print/installation/add-an-hspos-cloud-printer-to-your-account), [Star Micronics](/expedy-print/installation/add-a-star-micronics-printer-to-your-account) or [Raspberry Pi](/expedy-print/installation/add-a-raspberry-pi-cloud-print-server-to-your-account)
- A [HubRise account](https://manager.hubrise.com/signup), which aggregates your sales channels
- A Smood account linked to your HubRise location
## How it works
| Step | What happens |
|---|---|
| 1 | An order is placed on Smood |
| 2 | Smood pushes it to HubRise |
| 3 | Expedy PRINT receives it and prints a standardised ticket |
A single printer covers every channel connected to the same HubRise location, so you do not need one machine per platform.
## Connect it
The setup happens once, on the HubRise side, and is described step by step in the reference guide:
**[Connect a receipt printer to HubRise](/integrations/hubrise/connecting-a-receipt-printer-to-hubrise)**
Then link your Smood account to the same HubRise location. That part is done from the Smood back office, or by Smood support.
## Receipt settings
Once connected, the printer page in the [Expedy console](https://www.expedy.fr/console/v3/) controls what gets printed:
- **Print order when**, the status that triggers printing, `NEW`, `RECEIVED` or `ACCEPTED`
- **Then change status to**, the automatic status update applied after printing
- **Number of copies**, one ticket for the kitchen, one for the counter or the delivery bag
- The receipt header and footer, logo, company name, address and registration number
All of it is detailed in [Connect a receipt printer to HubRise](/integrations/hubrise/connecting-a-receipt-printer-to-hubrise).
> Depending on the connector or the point-of-sale software you use, this setup may be handled by your partner. Check with them before you start.
## Need help?
- [Browse all integrations](/integrations)
- [Open a support ticket](https://help.expedy.io/support/tickets/new)
---
url: https://docs.expedy.io/en/integrations/bigcommerce/connect-a-receipt-printer-to-bigcommerce
title: Print from BigCommerce with Expedy PRINT
updated_at: 2026-10-23T08:26:03.866644+00:00
---
# Print from BigCommerce with Expedy PRINT
[BigCommerce](https://www.bigcommerce.com/) is an online ordering platform. It reaches Expedy PRINT in two ways: through **Zapier**, with no code, or through the **Expedy REST API**, when you want full control over the ticket.
## What you need
- An Expedy account with an active printer. Not added yet? Follow the guide for your machine, [Expedy XPDY80](/expedy-print/installation/add-an-expedy-xpdy80-cloud-printer-to-your-account), [HSPOS](/expedy-print/installation/add-an-hspos-cloud-printer-to-your-account), [Star Micronics](/expedy-print/installation/add-a-star-micronics-printer-to-your-account) or [Raspberry Pi](/expedy-print/installation/add-a-raspberry-pi-cloud-print-server-to-your-account)
- Your **API SID**, **API TOKEN** and **API Printer UID**, all three on the printer page of the [Expedy console](https://www.expedy.fr/console/v3/), in the **API Keys & UID** card
## Option 1, through Zapier, no code
BigCommerce connects to Zapier, and Zapier ships a ready-made **Expedy Print** action. The recipe is always the same: an event in BigCommerce triggers **Create a Print Job** in Expedy Print, and you map the fields you want on the ticket.
Full walkthrough: **[How to integrate Expedy Print with Zapier](/integrations/zapier/how-to-integrate-expedy-print-with-zapier)**
## Option 2, through the REST API
If BigCommerce can issue an HTTP request, it can drive the printer directly.
```api
POST https://www.expedy.fr/api/v2/printers/{printer_uid}/print
```
Authentication uses an `Authorization` header carrying your `SID:TOKEN`, with no `Bearer` prefix. Parameters and a complete example are in [Create a Print Job](/expedy-print/api-print-v2/create-a-print-job).
## Formatting the ticket
Whichever route you take, the message accepts the Expedy layout tags:
| What you want | Where to look |
|---|---|
| Align, resize or emphasise text | [Text Layout](/expedy-print/receipt-layout/text-layout-tags) |
| Print a logo or an image | [Image and Logo](/expedy-print/receipt-layout/image-and-logo-printing) |
| Print a QR code | [QR Code](/expedy-print/receipt-layout/qr-code) |
| Print a barcode | [EAN13 Barcode](/expedy-print/receipt-layout/ean13-barcode) |
> Depending on the connector or the software you use, this setup may be handled by your partner or your agency. Check with them before you start.
## Need help?
- [Browse all integrations](/integrations)
- [Open a support ticket](https://help.expedy.io/support/tickets/new)
---
url: https://docs.expedy.io/en/integrations/bubble/connect-a-receipt-printer-to-bubble
title: Print from Bubble with Expedy PRINT
updated_at: 2026-10-21T01:12:12.249794+00:00
---
# Print from Bubble with Expedy PRINT
[Bubble](https://bubble.io/) is a no-code app building platform. It reaches Expedy PRINT in two ways: through **Zapier**, with no code, or through the **Expedy REST API**, when you want full control over the ticket.
## What you need
- An Expedy account with an active printer. Not added yet? Follow the guide for your machine, [Expedy XPDY80](/expedy-print/installation/add-an-expedy-xpdy80-cloud-printer-to-your-account), [HSPOS](/expedy-print/installation/add-an-hspos-cloud-printer-to-your-account), [Star Micronics](/expedy-print/installation/add-a-star-micronics-printer-to-your-account) or [Raspberry Pi](/expedy-print/installation/add-a-raspberry-pi-cloud-print-server-to-your-account)
- Your **API SID**, **API TOKEN** and **API Printer UID**, all three on the printer page of the [Expedy console](https://www.expedy.fr/console/v3/), in the **API Keys & UID** card
## Option 1, through Zapier, no code
Bubble connects to Zapier, and Zapier ships a ready-made **Expedy Print** action. The recipe is always the same: an event in Bubble triggers **Create a Print Job** in Expedy Print, and you map the fields you want on the ticket.
Full walkthrough: **[How to integrate Expedy Print with Zapier](/integrations/zapier/how-to-integrate-expedy-print-with-zapier)**
## Option 2, through the REST API
If Bubble can issue an HTTP request, it can drive the printer directly.
```api
POST https://www.expedy.fr/api/v2/printers/{printer_uid}/print
```
Authentication uses an `Authorization` header carrying your `SID:TOKEN`, with no `Bearer` prefix. Parameters and a complete example are in [Create a Print Job](/expedy-print/api-print-v2/create-a-print-job).
## Formatting the ticket
Whichever route you take, the message accepts the Expedy layout tags:
| What you want | Where to look |
|---|---|
| Align, resize or emphasise text | [Text Layout](/expedy-print/receipt-layout/text-layout-tags) |
| Print a logo or an image | [Image and Logo](/expedy-print/receipt-layout/image-and-logo-printing) |
| Print a QR code | [QR Code](/expedy-print/receipt-layout/qr-code) |
| Print a barcode | [EAN13 Barcode](/expedy-print/receipt-layout/ean13-barcode) |
> Depending on the connector or the software you use, this setup may be handled by your partner or your agency. Check with them before you start.
## Need help?
- [Browse all integrations](/integrations)
- [Open a support ticket](https://help.expedy.io/support/tickets/new)
---
url: https://docs.expedy.io/en/integrations/thuisbezorgd/connect-a-receipt-printer-to-thuisbezorgd
title: Print Thuisbezorgd orders on a receipt printer
updated_at: 2026-10-21T02:05:14.541567+00:00
---
# Print Thuisbezorgd orders on a receipt printer
[Thuisbezorgd](https://www.thuisbezorgd.nl/) is a meal delivery platform. It connects to Expedy PRINT through **HubRise**: Thuisbezorgd sends its orders to HubRise, HubRise forwards them to your cloud printer, and the ticket comes out within seconds.
## What you need
- An Expedy account with an active printer. Not added yet? Follow the guide for your machine, [Expedy XPDY80](/expedy-print/installation/add-an-expedy-xpdy80-cloud-printer-to-your-account), [HSPOS](/expedy-print/installation/add-an-hspos-cloud-printer-to-your-account), [Star Micronics](/expedy-print/installation/add-a-star-micronics-printer-to-your-account) or [Raspberry Pi](/expedy-print/installation/add-a-raspberry-pi-cloud-print-server-to-your-account)
- A [HubRise account](https://manager.hubrise.com/signup), which aggregates your sales channels
- A Thuisbezorgd account linked to your HubRise location
## How it works
| Step | What happens |
|---|---|
| 1 | An order is placed on Thuisbezorgd |
| 2 | Thuisbezorgd pushes it to HubRise |
| 3 | Expedy PRINT receives it and prints a standardised ticket |
A single printer covers every channel connected to the same HubRise location, so you do not need one machine per platform.
## Connect it
The setup happens once, on the HubRise side, and is described step by step in the reference guide:
**[Connect a receipt printer to HubRise](/integrations/hubrise/connecting-a-receipt-printer-to-hubrise)**
Then link your Thuisbezorgd account to the same HubRise location. That part is done from the Thuisbezorgd back office, or by Thuisbezorgd support.
## Receipt settings
Once connected, the printer page in the [Expedy console](https://www.expedy.fr/console/v3/) controls what gets printed:
- **Print order when**, the status that triggers printing, `NEW`, `RECEIVED` or `ACCEPTED`
- **Then change status to**, the automatic status update applied after printing
- **Number of copies**, one ticket for the kitchen, one for the counter or the delivery bag
- The receipt header and footer, logo, company name, address and registration number
All of it is detailed in [Connect a receipt printer to HubRise](/integrations/hubrise/connecting-a-receipt-printer-to-hubrise).
> Depending on the connector or the point-of-sale software you use, this setup may be handled by your partner. Check with them before you start.
## Need help?
- [Browse all integrations](/integrations)
- [Open a support ticket](https://help.expedy.io/support/tickets/new)
---
url: https://docs.expedy.io/en/integrations/uber-eats/connect-a-receipt-printer-to-uber-eats
title: Print Uber Eats orders on a receipt printer
updated_at: 2026-10-20T11:14:20.77663+00:00
---
# Print Uber Eats orders on a receipt printer
[Uber Eats](https://www.ubereats.com/) is a meal delivery platform. It connects to Expedy PRINT through **HubRise**: Uber Eats sends its orders to HubRise, HubRise forwards them to your cloud printer, and the ticket comes out within seconds.
## What you need
- An Expedy account with an active printer. Not added yet? Follow the guide for your machine, [Expedy XPDY80](/expedy-print/installation/add-an-expedy-xpdy80-cloud-printer-to-your-account), [HSPOS](/expedy-print/installation/add-an-hspos-cloud-printer-to-your-account), [Star Micronics](/expedy-print/installation/add-a-star-micronics-printer-to-your-account) or [Raspberry Pi](/expedy-print/installation/add-a-raspberry-pi-cloud-print-server-to-your-account)
- A [HubRise account](https://manager.hubrise.com/signup), which aggregates your sales channels
- A Uber Eats account linked to your HubRise location
## How it works
| Step | What happens |
|---|---|
| 1 | An order is placed on Uber Eats |
| 2 | Uber Eats pushes it to HubRise |
| 3 | Expedy PRINT receives it and prints a standardised ticket |
A single printer covers every channel connected to the same HubRise location, so you do not need one machine per platform.
## Connect it
The setup happens once, on the HubRise side, and is described step by step in the reference guide:
**[Connect a receipt printer to HubRise](/integrations/hubrise/connecting-a-receipt-printer-to-hubrise)**
Then link your Uber Eats account to the same HubRise location. That part is done from the Uber Eats back office, or by Uber Eats support.
## Receipt settings
Once connected, the printer page in the [Expedy console](https://www.expedy.fr/console/v3/) controls what gets printed:
- **Print order when**, the status that triggers printing, `NEW`, `RECEIVED` or `ACCEPTED`
- **Then change status to**, the automatic status update applied after printing
- **Number of copies**, one ticket for the kitchen, one for the counter or the delivery bag
- The receipt header and footer, logo, company name, address and registration number
All of it is detailed in [Connect a receipt printer to HubRise](/integrations/hubrise/connecting-a-receipt-printer-to-hubrise).
> Depending on the connector or the point-of-sale software you use, this setup may be handled by your partner. Check with them before you start.
## Need help?
- [Browse all integrations](/integrations)
- [Open a support ticket](https://help.expedy.io/support/tickets/new)
---
url: https://docs.expedy.io/en/integrations/gonnaorder/connect-a-receipt-printer-to-gonnaorder
title: Print GonnaOrder orders on a receipt printer
updated_at: 2026-10-20T11:55:18.74047+00:00
---
# Print GonnaOrder orders on a receipt printer
[GonnaOrder](https://www.gonnaorder.com/) is an online ordering solution for hospitality. It connects to Expedy PRINT through **HubRise**: GonnaOrder sends its orders to HubRise, HubRise forwards them to your cloud printer, and the ticket comes out within seconds.
## What you need
- An Expedy account with an active printer. Not added yet? Follow the guide for your machine, [Expedy XPDY80](/expedy-print/installation/add-an-expedy-xpdy80-cloud-printer-to-your-account), [HSPOS](/expedy-print/installation/add-an-hspos-cloud-printer-to-your-account), [Star Micronics](/expedy-print/installation/add-a-star-micronics-printer-to-your-account) or [Raspberry Pi](/expedy-print/installation/add-a-raspberry-pi-cloud-print-server-to-your-account)
- A [HubRise account](https://manager.hubrise.com/signup), which aggregates your sales channels
- A GonnaOrder account linked to your HubRise location
## How it works
| Step | What happens |
|---|---|
| 1 | An order is placed on GonnaOrder |
| 2 | GonnaOrder pushes it to HubRise |
| 3 | Expedy PRINT receives it and prints a standardised ticket |
A single printer covers every channel connected to the same HubRise location, so you do not need one machine per platform.
## Connect it
The setup happens once, on the HubRise side, and is described step by step in the reference guide:
**[Connect a receipt printer to HubRise](/integrations/hubrise/connecting-a-receipt-printer-to-hubrise)**
Then link your GonnaOrder account to the same HubRise location. That part is done from the GonnaOrder back office, or by GonnaOrder support.
## Receipt settings
Once connected, the printer page in the [Expedy console](https://www.expedy.fr/console/v3/) controls what gets printed:
- **Print order when**, the status that triggers printing, `NEW`, `RECEIVED` or `ACCEPTED`
- **Then change status to**, the automatic status update applied after printing
- **Number of copies**, one ticket for the kitchen, one for the counter or the delivery bag
- The receipt header and footer, logo, company name, address and registration number
All of it is detailed in [Connect a receipt printer to HubRise](/integrations/hubrise/connecting-a-receipt-printer-to-hubrise).
> Depending on the connector or the point-of-sale software you use, this setup may be handled by your partner. Check with them before you start.
## Need help?
- [Browse all integrations](/integrations)
- [Open a support ticket](https://help.expedy.io/support/tickets/new)
---
url: https://docs.expedy.io/en/integrations/orderlemon/connect-a-receipt-printer-to-orderlemon
title: Receipt printing with OrderLemon
updated_at: 2026-10-22T22:07:19.171393+00:00
---
# Receipt printing with OrderLemon
[OrderLemon](https://orderlemon.com/) is an online ordering solution for hospitality. With OrderLemon, **the receipt printer is installed and configured by OrderLemon**, not from your Expedy console. Get in touch with them to have your printer activated.
## Who does what
| Party | Responsibility |
|---|---|
| Expedy | Supplies the cloud printer, its connectivity (Ethernet, Wi-Fi or 4G SIM) and the console where you follow your print jobs |
| OrderLemon | Pairs the printer with your account, sets the receipt layout and switches the service on |
## Getting your printer activated
1. Order your machine, or use the one you already have
2. Contact OrderLemon and tell them you want to print your orders on an Expedy cloud printer
3. OrderLemon handles the pairing and the receipt layout on their side
4. Once activated, orders print automatically, with nothing left to do on your part
> If your printer already appears in your Expedy account, give OrderLemon its **API Printer UID**, shown on the printer page in the **API Keys & UID** card of the [Expedy console](https://www.expedy.fr/console/v3/).
## Once it is live
From the [Expedy console](https://www.expedy.fr/console/v3/) you can, at any time:
- Check that the machine is reachable, with **Check Status** on the printer page
- Review every job in **Print Jobs History**
- Follow your monthly usage and change plan, the **FREE** plan being capped at 50 print requests per month
Anything about the order content or the ticket layout goes through OrderLemon, since the connection lives on their side.
## Need help?
- [Add your printer to your Expedy account](/expedy-print/installation/add-an-expedy-xpdy80-cloud-printer-to-your-account)
- [Browse all integrations](/integrations)
- Expedy hardware or account question: [open a support ticket](https://help.expedy.io/support/tickets/new)
---
url: https://docs.expedy.io/en/integrations/shipmondo/connect-a-receipt-printer-to-shipmondo
title: Print your Shipmondo shipping labels automatically
updated_at: 2026-10-23T00:34:10.956184+00:00
---
# Print your Shipmondo shipping labels automatically
[Shipmondo](https://www.shipmondo.com/) generates your carrier shipping labels. Through **Zapier**, the label PDF goes straight to your label printer the moment Shipmondo creates it, so nobody has to download it and print it by hand.
> An Expedy cloud receipt printer, XPDY80, HSPOS or Star Micronics, **cannot print a carrier label**: it is a receipt printer. Carrier labels always go through a **Raspberry Pi** or a **Cloud Print Box USB adapter** driving a label printer.
## What you need
- An Expedy account with an active **Raspberry Pi print server** or **Cloud Print Box USB adapter**. Not set up yet? See [Add a Raspberry Pi print server to your account](/expedy-print/installation/add-a-raspberry-pi-cloud-print-server-to-your-account)
- **Your own label printer**, connected by USB to that Raspberry Pi or adapter, with its port set to `LABEL`
- A Shipmondo account and a [Zapier](https://zapier.com/) account
- Your **API SID**, **API TOKEN** and **API Printer UID**, on the printer page of the [Expedy console](https://www.expedy.fr/console/v3/), in the **API Keys & UID** card
## Why a label printer
A carrier label is a PDF in a fixed format, most often 100 x 150 mm. A receipt printer cannot render it at the right size, so the job goes to a label printer driven by a Raspberry Pi or the Cloud Print Box.
On the printer page, run a **USB scan** and set the port that carries the label printer to `LABEL`, not `ESC/POS`. See [Installation on Raspberry Pi](/usb-cloud-printer-adapter/rpi-installation/installation-on-raspberry-pi).
## Build the Zap
1. In Zapier, create a Zap and pick **Shipmondo** as the trigger app
2. Choose the event that fires when a label is created
3. Add **Expedy Print** as the action, then **Create a Print Job**
4. Connect your Expedy account with your **Expedy SID** and your **Expedy TOKEN**
5. Enter the **Printer UID** of the label printer
6. In the message field, map the label PDF URL returned by Shipmondo
Step by step on the Zapier side: [How to integrate Expedy Print with Zapier](/integrations/zapier/how-to-integrate-expedy-print-with-zapier)
## What to send
A label printer takes the PDF URL **on its own, with no tag**:
```text
https://example.com/label.pdf
```
On an ESC/POS receipt printer the same URL has to be wrapped in the `` tag instead. Both forms are detailed in [PDF printing](/expedy-print/receipt-layout/print-pdf).
## Test it
Create a test label in Shipmondo and check that it comes out at the right size. If nothing prints:
- check the **Printer UID**, it must be the label printer, not the receipt printer
- check that the USB port is in `LABEL` mode after the scan
- check that the PDF URL is reachable without authentication, Expedy fetches it from its own servers
> Depending on the connector or the software you use, this setup may be handled by your partner or your agency. Check with them before you start.
## Need help?
- [Browse all integrations](/integrations)
- [Open a support ticket](https://help.expedy.io/support/tickets/new)
---
url: https://docs.expedy.io/en/integrations/acuity-scheduling/connect-a-receipt-printer-to-acuity-scheduling
title: Print from Acuity Scheduling with Expedy PRINT
updated_at: 2026-10-21T16:04:32.881821+00:00
---
# Print from Acuity Scheduling with Expedy PRINT
[Acuity Scheduling](https://acuityscheduling.com/) is an online booking tool. It reaches Expedy PRINT in two ways: through **Zapier**, with no code, or through the **Expedy REST API**, when you want full control over the ticket.
## What you need
- An Expedy account with an active printer. Not added yet? Follow the guide for your machine, [Expedy XPDY80](/expedy-print/installation/add-an-expedy-xpdy80-cloud-printer-to-your-account), [HSPOS](/expedy-print/installation/add-an-hspos-cloud-printer-to-your-account), [Star Micronics](/expedy-print/installation/add-a-star-micronics-printer-to-your-account) or [Raspberry Pi](/expedy-print/installation/add-a-raspberry-pi-cloud-print-server-to-your-account)
- Your **API SID**, **API TOKEN** and **API Printer UID**, all three on the printer page of the [Expedy console](https://www.expedy.fr/console/v3/), in the **API Keys & UID** card
## Option 1, through Zapier, no code
Acuity Scheduling connects to Zapier, and Zapier ships a ready-made **Expedy Print** action. The recipe is always the same: an event in Acuity Scheduling triggers **Create a Print Job** in Expedy Print, and you map the fields you want on the ticket.
Full walkthrough: **[How to integrate Expedy Print with Zapier](/integrations/zapier/how-to-integrate-expedy-print-with-zapier)**
## Option 2, through the REST API
If Acuity Scheduling can issue an HTTP request, it can drive the printer directly.
```api
POST https://www.expedy.fr/api/v2/printers/{printer_uid}/print
```
Authentication uses an `Authorization` header carrying your `SID:TOKEN`, with no `Bearer` prefix. Parameters and a complete example are in [Create a Print Job](/expedy-print/api-print-v2/create-a-print-job).
## Formatting the ticket
Whichever route you take, the message accepts the Expedy layout tags:
| What you want | Where to look |
|---|---|
| Align, resize or emphasise text | [Text Layout](/expedy-print/receipt-layout/text-layout-tags) |
| Print a logo or an image | [Image and Logo](/expedy-print/receipt-layout/image-and-logo-printing) |
| Print a QR code | [QR Code](/expedy-print/receipt-layout/qr-code) |
| Print a barcode | [EAN13 Barcode](/expedy-print/receipt-layout/ean13-barcode) |
> Depending on the connector or the software you use, this setup may be handled by your partner or your agency. Check with them before you start.
## Need help?
- [Browse all integrations](/integrations)
- [Open a support ticket](https://help.expedy.io/support/tickets/new)
---
url: https://docs.expedy.io/en/integrations/eventbrite/connect-a-receipt-printer-to-eventbrite
title: Print from Eventbrite with Expedy PRINT
updated_at: 2026-10-21T16:57:08.126075+00:00
---
# Print from Eventbrite with Expedy PRINT
[Eventbrite](https://www.eventbrite.com/) is an event ticketing platform. It reaches Expedy PRINT in two ways: through **Zapier**, with no code, or through the **Expedy REST API**, when you want full control over the ticket.
## What you need
- An Expedy account with an active printer. Not added yet? Follow the guide for your machine, [Expedy XPDY80](/expedy-print/installation/add-an-expedy-xpdy80-cloud-printer-to-your-account), [HSPOS](/expedy-print/installation/add-an-hspos-cloud-printer-to-your-account), [Star Micronics](/expedy-print/installation/add-a-star-micronics-printer-to-your-account) or [Raspberry Pi](/expedy-print/installation/add-a-raspberry-pi-cloud-print-server-to-your-account)
- Your **API SID**, **API TOKEN** and **API Printer UID**, all three on the printer page of the [Expedy console](https://www.expedy.fr/console/v3/), in the **API Keys & UID** card
## Option 1, through Zapier, no code
Eventbrite connects to Zapier, and Zapier ships a ready-made **Expedy Print** action. The recipe is always the same: an event in Eventbrite triggers **Create a Print Job** in Expedy Print, and you map the fields you want on the ticket.
Full walkthrough: **[How to integrate Expedy Print with Zapier](/integrations/zapier/how-to-integrate-expedy-print-with-zapier)**
## Option 2, through the REST API
If Eventbrite can issue an HTTP request, it can drive the printer directly.
```api
POST https://www.expedy.fr/api/v2/printers/{printer_uid}/print
```
Authentication uses an `Authorization` header carrying your `SID:TOKEN`, with no `Bearer` prefix. Parameters and a complete example are in [Create a Print Job](/expedy-print/api-print-v2/create-a-print-job).
## Formatting the ticket
Whichever route you take, the message accepts the Expedy layout tags:
| What you want | Where to look |
|---|---|
| Align, resize or emphasise text | [Text Layout](/expedy-print/receipt-layout/text-layout-tags) |
| Print a logo or an image | [Image and Logo](/expedy-print/receipt-layout/image-and-logo-printing) |
| Print a QR code | [QR Code](/expedy-print/receipt-layout/qr-code) |
| Print a barcode | [EAN13 Barcode](/expedy-print/receipt-layout/ean13-barcode) |
> Depending on the connector or the software you use, this setup may be handled by your partner or your agency. Check with them before you start.
## Need help?
- [Browse all integrations](/integrations)
- [Open a support ticket](https://help.expedy.io/support/tickets/new)
---
url: https://docs.expedy.io/en/integrations/pipedrive/connect-a-receipt-printer-to-pipedrive
title: Print from Pipedrive with Expedy PRINT
updated_at: 2026-10-20T14:33:23.702326+00:00
---
# Print from Pipedrive with Expedy PRINT
[Pipedrive](https://www.pipedrive.com/) is a CRM. It reaches Expedy PRINT in two ways: through **Zapier**, with no code, or through the **Expedy REST API**, when you want full control over the ticket.
## What you need
- An Expedy account with an active printer. Not added yet? Follow the guide for your machine, [Expedy XPDY80](/expedy-print/installation/add-an-expedy-xpdy80-cloud-printer-to-your-account), [HSPOS](/expedy-print/installation/add-an-hspos-cloud-printer-to-your-account), [Star Micronics](/expedy-print/installation/add-a-star-micronics-printer-to-your-account) or [Raspberry Pi](/expedy-print/installation/add-a-raspberry-pi-cloud-print-server-to-your-account)
- Your **API SID**, **API TOKEN** and **API Printer UID**, all three on the printer page of the [Expedy console](https://www.expedy.fr/console/v3/), in the **API Keys & UID** card
## Option 1, through Zapier, no code
Pipedrive connects to Zapier, and Zapier ships a ready-made **Expedy Print** action. The recipe is always the same: an event in Pipedrive triggers **Create a Print Job** in Expedy Print, and you map the fields you want on the ticket.
Full walkthrough: **[How to integrate Expedy Print with Zapier](/integrations/zapier/how-to-integrate-expedy-print-with-zapier)**
## Option 2, through the REST API
If Pipedrive can issue an HTTP request, it can drive the printer directly.
```api
POST https://www.expedy.fr/api/v2/printers/{printer_uid}/print
```
Authentication uses an `Authorization` header carrying your `SID:TOKEN`, with no `Bearer` prefix. Parameters and a complete example are in [Create a Print Job](/expedy-print/api-print-v2/create-a-print-job).
## Formatting the ticket
Whichever route you take, the message accepts the Expedy layout tags:
| What you want | Where to look |
|---|---|
| Align, resize or emphasise text | [Text Layout](/expedy-print/receipt-layout/text-layout-tags) |
| Print a logo or an image | [Image and Logo](/expedy-print/receipt-layout/image-and-logo-printing) |
| Print a QR code | [QR Code](/expedy-print/receipt-layout/qr-code) |
| Print a barcode | [EAN13 Barcode](/expedy-print/receipt-layout/ean13-barcode) |
> Depending on the connector or the software you use, this setup may be handled by your partner or your agency. Check with them before you start.
## Need help?
- [Browse all integrations](/integrations)
- [Open a support ticket](https://help.expedy.io/support/tickets/new)
---
url: https://docs.expedy.io/en/integrations/restaurant-internet/connect-a-receipt-printer-to-restaurant-internet
title: Print Restaurant-internet orders on a receipt printer
updated_at: 2026-10-17T08:04:57.372146+00:00
---
# Print Restaurant-internet orders on a receipt printer
**Restaurant-internet** is an online ordering solution for hospitality. It connects to Expedy PRINT through **HubRise**: Restaurant-internet sends its orders to HubRise, HubRise forwards them to your cloud printer, and the ticket comes out within seconds.
## What you need
- An Expedy account with an active printer. Not added yet? Follow the guide for your machine, [Expedy XPDY80](/expedy-print/installation/add-an-expedy-xpdy80-cloud-printer-to-your-account), [HSPOS](/expedy-print/installation/add-an-hspos-cloud-printer-to-your-account), [Star Micronics](/expedy-print/installation/add-a-star-micronics-printer-to-your-account) or [Raspberry Pi](/expedy-print/installation/add-a-raspberry-pi-cloud-print-server-to-your-account)
- A [HubRise account](https://manager.hubrise.com/signup), which aggregates your sales channels
- A Restaurant-internet account linked to your HubRise location
## How it works
| Step | What happens |
|---|---|
| 1 | An order is placed on Restaurant-internet |
| 2 | Restaurant-internet pushes it to HubRise |
| 3 | Expedy PRINT receives it and prints a standardised ticket |
A single printer covers every channel connected to the same HubRise location, so you do not need one machine per platform.
## Connect it
The setup happens once, on the HubRise side, and is described step by step in the reference guide:
**[Connect a receipt printer to HubRise](/integrations/hubrise/connecting-a-receipt-printer-to-hubrise)**
Then link your Restaurant-internet account to the same HubRise location. That part is done from the Restaurant-internet back office, or by Restaurant-internet support.
## Receipt settings
Once connected, the printer page in the [Expedy console](https://www.expedy.fr/console/v3/) controls what gets printed:
- **Print order when**, the status that triggers printing, `NEW`, `RECEIVED` or `ACCEPTED`
- **Then change status to**, the automatic status update applied after printing
- **Number of copies**, one ticket for the kitchen, one for the counter or the delivery bag
- The receipt header and footer, logo, company name, address and registration number
All of it is detailed in [Connect a receipt printer to HubRise](/integrations/hubrise/connecting-a-receipt-printer-to-hubrise).
> Depending on the connector or the point-of-sale software you use, this setup may be handled by your partner. Check with them before you start.
## Need help?
- [Browse all integrations](/integrations)
- [Open a support ticket](https://help.expedy.io/support/tickets/new)
---
url: https://docs.expedy.io/en/integrations/shopline/connect-a-receipt-printer-to-shopline
title: Print from SHOPLINE with Expedy PRINT
updated_at: 2026-10-22T19:24:00.908277+00:00
---
# Print from SHOPLINE with Expedy PRINT
**SHOPLINE** is an eCommerce platform. It reaches Expedy PRINT in two ways: through **Zapier**, with no code, or through the **Expedy REST API**, when you want full control over the ticket.
## What you need
- An Expedy account with an active printer. Not added yet? Follow the guide for your machine, [Expedy XPDY80](/expedy-print/installation/add-an-expedy-xpdy80-cloud-printer-to-your-account), [HSPOS](/expedy-print/installation/add-an-hspos-cloud-printer-to-your-account), [Star Micronics](/expedy-print/installation/add-a-star-micronics-printer-to-your-account) or [Raspberry Pi](/expedy-print/installation/add-a-raspberry-pi-cloud-print-server-to-your-account)
- Your **API SID**, **API TOKEN** and **API Printer UID**, all three on the printer page of the [Expedy console](https://www.expedy.fr/console/v3/), in the **API Keys & UID** card
## Option 1, through Zapier, no code
SHOPLINE connects to Zapier, and Zapier ships a ready-made **Expedy Print** action. The recipe is always the same: an event in SHOPLINE triggers **Create a Print Job** in Expedy Print, and you map the fields you want on the ticket.
Full walkthrough: **[How to integrate Expedy Print with Zapier](/integrations/zapier/how-to-integrate-expedy-print-with-zapier)**
## Option 2, through the REST API
If SHOPLINE can issue an HTTP request, it can drive the printer directly.
```api
POST https://www.expedy.fr/api/v2/printers/{printer_uid}/print
```
Authentication uses an `Authorization` header carrying your `SID:TOKEN`, with no `Bearer` prefix. Parameters and a complete example are in [Create a Print Job](/expedy-print/api-print-v2/create-a-print-job).
## Formatting the ticket
Whichever route you take, the message accepts the Expedy layout tags:
| What you want | Where to look |
|---|---|
| Align, resize or emphasise text | [Text Layout](/expedy-print/receipt-layout/text-layout-tags) |
| Print a logo or an image | [Image and Logo](/expedy-print/receipt-layout/image-and-logo-printing) |
| Print a QR code | [QR Code](/expedy-print/receipt-layout/qr-code) |
| Print a barcode | [EAN13 Barcode](/expedy-print/receipt-layout/ean13-barcode) |
> Depending on the connector or the software you use, this setup may be handled by your partner or your agency. Check with them before you start.
## Need help?
- [Browse all integrations](/integrations)
- [Open a support ticket](https://help.expedy.io/support/tickets/new)
---
url: https://docs.expedy.io/en/integrations/eddress/connect-a-receipt-printer-to-eddress
title: Print eddress orders on a receipt printer
updated_at: 2026-10-19T21:33:57.089554+00:00
---
# Print eddress orders on a receipt printer
[eddress](https://eddress.co/) is an online ordering solution for hospitality. It connects to Expedy PRINT through **HubRise**: eddress sends its orders to HubRise, HubRise forwards them to your cloud printer, and the ticket comes out within seconds.
## What you need
- An Expedy account with an active printer. Not added yet? Follow the guide for your machine, [Expedy XPDY80](/expedy-print/installation/add-an-expedy-xpdy80-cloud-printer-to-your-account), [HSPOS](/expedy-print/installation/add-an-hspos-cloud-printer-to-your-account), [Star Micronics](/expedy-print/installation/add-a-star-micronics-printer-to-your-account) or [Raspberry Pi](/expedy-print/installation/add-a-raspberry-pi-cloud-print-server-to-your-account)
- A [HubRise account](https://manager.hubrise.com/signup), which aggregates your sales channels
- A eddress account linked to your HubRise location
## How it works
| Step | What happens |
|---|---|
| 1 | An order is placed on eddress |
| 2 | eddress pushes it to HubRise |
| 3 | Expedy PRINT receives it and prints a standardised ticket |
A single printer covers every channel connected to the same HubRise location, so you do not need one machine per platform.
## Connect it
The setup happens once, on the HubRise side, and is described step by step in the reference guide:
**[Connect a receipt printer to HubRise](/integrations/hubrise/connecting-a-receipt-printer-to-hubrise)**
Then link your eddress account to the same HubRise location. That part is done from the eddress back office, or by eddress support.
## Receipt settings
Once connected, the printer page in the [Expedy console](https://www.expedy.fr/console/v3/) controls what gets printed:
- **Print order when**, the status that triggers printing, `NEW`, `RECEIVED` or `ACCEPTED`
- **Then change status to**, the automatic status update applied after printing
- **Number of copies**, one ticket for the kitchen, one for the counter or the delivery bag
- The receipt header and footer, logo, company name, address and registration number
All of it is detailed in [Connect a receipt printer to HubRise](/integrations/hubrise/connecting-a-receipt-printer-to-hubrise).
> Depending on the connector or the point-of-sale software you use, this setup may be handled by your partner. Check with them before you start.
## Need help?
- [Browse all integrations](/integrations)
- [Open a support ticket](https://help.expedy.io/support/tickets/new)
---
url: https://docs.expedy.io/en/integrations/doordash/connect-a-receipt-printer-to-doordash
title: Print DoorDash orders on a receipt printer
updated_at: 2026-10-21T19:40:10.317096+00:00
---
# Print DoorDash orders on a receipt printer
[DoorDash](https://www.doordash.com/) is a meal delivery platform. It connects to Expedy PRINT through **HubRise**: DoorDash sends its orders to HubRise, HubRise forwards them to your cloud printer, and the ticket comes out within seconds.
## What you need
- An Expedy account with an active printer. Not added yet? Follow the guide for your machine, [Expedy XPDY80](/expedy-print/installation/add-an-expedy-xpdy80-cloud-printer-to-your-account), [HSPOS](/expedy-print/installation/add-an-hspos-cloud-printer-to-your-account), [Star Micronics](/expedy-print/installation/add-a-star-micronics-printer-to-your-account) or [Raspberry Pi](/expedy-print/installation/add-a-raspberry-pi-cloud-print-server-to-your-account)
- A [HubRise account](https://manager.hubrise.com/signup), which aggregates your sales channels
- A DoorDash account linked to your HubRise location
## How it works
| Step | What happens |
|---|---|
| 1 | An order is placed on DoorDash |
| 2 | DoorDash pushes it to HubRise |
| 3 | Expedy PRINT receives it and prints a standardised ticket |
A single printer covers every channel connected to the same HubRise location, so you do not need one machine per platform.
## Connect it
The setup happens once, on the HubRise side, and is described step by step in the reference guide:
**[Connect a receipt printer to HubRise](/integrations/hubrise/connecting-a-receipt-printer-to-hubrise)**
Then link your DoorDash account to the same HubRise location. That part is done from the DoorDash back office, or by DoorDash support.
## Receipt settings
Once connected, the printer page in the [Expedy console](https://www.expedy.fr/console/v3/) controls what gets printed:
- **Print order when**, the status that triggers printing, `NEW`, `RECEIVED` or `ACCEPTED`
- **Then change status to**, the automatic status update applied after printing
- **Number of copies**, one ticket for the kitchen, one for the counter or the delivery bag
- The receipt header and footer, logo, company name, address and registration number
All of it is detailed in [Connect a receipt printer to HubRise](/integrations/hubrise/connecting-a-receipt-printer-to-hubrise).
> Depending on the connector or the point-of-sale software you use, this setup may be handled by your partner. Check with them before you start.
## Need help?
- [Browse all integrations](/integrations)
- [Open a support ticket](https://help.expedy.io/support/tickets/new)
---
url: https://docs.expedy.io/en/integrations/deliveroo/connect-a-receipt-printer-to-deliveroo
title: Print Deliveroo orders on a receipt printer
updated_at: 2026-10-22T01:29:22.051637+00:00
---
# Print Deliveroo orders on a receipt printer
[Deliveroo](https://deliveroo.com/) is a meal delivery platform. It connects to Expedy PRINT through **HubRise**: Deliveroo sends its orders to HubRise, HubRise forwards them to your cloud printer, and the ticket comes out within seconds.
## What you need
- An Expedy account with an active printer. Not added yet? Follow the guide for your machine, [Expedy XPDY80](/expedy-print/installation/add-an-expedy-xpdy80-cloud-printer-to-your-account), [HSPOS](/expedy-print/installation/add-an-hspos-cloud-printer-to-your-account), [Star Micronics](/expedy-print/installation/add-a-star-micronics-printer-to-your-account) or [Raspberry Pi](/expedy-print/installation/add-a-raspberry-pi-cloud-print-server-to-your-account)
- A [HubRise account](https://manager.hubrise.com/signup), which aggregates your sales channels
- A Deliveroo account linked to your HubRise location
## How it works
| Step | What happens |
|---|---|
| 1 | An order is placed on Deliveroo |
| 2 | Deliveroo pushes it to HubRise |
| 3 | Expedy PRINT receives it and prints a standardised ticket |
A single printer covers every channel connected to the same HubRise location, so you do not need one machine per platform.
## Connect it
The setup happens once, on the HubRise side, and is described step by step in the reference guide:
**[Connect a receipt printer to HubRise](/integrations/hubrise/connecting-a-receipt-printer-to-hubrise)**
Then link your Deliveroo account to the same HubRise location. That part is done from the Deliveroo back office, or by Deliveroo support.
## Receipt settings
Once connected, the printer page in the [Expedy console](https://www.expedy.fr/console/v3/) controls what gets printed:
- **Print order when**, the status that triggers printing, `NEW`, `RECEIVED` or `ACCEPTED`
- **Then change status to**, the automatic status update applied after printing
- **Number of copies**, one ticket for the kitchen, one for the counter or the delivery bag
- The receipt header and footer, logo, company name, address and registration number
All of it is detailed in [Connect a receipt printer to HubRise](/integrations/hubrise/connecting-a-receipt-printer-to-hubrise).
> Depending on the connector or the point-of-sale software you use, this setup may be handled by your partner. Check with them before you start.
## Need help?
- [Browse all integrations](/integrations)
- [Open a support ticket](https://help.expedy.io/support/tickets/new)
---
url: https://docs.expedy.io/en/integrations/app4/connect-a-receipt-printer-to-app4
title: Print App4 orders on a receipt printer
updated_at: 2026-10-21T22:47:39.06307+00:00
---
# Print App4 orders on a receipt printer
[App4](https://www.app4.co.uk/) is an online ordering solution for hospitality. It connects to Expedy PRINT through **HubRise**: App4 sends its orders to HubRise, HubRise forwards them to your cloud printer, and the ticket comes out within seconds.
## What you need
- An Expedy account with an active printer. Not added yet? Follow the guide for your machine, [Expedy XPDY80](/expedy-print/installation/add-an-expedy-xpdy80-cloud-printer-to-your-account), [HSPOS](/expedy-print/installation/add-an-hspos-cloud-printer-to-your-account), [Star Micronics](/expedy-print/installation/add-a-star-micronics-printer-to-your-account) or [Raspberry Pi](/expedy-print/installation/add-a-raspberry-pi-cloud-print-server-to-your-account)
- A [HubRise account](https://manager.hubrise.com/signup), which aggregates your sales channels
- A App4 account linked to your HubRise location
## How it works
| Step | What happens |
|---|---|
| 1 | An order is placed on App4 |
| 2 | App4 pushes it to HubRise |
| 3 | Expedy PRINT receives it and prints a standardised ticket |
A single printer covers every channel connected to the same HubRise location, so you do not need one machine per platform.
## Connect it
The setup happens once, on the HubRise side, and is described step by step in the reference guide:
**[Connect a receipt printer to HubRise](/integrations/hubrise/connecting-a-receipt-printer-to-hubrise)**
Then link your App4 account to the same HubRise location. That part is done from the App4 back office, or by App4 support.
## Receipt settings
Once connected, the printer page in the [Expedy console](https://www.expedy.fr/console/v3/) controls what gets printed:
- **Print order when**, the status that triggers printing, `NEW`, `RECEIVED` or `ACCEPTED`
- **Then change status to**, the automatic status update applied after printing
- **Number of copies**, one ticket for the kitchen, one for the counter or the delivery bag
- The receipt header and footer, logo, company name, address and registration number
All of it is detailed in [Connect a receipt printer to HubRise](/integrations/hubrise/connecting-a-receipt-printer-to-hubrise).
> Depending on the connector or the point-of-sale software you use, this setup may be handled by your partner. Check with them before you start.
## Need help?
- [Browse all integrations](/integrations)
- [Open a support ticket](https://help.expedy.io/support/tickets/new)
---
url: https://docs.expedy.io/en/integrations/n8n/connect-a-receipt-printer-to-n8n
title: Print from n8n with Expedy PRINT
updated_at: 2026-10-13T08:18:32.27594+00:00
---
# Print from n8n with Expedy PRINT
[n8n](https://n8n.io/) is an automation platform. It reaches Expedy PRINT in two ways: through **Zapier**, with no code, or through the **Expedy REST API**, when you want full control over the ticket.
## What you need
- An Expedy account with an active printer. Not added yet? Follow the guide for your machine, [Expedy XPDY80](/expedy-print/installation/add-an-expedy-xpdy80-cloud-printer-to-your-account), [HSPOS](/expedy-print/installation/add-an-hspos-cloud-printer-to-your-account), [Star Micronics](/expedy-print/installation/add-a-star-micronics-printer-to-your-account) or [Raspberry Pi](/expedy-print/installation/add-a-raspberry-pi-cloud-print-server-to-your-account)
- Your **API SID**, **API TOKEN** and **API Printer UID**, all three on the printer page of the [Expedy console](https://www.expedy.fr/console/v3/), in the **API Keys & UID** card
## Option 1, through Zapier, no code
n8n connects to Zapier, and Zapier ships a ready-made **Expedy Print** action. The recipe is always the same: an event in n8n triggers **Create a Print Job** in Expedy Print, and you map the fields you want on the ticket.
Full walkthrough: **[How to integrate Expedy Print with Zapier](/integrations/zapier/how-to-integrate-expedy-print-with-zapier)**
## Option 2, through the REST API
If n8n can issue an HTTP request, it can drive the printer directly.
```api
POST https://www.expedy.fr/api/v2/printers/{printer_uid}/print
```
Authentication uses an `Authorization` header carrying your `SID:TOKEN`, with no `Bearer` prefix. Parameters and a complete example are in [Create a Print Job](/expedy-print/api-print-v2/create-a-print-job).
## Formatting the ticket
Whichever route you take, the message accepts the Expedy layout tags:
| What you want | Where to look |
|---|---|
| Align, resize or emphasise text | [Text Layout](/expedy-print/receipt-layout/text-layout-tags) |
| Print a logo or an image | [Image and Logo](/expedy-print/receipt-layout/image-and-logo-printing) |
| Print a QR code | [QR Code](/expedy-print/receipt-layout/qr-code) |
| Print a barcode | [EAN13 Barcode](/expedy-print/receipt-layout/ean13-barcode) |
> Depending on the connector or the software you use, this setup may be handled by your partner or your agency. Check with them before you start.
## Need help?
- [Browse all integrations](/integrations)
- [Open a support ticket](https://help.expedy.io/support/tickets/new)
---
url: https://docs.expedy.io/en/integrations/pipedream/connect-a-receipt-printer-to-pipedream
title: Print from Pipedream with Expedy PRINT
updated_at: 2026-10-18T15:44:50.876372+00:00
---
# Print from Pipedream with Expedy PRINT
[Pipedream](https://pipedream.com/) is an automation platform. It reaches Expedy PRINT in two ways: through **Zapier**, with no code, or through the **Expedy REST API**, when you want full control over the ticket.
## What you need
- An Expedy account with an active printer. Not added yet? Follow the guide for your machine, [Expedy XPDY80](/expedy-print/installation/add-an-expedy-xpdy80-cloud-printer-to-your-account), [HSPOS](/expedy-print/installation/add-an-hspos-cloud-printer-to-your-account), [Star Micronics](/expedy-print/installation/add-a-star-micronics-printer-to-your-account) or [Raspberry Pi](/expedy-print/installation/add-a-raspberry-pi-cloud-print-server-to-your-account)
- Your **API SID**, **API TOKEN** and **API Printer UID**, all three on the printer page of the [Expedy console](https://www.expedy.fr/console/v3/), in the **API Keys & UID** card
## Option 1, through Zapier, no code
Pipedream connects to Zapier, and Zapier ships a ready-made **Expedy Print** action. The recipe is always the same: an event in Pipedream triggers **Create a Print Job** in Expedy Print, and you map the fields you want on the ticket.
Full walkthrough: **[How to integrate Expedy Print with Zapier](/integrations/zapier/how-to-integrate-expedy-print-with-zapier)**
## Option 2, through the REST API
If Pipedream can issue an HTTP request, it can drive the printer directly.
```api
POST https://www.expedy.fr/api/v2/printers/{printer_uid}/print
```
Authentication uses an `Authorization` header carrying your `SID:TOKEN`, with no `Bearer` prefix. Parameters and a complete example are in [Create a Print Job](/expedy-print/api-print-v2/create-a-print-job).
## Formatting the ticket
Whichever route you take, the message accepts the Expedy layout tags:
| What you want | Where to look |
|---|---|
| Align, resize or emphasise text | [Text Layout](/expedy-print/receipt-layout/text-layout-tags) |
| Print a logo or an image | [Image and Logo](/expedy-print/receipt-layout/image-and-logo-printing) |
| Print a QR code | [QR Code](/expedy-print/receipt-layout/qr-code) |
| Print a barcode | [EAN13 Barcode](/expedy-print/receipt-layout/ean13-barcode) |
> Depending on the connector or the software you use, this setup may be handled by your partner or your agency. Check with them before you start.
## Need help?
- [Browse all integrations](/integrations)
- [Open a support ticket](https://help.expedy.io/support/tickets/new)
---
url: https://docs.expedy.io/en/integrations/jumpseller/connect-a-receipt-printer-to-jumpseller
title: Print from Jumpseller with Expedy PRINT
updated_at: 2026-10-19T23:13:42.919122+00:00
---
# Print from Jumpseller with Expedy PRINT
[Jumpseller](https://jumpseller.com/) is an eCommerce platform. It reaches Expedy PRINT in two ways: through **Zapier**, with no code, or through the **Expedy REST API**, when you want full control over the ticket.
## What you need
- An Expedy account with an active printer. Not added yet? Follow the guide for your machine, [Expedy XPDY80](/expedy-print/installation/add-an-expedy-xpdy80-cloud-printer-to-your-account), [HSPOS](/expedy-print/installation/add-an-hspos-cloud-printer-to-your-account), [Star Micronics](/expedy-print/installation/add-a-star-micronics-printer-to-your-account) or [Raspberry Pi](/expedy-print/installation/add-a-raspberry-pi-cloud-print-server-to-your-account)
- Your **API SID**, **API TOKEN** and **API Printer UID**, all three on the printer page of the [Expedy console](https://www.expedy.fr/console/v3/), in the **API Keys & UID** card
## Option 1, through Zapier, no code
Jumpseller connects to Zapier, and Zapier ships a ready-made **Expedy Print** action. The recipe is always the same: an event in Jumpseller triggers **Create a Print Job** in Expedy Print, and you map the fields you want on the ticket.
Full walkthrough: **[How to integrate Expedy Print with Zapier](/integrations/zapier/how-to-integrate-expedy-print-with-zapier)**
## Option 2, through the REST API
If Jumpseller can issue an HTTP request, it can drive the printer directly.
```api
POST https://www.expedy.fr/api/v2/printers/{printer_uid}/print
```
Authentication uses an `Authorization` header carrying your `SID:TOKEN`, with no `Bearer` prefix. Parameters and a complete example are in [Create a Print Job](/expedy-print/api-print-v2/create-a-print-job).
## Formatting the ticket
Whichever route you take, the message accepts the Expedy layout tags:
| What you want | Where to look |
|---|---|
| Align, resize or emphasise text | [Text Layout](/expedy-print/receipt-layout/text-layout-tags) |
| Print a logo or an image | [Image and Logo](/expedy-print/receipt-layout/image-and-logo-printing) |
| Print a QR code | [QR Code](/expedy-print/receipt-layout/qr-code) |
| Print a barcode | [EAN13 Barcode](/expedy-print/receipt-layout/ean13-barcode) |
> Depending on the connector or the software you use, this setup may be handled by your partner or your agency. Check with them before you start.
## Need help?
- [Browse all integrations](/integrations)
- [Open a support ticket](https://help.expedy.io/support/tickets/new)
---
url: https://docs.expedy.io/en/integrations/samcart/connect-a-receipt-printer-to-samcart
title: Print from SamCart with Expedy PRINT
updated_at: 2026-10-21T04:26:11.343822+00:00
---
# Print from SamCart with Expedy PRINT
[SamCart](https://www.samcart.com/) is an online cart and checkout platform. It reaches Expedy PRINT in two ways: through **Zapier**, with no code, or through the **Expedy REST API**, when you want full control over the ticket.
## What you need
- An Expedy account with an active printer. Not added yet? Follow the guide for your machine, [Expedy XPDY80](/expedy-print/installation/add-an-expedy-xpdy80-cloud-printer-to-your-account), [HSPOS](/expedy-print/installation/add-an-hspos-cloud-printer-to-your-account), [Star Micronics](/expedy-print/installation/add-a-star-micronics-printer-to-your-account) or [Raspberry Pi](/expedy-print/installation/add-a-raspberry-pi-cloud-print-server-to-your-account)
- Your **API SID**, **API TOKEN** and **API Printer UID**, all three on the printer page of the [Expedy console](https://www.expedy.fr/console/v3/), in the **API Keys & UID** card
## Option 1, through Zapier, no code
SamCart connects to Zapier, and Zapier ships a ready-made **Expedy Print** action. The recipe is always the same: an event in SamCart triggers **Create a Print Job** in Expedy Print, and you map the fields you want on the ticket.
Full walkthrough: **[How to integrate Expedy Print with Zapier](/integrations/zapier/how-to-integrate-expedy-print-with-zapier)**
## Option 2, through the REST API
If SamCart can issue an HTTP request, it can drive the printer directly.
```api
POST https://www.expedy.fr/api/v2/printers/{printer_uid}/print
```
Authentication uses an `Authorization` header carrying your `SID:TOKEN`, with no `Bearer` prefix. Parameters and a complete example are in [Create a Print Job](/expedy-print/api-print-v2/create-a-print-job).
## Formatting the ticket
Whichever route you take, the message accepts the Expedy layout tags:
| What you want | Where to look |
|---|---|
| Align, resize or emphasise text | [Text Layout](/expedy-print/receipt-layout/text-layout-tags) |
| Print a logo or an image | [Image and Logo](/expedy-print/receipt-layout/image-and-logo-printing) |
| Print a QR code | [QR Code](/expedy-print/receipt-layout/qr-code) |
| Print a barcode | [EAN13 Barcode](/expedy-print/receipt-layout/ean13-barcode) |
> Depending on the connector or the software you use, this setup may be handled by your partner or your agency. Check with them before you start.
## Need help?
- [Browse all integrations](/integrations)
- [Open a support ticket](https://help.expedy.io/support/tickets/new)
---
url: https://docs.expedy.io/en/integrations/lieferando/connect-a-receipt-printer-to-lieferando
title: Print Lieferando orders on a receipt printer
updated_at: 2026-10-22T01:11:30.607999+00:00
---
# Print Lieferando orders on a receipt printer
[Lieferando](https://www.lieferando.de/) is a meal delivery platform. It connects to Expedy PRINT through **HubRise**: Lieferando sends its orders to HubRise, HubRise forwards them to your cloud printer, and the ticket comes out within seconds.
## What you need
- An Expedy account with an active printer. Not added yet? Follow the guide for your machine, [Expedy XPDY80](/expedy-print/installation/add-an-expedy-xpdy80-cloud-printer-to-your-account), [HSPOS](/expedy-print/installation/add-an-hspos-cloud-printer-to-your-account), [Star Micronics](/expedy-print/installation/add-a-star-micronics-printer-to-your-account) or [Raspberry Pi](/expedy-print/installation/add-a-raspberry-pi-cloud-print-server-to-your-account)
- A [HubRise account](https://manager.hubrise.com/signup), which aggregates your sales channels
- A Lieferando account linked to your HubRise location
## How it works
| Step | What happens |
|---|---|
| 1 | An order is placed on Lieferando |
| 2 | Lieferando pushes it to HubRise |
| 3 | Expedy PRINT receives it and prints a standardised ticket |
A single printer covers every channel connected to the same HubRise location, so you do not need one machine per platform.
## Connect it
The setup happens once, on the HubRise side, and is described step by step in the reference guide:
**[Connect a receipt printer to HubRise](/integrations/hubrise/connecting-a-receipt-printer-to-hubrise)**
Then link your Lieferando account to the same HubRise location. That part is done from the Lieferando back office, or by Lieferando support.
## Receipt settings
Once connected, the printer page in the [Expedy console](https://www.expedy.fr/console/v3/) controls what gets printed:
- **Print order when**, the status that triggers printing, `NEW`, `RECEIVED` or `ACCEPTED`
- **Then change status to**, the automatic status update applied after printing
- **Number of copies**, one ticket for the kitchen, one for the counter or the delivery bag
- The receipt header and footer, logo, company name, address and registration number
All of it is detailed in [Connect a receipt printer to HubRise](/integrations/hubrise/connecting-a-receipt-printer-to-hubrise).
> Depending on the connector or the point-of-sale software you use, this setup may be handled by your partner. Check with them before you start.
## Need help?
- [Browse all integrations](/integrations)
- [Open a support ticket](https://help.expedy.io/support/tickets/new)
---
url: https://docs.expedy.io/en/integrations/power-automate/connect-a-receipt-printer-to-power-automate
title: Print from Microsoft Power Automate with Expedy PRINT
updated_at: 2026-10-20T06:18:59.611354+00:00
---
# Print from Microsoft Power Automate with Expedy PRINT
[Microsoft Power Automate](https://www.microsoft.com/power-platform/products/power-automate) is an automation platform. It reaches Expedy PRINT in two ways: through **Zapier**, with no code, or through the **Expedy REST API**, when you want full control over the ticket.
## What you need
- An Expedy account with an active printer. Not added yet? Follow the guide for your machine, [Expedy XPDY80](/expedy-print/installation/add-an-expedy-xpdy80-cloud-printer-to-your-account), [HSPOS](/expedy-print/installation/add-an-hspos-cloud-printer-to-your-account), [Star Micronics](/expedy-print/installation/add-a-star-micronics-printer-to-your-account) or [Raspberry Pi](/expedy-print/installation/add-a-raspberry-pi-cloud-print-server-to-your-account)
- Your **API SID**, **API TOKEN** and **API Printer UID**, all three on the printer page of the [Expedy console](https://www.expedy.fr/console/v3/), in the **API Keys & UID** card
## Option 1, through Zapier, no code
Microsoft Power Automate connects to Zapier, and Zapier ships a ready-made **Expedy Print** action. The recipe is always the same: an event in Microsoft Power Automate triggers **Create a Print Job** in Expedy Print, and you map the fields you want on the ticket.
Full walkthrough: **[How to integrate Expedy Print with Zapier](/integrations/zapier/how-to-integrate-expedy-print-with-zapier)**
## Option 2, through the REST API
If Microsoft Power Automate can issue an HTTP request, it can drive the printer directly.
```api
POST https://www.expedy.fr/api/v2/printers/{printer_uid}/print
```
Authentication uses an `Authorization` header carrying your `SID:TOKEN`, with no `Bearer` prefix. Parameters and a complete example are in [Create a Print Job](/expedy-print/api-print-v2/create-a-print-job).
## Formatting the ticket
Whichever route you take, the message accepts the Expedy layout tags:
| What you want | Where to look |
|---|---|
| Align, resize or emphasise text | [Text Layout](/expedy-print/receipt-layout/text-layout-tags) |
| Print a logo or an image | [Image and Logo](/expedy-print/receipt-layout/image-and-logo-printing) |
| Print a QR code | [QR Code](/expedy-print/receipt-layout/qr-code) |
| Print a barcode | [EAN13 Barcode](/expedy-print/receipt-layout/ean13-barcode) |
> Depending on the connector or the software you use, this setup may be handled by your partner or your agency. Check with them before you start.
## Need help?
- [Browse all integrations](/integrations)
- [Open a support ticket](https://help.expedy.io/support/tickets/new)
---
url: https://docs.expedy.io/en/integrations/inflow-inventory/connect-a-receipt-printer-to-inflow-inventory
title: Print from inFlow Inventory with Expedy PRINT
updated_at: 2026-10-23T03:16:24.63605+00:00
---
# Print from inFlow Inventory with Expedy PRINT
[inFlow Inventory](https://www.inflowinventory.com/) is an inventory and order management tool. It reaches Expedy PRINT in two ways: through **Zapier**, with no code, or through the **Expedy REST API**, when you want full control over the ticket.
## What you need
- An Expedy account with an active printer. Not added yet? Follow the guide for your machine, [Expedy XPDY80](/expedy-print/installation/add-an-expedy-xpdy80-cloud-printer-to-your-account), [HSPOS](/expedy-print/installation/add-an-hspos-cloud-printer-to-your-account), [Star Micronics](/expedy-print/installation/add-a-star-micronics-printer-to-your-account) or [Raspberry Pi](/expedy-print/installation/add-a-raspberry-pi-cloud-print-server-to-your-account)
- Your **API SID**, **API TOKEN** and **API Printer UID**, all three on the printer page of the [Expedy console](https://www.expedy.fr/console/v3/), in the **API Keys & UID** card
## Option 1, through Zapier, no code
inFlow Inventory connects to Zapier, and Zapier ships a ready-made **Expedy Print** action. The recipe is always the same: an event in inFlow Inventory triggers **Create a Print Job** in Expedy Print, and you map the fields you want on the ticket.
Full walkthrough: **[How to integrate Expedy Print with Zapier](/integrations/zapier/how-to-integrate-expedy-print-with-zapier)**
## Option 2, through the REST API
If inFlow Inventory can issue an HTTP request, it can drive the printer directly.
```api
POST https://www.expedy.fr/api/v2/printers/{printer_uid}/print
```
Authentication uses an `Authorization` header carrying your `SID:TOKEN`, with no `Bearer` prefix. Parameters and a complete example are in [Create a Print Job](/expedy-print/api-print-v2/create-a-print-job).
## Formatting the ticket
Whichever route you take, the message accepts the Expedy layout tags:
| What you want | Where to look |
|---|---|
| Align, resize or emphasise text | [Text Layout](/expedy-print/receipt-layout/text-layout-tags) |
| Print a logo or an image | [Image and Logo](/expedy-print/receipt-layout/image-and-logo-printing) |
| Print a QR code | [QR Code](/expedy-print/receipt-layout/qr-code) |
| Print a barcode | [EAN13 Barcode](/expedy-print/receipt-layout/ean13-barcode) |
> Depending on the connector or the software you use, this setup may be handled by your partner or your agency. Check with them before you start.
## Need help?
- [Browse all integrations](/integrations)
- [Open a support ticket](https://help.expedy.io/support/tickets/new)
---
url: https://docs.expedy.io/en/integrations/smilein/connect-a-receipt-printer-to-smilein
title: Print smilein orders on a receipt printer
updated_at: 2026-10-21T17:23:47.37314+00:00
---
# Print smilein orders on a receipt printer
**smilein** is an online ordering solution for hospitality. It connects to Expedy PRINT through **HubRise**: smilein sends its orders to HubRise, HubRise forwards them to your cloud printer, and the ticket comes out within seconds.
## What you need
- An Expedy account with an active printer. Not added yet? Follow the guide for your machine, [Expedy XPDY80](/expedy-print/installation/add-an-expedy-xpdy80-cloud-printer-to-your-account), [HSPOS](/expedy-print/installation/add-an-hspos-cloud-printer-to-your-account), [Star Micronics](/expedy-print/installation/add-a-star-micronics-printer-to-your-account) or [Raspberry Pi](/expedy-print/installation/add-a-raspberry-pi-cloud-print-server-to-your-account)
- A [HubRise account](https://manager.hubrise.com/signup), which aggregates your sales channels
- A smilein account linked to your HubRise location
## How it works
| Step | What happens |
|---|---|
| 1 | An order is placed on smilein |
| 2 | smilein pushes it to HubRise |
| 3 | Expedy PRINT receives it and prints a standardised ticket |
A single printer covers every channel connected to the same HubRise location, so you do not need one machine per platform.
## Connect it
The setup happens once, on the HubRise side, and is described step by step in the reference guide:
**[Connect a receipt printer to HubRise](/integrations/hubrise/connecting-a-receipt-printer-to-hubrise)**
Then link your smilein account to the same HubRise location. That part is done from the smilein back office, or by smilein support.
## Receipt settings
Once connected, the printer page in the [Expedy console](https://www.expedy.fr/console/v3/) controls what gets printed:
- **Print order when**, the status that triggers printing, `NEW`, `RECEIVED` or `ACCEPTED`
- **Then change status to**, the automatic status update applied after printing
- **Number of copies**, one ticket for the kitchen, one for the counter or the delivery bag
- The receipt header and footer, logo, company name, address and registration number
All of it is detailed in [Connect a receipt printer to HubRise](/integrations/hubrise/connecting-a-receipt-printer-to-hubrise).
> Depending on the connector or the point-of-sale software you use, this setup may be handled by your partner. Check with them before you start.
## Need help?
- [Browse all integrations](/integrations)
- [Open a support ticket](https://help.expedy.io/support/tickets/new)
---
url: https://docs.expedy.io/en/integrations/latenode/connect-a-receipt-printer-to-latenode
title: Print from Latenode with Expedy PRINT
updated_at: 2026-10-20T21:21:46.318222+00:00
---
# Print from Latenode with Expedy PRINT
[Latenode](https://latenode.com/) is an automation platform. It reaches Expedy PRINT in two ways: through **Zapier**, with no code, or through the **Expedy REST API**, when you want full control over the ticket.
## What you need
- An Expedy account with an active printer. Not added yet? Follow the guide for your machine, [Expedy XPDY80](/expedy-print/installation/add-an-expedy-xpdy80-cloud-printer-to-your-account), [HSPOS](/expedy-print/installation/add-an-hspos-cloud-printer-to-your-account), [Star Micronics](/expedy-print/installation/add-a-star-micronics-printer-to-your-account) or [Raspberry Pi](/expedy-print/installation/add-a-raspberry-pi-cloud-print-server-to-your-account)
- Your **API SID**, **API TOKEN** and **API Printer UID**, all three on the printer page of the [Expedy console](https://www.expedy.fr/console/v3/), in the **API Keys & UID** card
## Option 1, through Zapier, no code
Latenode connects to Zapier, and Zapier ships a ready-made **Expedy Print** action. The recipe is always the same: an event in Latenode triggers **Create a Print Job** in Expedy Print, and you map the fields you want on the ticket.
Full walkthrough: **[How to integrate Expedy Print with Zapier](/integrations/zapier/how-to-integrate-expedy-print-with-zapier)**
## Option 2, through the REST API
If Latenode can issue an HTTP request, it can drive the printer directly.
```api
POST https://www.expedy.fr/api/v2/printers/{printer_uid}/print
```
Authentication uses an `Authorization` header carrying your `SID:TOKEN`, with no `Bearer` prefix. Parameters and a complete example are in [Create a Print Job](/expedy-print/api-print-v2/create-a-print-job).
## Formatting the ticket
Whichever route you take, the message accepts the Expedy layout tags:
| What you want | Where to look |
|---|---|
| Align, resize or emphasise text | [Text Layout](/expedy-print/receipt-layout/text-layout-tags) |
| Print a logo or an image | [Image and Logo](/expedy-print/receipt-layout/image-and-logo-printing) |
| Print a QR code | [QR Code](/expedy-print/receipt-layout/qr-code) |
| Print a barcode | [EAN13 Barcode](/expedy-print/receipt-layout/ean13-barcode) |
> Depending on the connector or the software you use, this setup may be handled by your partner or your agency. Check with them before you start.
## Need help?
- [Browse all integrations](/integrations)
- [Open a support ticket](https://help.expedy.io/support/tickets/new)
---
url: https://docs.expedy.io/en/integrations/salla/connect-a-receipt-printer-to-salla
title: Print from Salla with Expedy PRINT
updated_at: 2026-10-22T05:36:19.269549+00:00
---
# Print from Salla with Expedy PRINT
**Salla** is an eCommerce platform. It reaches Expedy PRINT in two ways: through **Zapier**, with no code, or through the **Expedy REST API**, when you want full control over the ticket.
## What you need
- An Expedy account with an active printer. Not added yet? Follow the guide for your machine, [Expedy XPDY80](/expedy-print/installation/add-an-expedy-xpdy80-cloud-printer-to-your-account), [HSPOS](/expedy-print/installation/add-an-hspos-cloud-printer-to-your-account), [Star Micronics](/expedy-print/installation/add-a-star-micronics-printer-to-your-account) or [Raspberry Pi](/expedy-print/installation/add-a-raspberry-pi-cloud-print-server-to-your-account)
- Your **API SID**, **API TOKEN** and **API Printer UID**, all three on the printer page of the [Expedy console](https://www.expedy.fr/console/v3/), in the **API Keys & UID** card
## Option 1, through Zapier, no code
Salla connects to Zapier, and Zapier ships a ready-made **Expedy Print** action. The recipe is always the same: an event in Salla triggers **Create a Print Job** in Expedy Print, and you map the fields you want on the ticket.
Full walkthrough: **[How to integrate Expedy Print with Zapier](/integrations/zapier/how-to-integrate-expedy-print-with-zapier)**
## Option 2, through the REST API
If Salla can issue an HTTP request, it can drive the printer directly.
```api
POST https://www.expedy.fr/api/v2/printers/{printer_uid}/print
```
Authentication uses an `Authorization` header carrying your `SID:TOKEN`, with no `Bearer` prefix. Parameters and a complete example are in [Create a Print Job](/expedy-print/api-print-v2/create-a-print-job).
## Formatting the ticket
Whichever route you take, the message accepts the Expedy layout tags:
| What you want | Where to look |
|---|---|
| Align, resize or emphasise text | [Text Layout](/expedy-print/receipt-layout/text-layout-tags) |
| Print a logo or an image | [Image and Logo](/expedy-print/receipt-layout/image-and-logo-printing) |
| Print a QR code | [QR Code](/expedy-print/receipt-layout/qr-code) |
| Print a barcode | [EAN13 Barcode](/expedy-print/receipt-layout/ean13-barcode) |
> Depending on the connector or the software you use, this setup may be handled by your partner or your agency. Check with them before you start.
## Need help?
- [Browse all integrations](/integrations)
- [Open a support ticket](https://help.expedy.io/support/tickets/new)
---
url: https://docs.expedy.io/en/integrations/bowo/connect-a-receipt-printer-to-bowo
title: Receipt printing with Bowo
updated_at: 2026-10-11T14:53:10.908333+00:00
---
# Receipt printing with Bowo
[Bowo](https://www.bowo.fr/) is an online ordering solution for hospitality. With Bowo, **the receipt printer is installed and configured by Bowo**, not from your Expedy console. Get in touch with them to have your printer activated.
## Who does what
| Party | Responsibility |
|---|---|
| Expedy | Supplies the cloud printer, its connectivity (Ethernet, Wi-Fi or 4G SIM) and the console where you follow your print jobs |
| Bowo | Pairs the printer with your account, sets the receipt layout and switches the service on |
## Getting your printer activated
1. Order your machine, or use the one you already have
2. Contact Bowo and tell them you want to print your orders on an Expedy cloud printer
3. Bowo handles the pairing and the receipt layout on their side
4. Once activated, orders print automatically, with nothing left to do on your part
> If your printer already appears in your Expedy account, give Bowo its **API Printer UID**, shown on the printer page in the **API Keys & UID** card of the [Expedy console](https://www.expedy.fr/console/v3/).
## Once it is live
From the [Expedy console](https://www.expedy.fr/console/v3/) you can, at any time:
- Check that the machine is reachable, with **Check Status** on the printer page
- Review every job in **Print Jobs History**
- Follow your monthly usage and change plan, the **FREE** plan being capped at 50 print requests per month
Anything about the order content or the ticket layout goes through Bowo, since the connection lives on their side.
## Need help?
- [Add your printer to your Expedy account](/expedy-print/installation/add-an-expedy-xpdy80-cloud-printer-to-your-account)
- [Browse all integrations](/integrations)
- Expedy hardware or account question: [open a support ticket](https://help.expedy.io/support/tickets/new)
---
url: https://docs.expedy.io/en/integrations/restajet/connect-a-receipt-printer-to-restajet
title: Print RestaJet orders on a receipt printer
updated_at: 2026-10-20T02:13:58.263559+00:00
---
# Print RestaJet orders on a receipt printer
**RestaJet** is an online ordering solution for hospitality. It connects to Expedy PRINT through **HubRise**: RestaJet sends its orders to HubRise, HubRise forwards them to your cloud printer, and the ticket comes out within seconds.
## What you need
- An Expedy account with an active printer. Not added yet? Follow the guide for your machine, [Expedy XPDY80](/expedy-print/installation/add-an-expedy-xpdy80-cloud-printer-to-your-account), [HSPOS](/expedy-print/installation/add-an-hspos-cloud-printer-to-your-account), [Star Micronics](/expedy-print/installation/add-a-star-micronics-printer-to-your-account) or [Raspberry Pi](/expedy-print/installation/add-a-raspberry-pi-cloud-print-server-to-your-account)
- A [HubRise account](https://manager.hubrise.com/signup), which aggregates your sales channels
- A RestaJet account linked to your HubRise location
## How it works
| Step | What happens |
|---|---|
| 1 | An order is placed on RestaJet |
| 2 | RestaJet pushes it to HubRise |
| 3 | Expedy PRINT receives it and prints a standardised ticket |
A single printer covers every channel connected to the same HubRise location, so you do not need one machine per platform.
## Connect it
The setup happens once, on the HubRise side, and is described step by step in the reference guide:
**[Connect a receipt printer to HubRise](/integrations/hubrise/connecting-a-receipt-printer-to-hubrise)**
Then link your RestaJet account to the same HubRise location. That part is done from the RestaJet back office, or by RestaJet support.
## Receipt settings
Once connected, the printer page in the [Expedy console](https://www.expedy.fr/console/v3/) controls what gets printed:
- **Print order when**, the status that triggers printing, `NEW`, `RECEIVED` or `ACCEPTED`
- **Then change status to**, the automatic status update applied after printing
- **Number of copies**, one ticket for the kitchen, one for the counter or the delivery bag
- The receipt header and footer, logo, company name, address and registration number
All of it is detailed in [Connect a receipt printer to HubRise](/integrations/hubrise/connecting-a-receipt-printer-to-hubrise).
> Depending on the connector or the point-of-sale software you use, this setup may be handled by your partner. Check with them before you start.
## Need help?
- [Browse all integrations](/integrations)
- [Open a support ticket](https://help.expedy.io/support/tickets/new)
---
url: https://docs.expedy.io/en/integrations/skip-the-dishes/connect-a-receipt-printer-to-skip-the-dishes
title: Print Skip The Dishes orders on a receipt printer
updated_at: 2026-10-16T02:32:09.638348+00:00
---
# Print Skip The Dishes orders on a receipt printer
[Skip The Dishes](https://www.skipthedishes.com/) is a meal delivery platform. It connects to Expedy PRINT through **HubRise**: Skip The Dishes sends its orders to HubRise, HubRise forwards them to your cloud printer, and the ticket comes out within seconds.
## What you need
- An Expedy account with an active printer. Not added yet? Follow the guide for your machine, [Expedy XPDY80](/expedy-print/installation/add-an-expedy-xpdy80-cloud-printer-to-your-account), [HSPOS](/expedy-print/installation/add-an-hspos-cloud-printer-to-your-account), [Star Micronics](/expedy-print/installation/add-a-star-micronics-printer-to-your-account) or [Raspberry Pi](/expedy-print/installation/add-a-raspberry-pi-cloud-print-server-to-your-account)
- A [HubRise account](https://manager.hubrise.com/signup), which aggregates your sales channels
- A Skip The Dishes account linked to your HubRise location
## How it works
| Step | What happens |
|---|---|
| 1 | An order is placed on Skip The Dishes |
| 2 | Skip The Dishes pushes it to HubRise |
| 3 | Expedy PRINT receives it and prints a standardised ticket |
A single printer covers every channel connected to the same HubRise location, so you do not need one machine per platform.
## Connect it
The setup happens once, on the HubRise side, and is described step by step in the reference guide:
**[Connect a receipt printer to HubRise](/integrations/hubrise/connecting-a-receipt-printer-to-hubrise)**
Then link your Skip The Dishes account to the same HubRise location. That part is done from the Skip The Dishes back office, or by Skip The Dishes support.
## Receipt settings
Once connected, the printer page in the [Expedy console](https://www.expedy.fr/console/v3/) controls what gets printed:
- **Print order when**, the status that triggers printing, `NEW`, `RECEIVED` or `ACCEPTED`
- **Then change status to**, the automatic status update applied after printing
- **Number of copies**, one ticket for the kitchen, one for the counter or the delivery bag
- The receipt header and footer, logo, company name, address and registration number
All of it is detailed in [Connect a receipt printer to HubRise](/integrations/hubrise/connecting-a-receipt-printer-to-hubrise).
> Depending on the connector or the point-of-sale software you use, this setup may be handled by your partner. Check with them before you start.
## Need help?
- [Browse all integrations](/integrations)
- [Open a support ticket](https://help.expedy.io/support/tickets/new)
---
url: https://docs.expedy.io/en/integrations/pyszne/connect-a-receipt-printer-to-pyszne
title: Print Pyszne orders on a receipt printer
updated_at: 2026-10-20T04:09:02.479356+00:00
---
# Print Pyszne orders on a receipt printer
[Pyszne](https://www.pyszne.pl/) is a meal delivery platform. It connects to Expedy PRINT through **HubRise**: Pyszne sends its orders to HubRise, HubRise forwards them to your cloud printer, and the ticket comes out within seconds.
## What you need
- An Expedy account with an active printer. Not added yet? Follow the guide for your machine, [Expedy XPDY80](/expedy-print/installation/add-an-expedy-xpdy80-cloud-printer-to-your-account), [HSPOS](/expedy-print/installation/add-an-hspos-cloud-printer-to-your-account), [Star Micronics](/expedy-print/installation/add-a-star-micronics-printer-to-your-account) or [Raspberry Pi](/expedy-print/installation/add-a-raspberry-pi-cloud-print-server-to-your-account)
- A [HubRise account](https://manager.hubrise.com/signup), which aggregates your sales channels
- A Pyszne account linked to your HubRise location
## How it works
| Step | What happens |
|---|---|
| 1 | An order is placed on Pyszne |
| 2 | Pyszne pushes it to HubRise |
| 3 | Expedy PRINT receives it and prints a standardised ticket |
A single printer covers every channel connected to the same HubRise location, so you do not need one machine per platform.
## Connect it
The setup happens once, on the HubRise side, and is described step by step in the reference guide:
**[Connect a receipt printer to HubRise](/integrations/hubrise/connecting-a-receipt-printer-to-hubrise)**
Then link your Pyszne account to the same HubRise location. That part is done from the Pyszne back office, or by Pyszne support.
## Receipt settings
Once connected, the printer page in the [Expedy console](https://www.expedy.fr/console/v3/) controls what gets printed:
- **Print order when**, the status that triggers printing, `NEW`, `RECEIVED` or `ACCEPTED`
- **Then change status to**, the automatic status update applied after printing
- **Number of copies**, one ticket for the kitchen, one for the counter or the delivery bag
- The receipt header and footer, logo, company name, address and registration number
All of it is detailed in [Connect a receipt printer to HubRise](/integrations/hubrise/connecting-a-receipt-printer-to-hubrise).
> Depending on the connector or the point-of-sale software you use, this setup may be handled by your partner. Check with them before you start.
## Need help?
- [Browse all integrations](/integrations)
- [Open a support ticket](https://help.expedy.io/support/tickets/new)
---
url: https://docs.expedy.io/en/integrations/mynober/connect-a-receipt-printer-to-mynober
title: Print MynOber orders on a receipt printer
updated_at: 2026-10-20T22:01:12.883706+00:00
---
# Print MynOber orders on a receipt printer
**MynOber** is an online ordering solution for hospitality. It connects to Expedy PRINT through **HubRise**: MynOber sends its orders to HubRise, HubRise forwards them to your cloud printer, and the ticket comes out within seconds.
## What you need
- An Expedy account with an active printer. Not added yet? Follow the guide for your machine, [Expedy XPDY80](/expedy-print/installation/add-an-expedy-xpdy80-cloud-printer-to-your-account), [HSPOS](/expedy-print/installation/add-an-hspos-cloud-printer-to-your-account), [Star Micronics](/expedy-print/installation/add-a-star-micronics-printer-to-your-account) or [Raspberry Pi](/expedy-print/installation/add-a-raspberry-pi-cloud-print-server-to-your-account)
- A [HubRise account](https://manager.hubrise.com/signup), which aggregates your sales channels
- A MynOber account linked to your HubRise location
## How it works
| Step | What happens |
|---|---|
| 1 | An order is placed on MynOber |
| 2 | MynOber pushes it to HubRise |
| 3 | Expedy PRINT receives it and prints a standardised ticket |
A single printer covers every channel connected to the same HubRise location, so you do not need one machine per platform.
## Connect it
The setup happens once, on the HubRise side, and is described step by step in the reference guide:
**[Connect a receipt printer to HubRise](/integrations/hubrise/connecting-a-receipt-printer-to-hubrise)**
Then link your MynOber account to the same HubRise location. That part is done from the MynOber back office, or by MynOber support.
## Receipt settings
Once connected, the printer page in the [Expedy console](https://www.expedy.fr/console/v3/) controls what gets printed:
- **Print order when**, the status that triggers printing, `NEW`, `RECEIVED` or `ACCEPTED`
- **Then change status to**, the automatic status update applied after printing
- **Number of copies**, one ticket for the kitchen, one for the counter or the delivery bag
- The receipt header and footer, logo, company name, address and registration number
All of it is detailed in [Connect a receipt printer to HubRise](/integrations/hubrise/connecting-a-receipt-printer-to-hubrise).
> Depending on the connector or the point-of-sale software you use, this setup may be handled by your partner. Check with them before you start.
## Need help?
- [Browse all integrations](/integrations)
- [Open a support ticket](https://help.expedy.io/support/tickets/new)
---
url: https://docs.expedy.io/en/integrations/tablati/connect-a-receipt-printer-to-tablati
title: Print Tablati orders on a receipt printer
updated_at: 2026-10-20T22:03:35.036113+00:00
---
# Print Tablati orders on a receipt printer
**Tablati** is an online ordering solution for hospitality. It connects to Expedy PRINT through **HubRise**: Tablati sends its orders to HubRise, HubRise forwards them to your cloud printer, and the ticket comes out within seconds.
## What you need
- An Expedy account with an active printer. Not added yet? Follow the guide for your machine, [Expedy XPDY80](/expedy-print/installation/add-an-expedy-xpdy80-cloud-printer-to-your-account), [HSPOS](/expedy-print/installation/add-an-hspos-cloud-printer-to-your-account), [Star Micronics](/expedy-print/installation/add-a-star-micronics-printer-to-your-account) or [Raspberry Pi](/expedy-print/installation/add-a-raspberry-pi-cloud-print-server-to-your-account)
- A [HubRise account](https://manager.hubrise.com/signup), which aggregates your sales channels
- A Tablati account linked to your HubRise location
## How it works
| Step | What happens |
|---|---|
| 1 | An order is placed on Tablati |
| 2 | Tablati pushes it to HubRise |
| 3 | Expedy PRINT receives it and prints a standardised ticket |
A single printer covers every channel connected to the same HubRise location, so you do not need one machine per platform.
## Connect it
The setup happens once, on the HubRise side, and is described step by step in the reference guide:
**[Connect a receipt printer to HubRise](/integrations/hubrise/connecting-a-receipt-printer-to-hubrise)**
Then link your Tablati account to the same HubRise location. That part is done from the Tablati back office, or by Tablati support.
## Receipt settings
Once connected, the printer page in the [Expedy console](https://www.expedy.fr/console/v3/) controls what gets printed:
- **Print order when**, the status that triggers printing, `NEW`, `RECEIVED` or `ACCEPTED`
- **Then change status to**, the automatic status update applied after printing
- **Number of copies**, one ticket for the kitchen, one for the counter or the delivery bag
- The receipt header and footer, logo, company name, address and registration number
All of it is detailed in [Connect a receipt printer to HubRise](/integrations/hubrise/connecting-a-receipt-printer-to-hubrise).
> Depending on the connector or the point-of-sale software you use, this setup may be handled by your partner. Check with them before you start.
## Need help?
- [Browse all integrations](/integrations)
- [Open a support ticket](https://help.expedy.io/support/tickets/new)
---
url: https://docs.expedy.io/en/integrations/smartresto/connect-a-receipt-printer-to-smartresto
title: Print SmartResto.Net orders on a receipt printer
updated_at: 2026-10-20T16:56:55.843286+00:00
---
# Print SmartResto.Net orders on a receipt printer
**SmartResto.Net** is an online ordering solution for hospitality. It connects to Expedy PRINT through **HubRise**: SmartResto.Net sends its orders to HubRise, HubRise forwards them to your cloud printer, and the ticket comes out within seconds.
## What you need
- An Expedy account with an active printer. Not added yet? Follow the guide for your machine, [Expedy XPDY80](/expedy-print/installation/add-an-expedy-xpdy80-cloud-printer-to-your-account), [HSPOS](/expedy-print/installation/add-an-hspos-cloud-printer-to-your-account), [Star Micronics](/expedy-print/installation/add-a-star-micronics-printer-to-your-account) or [Raspberry Pi](/expedy-print/installation/add-a-raspberry-pi-cloud-print-server-to-your-account)
- A [HubRise account](https://manager.hubrise.com/signup), which aggregates your sales channels
- A SmartResto.Net account linked to your HubRise location
## How it works
| Step | What happens |
|---|---|
| 1 | An order is placed on SmartResto.Net |
| 2 | SmartResto.Net pushes it to HubRise |
| 3 | Expedy PRINT receives it and prints a standardised ticket |
A single printer covers every channel connected to the same HubRise location, so you do not need one machine per platform.
## Connect it
The setup happens once, on the HubRise side, and is described step by step in the reference guide:
**[Connect a receipt printer to HubRise](/integrations/hubrise/connecting-a-receipt-printer-to-hubrise)**
Then link your SmartResto.Net account to the same HubRise location. That part is done from the SmartResto.Net back office, or by SmartResto.Net support.
## Receipt settings
Once connected, the printer page in the [Expedy console](https://www.expedy.fr/console/v3/) controls what gets printed:
- **Print order when**, the status that triggers printing, `NEW`, `RECEIVED` or `ACCEPTED`
- **Then change status to**, the automatic status update applied after printing
- **Number of copies**, one ticket for the kitchen, one for the counter or the delivery bag
- The receipt header and footer, logo, company name, address and registration number
All of it is detailed in [Connect a receipt printer to HubRise](/integrations/hubrise/connecting-a-receipt-printer-to-hubrise).
> Depending on the connector or the point-of-sale software you use, this setup may be handled by your partner. Check with them before you start.
## Need help?
- [Browse all integrations](/integrations)
- [Open a support ticket](https://help.expedy.io/support/tickets/new)
---
url: https://docs.expedy.io/en/integrations/just-eat-takeaway/connect-a-receipt-printer-to-just-eat-takeaway
title: Print Just Eat Takeaway orders on a receipt printer
updated_at: 2026-10-20T05:07:02.335476+00:00
---
# Print Just Eat Takeaway orders on a receipt printer
[Just Eat Takeaway](https://www.justeattakeaway.com/) is a meal delivery platform. It connects to Expedy PRINT through **HubRise**: Just Eat Takeaway sends its orders to HubRise, HubRise forwards them to your cloud printer, and the ticket comes out within seconds.
## What you need
- An Expedy account with an active printer. Not added yet? Follow the guide for your machine, [Expedy XPDY80](/expedy-print/installation/add-an-expedy-xpdy80-cloud-printer-to-your-account), [HSPOS](/expedy-print/installation/add-an-hspos-cloud-printer-to-your-account), [Star Micronics](/expedy-print/installation/add-a-star-micronics-printer-to-your-account) or [Raspberry Pi](/expedy-print/installation/add-a-raspberry-pi-cloud-print-server-to-your-account)
- A [HubRise account](https://manager.hubrise.com/signup), which aggregates your sales channels
- A Just Eat Takeaway account linked to your HubRise location
## How it works
| Step | What happens |
|---|---|
| 1 | An order is placed on Just Eat Takeaway |
| 2 | Just Eat Takeaway pushes it to HubRise |
| 3 | Expedy PRINT receives it and prints a standardised ticket |
A single printer covers every channel connected to the same HubRise location, so you do not need one machine per platform.
## Connect it
The setup happens once, on the HubRise side, and is described step by step in the reference guide:
**[Connect a receipt printer to HubRise](/integrations/hubrise/connecting-a-receipt-printer-to-hubrise)**
Then link your Just Eat Takeaway account to the same HubRise location. That part is done from the Just Eat Takeaway back office, or by Just Eat Takeaway support.
## Receipt settings
Once connected, the printer page in the [Expedy console](https://www.expedy.fr/console/v3/) controls what gets printed:
- **Print order when**, the status that triggers printing, `NEW`, `RECEIVED` or `ACCEPTED`
- **Then change status to**, the automatic status update applied after printing
- **Number of copies**, one ticket for the kitchen, one for the counter or the delivery bag
- The receipt header and footer, logo, company name, address and registration number
All of it is detailed in [Connect a receipt printer to HubRise](/integrations/hubrise/connecting-a-receipt-printer-to-hubrise).
> Depending on the connector or the point-of-sale software you use, this setup may be handled by your partner. Check with them before you start.
## Need help?
- [Browse all integrations](/integrations)
- [Open a support ticket](https://help.expedy.io/support/tickets/new)
---
url: https://docs.expedy.io/en/integrations/activepieces/connect-a-receipt-printer-to-activepieces
title: Print from Activepieces with Expedy PRINT
updated_at: 2026-10-20T00:26:56.353987+00:00
---
# Print from Activepieces with Expedy PRINT
[Activepieces](https://www.activepieces.com/) is an automation platform. It reaches Expedy PRINT in two ways: through **Zapier**, with no code, or through the **Expedy REST API**, when you want full control over the ticket.
## What you need
- An Expedy account with an active printer. Not added yet? Follow the guide for your machine, [Expedy XPDY80](/expedy-print/installation/add-an-expedy-xpdy80-cloud-printer-to-your-account), [HSPOS](/expedy-print/installation/add-an-hspos-cloud-printer-to-your-account), [Star Micronics](/expedy-print/installation/add-a-star-micronics-printer-to-your-account) or [Raspberry Pi](/expedy-print/installation/add-a-raspberry-pi-cloud-print-server-to-your-account)
- Your **API SID**, **API TOKEN** and **API Printer UID**, all three on the printer page of the [Expedy console](https://www.expedy.fr/console/v3/), in the **API Keys & UID** card
## Option 1, through Zapier, no code
Activepieces connects to Zapier, and Zapier ships a ready-made **Expedy Print** action. The recipe is always the same: an event in Activepieces triggers **Create a Print Job** in Expedy Print, and you map the fields you want on the ticket.
Full walkthrough: **[How to integrate Expedy Print with Zapier](/integrations/zapier/how-to-integrate-expedy-print-with-zapier)**
## Option 2, through the REST API
If Activepieces can issue an HTTP request, it can drive the printer directly.
```api
POST https://www.expedy.fr/api/v2/printers/{printer_uid}/print
```
Authentication uses an `Authorization` header carrying your `SID:TOKEN`, with no `Bearer` prefix. Parameters and a complete example are in [Create a Print Job](/expedy-print/api-print-v2/create-a-print-job).
## Formatting the ticket
Whichever route you take, the message accepts the Expedy layout tags:
| What you want | Where to look |
|---|---|
| Align, resize or emphasise text | [Text Layout](/expedy-print/receipt-layout/text-layout-tags) |
| Print a logo or an image | [Image and Logo](/expedy-print/receipt-layout/image-and-logo-printing) |
| Print a QR code | [QR Code](/expedy-print/receipt-layout/qr-code) |
| Print a barcode | [EAN13 Barcode](/expedy-print/receipt-layout/ean13-barcode) |
> Depending on the connector or the software you use, this setup may be handled by your partner or your agency. Check with them before you start.
## Need help?
- [Browse all integrations](/integrations)
- [Open a support ticket](https://help.expedy.io/support/tickets/new)
---
url: https://docs.expedy.io/en/integrations/ebay/connect-a-receipt-printer-to-ebay
title: Print from eBay with Expedy PRINT
updated_at: 2026-10-20T19:44:14.111119+00:00
---
# Print from eBay with Expedy PRINT
[eBay](https://www.ebay.com/) is an online marketplace. It reaches Expedy PRINT in two ways: through **Zapier**, with no code, or through the **Expedy REST API**, when you want full control over the ticket.
## What you need
- An Expedy account with an active printer. Not added yet? Follow the guide for your machine, [Expedy XPDY80](/expedy-print/installation/add-an-expedy-xpdy80-cloud-printer-to-your-account), [HSPOS](/expedy-print/installation/add-an-hspos-cloud-printer-to-your-account), [Star Micronics](/expedy-print/installation/add-a-star-micronics-printer-to-your-account) or [Raspberry Pi](/expedy-print/installation/add-a-raspberry-pi-cloud-print-server-to-your-account)
- Your **API SID**, **API TOKEN** and **API Printer UID**, all three on the printer page of the [Expedy console](https://www.expedy.fr/console/v3/), in the **API Keys & UID** card
## Option 1, through Zapier, no code
eBay connects to Zapier, and Zapier ships a ready-made **Expedy Print** action. The recipe is always the same: an event in eBay triggers **Create a Print Job** in Expedy Print, and you map the fields you want on the ticket.
Full walkthrough: **[How to integrate Expedy Print with Zapier](/integrations/zapier/how-to-integrate-expedy-print-with-zapier)**
## Option 2, through the REST API
If eBay can issue an HTTP request, it can drive the printer directly.
```api
POST https://www.expedy.fr/api/v2/printers/{printer_uid}/print
```
Authentication uses an `Authorization` header carrying your `SID:TOKEN`, with no `Bearer` prefix. Parameters and a complete example are in [Create a Print Job](/expedy-print/api-print-v2/create-a-print-job).
## Formatting the ticket
Whichever route you take, the message accepts the Expedy layout tags:
| What you want | Where to look |
|---|---|
| Align, resize or emphasise text | [Text Layout](/expedy-print/receipt-layout/text-layout-tags) |
| Print a logo or an image | [Image and Logo](/expedy-print/receipt-layout/image-and-logo-printing) |
| Print a QR code | [QR Code](/expedy-print/receipt-layout/qr-code) |
| Print a barcode | [EAN13 Barcode](/expedy-print/receipt-layout/ean13-barcode) |
> Depending on the connector or the software you use, this setup may be handled by your partner or your agency. Check with them before you start.
## Need help?
- [Browse all integrations](/integrations)
- [Open a support ticket](https://help.expedy.io/support/tickets/new)
---
url: https://docs.expedy.io/en/integrations/squarespace-commerce/connect-a-receipt-printer-to-squarespace-commerce
title: Print from Squarespace Commerce with Expedy PRINT
updated_at: 2026-10-10T01:29:45.459672+00:00
---
# Print from Squarespace Commerce with Expedy PRINT
[Squarespace Commerce](https://www.squarespace.com/) is an online ordering platform. It reaches Expedy PRINT in two ways: through **Zapier**, with no code, or through the **Expedy REST API**, when you want full control over the ticket.
## What you need
- An Expedy account with an active printer. Not added yet? Follow the guide for your machine, [Expedy XPDY80](/expedy-print/installation/add-an-expedy-xpdy80-cloud-printer-to-your-account), [HSPOS](/expedy-print/installation/add-an-hspos-cloud-printer-to-your-account), [Star Micronics](/expedy-print/installation/add-a-star-micronics-printer-to-your-account) or [Raspberry Pi](/expedy-print/installation/add-a-raspberry-pi-cloud-print-server-to-your-account)
- Your **API SID**, **API TOKEN** and **API Printer UID**, all three on the printer page of the [Expedy console](https://www.expedy.fr/console/v3/), in the **API Keys & UID** card
## Option 1, through Zapier, no code
Squarespace Commerce connects to Zapier, and Zapier ships a ready-made **Expedy Print** action. The recipe is always the same: an event in Squarespace Commerce triggers **Create a Print Job** in Expedy Print, and you map the fields you want on the ticket.
Full walkthrough: **[How to integrate Expedy Print with Zapier](/integrations/zapier/how-to-integrate-expedy-print-with-zapier)**
## Option 2, through the REST API
If Squarespace Commerce can issue an HTTP request, it can drive the printer directly.
```api
POST https://www.expedy.fr/api/v2/printers/{printer_uid}/print
```
Authentication uses an `Authorization` header carrying your `SID:TOKEN`, with no `Bearer` prefix. Parameters and a complete example are in [Create a Print Job](/expedy-print/api-print-v2/create-a-print-job).
## Formatting the ticket
Whichever route you take, the message accepts the Expedy layout tags:
| What you want | Where to look |
|---|---|
| Align, resize or emphasise text | [Text Layout](/expedy-print/receipt-layout/text-layout-tags) |
| Print a logo or an image | [Image and Logo](/expedy-print/receipt-layout/image-and-logo-printing) |
| Print a QR code | [QR Code](/expedy-print/receipt-layout/qr-code) |
| Print a barcode | [EAN13 Barcode](/expedy-print/receipt-layout/ean13-barcode) |
> Depending on the connector or the software you use, this setup may be handled by your partner or your agency. Check with them before you start.
## Need help?
- [Browse all integrations](/integrations)
- [Open a support ticket](https://help.expedy.io/support/tickets/new)
---
url: https://docs.expedy.io/en/integrations/prestashop/prestashop-module-cloud-print-orders-automatically
title: PrestaShop Module: Automatic Order Printing
updated_at: 2026-10-22T14:06:26.669039+00:00
---
# PrestaShop Module: Automatic Order Printing
> **Before you start**: you need an Expedy account and an active printer on it. Not added yet? Follow the guide for your machine, [Expedy XPDY80](/expedy-print/installation/add-an-expedy-xpdy80-cloud-printer-to-your-account), [HSPOS](/expedy-print/installation/add-an-hspos-cloud-printer-to-your-account), [Star Micronics](/expedy-print/installation/add-a-star-micronics-printer-to-your-account) or [Raspberry Pi](/expedy-print/installation/add-a-raspberry-pi-cloud-print-server-to-your-account).
Print new orders automatically as soon as they are placed (or once payment is accepted). No computer, tablet, smartphone, local print server, or driver to install. Your printer connects directly to your PrestaShop store through the Expedy Cloud Print Server over Wi-Fi, Ethernet, or a 3G/4G SIM card.
> This documentation covers **ExpedyPRINT v2**, our current module rebuilt on the ExpedyPRINT API v2. We do not provide support for versions prior to v2.
> ⚠️ Your PrestaShop store must have **SSL enabled** and must **not** run in dev or debug mode. These modes can block API requests and prevent print jobs from being sent.
**Compatible printers:**
- Any ESC/POS or ESC/P printer paired with a [Cloud Print Box adapter](https://www.expedy.io/product)
- [Expedy Cloud Print printers](https://www.expedy.io/product)
> Need to check compatibility with another printer? [Create a support ticket](https://help.expedy.io/support/tickets/new).
---
## Requirements
| | Minimum |
|---|---|
| PrestaShop | 1.6 (tested up to 8.x) |
| PHP | 7.2 |
You also need a free [Expedy](https://www.expedy.io) account with an **API SID**, an **API token**, and at least one cloud printer registered on the account.
---
## Download
Download the latest **`expedyprint.zip`** from the GitHub releases page:
👉 **[github.com/ExpedyDev/expedyprint-prestashop-addon/releases](https://github.com/ExpedyDev/expedyprint-prestashop-addon/releases/)**
Each release ships the ready-to-install zip and its changelog. That single file is all you need.
The full source code is open and available here:
👉 **[github.com/ExpedyDev/expedyprint-prestashop-addon](https://github.com/ExpedyDev/expedyprint-prestashop-addon)**
---
## Installation
1. Download **`expedyprint.zip`** from the [latest release](https://github.com/ExpedyDev/expedyprint-prestashop-addon/releases/).
2. In your PrestaShop back office, open **Modules → Module Manager**.
3. Click **Upload a module** and select the `expedyprint.zip` you downloaded. The module installs automatically.
4. Once installed, click **Configure**.
No drivers, no command line, no extra software.
---
## Configuration
Open **Modules → Module Manager → ExpedyPRINT → Configure**. The settings dashboard is organised into clearly labelled panels, and the connection, printer, and preview tools all work without saving the form first.
### 1. API connection
Paste your **API SID** and **API token**, then click **Test connection**.
| Setting | Description |
|---------|-------------|
| **API SID** | Your account identifier, available in the [Expedy console](https://www.expedy.fr/console/v3/) under **API**. |
| **API token** | Your secret key, available in the same **API** section. Treat it like a password. It is stored securely and write-only, so it is never displayed back. Leave the field blank when saving to keep the token already stored. |
On a successful test, the printer list is fetched from your account and the printer dropdown is populated automatically.
### 2. Printer
| Setting | Description |
|---------|-------------|
| **Printer** | Pick your printer from the dropdown loaded from your account (it shows the name, paper width, and UID). |
| **Backup printer UID** | Optional. A second printer that receives the same ticket, useful for redundancy. |
| **Paper width** | 58 mm or 80 mm, matching your printer's paper roll. |
Use **Send test print** to print a sample ticket to the selected printer and confirm everything is wired up.
### 3. Printing trigger
| Setting | Description |
|---------|-------------|
| **Print the ticket** | Choose when printing happens: as soon as an order is placed, or when the order status becomes "Payment accepted". |
| **Number of copies** | 1 to 5 copies per order. |
| **Cut the paper after each ticket** | Automatically cuts the paper at the end of each print job, on printers that support it. |
### 4. Receipt content
Choose how products and amounts are shown and which blocks are printed:
- **Product display:** product name and attributes, product reference and attributes, name only, or reference only.
- **Amounts:** line amounts including tax, excluding tax, or no line amounts. Amounts print without a currency symbol for maximum thermal-printer compatibility.
- **Totals:** print the total incl. tax, the total excl. tax, and/or the tax detail.
- **EAN-13 barcodes:** print the product barcode on each line.
- **Number of items, payment method, delivery/carrier method, customer note:** toggle each block on or off.
### 5. Store header and footer
Optional logo URL (HTTPS, GIF/JPG/PNG, max width 570px), store title, company name, address, postcode, city, phone, and company ID, all printed on the ticket.
### 6. Receipt wording
Every label printed on the ticket (Order, Product, Price, and so on) is fully editable, in any language you like.
### 7. Advanced: multistore mapping
Route store pickups to a specific printer using the format `store_id:printer_uid||store_id:printer_uid`. For example, orders for your London store can print automatically on one printer while Edinburgh orders go to another, fully automated, with no manual sorting.
---
## Order ticket preview
At the bottom of the settings page, the **Preview an order ticket** tool renders the exact ticket for any existing order. Just enter the order ID and click **Preview**. No printer required.
---
## How it works
The module watches your order events and, when the trigger you configured is reached, builds the receipt and sends it to your printer through the ExpedyPRINT cloud API.
An order prints once: an idempotency flag prevents the same order from printing twice. If a print attempt fails, the order is not flagged, so it can retry on the next status change. Every attempt, success or failure, is recorded in **Advanced Parameters → Logs** (source `expedyprint`).
---
## Compatible modules
ExpedyPRINT can read data from other PrestaShop modules to print extra information such as pickup or delivery type, date, and time slot, plus product options. Supported integrations include:
- Delivery and pickup slots: `prestatilldrive`, `prestadrive`, `prestatillhomedelivery`, `fspickupatstorecarrier`, `preferreddeliverytime`
- Product options and custom fields: `configurator`, `an_productfields`, `idxrcustomproduct`
> This list is non-exhaustive. We cannot guarantee correct printing if your PrestaShop installation is heavily customised or uses modules that alter core order functions.
---
## Build your own integration
To print from your own application or another platform, use the official Node.js SDK and API examples:
👉 **[github.com/ExpedyDev/expedy-sdk-node](https://github.com/ExpedyDev/expedy-sdk-node)**
It shows how to authenticate, list your printers, and send print jobs through the ExpedyPRINT API v2.
---
## Customisation and support
The module is open source under the Open Software License (OSL 3.0), so you can freely modify the code to fit your needs. Expedy no longer offers custom development or bespoke customisation services.
- ExpedyPRINT service, account, and API: **[www.expedy.io](https://www.expedy.io)**
- Questions or help: **[create a support ticket](https://help.expedy.io/support/tickets/new)**
- Bugs and feature requests for this module: open an [issue](https://github.com/ExpedyDev/expedyprint-prestashop-addon/issues) on the repository
> Support is provided for ExpedyPRINT v2 only. Versions prior to v2 are no longer supported.
---
url: https://docs.expedy.io/en/integrations/weweb/connect-a-receipt-printer-to-weweb
title: Print from WeWeb with Expedy PRINT
updated_at: 2026-10-19T19:40:57.607484+00:00
---
# Print from WeWeb with Expedy PRINT
[WeWeb](https://www.weweb.io/) is a no-code app building platform. It reaches Expedy PRINT in two ways: through **Zapier**, with no code, or through the **Expedy REST API**, when you want full control over the ticket.
## What you need
- An Expedy account with an active printer. Not added yet? Follow the guide for your machine, [Expedy XPDY80](/expedy-print/installation/add-an-expedy-xpdy80-cloud-printer-to-your-account), [HSPOS](/expedy-print/installation/add-an-hspos-cloud-printer-to-your-account), [Star Micronics](/expedy-print/installation/add-a-star-micronics-printer-to-your-account) or [Raspberry Pi](/expedy-print/installation/add-a-raspberry-pi-cloud-print-server-to-your-account)
- Your **API SID**, **API TOKEN** and **API Printer UID**, all three on the printer page of the [Expedy console](https://www.expedy.fr/console/v3/), in the **API Keys & UID** card
## Option 1, through Zapier, no code
WeWeb connects to Zapier, and Zapier ships a ready-made **Expedy Print** action. The recipe is always the same: an event in WeWeb triggers **Create a Print Job** in Expedy Print, and you map the fields you want on the ticket.
Full walkthrough: **[How to integrate Expedy Print with Zapier](/integrations/zapier/how-to-integrate-expedy-print-with-zapier)**
## Option 2, through the REST API
If WeWeb can issue an HTTP request, it can drive the printer directly.
```api
POST https://www.expedy.fr/api/v2/printers/{printer_uid}/print
```
Authentication uses an `Authorization` header carrying your `SID:TOKEN`, with no `Bearer` prefix. Parameters and a complete example are in [Create a Print Job](/expedy-print/api-print-v2/create-a-print-job).
## Formatting the ticket
Whichever route you take, the message accepts the Expedy layout tags:
| What you want | Where to look |
|---|---|
| Align, resize or emphasise text | [Text Layout](/expedy-print/receipt-layout/text-layout-tags) |
| Print a logo or an image | [Image and Logo](/expedy-print/receipt-layout/image-and-logo-printing) |
| Print a QR code | [QR Code](/expedy-print/receipt-layout/qr-code) |
| Print a barcode | [EAN13 Barcode](/expedy-print/receipt-layout/ean13-barcode) |
> Depending on the connector or the software you use, this setup may be handled by your partner or your agency. Check with them before you start.
## Need help?
- [Browse all integrations](/integrations)
- [Open a support ticket](https://help.expedy.io/support/tickets/new)
---
url: https://docs.expedy.io/en/integrations/ecwid/connect-a-receipt-printer-to-ecwid
title: Print from Ecwid by Lightspeed with Expedy PRINT
updated_at: 2026-10-20T18:51:54.12279+00:00
---
# Print from Ecwid by Lightspeed with Expedy PRINT
[Ecwid by Lightspeed](https://www.ecwid.com/) is an online ordering platform. It reaches Expedy PRINT in two ways: through **Zapier**, with no code, or through the **Expedy REST API**, when you want full control over the ticket.
## What you need
- An Expedy account with an active printer. Not added yet? Follow the guide for your machine, [Expedy XPDY80](/expedy-print/installation/add-an-expedy-xpdy80-cloud-printer-to-your-account), [HSPOS](/expedy-print/installation/add-an-hspos-cloud-printer-to-your-account), [Star Micronics](/expedy-print/installation/add-a-star-micronics-printer-to-your-account) or [Raspberry Pi](/expedy-print/installation/add-a-raspberry-pi-cloud-print-server-to-your-account)
- Your **API SID**, **API TOKEN** and **API Printer UID**, all three on the printer page of the [Expedy console](https://www.expedy.fr/console/v3/), in the **API Keys & UID** card
## Option 1, through Zapier, no code
Ecwid by Lightspeed connects to Zapier, and Zapier ships a ready-made **Expedy Print** action. The recipe is always the same: an event in Ecwid by Lightspeed triggers **Create a Print Job** in Expedy Print, and you map the fields you want on the ticket.
Full walkthrough: **[How to integrate Expedy Print with Zapier](/integrations/zapier/how-to-integrate-expedy-print-with-zapier)**
## Option 2, through the REST API
If Ecwid by Lightspeed can issue an HTTP request, it can drive the printer directly.
```api
POST https://www.expedy.fr/api/v2/printers/{printer_uid}/print
```
Authentication uses an `Authorization` header carrying your `SID:TOKEN`, with no `Bearer` prefix. Parameters and a complete example are in [Create a Print Job](/expedy-print/api-print-v2/create-a-print-job).
## Formatting the ticket
Whichever route you take, the message accepts the Expedy layout tags:
| What you want | Where to look |
|---|---|
| Align, resize or emphasise text | [Text Layout](/expedy-print/receipt-layout/text-layout-tags) |
| Print a logo or an image | [Image and Logo](/expedy-print/receipt-layout/image-and-logo-printing) |
| Print a QR code | [QR Code](/expedy-print/receipt-layout/qr-code) |
| Print a barcode | [EAN13 Barcode](/expedy-print/receipt-layout/ean13-barcode) |
> Depending on the connector or the software you use, this setup may be handled by your partner or your agency. Check with them before you start.
## Need help?
- [Browse all integrations](/integrations)
- [Open a support ticket](https://help.expedy.io/support/tickets/new)
---
url: https://docs.expedy.io/en/integrations/tumblr/connect-a-receipt-printer-to-tumblr
title: Print your Tumblr photos automatically
updated_at: 2026-10-20T12:56:31.355889+00:00
---
# Print your Tumblr photos automatically
[Tumblr](https://www.tumblr.com/) is a photo sharing platform. Through **Zapier**, every new image can go straight to a printer: a black and white copy on a thermal receipt printer, or a full colour print on a photo printer driven by a Raspberry Pi.
## Two very different ways to print an image
| | Receipt printer, thermal | Raspberry Pi or Cloud Print Box |
|---|---|---|
| Hardware | Expedy XPDY80, HSPOS, Star Micronics | Your own laser, inkjet or photo printer, Kodak or DNP and the like, on USB |
| Result | Black and white, no ink, nothing to buy beyond the paper roll | Full colour, photo quality |
| Formats | `.JPG` `.GIF` `.PNG`, wrapped in the `![]() ` tag | `.JPG` `.BMP` `.PNG` `.PDF`, sent as a bare URL |
| Width | 398 px at 58 mm, 602 px at 80 mm, 1002 px at 104 mm | The printer's own format |
| Setup | Nothing to install | USB port set to `LABEL` after a scan, printer driver installed |
## On a thermal receipt printer
Thermal printing uses no ink: the image is burned into the paper, so a print costs nothing beyond the roll. That is what makes it viable for a photo booth, an event or a loyalty coupon.
The trade-off is the rendering. The documented requirement is **flat black on a white background**, at the exact width of your paper, 5 to 15 KB, served over HTTPS. A colour photo taken straight from Tumblr will not come out as is: convert it to black and white and resize it first. Every constraint is listed in [Image and Logo](/expedy-print/receipt-layout/image-and-logo-printing).
In the Zap, the message is the `
` tag | `.JPG` `.BMP` `.PNG` `.PDF`, sent as a bare URL |
| Width | 398 px at 58 mm, 602 px at 80 mm, 1002 px at 104 mm | The printer's own format |
| Setup | Nothing to install | USB port set to `LABEL` after a scan, printer driver installed |
## On a thermal receipt printer
Thermal printing uses no ink: the image is burned into the paper, so a print costs nothing beyond the roll. That is what makes it viable for a photo booth, an event or a loyalty coupon.
The trade-off is the rendering. The documented requirement is **flat black on a white background**, at the exact width of your paper, 5 to 15 KB, served over HTTPS. A colour photo taken straight from Tumblr will not come out as is: convert it to black and white and resize it first. Every constraint is listed in [Image and Logo](/expedy-print/receipt-layout/image-and-logo-printing).
In the Zap, the message is the `![]() ` tag wrapping the image URL:
```text
` tag wrapping the image URL:
```text
![]() https://example.com/photo.png
```
## On a photo, laser or inkjet printer
For real photo output, the job goes to **your own printer**, connected by USB to a **Raspberry Pi** or a **Cloud Print Box adapter**. Laser, inkjet, label and dye-sublimation photo printers such as Kodak or DNP all work, as long as their driver is installed.
Run a **USB scan** on the device page, set that port to `LABEL`, and send the image URL **on its own, with no tag**:
```text
https://example.com/photo.jpg
```
See [Installation on Raspberry Pi](/usb-cloud-printer-adapter/rpi-installation/installation-on-raspberry-pi) and [PDF printing](/expedy-print/receipt-layout/print-pdf).
## Build the Zap
1. Pick **Tumblr** as the trigger app and the event that fires on a new image
2. Add **Expedy Print** as the action, then **Create a Print Job**
3. Connect your Expedy account with your **Expedy SID** and your **Expedy TOKEN**, both on the printer page of the [Expedy console](https://www.expedy.fr/console/v3/), in the **API Keys & UID** card
4. Enter the **Printer UID** of the machine that will print
5. In the message, put the `
https://example.com/photo.png
```
## On a photo, laser or inkjet printer
For real photo output, the job goes to **your own printer**, connected by USB to a **Raspberry Pi** or a **Cloud Print Box adapter**. Laser, inkjet, label and dye-sublimation photo printers such as Kodak or DNP all work, as long as their driver is installed.
Run a **USB scan** on the device page, set that port to `LABEL`, and send the image URL **on its own, with no tag**:
```text
https://example.com/photo.jpg
```
See [Installation on Raspberry Pi](/usb-cloud-printer-adapter/rpi-installation/installation-on-raspberry-pi) and [PDF printing](/expedy-print/receipt-layout/print-pdf).
## Build the Zap
1. Pick **Tumblr** as the trigger app and the event that fires on a new image
2. Add **Expedy Print** as the action, then **Create a Print Job**
3. Connect your Expedy account with your **Expedy SID** and your **Expedy TOKEN**, both on the printer page of the [Expedy console](https://www.expedy.fr/console/v3/), in the **API Keys & UID** card
4. Enter the **Printer UID** of the machine that will print
5. In the message, put the `![]() ` tag on a receipt printer, or the bare image URL on a photo printer
Step by step on the Zapier side: [How to integrate Expedy Print with Zapier](/integrations/zapier/how-to-integrate-expedy-print-with-zapier)
> Depending on the connector or the software you use, this setup may be handled by your partner or your agency. Check with them before you start.
## Need help?
- [Browse all integrations](/integrations)
- [Open a support ticket](https://help.expedy.io/support/tickets/new)
---
url: https://docs.expedy.io/en/integrations/webflow/connect-a-receipt-printer-to-webflow
title: Print from Webflow with Expedy PRINT
updated_at: 2026-10-19T21:04:28.964472+00:00
---
# Print from Webflow with Expedy PRINT
[Webflow](https://webflow.com/) is a website and online store builder. It reaches Expedy PRINT in two ways: through **Zapier**, with no code, or through the **Expedy REST API**, when you want full control over the ticket.
## What you need
- An Expedy account with an active printer. Not added yet? Follow the guide for your machine, [Expedy XPDY80](/expedy-print/installation/add-an-expedy-xpdy80-cloud-printer-to-your-account), [HSPOS](/expedy-print/installation/add-an-hspos-cloud-printer-to-your-account), [Star Micronics](/expedy-print/installation/add-a-star-micronics-printer-to-your-account) or [Raspberry Pi](/expedy-print/installation/add-a-raspberry-pi-cloud-print-server-to-your-account)
- Your **API SID**, **API TOKEN** and **API Printer UID**, all three on the printer page of the [Expedy console](https://www.expedy.fr/console/v3/), in the **API Keys & UID** card
## Option 1, through Zapier, no code
Webflow connects to Zapier, and Zapier ships a ready-made **Expedy Print** action. The recipe is always the same: an event in Webflow triggers **Create a Print Job** in Expedy Print, and you map the fields you want on the ticket.
Full walkthrough: **[How to integrate Expedy Print with Zapier](/integrations/zapier/how-to-integrate-expedy-print-with-zapier)**
## Option 2, through the REST API
If Webflow can issue an HTTP request, it can drive the printer directly.
```api
POST https://www.expedy.fr/api/v2/printers/{printer_uid}/print
```
Authentication uses an `Authorization` header carrying your `SID:TOKEN`, with no `Bearer` prefix. Parameters and a complete example are in [Create a Print Job](/expedy-print/api-print-v2/create-a-print-job).
## Formatting the ticket
Whichever route you take, the message accepts the Expedy layout tags:
| What you want | Where to look |
|---|---|
| Align, resize or emphasise text | [Text Layout](/expedy-print/receipt-layout/text-layout-tags) |
| Print a logo or an image | [Image and Logo](/expedy-print/receipt-layout/image-and-logo-printing) |
| Print a QR code | [QR Code](/expedy-print/receipt-layout/qr-code) |
| Print a barcode | [EAN13 Barcode](/expedy-print/receipt-layout/ean13-barcode) |
> Depending on the connector or the software you use, this setup may be handled by your partner or your agency. Check with them before you start.
## Need help?
- [Browse all integrations](/integrations)
- [Open a support ticket](https://help.expedy.io/support/tickets/new)
---
url: https://docs.expedy.io/en/integrations/wordpress-woocommerce/wordpress-woocommerce-extension-plugin-print-orders-automatically
title: WordPress/WooCommerce Extension Plugin : Print orders automatically
updated_at: 2026-10-22T14:29:29.000816+00:00
---
# WordPress/WooCommerce Extension Plugin : Print orders automatically
> **Before you start**: you need an Expedy account and an active printer on it. Not added yet? Follow the guide for your machine, [Expedy XPDY80](/expedy-print/installation/add-an-expedy-xpdy80-cloud-printer-to-your-account), [HSPOS](/expedy-print/installation/add-an-hspos-cloud-printer-to-your-account), [Star Micronics](/expedy-print/installation/add-a-star-micronics-printer-to-your-account) or [Raspberry Pi](/expedy-print/installation/add-a-raspberry-pi-cloud-print-server-to-your-account).
Automatically print new orders on your Expedy printer as soon as they are placed, no manual action
required. The plugin connects your WooCommerce store directly to your printer via the **Expedy API
v2**: no tablet, no local print server, no driver to install.
---
## Try it first (live sandbox)
Want to see the plugin in action before installing it on your own store? A ready-to-use sandbox runs
a full WordPress + WooCommerce + Expedy environment right in your browser:
👉 **[woo.expedy.io](https://woo.expedy.io)**
It comes pre-loaded with a demo order, so you can explore the settings dashboard and preview a printed
ticket immediately, no account and no installation required. The sandbox is temporary and isolated,
so real print jobs aren't sent; use it for interface and receipt-preview testing.
---
## Download
Download the latest version from the official **[Releases page](https://github.com/ExpedyDev/expedyprint-woocommerce-extension/releases)**.
Each release ships the ready-to-install `expedyprint.zip` and its changelog, that single file is all
you need.
---
## Installation
1. [**Download the plugin**](https://github.com/ExpedyDev/expedyprint-woocommerce-extension/releases) (`expedyprint.zip`).
2. In your WordPress admin, go to **Plugins → Add New → Upload Plugin**.
3. Click **Choose File** and select the `.zip` file downloaded in step 1.
4. Click **Install Now**.
5. Click **Activate** once the installation is complete.
6. Make sure **WooCommerce** is installed and active (the plugin needs it to run).
7. A new **ExpedyPRINT** entry appears in your wp-admin menu, open it to configure the plugin.
> No drivers, no command line, no extra software required.
---
## Get your API credentials
The plugin connects to your account using two credentials: an **API SID** (your account identifier)
and an **API token** (your secret key).
1. Don't have an account yet? Create your free account at **[expedy.io/signup](https://www.expedy.io/signup)**.
2. Log in to your [Expedy account](https://www.expedy.io) and open the **API** section.
3. Copy your **API SID** and **API token**.
4. Make sure at least **one cloud printer** is registered on your account.
> Keep your API token private, treat it like a password.
---
## Configuration
In your WordPress admin, open the **ExpedyPRINT** menu and fill in each section.
### 1. API connection
| Setting | Description |
|---------|-------------|
| **API SID** | Your account identifier, from the **API** section of your Expedy account. |
| **API token** | Your secret key, from the **API** section of your Expedy account. Leave blank to keep the value already saved. |
Click **Test connection**. On success, the list of printers on your account is loaded automatically.
### 2. Printer
| Setting | Description |
|---------|-------------|
| **Printer** | Pick your printer from the dropdown, it shows the name, paper width and UID. No need to type anything by hand. Use **Refresh list** if it stays empty, or **Send test print** to print a sample ticket. |
| **Backup printer ID** | *(optional)* UID of a second printer that receives a copy of every ticket. |
| **Paper width** | Paper roll size: **58 mm** or **80 mm**. |
### 3. Printing trigger
| Setting | Description |
|---------|-------------|
| **Print the ticket** | Order status that triggers automatic printing: **When the order is paid** · **When the order is processing** · **When the order is completed**. |
| **Copies** | Number of copies to print automatically for each order (1 to 3). |
| **Time zone** | Adjusts the printed delivery/pickup times if your server is in a different time zone. |
### 4. Receipt header & footer
| Setting | Description |
|---------|-------------|
| **Logo URL** | HTTPS URL of your logo. Recommended max width ~570px. Keep the file small to reduce data usage and improve print speed, if printing is blocked, test without the logo first. |
| **Title** | Title shown at the top of the ticket. |
| **Company name / Company ID / Address / Postcode / City / Phone / Email** | Store details printed in the receipt footer. |
| **Product options detail** | Choose **Full details** or **Minimal details** for the product options printed on each line. |
### 5. Receipt wording
Customize every label printed on the ticket (Order, Product, Price, Subtotal, Tax, Total, Shipping,
Total due, Customer note…). Defaults are in English; type your own wording in any language.
### 6. Advanced
| Setting | Description |
|---------|-------------|
| **Multi-vendor mapping** | Split orders between multiple printers by vendor. Format: `vendor_id:printer_uid` separated by `\|\|`. Example: `4:DESNBXP887K\|\|7:DESHKTI4EOW` |
---
## Preview an order ticket
At the bottom of the settings page, the **Preview an order ticket** tool renders the exact receipt
for any existing order, without printing it and without needing a printer connected. Handy to check
your wording and layout before going live.
---
## Where to find printing logs
Every print attempt (success or failure) is recorded as an **order note** and under
**WooCommerce → Status → Logs** (source `expedyprint`), so you always know what happened.
---
## Compatible plugins
The Expedy plugin is compatible with the following WooCommerce extensions:
- YITH (sub-items / product attributes)
- WooCommerce TM Extra Product Options
- ODT Extended / WooODT Lite (Byconsole)
- Advanced Product Fields Pro (StudioWombat)
- WooCommerce Local Pickup Time Select
- WCFM, Multi Vendor Marketplace Plugin
> We regularly add new compatible plugins. If yours isn't listed, [contact our support team](https://help.expedy.io/support/tickets/new).
---
## Build your own integration
Prefer to print from your own application or connect another platform instead of using this
WooCommerce plugin? Use the official Node.js SDK and API examples:
👉 **[github.com/ExpedyDev/expedy-sdk-node](https://github.com/ExpedyDev/expedy-sdk-node)**
It shows how to authenticate, list your printers and send print jobs through the Expedy API v2.
---
url: https://docs.expedy.io/en/integrations/relay-app/connect-a-receipt-printer-to-relay-app
title: Print from Relay.app with Expedy PRINT
updated_at: 2026-10-16T12:51:51.534765+00:00
---
# Print from Relay.app with Expedy PRINT
[Relay.app](https://www.relay.app/) is an automation platform. It reaches Expedy PRINT in two ways: through **Zapier**, with no code, or through the **Expedy REST API**, when you want full control over the ticket.
## What you need
- An Expedy account with an active printer. Not added yet? Follow the guide for your machine, [Expedy XPDY80](/expedy-print/installation/add-an-expedy-xpdy80-cloud-printer-to-your-account), [HSPOS](/expedy-print/installation/add-an-hspos-cloud-printer-to-your-account), [Star Micronics](/expedy-print/installation/add-a-star-micronics-printer-to-your-account) or [Raspberry Pi](/expedy-print/installation/add-a-raspberry-pi-cloud-print-server-to-your-account)
- Your **API SID**, **API TOKEN** and **API Printer UID**, all three on the printer page of the [Expedy console](https://www.expedy.fr/console/v3/), in the **API Keys & UID** card
## Option 1, through Zapier, no code
Relay.app connects to Zapier, and Zapier ships a ready-made **Expedy Print** action. The recipe is always the same: an event in Relay.app triggers **Create a Print Job** in Expedy Print, and you map the fields you want on the ticket.
Full walkthrough: **[How to integrate Expedy Print with Zapier](/integrations/zapier/how-to-integrate-expedy-print-with-zapier)**
## Option 2, through the REST API
If Relay.app can issue an HTTP request, it can drive the printer directly.
```api
POST https://www.expedy.fr/api/v2/printers/{printer_uid}/print
```
Authentication uses an `Authorization` header carrying your `SID:TOKEN`, with no `Bearer` prefix. Parameters and a complete example are in [Create a Print Job](/expedy-print/api-print-v2/create-a-print-job).
## Formatting the ticket
Whichever route you take, the message accepts the Expedy layout tags:
| What you want | Where to look |
|---|---|
| Align, resize or emphasise text | [Text Layout](/expedy-print/receipt-layout/text-layout-tags) |
| Print a logo or an image | [Image and Logo](/expedy-print/receipt-layout/image-and-logo-printing) |
| Print a QR code | [QR Code](/expedy-print/receipt-layout/qr-code) |
| Print a barcode | [EAN13 Barcode](/expedy-print/receipt-layout/ean13-barcode) |
> Depending on the connector or the software you use, this setup may be handled by your partner or your agency. Check with them before you start.
## Need help?
- [Browse all integrations](/integrations)
- [Open a support ticket](https://help.expedy.io/support/tickets/new)
---
url: https://docs.expedy.io/en/integrations/shippypro/connect-a-receipt-printer-to-shippypro
title: Print your ShippyPro shipping labels automatically
updated_at: 2026-10-22T04:24:50.449666+00:00
---
# Print your ShippyPro shipping labels automatically
[ShippyPro](https://www.shippypro.com/) generates your carrier shipping labels. Through **Zapier**, the label PDF goes straight to your label printer the moment ShippyPro creates it, so nobody has to download it and print it by hand.
> An Expedy cloud receipt printer, XPDY80, HSPOS or Star Micronics, **cannot print a carrier label**: it is a receipt printer. Carrier labels always go through a **Raspberry Pi** or a **Cloud Print Box USB adapter** driving a label printer.
## What you need
- An Expedy account with an active **Raspberry Pi print server** or **Cloud Print Box USB adapter**. Not set up yet? See [Add a Raspberry Pi print server to your account](/expedy-print/installation/add-a-raspberry-pi-cloud-print-server-to-your-account)
- **Your own label printer**, connected by USB to that Raspberry Pi or adapter, with its port set to `LABEL`
- A ShippyPro account and a [Zapier](https://zapier.com/) account
- Your **API SID**, **API TOKEN** and **API Printer UID**, on the printer page of the [Expedy console](https://www.expedy.fr/console/v3/), in the **API Keys & UID** card
## Why a label printer
A carrier label is a PDF in a fixed format, most often 100 x 150 mm. A receipt printer cannot render it at the right size, so the job goes to a label printer driven by a Raspberry Pi or the Cloud Print Box.
On the printer page, run a **USB scan** and set the port that carries the label printer to `LABEL`, not `ESC/POS`. See [Installation on Raspberry Pi](/usb-cloud-printer-adapter/rpi-installation/installation-on-raspberry-pi).
## Build the Zap
1. In Zapier, create a Zap and pick **ShippyPro** as the trigger app
2. Choose the event that fires when a label is created
3. Add **Expedy Print** as the action, then **Create a Print Job**
4. Connect your Expedy account with your **Expedy SID** and your **Expedy TOKEN**
5. Enter the **Printer UID** of the label printer
6. In the message field, map the label PDF URL returned by ShippyPro
Step by step on the Zapier side: [How to integrate Expedy Print with Zapier](/integrations/zapier/how-to-integrate-expedy-print-with-zapier)
## What to send
A label printer takes the PDF URL **on its own, with no tag**:
```text
https://example.com/label.pdf
```
On an ESC/POS receipt printer the same URL has to be wrapped in the `` tag instead. Both forms are detailed in [PDF printing](/expedy-print/receipt-layout/print-pdf).
## Test it
Create a test label in ShippyPro and check that it comes out at the right size. If nothing prints:
- check the **Printer UID**, it must be the label printer, not the receipt printer
- check that the USB port is in `LABEL` mode after the scan
- check that the PDF URL is reachable without authentication, Expedy fetches it from its own servers
> Depending on the connector or the software you use, this setup may be handled by your partner or your agency. Check with them before you start.
## Need help?
- [Browse all integrations](/integrations)
- [Open a support ticket](https://help.expedy.io/support/tickets/new)
---
url: https://docs.expedy.io/en/integrations/veeqo/connect-a-receipt-printer-to-veeqo
title: Print from Veeqo with Expedy PRINT
updated_at: 2026-10-20T10:04:06.898766+00:00
---
# Print from Veeqo with Expedy PRINT
[Veeqo](https://www.veeqo.com/) is an inventory and order management tool. It reaches Expedy PRINT in two ways: through **Zapier**, with no code, or through the **Expedy REST API**, when you want full control over the ticket.
## What you need
- An Expedy account with an active printer. Not added yet? Follow the guide for your machine, [Expedy XPDY80](/expedy-print/installation/add-an-expedy-xpdy80-cloud-printer-to-your-account), [HSPOS](/expedy-print/installation/add-an-hspos-cloud-printer-to-your-account), [Star Micronics](/expedy-print/installation/add-a-star-micronics-printer-to-your-account) or [Raspberry Pi](/expedy-print/installation/add-a-raspberry-pi-cloud-print-server-to-your-account)
- Your **API SID**, **API TOKEN** and **API Printer UID**, all three on the printer page of the [Expedy console](https://www.expedy.fr/console/v3/), in the **API Keys & UID** card
## Option 1, through Zapier, no code
Veeqo connects to Zapier, and Zapier ships a ready-made **Expedy Print** action. The recipe is always the same: an event in Veeqo triggers **Create a Print Job** in Expedy Print, and you map the fields you want on the ticket.
Full walkthrough: **[How to integrate Expedy Print with Zapier](/integrations/zapier/how-to-integrate-expedy-print-with-zapier)**
## Option 2, through the REST API
If Veeqo can issue an HTTP request, it can drive the printer directly.
```api
POST https://www.expedy.fr/api/v2/printers/{printer_uid}/print
```
Authentication uses an `Authorization` header carrying your `SID:TOKEN`, with no `Bearer` prefix. Parameters and a complete example are in [Create a Print Job](/expedy-print/api-print-v2/create-a-print-job).
## Formatting the ticket
Whichever route you take, the message accepts the Expedy layout tags:
| What you want | Where to look |
|---|---|
| Align, resize or emphasise text | [Text Layout](/expedy-print/receipt-layout/text-layout-tags) |
| Print a logo or an image | [Image and Logo](/expedy-print/receipt-layout/image-and-logo-printing) |
| Print a QR code | [QR Code](/expedy-print/receipt-layout/qr-code) |
| Print a barcode | [EAN13 Barcode](/expedy-print/receipt-layout/ean13-barcode) |
> Depending on the connector or the software you use, this setup may be handled by your partner or your agency. Check with them before you start.
## Need help?
- [Browse all integrations](/integrations)
- [Open a support ticket](https://help.expedy.io/support/tickets/new)
---
url: https://docs.expedy.io/en/integrations/fresh-kds/connect-a-receipt-printer-to-fresh-kds
title: Print from Fresh KDS with Expedy PRINT
updated_at: 2026-10-18T23:09:16.871927+00:00
---
# Print from Fresh KDS with Expedy PRINT
[Fresh KDS](https://www.freshkds.com/) is a kitchen display system. It reaches Expedy PRINT in two ways: through **Zapier**, with no code, or through the **Expedy REST API**, when you want full control over the ticket.
## What you need
- An Expedy account with an active printer. Not added yet? Follow the guide for your machine, [Expedy XPDY80](/expedy-print/installation/add-an-expedy-xpdy80-cloud-printer-to-your-account), [HSPOS](/expedy-print/installation/add-an-hspos-cloud-printer-to-your-account), [Star Micronics](/expedy-print/installation/add-a-star-micronics-printer-to-your-account) or [Raspberry Pi](/expedy-print/installation/add-a-raspberry-pi-cloud-print-server-to-your-account)
- Your **API SID**, **API TOKEN** and **API Printer UID**, all three on the printer page of the [Expedy console](https://www.expedy.fr/console/v3/), in the **API Keys & UID** card
## Option 1, through Zapier, no code
Fresh KDS connects to Zapier, and Zapier ships a ready-made **Expedy Print** action. The recipe is always the same: an event in Fresh KDS triggers **Create a Print Job** in Expedy Print, and you map the fields you want on the ticket.
Full walkthrough: **[How to integrate Expedy Print with Zapier](/integrations/zapier/how-to-integrate-expedy-print-with-zapier)**
## Option 2, through the REST API
If Fresh KDS can issue an HTTP request, it can drive the printer directly.
```api
POST https://www.expedy.fr/api/v2/printers/{printer_uid}/print
```
Authentication uses an `Authorization` header carrying your `SID:TOKEN`, with no `Bearer` prefix. Parameters and a complete example are in [Create a Print Job](/expedy-print/api-print-v2/create-a-print-job).
## Formatting the ticket
Whichever route you take, the message accepts the Expedy layout tags:
| What you want | Where to look |
|---|---|
| Align, resize or emphasise text | [Text Layout](/expedy-print/receipt-layout/text-layout-tags) |
| Print a logo or an image | [Image and Logo](/expedy-print/receipt-layout/image-and-logo-printing) |
| Print a QR code | [QR Code](/expedy-print/receipt-layout/qr-code) |
| Print a barcode | [EAN13 Barcode](/expedy-print/receipt-layout/ean13-barcode) |
> Depending on the connector or the software you use, this setup may be handled by your partner or your agency. Check with them before you start.
## Need help?
- [Browse all integrations](/integrations)
- [Open a support ticket](https://help.expedy.io/support/tickets/new)
---
url: https://docs.expedy.io/en/integrations/flex-catering/connect-a-receipt-printer-to-flex-catering
title: Print from Flex Catering with Expedy PRINT
updated_at: 2026-10-23T04:30:05.455+00:00
---
# Print from Flex Catering with Expedy PRINT
**Flex Catering** is an ordering and catering platform. It reaches Expedy PRINT in two ways: through **Zapier**, with no code, or through the **Expedy REST API**, when you want full control over the ticket.
## What you need
- An Expedy account with an active printer. Not added yet? Follow the guide for your machine, [Expedy XPDY80](/expedy-print/installation/add-an-expedy-xpdy80-cloud-printer-to-your-account), [HSPOS](/expedy-print/installation/add-an-hspos-cloud-printer-to-your-account), [Star Micronics](/expedy-print/installation/add-a-star-micronics-printer-to-your-account) or [Raspberry Pi](/expedy-print/installation/add-a-raspberry-pi-cloud-print-server-to-your-account)
- Your **API SID**, **API TOKEN** and **API Printer UID**, all three on the printer page of the [Expedy console](https://www.expedy.fr/console/v3/), in the **API Keys & UID** card
## Option 1, through Zapier, no code
Flex Catering connects to Zapier, and Zapier ships a ready-made **Expedy Print** action. The recipe is always the same: an event in Flex Catering triggers **Create a Print Job** in Expedy Print, and you map the fields you want on the ticket.
Full walkthrough: **[How to integrate Expedy Print with Zapier](/integrations/zapier/how-to-integrate-expedy-print-with-zapier)**
## Option 2, through the REST API
If Flex Catering can issue an HTTP request, it can drive the printer directly.
```api
POST https://www.expedy.fr/api/v2/printers/{printer_uid}/print
```
Authentication uses an `Authorization` header carrying your `SID:TOKEN`, with no `Bearer` prefix. Parameters and a complete example are in [Create a Print Job](/expedy-print/api-print-v2/create-a-print-job).
## Formatting the ticket
Whichever route you take, the message accepts the Expedy layout tags:
| What you want | Where to look |
|---|---|
| Align, resize or emphasise text | [Text Layout](/expedy-print/receipt-layout/text-layout-tags) |
| Print a logo or an image | [Image and Logo](/expedy-print/receipt-layout/image-and-logo-printing) |
| Print a QR code | [QR Code](/expedy-print/receipt-layout/qr-code) |
| Print a barcode | [EAN13 Barcode](/expedy-print/receipt-layout/ean13-barcode) |
> Depending on the connector or the software you use, this setup may be handled by your partner or your agency. Check with them before you start.
## Need help?
- [Browse all integrations](/integrations)
- [Open a support ticket](https://help.expedy.io/support/tickets/new)
---
url: https://docs.expedy.io/en/integrations/google-sheets/connect-a-receipt-printer-to-google-sheets
title: Print from Google Sheets with Expedy PRINT
updated_at: 2026-10-22T04:11:07.151093+00:00
---
# Print from Google Sheets with Expedy PRINT
[Google Sheets](https://workspace.google.com/products/sheets/) is a collaborative data platform. It reaches Expedy PRINT in two ways: through **Zapier**, with no code, or through the **Expedy REST API**, when you want full control over the ticket.
## What you need
- An Expedy account with an active printer. Not added yet? Follow the guide for your machine, [Expedy XPDY80](/expedy-print/installation/add-an-expedy-xpdy80-cloud-printer-to-your-account), [HSPOS](/expedy-print/installation/add-an-hspos-cloud-printer-to-your-account), [Star Micronics](/expedy-print/installation/add-a-star-micronics-printer-to-your-account) or [Raspberry Pi](/expedy-print/installation/add-a-raspberry-pi-cloud-print-server-to-your-account)
- Your **API SID**, **API TOKEN** and **API Printer UID**, all three on the printer page of the [Expedy console](https://www.expedy.fr/console/v3/), in the **API Keys & UID** card
## Option 1, through Zapier, no code
Google Sheets connects to Zapier, and Zapier ships a ready-made **Expedy Print** action. The recipe is always the same: an event in Google Sheets triggers **Create a Print Job** in Expedy Print, and you map the fields you want on the ticket.
Full walkthrough: **[How to integrate Expedy Print with Zapier](/integrations/zapier/how-to-integrate-expedy-print-with-zapier)**
## Option 2, through the REST API
If Google Sheets can issue an HTTP request, it can drive the printer directly.
```api
POST https://www.expedy.fr/api/v2/printers/{printer_uid}/print
```
Authentication uses an `Authorization` header carrying your `SID:TOKEN`, with no `Bearer` prefix. Parameters and a complete example are in [Create a Print Job](/expedy-print/api-print-v2/create-a-print-job).
## Formatting the ticket
Whichever route you take, the message accepts the Expedy layout tags:
| What you want | Where to look |
|---|---|
| Align, resize or emphasise text | [Text Layout](/expedy-print/receipt-layout/text-layout-tags) |
| Print a logo or an image | [Image and Logo](/expedy-print/receipt-layout/image-and-logo-printing) |
| Print a QR code | [QR Code](/expedy-print/receipt-layout/qr-code) |
| Print a barcode | [EAN13 Barcode](/expedy-print/receipt-layout/ean13-barcode) |
> Depending on the connector or the software you use, this setup may be handled by your partner or your agency. Check with them before you start.
## Need help?
- [Browse all integrations](/integrations)
- [Open a support ticket](https://help.expedy.io/support/tickets/new)
---
url: https://docs.expedy.io/en/integrations/chataigne/connect-a-receipt-printer-to-chataigne
title: Receipt printing with Châtaigne
updated_at: 2026-10-21T16:15:35.323091+00:00
---
# Receipt printing with Châtaigne
[Châtaigne](https://chataigne.ai/) is an online ordering solution for hospitality. With Châtaigne, **the receipt printer is installed and configured by Châtaigne**, not from your Expedy console. Get in touch with them to have your printer activated.
## Who does what
| Party | Responsibility |
|---|---|
| Expedy | Supplies the cloud printer, its connectivity (Ethernet, Wi-Fi or 4G SIM) and the console where you follow your print jobs |
| Châtaigne | Pairs the printer with your account, sets the receipt layout and switches the service on |
## Getting your printer activated
1. Order your machine, or use the one you already have
2. Contact Châtaigne and tell them you want to print your orders on an Expedy cloud printer
3. Châtaigne handles the pairing and the receipt layout on their side
4. Once activated, orders print automatically, with nothing left to do on your part
> If your printer already appears in your Expedy account, give Châtaigne its **API Printer UID**, shown on the printer page in the **API Keys & UID** card of the [Expedy console](https://www.expedy.fr/console/v3/).
## Once it is live
From the [Expedy console](https://www.expedy.fr/console/v3/) you can, at any time:
- Check that the machine is reachable, with **Check Status** on the printer page
- Review every job in **Print Jobs History**
- Follow your monthly usage and change plan, the **FREE** plan being capped at 50 print requests per month
Anything about the order content or the ticket layout goes through Châtaigne, since the connection lives on their side.
## Need help?
- [Add your printer to your Expedy account](/expedy-print/installation/add-an-expedy-xpdy80-cloud-printer-to-your-account)
- [Browse all integrations](/integrations)
- Expedy hardware or account question: [open a support ticket](https://help.expedy.io/support/tickets/new)
---
url: https://docs.expedy.io/en/integrations/kurve-kiosks/connect-a-receipt-printer-to-kurve-kiosks
title: Print Kurve Kiosks orders on a receipt printer
updated_at: 2026-10-20T10:17:53.024267+00:00
---
# Print Kurve Kiosks orders on a receipt printer
**Kurve Kiosks** is a self-ordering kiosk solution. It connects to Expedy PRINT through **HubRise**: Kurve Kiosks sends its orders to HubRise, HubRise forwards them to your cloud printer, and the ticket comes out within seconds.
## What you need
- An Expedy account with an active printer. Not added yet? Follow the guide for your machine, [Expedy XPDY80](/expedy-print/installation/add-an-expedy-xpdy80-cloud-printer-to-your-account), [HSPOS](/expedy-print/installation/add-an-hspos-cloud-printer-to-your-account), [Star Micronics](/expedy-print/installation/add-a-star-micronics-printer-to-your-account) or [Raspberry Pi](/expedy-print/installation/add-a-raspberry-pi-cloud-print-server-to-your-account)
- A [HubRise account](https://manager.hubrise.com/signup), which aggregates your sales channels
- A Kurve Kiosks account linked to your HubRise location
## How it works
| Step | What happens |
|---|---|
| 1 | An order is placed on Kurve Kiosks |
| 2 | Kurve Kiosks pushes it to HubRise |
| 3 | Expedy PRINT receives it and prints a standardised ticket |
A single printer covers every channel connected to the same HubRise location, so you do not need one machine per platform.
## Connect it
The setup happens once, on the HubRise side, and is described step by step in the reference guide:
**[Connect a receipt printer to HubRise](/integrations/hubrise/connecting-a-receipt-printer-to-hubrise)**
Then link your Kurve Kiosks account to the same HubRise location. That part is done from the Kurve Kiosks back office, or by Kurve Kiosks support.
## Receipt settings
Once connected, the printer page in the [Expedy console](https://www.expedy.fr/console/v3/) controls what gets printed:
- **Print order when**, the status that triggers printing, `NEW`, `RECEIVED` or `ACCEPTED`
- **Then change status to**, the automatic status update applied after printing
- **Number of copies**, one ticket for the kitchen, one for the counter or the delivery bag
- The receipt header and footer, logo, company name, address and registration number
All of it is detailed in [Connect a receipt printer to HubRise](/integrations/hubrise/connecting-a-receipt-printer-to-hubrise).
> Depending on the connector or the point-of-sale software you use, this setup may be handled by your partner. Check with them before you start.
## Need help?
- [Browse all integrations](/integrations)
- [Open a support ticket](https://help.expedy.io/support/tickets/new)
---
url: https://docs.expedy.io/en/integrations/livepepper/connect-a-receipt-printer-to-livepepper
title: Print LivePepper orders on a receipt printer
updated_at: 2026-10-21T03:42:32.353124+00:00
---
# Print LivePepper orders on a receipt printer
[LivePepper](https://www.livepepper.com/) is an online ordering solution for hospitality. It connects to Expedy PRINT through **HubRise**: LivePepper sends its orders to HubRise, HubRise forwards them to your cloud printer, and the ticket comes out within seconds.
## What you need
- An Expedy account with an active printer. Not added yet? Follow the guide for your machine, [Expedy XPDY80](/expedy-print/installation/add-an-expedy-xpdy80-cloud-printer-to-your-account), [HSPOS](/expedy-print/installation/add-an-hspos-cloud-printer-to-your-account), [Star Micronics](/expedy-print/installation/add-a-star-micronics-printer-to-your-account) or [Raspberry Pi](/expedy-print/installation/add-a-raspberry-pi-cloud-print-server-to-your-account)
- A [HubRise account](https://manager.hubrise.com/signup), which aggregates your sales channels
- A LivePepper account linked to your HubRise location
## How it works
| Step | What happens |
|---|---|
| 1 | An order is placed on LivePepper |
| 2 | LivePepper pushes it to HubRise |
| 3 | Expedy PRINT receives it and prints a standardised ticket |
A single printer covers every channel connected to the same HubRise location, so you do not need one machine per platform.
## Connect it
The setup happens once, on the HubRise side, and is described step by step in the reference guide:
**[Connect a receipt printer to HubRise](/integrations/hubrise/connecting-a-receipt-printer-to-hubrise)**
Then link your LivePepper account to the same HubRise location. That part is done from the LivePepper back office, or by LivePepper support.
## Receipt settings
Once connected, the printer page in the [Expedy console](https://www.expedy.fr/console/v3/) controls what gets printed:
- **Print order when**, the status that triggers printing, `NEW`, `RECEIVED` or `ACCEPTED`
- **Then change status to**, the automatic status update applied after printing
- **Number of copies**, one ticket for the kitchen, one for the counter or the delivery bag
- The receipt header and footer, logo, company name, address and registration number
All of it is detailed in [Connect a receipt printer to HubRise](/integrations/hubrise/connecting-a-receipt-printer-to-hubrise).
> Depending on the connector or the point-of-sale software you use, this setup may be handled by your partner. Check with them before you start.
## Need help?
- [Browse all integrations](/integrations)
- [Open a support ticket](https://help.expedy.io/support/tickets/new)
---
url: https://docs.expedy.io/en/integrations/love2food/connect-a-receipt-printer-to-love2food
title: Receipt printing with Love2Food
updated_at: 2026-10-21T14:29:15.151533+00:00
---
# Receipt printing with Love2Food
**Love2Food** is an order aggregation platform. With Love2Food, **the receipt printer is installed and configured by Love2Food**, not from your Expedy console. Get in touch with them to have your printer activated.
## Who does what
| Party | Responsibility |
|---|---|
| Expedy | Supplies the cloud printer, its connectivity (Ethernet, Wi-Fi or 4G SIM) and the console where you follow your print jobs |
| Love2Food | Pairs the printer with your account, sets the receipt layout and switches the service on |
## Getting your printer activated
1. Order your machine, or use the one you already have
2. Contact Love2Food and tell them you want to print your orders on an Expedy cloud printer
3. Love2Food handles the pairing and the receipt layout on their side
4. Once activated, orders print automatically, with nothing left to do on your part
> If your printer already appears in your Expedy account, give Love2Food its **API Printer UID**, shown on the printer page in the **API Keys & UID** card of the [Expedy console](https://www.expedy.fr/console/v3/).
## Once it is live
From the [Expedy console](https://www.expedy.fr/console/v3/) you can, at any time:
- Check that the machine is reachable, with **Check Status** on the printer page
- Review every job in **Print Jobs History**
- Follow your monthly usage and change plan, the **FREE** plan being capped at 50 print requests per month
Anything about the order content or the ticket layout goes through Love2Food, since the connection lives on their side.
## Need help?
- [Add your printer to your Expedy account](/expedy-print/installation/add-an-expedy-xpdy80-cloud-printer-to-your-account)
- [Browse all integrations](/integrations)
- Expedy hardware or account question: [open a support ticket](https://help.expedy.io/support/tickets/new)
---
url: https://docs.expedy.io/en/integrations/magento/connect-a-receipt-printer-to-magento
title: Print from Magento with Expedy PRINT
updated_at: 2026-10-22T21:58:58.792951+00:00
---
# Print from Magento with Expedy PRINT
[Magento](https://business.adobe.com/products/magento/magento-commerce.html) is an eCommerce platform. It reaches Expedy PRINT in two ways: through **Zapier**, with no code, or through the **Expedy REST API**, when you want full control over the ticket.
## What you need
- An Expedy account with an active printer. Not added yet? Follow the guide for your machine, [Expedy XPDY80](/expedy-print/installation/add-an-expedy-xpdy80-cloud-printer-to-your-account), [HSPOS](/expedy-print/installation/add-an-hspos-cloud-printer-to-your-account), [Star Micronics](/expedy-print/installation/add-a-star-micronics-printer-to-your-account) or [Raspberry Pi](/expedy-print/installation/add-a-raspberry-pi-cloud-print-server-to-your-account)
- Your **API SID**, **API TOKEN** and **API Printer UID**, all three on the printer page of the [Expedy console](https://www.expedy.fr/console/v3/), in the **API Keys & UID** card
## Option 1, through Zapier, no code
Magento connects to Zapier, and Zapier ships a ready-made **Expedy Print** action. The recipe is always the same: an event in Magento triggers **Create a Print Job** in Expedy Print, and you map the fields you want on the ticket.
Full walkthrough: **[How to integrate Expedy Print with Zapier](/integrations/zapier/how-to-integrate-expedy-print-with-zapier)**
## Option 2, through the REST API
If Magento can issue an HTTP request, it can drive the printer directly.
```api
POST https://www.expedy.fr/api/v2/printers/{printer_uid}/print
```
Authentication uses an `Authorization` header carrying your `SID:TOKEN`, with no `Bearer` prefix. Parameters and a complete example are in [Create a Print Job](/expedy-print/api-print-v2/create-a-print-job).
## Formatting the ticket
Whichever route you take, the message accepts the Expedy layout tags:
| What you want | Where to look |
|---|---|
| Align, resize or emphasise text | [Text Layout](/expedy-print/receipt-layout/text-layout-tags) |
| Print a logo or an image | [Image and Logo](/expedy-print/receipt-layout/image-and-logo-printing) |
| Print a QR code | [QR Code](/expedy-print/receipt-layout/qr-code) |
| Print a barcode | [EAN13 Barcode](/expedy-print/receipt-layout/ean13-barcode) |
> Depending on the connector or the software you use, this setup may be handled by your partner or your agency. Check with them before you start.
## Need help?
- [Browse all integrations](/integrations)
- [Open a support ticket](https://help.expedy.io/support/tickets/new)
---
url: https://docs.expedy.io/en/integrations/stripe/connect-a-receipt-printer-to-stripe
title: Print from Stripe with Expedy PRINT
updated_at: 2026-10-23T00:04:03.804011+00:00
---
# Print from Stripe with Expedy PRINT
[Stripe](https://stripe.com/) is an online payment platform. It reaches Expedy PRINT in two ways: through **Zapier**, with no code, or through the **Expedy REST API**, when you want full control over the ticket.
## What you need
- An Expedy account with an active printer. Not added yet? Follow the guide for your machine, [Expedy XPDY80](/expedy-print/installation/add-an-expedy-xpdy80-cloud-printer-to-your-account), [HSPOS](/expedy-print/installation/add-an-hspos-cloud-printer-to-your-account), [Star Micronics](/expedy-print/installation/add-a-star-micronics-printer-to-your-account) or [Raspberry Pi](/expedy-print/installation/add-a-raspberry-pi-cloud-print-server-to-your-account)
- Your **API SID**, **API TOKEN** and **API Printer UID**, all three on the printer page of the [Expedy console](https://www.expedy.fr/console/v3/), in the **API Keys & UID** card
## Option 1, through Zapier, no code
Stripe connects to Zapier, and Zapier ships a ready-made **Expedy Print** action. The recipe is always the same: an event in Stripe triggers **Create a Print Job** in Expedy Print, and you map the fields you want on the ticket.
Full walkthrough: **[How to integrate Expedy Print with Zapier](/integrations/zapier/how-to-integrate-expedy-print-with-zapier)**
## Option 2, through the REST API
If Stripe can issue an HTTP request, it can drive the printer directly.
```api
POST https://www.expedy.fr/api/v2/printers/{printer_uid}/print
```
Authentication uses an `Authorization` header carrying your `SID:TOKEN`, with no `Bearer` prefix. Parameters and a complete example are in [Create a Print Job](/expedy-print/api-print-v2/create-a-print-job).
## Formatting the ticket
Whichever route you take, the message accepts the Expedy layout tags:
| What you want | Where to look |
|---|---|
| Align, resize or emphasise text | [Text Layout](/expedy-print/receipt-layout/text-layout-tags) |
| Print a logo or an image | [Image and Logo](/expedy-print/receipt-layout/image-and-logo-printing) |
| Print a QR code | [QR Code](/expedy-print/receipt-layout/qr-code) |
| Print a barcode | [EAN13 Barcode](/expedy-print/receipt-layout/ean13-barcode) |
> Depending on the connector or the software you use, this setup may be handled by your partner or your agency. Check with them before you start.
## Need help?
- [Browse all integrations](/integrations)
- [Open a support ticket](https://help.expedy.io/support/tickets/new)
---
url: https://docs.expedy.io/en/integrations/lightspeed-retail/connect-a-receipt-printer-to-lightspeed-retail
title: Print from Lightspeed Retail POS with Expedy PRINT
updated_at: 2026-10-22T08:42:49.215292+00:00
---
# Print from Lightspeed Retail POS with Expedy PRINT
[Lightspeed Retail POS](https://www.lightspeedhq.com/) is a point-of-sale solution. It reaches Expedy PRINT in two ways: through **Zapier**, with no code, or through the **Expedy REST API**, when you want full control over the ticket.
## What you need
- An Expedy account with an active printer. Not added yet? Follow the guide for your machine, [Expedy XPDY80](/expedy-print/installation/add-an-expedy-xpdy80-cloud-printer-to-your-account), [HSPOS](/expedy-print/installation/add-an-hspos-cloud-printer-to-your-account), [Star Micronics](/expedy-print/installation/add-a-star-micronics-printer-to-your-account) or [Raspberry Pi](/expedy-print/installation/add-a-raspberry-pi-cloud-print-server-to-your-account)
- Your **API SID**, **API TOKEN** and **API Printer UID**, all three on the printer page of the [Expedy console](https://www.expedy.fr/console/v3/), in the **API Keys & UID** card
## Option 1, through Zapier, no code
Lightspeed Retail POS connects to Zapier, and Zapier ships a ready-made **Expedy Print** action. The recipe is always the same: an event in Lightspeed Retail POS triggers **Create a Print Job** in Expedy Print, and you map the fields you want on the ticket.
Full walkthrough: **[How to integrate Expedy Print with Zapier](/integrations/zapier/how-to-integrate-expedy-print-with-zapier)**
## Option 2, through the REST API
If Lightspeed Retail POS can issue an HTTP request, it can drive the printer directly.
```api
POST https://www.expedy.fr/api/v2/printers/{printer_uid}/print
```
Authentication uses an `Authorization` header carrying your `SID:TOKEN`, with no `Bearer` prefix. Parameters and a complete example are in [Create a Print Job](/expedy-print/api-print-v2/create-a-print-job).
## Formatting the ticket
Whichever route you take, the message accepts the Expedy layout tags:
| What you want | Where to look |
|---|---|
| Align, resize or emphasise text | [Text Layout](/expedy-print/receipt-layout/text-layout-tags) |
| Print a logo or an image | [Image and Logo](/expedy-print/receipt-layout/image-and-logo-printing) |
| Print a QR code | [QR Code](/expedy-print/receipt-layout/qr-code) |
| Print a barcode | [EAN13 Barcode](/expedy-print/receipt-layout/ean13-barcode) |
> Depending on the connector or the software you use, this setup may be handled by your partner or your agency. Check with them before you start.
## Need help?
- [Browse all integrations](/integrations)
- [Open a support ticket](https://help.expedy.io/support/tickets/new)
---
url: https://docs.expedy.io/en/integrations/softr/connect-a-receipt-printer-to-softr
title: Print from Softr with Expedy PRINT
updated_at: 2026-10-21T03:22:51.737292+00:00
---
# Print from Softr with Expedy PRINT
[Softr](https://www.softr.io/) is a no-code app building platform. It reaches Expedy PRINT in two ways: through **Zapier**, with no code, or through the **Expedy REST API**, when you want full control over the ticket.
## What you need
- An Expedy account with an active printer. Not added yet? Follow the guide for your machine, [Expedy XPDY80](/expedy-print/installation/add-an-expedy-xpdy80-cloud-printer-to-your-account), [HSPOS](/expedy-print/installation/add-an-hspos-cloud-printer-to-your-account), [Star Micronics](/expedy-print/installation/add-a-star-micronics-printer-to-your-account) or [Raspberry Pi](/expedy-print/installation/add-a-raspberry-pi-cloud-print-server-to-your-account)
- Your **API SID**, **API TOKEN** and **API Printer UID**, all three on the printer page of the [Expedy console](https://www.expedy.fr/console/v3/), in the **API Keys & UID** card
## Option 1, through Zapier, no code
Softr connects to Zapier, and Zapier ships a ready-made **Expedy Print** action. The recipe is always the same: an event in Softr triggers **Create a Print Job** in Expedy Print, and you map the fields you want on the ticket.
Full walkthrough: **[How to integrate Expedy Print with Zapier](/integrations/zapier/how-to-integrate-expedy-print-with-zapier)**
## Option 2, through the REST API
If Softr can issue an HTTP request, it can drive the printer directly.
```api
POST https://www.expedy.fr/api/v2/printers/{printer_uid}/print
```
Authentication uses an `Authorization` header carrying your `SID:TOKEN`, with no `Bearer` prefix. Parameters and a complete example are in [Create a Print Job](/expedy-print/api-print-v2/create-a-print-job).
## Formatting the ticket
Whichever route you take, the message accepts the Expedy layout tags:
| What you want | Where to look |
|---|---|
| Align, resize or emphasise text | [Text Layout](/expedy-print/receipt-layout/text-layout-tags) |
| Print a logo or an image | [Image and Logo](/expedy-print/receipt-layout/image-and-logo-printing) |
| Print a QR code | [QR Code](/expedy-print/receipt-layout/qr-code) |
| Print a barcode | [EAN13 Barcode](/expedy-print/receipt-layout/ean13-barcode) |
> Depending on the connector or the software you use, this setup may be handled by your partner or your agency. Check with them before you start.
## Need help?
- [Browse all integrations](/integrations)
- [Open a support ticket](https://help.expedy.io/support/tickets/new)
---
url: https://docs.expedy.io/en/integrations/delicity/connect-a-receipt-printer-to-delicity
title: Print Delicity orders on a receipt printer
updated_at: 2026-10-19T05:03:11.636944+00:00
---
# Print Delicity orders on a receipt printer
**Delicity** is a meal delivery platform. It connects to Expedy PRINT through **HubRise**: Delicity sends its orders to HubRise, HubRise forwards them to your cloud printer, and the ticket comes out within seconds.
## What you need
- An Expedy account with an active printer. Not added yet? Follow the guide for your machine, [Expedy XPDY80](/expedy-print/installation/add-an-expedy-xpdy80-cloud-printer-to-your-account), [HSPOS](/expedy-print/installation/add-an-hspos-cloud-printer-to-your-account), [Star Micronics](/expedy-print/installation/add-a-star-micronics-printer-to-your-account) or [Raspberry Pi](/expedy-print/installation/add-a-raspberry-pi-cloud-print-server-to-your-account)
- A [HubRise account](https://manager.hubrise.com/signup), which aggregates your sales channels
- A Delicity account linked to your HubRise location
## How it works
| Step | What happens |
|---|---|
| 1 | An order is placed on Delicity |
| 2 | Delicity pushes it to HubRise |
| 3 | Expedy PRINT receives it and prints a standardised ticket |
A single printer covers every channel connected to the same HubRise location, so you do not need one machine per platform.
## Connect it
The setup happens once, on the HubRise side, and is described step by step in the reference guide:
**[Connect a receipt printer to HubRise](/integrations/hubrise/connecting-a-receipt-printer-to-hubrise)**
Then link your Delicity account to the same HubRise location. That part is done from the Delicity back office, or by Delicity support.
## Receipt settings
Once connected, the printer page in the [Expedy console](https://www.expedy.fr/console/v3/) controls what gets printed:
- **Print order when**, the status that triggers printing, `NEW`, `RECEIVED` or `ACCEPTED`
- **Then change status to**, the automatic status update applied after printing
- **Number of copies**, one ticket for the kitchen, one for the counter or the delivery bag
- The receipt header and footer, logo, company name, address and registration number
All of it is detailed in [Connect a receipt printer to HubRise](/integrations/hubrise/connecting-a-receipt-printer-to-hubrise).
> Depending on the connector or the point-of-sale software you use, this setup may be handled by your partner. Check with them before you start.
## Need help?
- [Browse all integrations](/integrations)
- [Open a support ticket](https://help.expedy.io/support/tickets/new)
---
url: https://docs.expedy.io/en/integrations/typeform/connect-a-receipt-printer-to-typeform
title: Print from Typeform with Expedy PRINT
updated_at: 2026-10-19T20:19:48.332458+00:00
---
# Print from Typeform with Expedy PRINT
[Typeform](https://www.typeform.com/) is an online form builder. It reaches Expedy PRINT in two ways: through **Zapier**, with no code, or through the **Expedy REST API**, when you want full control over the ticket.
## What you need
- An Expedy account with an active printer. Not added yet? Follow the guide for your machine, [Expedy XPDY80](/expedy-print/installation/add-an-expedy-xpdy80-cloud-printer-to-your-account), [HSPOS](/expedy-print/installation/add-an-hspos-cloud-printer-to-your-account), [Star Micronics](/expedy-print/installation/add-a-star-micronics-printer-to-your-account) or [Raspberry Pi](/expedy-print/installation/add-a-raspberry-pi-cloud-print-server-to-your-account)
- Your **API SID**, **API TOKEN** and **API Printer UID**, all three on the printer page of the [Expedy console](https://www.expedy.fr/console/v3/), in the **API Keys & UID** card
## Option 1, through Zapier, no code
Typeform connects to Zapier, and Zapier ships a ready-made **Expedy Print** action. The recipe is always the same: an event in Typeform triggers **Create a Print Job** in Expedy Print, and you map the fields you want on the ticket.
Full walkthrough: **[How to integrate Expedy Print with Zapier](/integrations/zapier/how-to-integrate-expedy-print-with-zapier)**
## Option 2, through the REST API
If Typeform can issue an HTTP request, it can drive the printer directly.
```api
POST https://www.expedy.fr/api/v2/printers/{printer_uid}/print
```
Authentication uses an `Authorization` header carrying your `SID:TOKEN`, with no `Bearer` prefix. Parameters and a complete example are in [Create a Print Job](/expedy-print/api-print-v2/create-a-print-job).
## Formatting the ticket
Whichever route you take, the message accepts the Expedy layout tags:
| What you want | Where to look |
|---|---|
| Align, resize or emphasise text | [Text Layout](/expedy-print/receipt-layout/text-layout-tags) |
| Print a logo or an image | [Image and Logo](/expedy-print/receipt-layout/image-and-logo-printing) |
| Print a QR code | [QR Code](/expedy-print/receipt-layout/qr-code) |
| Print a barcode | [EAN13 Barcode](/expedy-print/receipt-layout/ean13-barcode) |
> Depending on the connector or the software you use, this setup may be handled by your partner or your agency. Check with them before you start.
## Need help?
- [Browse all integrations](/integrations)
- [Open a support ticket](https://help.expedy.io/support/tickets/new)
---
url: https://docs.expedy.io/en/integrations/cs-cart/connect-a-receipt-printer-to-cs-cart
title: Print from CS-Cart with Expedy PRINT
updated_at: 2026-10-22T08:14:08.778252+00:00
---
# Print from CS-Cart with Expedy PRINT
[CS-Cart](https://www.cs-cart.com/) is an eCommerce platform. It reaches Expedy PRINT in two ways: through **Zapier**, with no code, or through the **Expedy REST API**, when you want full control over the ticket.
## What you need
- An Expedy account with an active printer. Not added yet? Follow the guide for your machine, [Expedy XPDY80](/expedy-print/installation/add-an-expedy-xpdy80-cloud-printer-to-your-account), [HSPOS](/expedy-print/installation/add-an-hspos-cloud-printer-to-your-account), [Star Micronics](/expedy-print/installation/add-a-star-micronics-printer-to-your-account) or [Raspberry Pi](/expedy-print/installation/add-a-raspberry-pi-cloud-print-server-to-your-account)
- Your **API SID**, **API TOKEN** and **API Printer UID**, all three on the printer page of the [Expedy console](https://www.expedy.fr/console/v3/), in the **API Keys & UID** card
## Option 1, through Zapier, no code
CS-Cart connects to Zapier, and Zapier ships a ready-made **Expedy Print** action. The recipe is always the same: an event in CS-Cart triggers **Create a Print Job** in Expedy Print, and you map the fields you want on the ticket.
Full walkthrough: **[How to integrate Expedy Print with Zapier](/integrations/zapier/how-to-integrate-expedy-print-with-zapier)**
## Option 2, through the REST API
If CS-Cart can issue an HTTP request, it can drive the printer directly.
```api
POST https://www.expedy.fr/api/v2/printers/{printer_uid}/print
```
Authentication uses an `Authorization` header carrying your `SID:TOKEN`, with no `Bearer` prefix. Parameters and a complete example are in [Create a Print Job](/expedy-print/api-print-v2/create-a-print-job).
## Formatting the ticket
Whichever route you take, the message accepts the Expedy layout tags:
| What you want | Where to look |
|---|---|
| Align, resize or emphasise text | [Text Layout](/expedy-print/receipt-layout/text-layout-tags) |
| Print a logo or an image | [Image and Logo](/expedy-print/receipt-layout/image-and-logo-printing) |
| Print a QR code | [QR Code](/expedy-print/receipt-layout/qr-code) |
| Print a barcode | [EAN13 Barcode](/expedy-print/receipt-layout/ean13-barcode) |
> Depending on the connector or the software you use, this setup may be handled by your partner or your agency. Check with them before you start.
## Need help?
- [Browse all integrations](/integrations)
- [Open a support ticket](https://help.expedy.io/support/tickets/new)
---
url: https://docs.expedy.io/en/integrations/katana/connect-a-receipt-printer-to-katana
title: Print from Katana with Expedy PRINT
updated_at: 2026-10-19T18:10:42.510929+00:00
---
# Print from Katana with Expedy PRINT
**Katana** is an inventory and order management tool. It reaches Expedy PRINT in two ways: through **Zapier**, with no code, or through the **Expedy REST API**, when you want full control over the ticket.
## What you need
- An Expedy account with an active printer. Not added yet? Follow the guide for your machine, [Expedy XPDY80](/expedy-print/installation/add-an-expedy-xpdy80-cloud-printer-to-your-account), [HSPOS](/expedy-print/installation/add-an-hspos-cloud-printer-to-your-account), [Star Micronics](/expedy-print/installation/add-a-star-micronics-printer-to-your-account) or [Raspberry Pi](/expedy-print/installation/add-a-raspberry-pi-cloud-print-server-to-your-account)
- Your **API SID**, **API TOKEN** and **API Printer UID**, all three on the printer page of the [Expedy console](https://www.expedy.fr/console/v3/), in the **API Keys & UID** card
## Option 1, through Zapier, no code
Katana connects to Zapier, and Zapier ships a ready-made **Expedy Print** action. The recipe is always the same: an event in Katana triggers **Create a Print Job** in Expedy Print, and you map the fields you want on the ticket.
Full walkthrough: **[How to integrate Expedy Print with Zapier](/integrations/zapier/how-to-integrate-expedy-print-with-zapier)**
## Option 2, through the REST API
If Katana can issue an HTTP request, it can drive the printer directly.
```api
POST https://www.expedy.fr/api/v2/printers/{printer_uid}/print
```
Authentication uses an `Authorization` header carrying your `SID:TOKEN`, with no `Bearer` prefix. Parameters and a complete example are in [Create a Print Job](/expedy-print/api-print-v2/create-a-print-job).
## Formatting the ticket
Whichever route you take, the message accepts the Expedy layout tags:
| What you want | Where to look |
|---|---|
| Align, resize or emphasise text | [Text Layout](/expedy-print/receipt-layout/text-layout-tags) |
| Print a logo or an image | [Image and Logo](/expedy-print/receipt-layout/image-and-logo-printing) |
| Print a QR code | [QR Code](/expedy-print/receipt-layout/qr-code) |
| Print a barcode | [EAN13 Barcode](/expedy-print/receipt-layout/ean13-barcode) |
> Depending on the connector or the software you use, this setup may be handled by your partner or your agency. Check with them before you start.
## Need help?
- [Browse all integrations](/integrations)
- [Open a support ticket](https://help.expedy.io/support/tickets/new)
---
url: https://docs.expedy.io/en/integrations/honeycart/connect-a-receipt-printer-to-honeycart
title: Print from HoneyCart with Expedy PRINT
updated_at: 2026-10-20T14:23:57.111332+00:00
---
# Print from HoneyCart with Expedy PRINT
**HoneyCart** is an ordering and catering platform. It reaches Expedy PRINT in two ways: through **Zapier**, with no code, or through the **Expedy REST API**, when you want full control over the ticket.
## What you need
- An Expedy account with an active printer. Not added yet? Follow the guide for your machine, [Expedy XPDY80](/expedy-print/installation/add-an-expedy-xpdy80-cloud-printer-to-your-account), [HSPOS](/expedy-print/installation/add-an-hspos-cloud-printer-to-your-account), [Star Micronics](/expedy-print/installation/add-a-star-micronics-printer-to-your-account) or [Raspberry Pi](/expedy-print/installation/add-a-raspberry-pi-cloud-print-server-to-your-account)
- Your **API SID**, **API TOKEN** and **API Printer UID**, all three on the printer page of the [Expedy console](https://www.expedy.fr/console/v3/), in the **API Keys & UID** card
## Option 1, through Zapier, no code
HoneyCart connects to Zapier, and Zapier ships a ready-made **Expedy Print** action. The recipe is always the same: an event in HoneyCart triggers **Create a Print Job** in Expedy Print, and you map the fields you want on the ticket.
Full walkthrough: **[How to integrate Expedy Print with Zapier](/integrations/zapier/how-to-integrate-expedy-print-with-zapier)**
## Option 2, through the REST API
If HoneyCart can issue an HTTP request, it can drive the printer directly.
```api
POST https://www.expedy.fr/api/v2/printers/{printer_uid}/print
```
Authentication uses an `Authorization` header carrying your `SID:TOKEN`, with no `Bearer` prefix. Parameters and a complete example are in [Create a Print Job](/expedy-print/api-print-v2/create-a-print-job).
## Formatting the ticket
Whichever route you take, the message accepts the Expedy layout tags:
| What you want | Where to look |
|---|---|
| Align, resize or emphasise text | [Text Layout](/expedy-print/receipt-layout/text-layout-tags) |
| Print a logo or an image | [Image and Logo](/expedy-print/receipt-layout/image-and-logo-printing) |
| Print a QR code | [QR Code](/expedy-print/receipt-layout/qr-code) |
| Print a barcode | [EAN13 Barcode](/expedy-print/receipt-layout/ean13-barcode) |
> Depending on the connector or the software you use, this setup may be handled by your partner or your agency. Check with them before you start.
## Need help?
- [Browse all integrations](/integrations)
- [Open a support ticket](https://help.expedy.io/support/tickets/new)
---
url: https://docs.expedy.io/en/integrations/gumroad/connect-a-receipt-printer-to-gumroad
title: Print from Gumroad with Expedy PRINT
updated_at: 2026-10-19T21:10:36.49936+00:00
---
# Print from Gumroad with Expedy PRINT
[Gumroad](https://gumroad.com/) is an online cart and checkout platform. It reaches Expedy PRINT in two ways: through **Zapier**, with no code, or through the **Expedy REST API**, when you want full control over the ticket.
## What you need
- An Expedy account with an active printer. Not added yet? Follow the guide for your machine, [Expedy XPDY80](/expedy-print/installation/add-an-expedy-xpdy80-cloud-printer-to-your-account), [HSPOS](/expedy-print/installation/add-an-hspos-cloud-printer-to-your-account), [Star Micronics](/expedy-print/installation/add-a-star-micronics-printer-to-your-account) or [Raspberry Pi](/expedy-print/installation/add-a-raspberry-pi-cloud-print-server-to-your-account)
- Your **API SID**, **API TOKEN** and **API Printer UID**, all three on the printer page of the [Expedy console](https://www.expedy.fr/console/v3/), in the **API Keys & UID** card
## Option 1, through Zapier, no code
Gumroad connects to Zapier, and Zapier ships a ready-made **Expedy Print** action. The recipe is always the same: an event in Gumroad triggers **Create a Print Job** in Expedy Print, and you map the fields you want on the ticket.
Full walkthrough: **[How to integrate Expedy Print with Zapier](/integrations/zapier/how-to-integrate-expedy-print-with-zapier)**
## Option 2, through the REST API
If Gumroad can issue an HTTP request, it can drive the printer directly.
```api
POST https://www.expedy.fr/api/v2/printers/{printer_uid}/print
```
Authentication uses an `Authorization` header carrying your `SID:TOKEN`, with no `Bearer` prefix. Parameters and a complete example are in [Create a Print Job](/expedy-print/api-print-v2/create-a-print-job).
## Formatting the ticket
Whichever route you take, the message accepts the Expedy layout tags:
| What you want | Where to look |
|---|---|
| Align, resize or emphasise text | [Text Layout](/expedy-print/receipt-layout/text-layout-tags) |
| Print a logo or an image | [Image and Logo](/expedy-print/receipt-layout/image-and-logo-printing) |
| Print a QR code | [QR Code](/expedy-print/receipt-layout/qr-code) |
| Print a barcode | [EAN13 Barcode](/expedy-print/receipt-layout/ean13-barcode) |
> Depending on the connector or the software you use, this setup may be handled by your partner or your agency. Check with them before you start.
## Need help?
- [Browse all integrations](/integrations)
- [Open a support ticket](https://help.expedy.io/support/tickets/new)
---
url: https://docs.expedy.io/en/integrations/amazon-seller-central/connect-a-receipt-printer-to-amazon-seller-central
title: Print from Amazon Seller Central with Expedy PRINT
updated_at: 2026-10-20T11:54:36.640965+00:00
---
# Print from Amazon Seller Central with Expedy PRINT
[Amazon Seller Central](https://sellercentral.amazon.com/) is an online marketplace. It reaches Expedy PRINT in two ways: through **Zapier**, with no code, or through the **Expedy REST API**, when you want full control over the ticket.
## What you need
- An Expedy account with an active printer. Not added yet? Follow the guide for your machine, [Expedy XPDY80](/expedy-print/installation/add-an-expedy-xpdy80-cloud-printer-to-your-account), [HSPOS](/expedy-print/installation/add-an-hspos-cloud-printer-to-your-account), [Star Micronics](/expedy-print/installation/add-a-star-micronics-printer-to-your-account) or [Raspberry Pi](/expedy-print/installation/add-a-raspberry-pi-cloud-print-server-to-your-account)
- Your **API SID**, **API TOKEN** and **API Printer UID**, all three on the printer page of the [Expedy console](https://www.expedy.fr/console/v3/), in the **API Keys & UID** card
## Option 1, through Zapier, no code
Amazon Seller Central connects to Zapier, and Zapier ships a ready-made **Expedy Print** action. The recipe is always the same: an event in Amazon Seller Central triggers **Create a Print Job** in Expedy Print, and you map the fields you want on the ticket.
Full walkthrough: **[How to integrate Expedy Print with Zapier](/integrations/zapier/how-to-integrate-expedy-print-with-zapier)**
## Option 2, through the REST API
If Amazon Seller Central can issue an HTTP request, it can drive the printer directly.
```api
POST https://www.expedy.fr/api/v2/printers/{printer_uid}/print
```
Authentication uses an `Authorization` header carrying your `SID:TOKEN`, with no `Bearer` prefix. Parameters and a complete example are in [Create a Print Job](/expedy-print/api-print-v2/create-a-print-job).
## Formatting the ticket
Whichever route you take, the message accepts the Expedy layout tags:
| What you want | Where to look |
|---|---|
| Align, resize or emphasise text | [Text Layout](/expedy-print/receipt-layout/text-layout-tags) |
| Print a logo or an image | [Image and Logo](/expedy-print/receipt-layout/image-and-logo-printing) |
| Print a QR code | [QR Code](/expedy-print/receipt-layout/qr-code) |
| Print a barcode | [EAN13 Barcode](/expedy-print/receipt-layout/ean13-barcode) |
> Depending on the connector or the software you use, this setup may be handled by your partner or your agency. Check with them before you start.
## Need help?
- [Browse all integrations](/integrations)
- [Open a support ticket](https://help.expedy.io/support/tickets/new)
---
url: https://docs.expedy.io/en/integrations/servier-bar/connect-a-receipt-printer-to-servier-bar
title: Print Servier.bar orders on a receipt printer
updated_at: 2026-10-12T02:01:04.638482+00:00
---
# Print Servier.bar orders on a receipt printer
**Servier.bar** is an online ordering solution for hospitality. It connects to Expedy PRINT through **HubRise**: Servier.bar sends its orders to HubRise, HubRise forwards them to your cloud printer, and the ticket comes out within seconds.
## What you need
- An Expedy account with an active printer. Not added yet? Follow the guide for your machine, [Expedy XPDY80](/expedy-print/installation/add-an-expedy-xpdy80-cloud-printer-to-your-account), [HSPOS](/expedy-print/installation/add-an-hspos-cloud-printer-to-your-account), [Star Micronics](/expedy-print/installation/add-a-star-micronics-printer-to-your-account) or [Raspberry Pi](/expedy-print/installation/add-a-raspberry-pi-cloud-print-server-to-your-account)
- A [HubRise account](https://manager.hubrise.com/signup), which aggregates your sales channels
- A Servier.bar account linked to your HubRise location
## How it works
| Step | What happens |
|---|---|
| 1 | An order is placed on Servier.bar |
| 2 | Servier.bar pushes it to HubRise |
| 3 | Expedy PRINT receives it and prints a standardised ticket |
A single printer covers every channel connected to the same HubRise location, so you do not need one machine per platform.
## Connect it
The setup happens once, on the HubRise side, and is described step by step in the reference guide:
**[Connect a receipt printer to HubRise](/integrations/hubrise/connecting-a-receipt-printer-to-hubrise)**
Then link your Servier.bar account to the same HubRise location. That part is done from the Servier.bar back office, or by Servier.bar support.
## Receipt settings
Once connected, the printer page in the [Expedy console](https://www.expedy.fr/console/v3/) controls what gets printed:
- **Print order when**, the status that triggers printing, `NEW`, `RECEIVED` or `ACCEPTED`
- **Then change status to**, the automatic status update applied after printing
- **Number of copies**, one ticket for the kitchen, one for the counter or the delivery bag
- The receipt header and footer, logo, company name, address and registration number
All of it is detailed in [Connect a receipt printer to HubRise](/integrations/hubrise/connecting-a-receipt-printer-to-hubrise).
> Depending on the connector or the point-of-sale software you use, this setup may be handled by your partner. Check with them before you start.
## Need help?
- [Browse all integrations](/integrations)
- [Open a support ticket](https://help.expedy.io/support/tickets/new)
---
url: https://docs.expedy.io/en/integrations/wizishop/connect-a-receipt-printer-to-wizishop
title: Print from WiziShop with Expedy PRINT
updated_at: 2026-10-21T21:45:09.621223+00:00
---
# Print from WiziShop with Expedy PRINT
[WiziShop](https://www.wizishop.com/) is an eCommerce platform. It reaches Expedy PRINT in two ways: through **Zapier**, with no code, or through the **Expedy REST API**, when you want full control over the ticket.
## What you need
- An Expedy account with an active printer. Not added yet? Follow the guide for your machine, [Expedy XPDY80](/expedy-print/installation/add-an-expedy-xpdy80-cloud-printer-to-your-account), [HSPOS](/expedy-print/installation/add-an-hspos-cloud-printer-to-your-account), [Star Micronics](/expedy-print/installation/add-a-star-micronics-printer-to-your-account) or [Raspberry Pi](/expedy-print/installation/add-a-raspberry-pi-cloud-print-server-to-your-account)
- Your **API SID**, **API TOKEN** and **API Printer UID**, all three on the printer page of the [Expedy console](https://www.expedy.fr/console/v3/), in the **API Keys & UID** card
## Option 1, through Zapier, no code
WiziShop connects to Zapier, and Zapier ships a ready-made **Expedy Print** action. The recipe is always the same: an event in WiziShop triggers **Create a Print Job** in Expedy Print, and you map the fields you want on the ticket.
Full walkthrough: **[How to integrate Expedy Print with Zapier](/integrations/zapier/how-to-integrate-expedy-print-with-zapier)**
## Option 2, through the REST API
If WiziShop can issue an HTTP request, it can drive the printer directly.
```api
POST https://www.expedy.fr/api/v2/printers/{printer_uid}/print
```
Authentication uses an `Authorization` header carrying your `SID:TOKEN`, with no `Bearer` prefix. Parameters and a complete example are in [Create a Print Job](/expedy-print/api-print-v2/create-a-print-job).
## Formatting the ticket
Whichever route you take, the message accepts the Expedy layout tags:
| What you want | Where to look |
|---|---|
| Align, resize or emphasise text | [Text Layout](/expedy-print/receipt-layout/text-layout-tags) |
| Print a logo or an image | [Image and Logo](/expedy-print/receipt-layout/image-and-logo-printing) |
| Print a QR code | [QR Code](/expedy-print/receipt-layout/qr-code) |
| Print a barcode | [EAN13 Barcode](/expedy-print/receipt-layout/ean13-barcode) |
> Depending on the connector or the software you use, this setup may be handled by your partner or your agency. Check with them before you start.
## Need help?
- [Browse all integrations](/integrations)
- [Open a support ticket](https://help.expedy.io/support/tickets/new)
---
url: https://docs.expedy.io/en/integrations/square/connect-a-receipt-printer-to-square
title: Print from Square with Expedy PRINT
updated_at: 2026-10-22T17:21:13.729801+00:00
---
# Print from Square with Expedy PRINT
[Square](https://squareup.com/) is a point-of-sale solution. It reaches Expedy PRINT in two ways: through **Zapier**, with no code, or through the **Expedy REST API**, when you want full control over the ticket.
## What you need
- An Expedy account with an active printer. Not added yet? Follow the guide for your machine, [Expedy XPDY80](/expedy-print/installation/add-an-expedy-xpdy80-cloud-printer-to-your-account), [HSPOS](/expedy-print/installation/add-an-hspos-cloud-printer-to-your-account), [Star Micronics](/expedy-print/installation/add-a-star-micronics-printer-to-your-account) or [Raspberry Pi](/expedy-print/installation/add-a-raspberry-pi-cloud-print-server-to-your-account)
- Your **API SID**, **API TOKEN** and **API Printer UID**, all three on the printer page of the [Expedy console](https://www.expedy.fr/console/v3/), in the **API Keys & UID** card
## Option 1, through Zapier, no code
Square connects to Zapier, and Zapier ships a ready-made **Expedy Print** action. The recipe is always the same: an event in Square triggers **Create a Print Job** in Expedy Print, and you map the fields you want on the ticket.
Full walkthrough: **[How to integrate Expedy Print with Zapier](/integrations/zapier/how-to-integrate-expedy-print-with-zapier)**
## Option 2, through the REST API
If Square can issue an HTTP request, it can drive the printer directly.
```api
POST https://www.expedy.fr/api/v2/printers/{printer_uid}/print
```
Authentication uses an `Authorization` header carrying your `SID:TOKEN`, with no `Bearer` prefix. Parameters and a complete example are in [Create a Print Job](/expedy-print/api-print-v2/create-a-print-job).
## Formatting the ticket
Whichever route you take, the message accepts the Expedy layout tags:
| What you want | Where to look |
|---|---|
| Align, resize or emphasise text | [Text Layout](/expedy-print/receipt-layout/text-layout-tags) |
| Print a logo or an image | [Image and Logo](/expedy-print/receipt-layout/image-and-logo-printing) |
| Print a QR code | [QR Code](/expedy-print/receipt-layout/qr-code) |
| Print a barcode | [EAN13 Barcode](/expedy-print/receipt-layout/ean13-barcode) |
> Depending on the connector or the software you use, this setup may be handled by your partner or your agency. Check with them before you start.
## Need help?
- [Browse all integrations](/integrations)
- [Open a support ticket](https://help.expedy.io/support/tickets/new)
---
url: https://docs.expedy.io/en/integrations/tastycloud/connect-a-receipt-printer-to-tastycloud
title: Print TastyCloud orders on a receipt printer
updated_at: 2026-10-21T11:54:43.39257+00:00
---
# Print TastyCloud orders on a receipt printer
[TastyCloud](https://www.tastycloud.fr/) is an online ordering solution for hospitality. It connects to Expedy PRINT through **HubRise**: TastyCloud sends its orders to HubRise, HubRise forwards them to your cloud printer, and the ticket comes out within seconds.
## What you need
- An Expedy account with an active printer. Not added yet? Follow the guide for your machine, [Expedy XPDY80](/expedy-print/installation/add-an-expedy-xpdy80-cloud-printer-to-your-account), [HSPOS](/expedy-print/installation/add-an-hspos-cloud-printer-to-your-account), [Star Micronics](/expedy-print/installation/add-a-star-micronics-printer-to-your-account) or [Raspberry Pi](/expedy-print/installation/add-a-raspberry-pi-cloud-print-server-to-your-account)
- A [HubRise account](https://manager.hubrise.com/signup), which aggregates your sales channels
- A TastyCloud account linked to your HubRise location
## How it works
| Step | What happens |
|---|---|
| 1 | An order is placed on TastyCloud |
| 2 | TastyCloud pushes it to HubRise |
| 3 | Expedy PRINT receives it and prints a standardised ticket |
A single printer covers every channel connected to the same HubRise location, so you do not need one machine per platform.
## Connect it
The setup happens once, on the HubRise side, and is described step by step in the reference guide:
**[Connect a receipt printer to HubRise](/integrations/hubrise/connecting-a-receipt-printer-to-hubrise)**
Then link your TastyCloud account to the same HubRise location. That part is done from the TastyCloud back office, or by TastyCloud support.
## Receipt settings
Once connected, the printer page in the [Expedy console](https://www.expedy.fr/console/v3/) controls what gets printed:
- **Print order when**, the status that triggers printing, `NEW`, `RECEIVED` or `ACCEPTED`
- **Then change status to**, the automatic status update applied after printing
- **Number of copies**, one ticket for the kitchen, one for the counter or the delivery bag
- The receipt header and footer, logo, company name, address and registration number
All of it is detailed in [Connect a receipt printer to HubRise](/integrations/hubrise/connecting-a-receipt-printer-to-hubrise).
> Depending on the connector or the point-of-sale software you use, this setup may be handled by your partner. Check with them before you start.
## Need help?
- [Browse all integrations](/integrations)
- [Open a support ticket](https://help.expedy.io/support/tickets/new)
---
url: https://docs.expedy.io/en/integrations/just-eat/connect-a-receipt-printer-to-just-eat
title: Print Just Eat orders on a receipt printer
updated_at: 2026-10-22T02:35:26.601145+00:00
---
# Print Just Eat orders on a receipt printer
[Just Eat](https://www.just-eat.fr/) is a meal delivery platform. It connects to Expedy PRINT through **HubRise**: Just Eat sends its orders to HubRise, HubRise forwards them to your cloud printer, and the ticket comes out within seconds.
## What you need
- An Expedy account with an active printer. Not added yet? Follow the guide for your machine, [Expedy XPDY80](/expedy-print/installation/add-an-expedy-xpdy80-cloud-printer-to-your-account), [HSPOS](/expedy-print/installation/add-an-hspos-cloud-printer-to-your-account), [Star Micronics](/expedy-print/installation/add-a-star-micronics-printer-to-your-account) or [Raspberry Pi](/expedy-print/installation/add-a-raspberry-pi-cloud-print-server-to-your-account)
- A [HubRise account](https://manager.hubrise.com/signup), which aggregates your sales channels
- A Just Eat account linked to your HubRise location
## How it works
| Step | What happens |
|---|---|
| 1 | An order is placed on Just Eat |
| 2 | Just Eat pushes it to HubRise |
| 3 | Expedy PRINT receives it and prints a standardised ticket |
A single printer covers every channel connected to the same HubRise location, so you do not need one machine per platform.
## Connect it
The setup happens once, on the HubRise side, and is described step by step in the reference guide:
**[Connect a receipt printer to HubRise](/integrations/hubrise/connecting-a-receipt-printer-to-hubrise)**
Then link your Just Eat account to the same HubRise location. That part is done from the Just Eat back office, or by Just Eat support.
## Receipt settings
Once connected, the printer page in the [Expedy console](https://www.expedy.fr/console/v3/) controls what gets printed:
- **Print order when**, the status that triggers printing, `NEW`, `RECEIVED` or `ACCEPTED`
- **Then change status to**, the automatic status update applied after printing
- **Number of copies**, one ticket for the kitchen, one for the counter or the delivery bag
- The receipt header and footer, logo, company name, address and registration number
All of it is detailed in [Connect a receipt printer to HubRise](/integrations/hubrise/connecting-a-receipt-printer-to-hubrise).
> Depending on the connector or the point-of-sale software you use, this setup may be handled by your partner. Check with them before you start.
## Need help?
- [Browse all integrations](/integrations)
- [Open a support ticket](https://help.expedy.io/support/tickets/new)
---
url: https://docs.expedy.io/en/integrations/thrivecart/connect-a-receipt-printer-to-thrivecart
title: Print from ThriveCart with Expedy PRINT
updated_at: 2026-10-19T21:58:25.165515+00:00
---
# Print from ThriveCart with Expedy PRINT
[ThriveCart](https://thrivecart.com/) is an online cart and checkout platform. It reaches Expedy PRINT in two ways: through **Zapier**, with no code, or through the **Expedy REST API**, when you want full control over the ticket.
## What you need
- An Expedy account with an active printer. Not added yet? Follow the guide for your machine, [Expedy XPDY80](/expedy-print/installation/add-an-expedy-xpdy80-cloud-printer-to-your-account), [HSPOS](/expedy-print/installation/add-an-hspos-cloud-printer-to-your-account), [Star Micronics](/expedy-print/installation/add-a-star-micronics-printer-to-your-account) or [Raspberry Pi](/expedy-print/installation/add-a-raspberry-pi-cloud-print-server-to-your-account)
- Your **API SID**, **API TOKEN** and **API Printer UID**, all three on the printer page of the [Expedy console](https://www.expedy.fr/console/v3/), in the **API Keys & UID** card
## Option 1, through Zapier, no code
ThriveCart connects to Zapier, and Zapier ships a ready-made **Expedy Print** action. The recipe is always the same: an event in ThriveCart triggers **Create a Print Job** in Expedy Print, and you map the fields you want on the ticket.
Full walkthrough: **[How to integrate Expedy Print with Zapier](/integrations/zapier/how-to-integrate-expedy-print-with-zapier)**
## Option 2, through the REST API
If ThriveCart can issue an HTTP request, it can drive the printer directly.
```api
POST https://www.expedy.fr/api/v2/printers/{printer_uid}/print
```
Authentication uses an `Authorization` header carrying your `SID:TOKEN`, with no `Bearer` prefix. Parameters and a complete example are in [Create a Print Job](/expedy-print/api-print-v2/create-a-print-job).
## Formatting the ticket
Whichever route you take, the message accepts the Expedy layout tags:
| What you want | Where to look |
|---|---|
| Align, resize or emphasise text | [Text Layout](/expedy-print/receipt-layout/text-layout-tags) |
| Print a logo or an image | [Image and Logo](/expedy-print/receipt-layout/image-and-logo-printing) |
| Print a QR code | [QR Code](/expedy-print/receipt-layout/qr-code) |
| Print a barcode | [EAN13 Barcode](/expedy-print/receipt-layout/ean13-barcode) |
> Depending on the connector or the software you use, this setup may be handled by your partner or your agency. Check with them before you start.
## Need help?
- [Browse all integrations](/integrations)
- [Open a support ticket](https://help.expedy.io/support/tickets/new)
---
url: https://docs.expedy.io/en/integrations/foodpanda/connect-a-receipt-printer-to-foodpanda
title: Print Foodpanda orders on a receipt printer
updated_at: 2026-10-22T19:20:05.567532+00:00
---
# Print Foodpanda orders on a receipt printer
[Foodpanda](https://www.foodpanda.com/) is a meal delivery platform. It connects to Expedy PRINT through **HubRise**: Foodpanda sends its orders to HubRise, HubRise forwards them to your cloud printer, and the ticket comes out within seconds.
## What you need
- An Expedy account with an active printer. Not added yet? Follow the guide for your machine, [Expedy XPDY80](/expedy-print/installation/add-an-expedy-xpdy80-cloud-printer-to-your-account), [HSPOS](/expedy-print/installation/add-an-hspos-cloud-printer-to-your-account), [Star Micronics](/expedy-print/installation/add-a-star-micronics-printer-to-your-account) or [Raspberry Pi](/expedy-print/installation/add-a-raspberry-pi-cloud-print-server-to-your-account)
- A [HubRise account](https://manager.hubrise.com/signup), which aggregates your sales channels
- A Foodpanda account linked to your HubRise location
## How it works
| Step | What happens |
|---|---|
| 1 | An order is placed on Foodpanda |
| 2 | Foodpanda pushes it to HubRise |
| 3 | Expedy PRINT receives it and prints a standardised ticket |
A single printer covers every channel connected to the same HubRise location, so you do not need one machine per platform.
## Connect it
The setup happens once, on the HubRise side, and is described step by step in the reference guide:
**[Connect a receipt printer to HubRise](/integrations/hubrise/connecting-a-receipt-printer-to-hubrise)**
Then link your Foodpanda account to the same HubRise location. That part is done from the Foodpanda back office, or by Foodpanda support.
## Receipt settings
Once connected, the printer page in the [Expedy console](https://www.expedy.fr/console/v3/) controls what gets printed:
- **Print order when**, the status that triggers printing, `NEW`, `RECEIVED` or `ACCEPTED`
- **Then change status to**, the automatic status update applied after printing
- **Number of copies**, one ticket for the kitchen, one for the counter or the delivery bag
- The receipt header and footer, logo, company name, address and registration number
All of it is detailed in [Connect a receipt printer to HubRise](/integrations/hubrise/connecting-a-receipt-printer-to-hubrise).
> Depending on the connector or the point-of-sale software you use, this setup may be handled by your partner. Check with them before you start.
## Need help?
- [Browse all integrations](/integrations)
- [Open a support ticket](https://help.expedy.io/support/tickets/new)
---
url: https://docs.expedy.io/en/integrations/starshipit/connect-a-receipt-printer-to-starshipit
title: Print your Starshipit shipping labels automatically
updated_at: 2026-10-20T14:44:16.905478+00:00
---
# Print your Starshipit shipping labels automatically
[Starshipit](https://www.starshipit.com/) generates your carrier shipping labels. Through **Zapier**, the label PDF goes straight to your label printer the moment Starshipit creates it, so nobody has to download it and print it by hand.
> An Expedy cloud receipt printer, XPDY80, HSPOS or Star Micronics, **cannot print a carrier label**: it is a receipt printer. Carrier labels always go through a **Raspberry Pi** or a **Cloud Print Box USB adapter** driving a label printer.
## What you need
- An Expedy account with an active **Raspberry Pi print server** or **Cloud Print Box USB adapter**. Not set up yet? See [Add a Raspberry Pi print server to your account](/expedy-print/installation/add-a-raspberry-pi-cloud-print-server-to-your-account)
- **Your own label printer**, connected by USB to that Raspberry Pi or adapter, with its port set to `LABEL`
- A Starshipit account and a [Zapier](https://zapier.com/) account
- Your **API SID**, **API TOKEN** and **API Printer UID**, on the printer page of the [Expedy console](https://www.expedy.fr/console/v3/), in the **API Keys & UID** card
## Why a label printer
A carrier label is a PDF in a fixed format, most often 100 x 150 mm. A receipt printer cannot render it at the right size, so the job goes to a label printer driven by a Raspberry Pi or the Cloud Print Box.
On the printer page, run a **USB scan** and set the port that carries the label printer to `LABEL`, not `ESC/POS`. See [Installation on Raspberry Pi](/usb-cloud-printer-adapter/rpi-installation/installation-on-raspberry-pi).
## Build the Zap
1. In Zapier, create a Zap and pick **Starshipit** as the trigger app
2. Choose the event that fires when a label is created
3. Add **Expedy Print** as the action, then **Create a Print Job**
4. Connect your Expedy account with your **Expedy SID** and your **Expedy TOKEN**
5. Enter the **Printer UID** of the label printer
6. In the message field, map the label PDF URL returned by Starshipit
Step by step on the Zapier side: [How to integrate Expedy Print with Zapier](/integrations/zapier/how-to-integrate-expedy-print-with-zapier)
## What to send
A label printer takes the PDF URL **on its own, with no tag**:
```text
https://example.com/label.pdf
```
On an ESC/POS receipt printer the same URL has to be wrapped in the `` tag instead. Both forms are detailed in [PDF printing](/expedy-print/receipt-layout/print-pdf).
## Test it
Create a test label in Starshipit and check that it comes out at the right size. If nothing prints:
- check the **Printer UID**, it must be the label printer, not the receipt printer
- check that the USB port is in `LABEL` mode after the scan
- check that the PDF URL is reachable without authentication, Expedy fetches it from its own servers
> Depending on the connector or the software you use, this setup may be handled by your partner or your agency. Check with them before you start.
## Need help?
- [Browse all integrations](/integrations)
- [Open a support ticket](https://help.expedy.io/support/tickets/new)
---
url: https://docs.expedy.io/en/integrations/dishop/connect-a-receipt-printer-to-dishop
title: Print Dishop orders on a receipt printer
updated_at: 2026-10-22T10:15:56.680078+00:00
---
# Print Dishop orders on a receipt printer
**Dishop** is an online ordering solution for hospitality. It connects to Expedy PRINT through **HubRise**: Dishop sends its orders to HubRise, HubRise forwards them to your cloud printer, and the ticket comes out within seconds.
## What you need
- An Expedy account with an active printer. Not added yet? Follow the guide for your machine, [Expedy XPDY80](/expedy-print/installation/add-an-expedy-xpdy80-cloud-printer-to-your-account), [HSPOS](/expedy-print/installation/add-an-hspos-cloud-printer-to-your-account), [Star Micronics](/expedy-print/installation/add-a-star-micronics-printer-to-your-account) or [Raspberry Pi](/expedy-print/installation/add-a-raspberry-pi-cloud-print-server-to-your-account)
- A [HubRise account](https://manager.hubrise.com/signup), which aggregates your sales channels
- A Dishop account linked to your HubRise location
## How it works
| Step | What happens |
|---|---|
| 1 | An order is placed on Dishop |
| 2 | Dishop pushes it to HubRise |
| 3 | Expedy PRINT receives it and prints a standardised ticket |
A single printer covers every channel connected to the same HubRise location, so you do not need one machine per platform.
## Connect it
The setup happens once, on the HubRise side, and is described step by step in the reference guide:
**[Connect a receipt printer to HubRise](/integrations/hubrise/connecting-a-receipt-printer-to-hubrise)**
Then link your Dishop account to the same HubRise location. That part is done from the Dishop back office, or by Dishop support.
## Receipt settings
Once connected, the printer page in the [Expedy console](https://www.expedy.fr/console/v3/) controls what gets printed:
- **Print order when**, the status that triggers printing, `NEW`, `RECEIVED` or `ACCEPTED`
- **Then change status to**, the automatic status update applied after printing
- **Number of copies**, one ticket for the kitchen, one for the counter or the delivery bag
- The receipt header and footer, logo, company name, address and registration number
All of it is detailed in [Connect a receipt printer to HubRise](/integrations/hubrise/connecting-a-receipt-printer-to-hubrise).
> Depending on the connector or the point-of-sale software you use, this setup may be handled by your partner. Check with them before you start.
## Need help?
- [Browse all integrations](/integrations)
- [Open a support ticket](https://help.expedy.io/support/tickets/new)
---
url: https://docs.expedy.io/en/integrations/shopify/shopify-plugins-cloud-print-orders-automatically
title: Shopify plugins : Cloud Print orders automatically
updated_at: 2026-10-20T20:55:43.462262+00:00
---
# Shopify plugins : Cloud Print orders automatically
> **Before you start**: you need an Expedy account and an active printer on it. Not added yet? Follow the guide for your machine, [Expedy XPDY80](/expedy-print/installation/add-an-expedy-xpdy80-cloud-printer-to-your-account), [HSPOS](/expedy-print/installation/add-an-hspos-cloud-printer-to-your-account), [Star Micronics](/expedy-print/installation/add-a-star-micronics-printer-to-your-account) or [Raspberry Pi](/expedy-print/installation/add-a-raspberry-pi-cloud-print-server-to-your-account).
When a customer places an order on your [Shopify store](http://shopify.pxf.io/DVYkPa), a receipt is automatically printed on your connected printer, no button to click, no manual action required.
---
## How it works
Shopify's **Webhook** feature allows you to push order data to an external URL instantly when an event occurs. By pointing a webhook to the Expedy API, every new order triggers an automatic print job on your printer.
---
## Setup, Create a Webhook in Shopify
1. Log in to your [Shopify admin](https://accounts.shopify.com/store-login)
2. Go to **Settings**
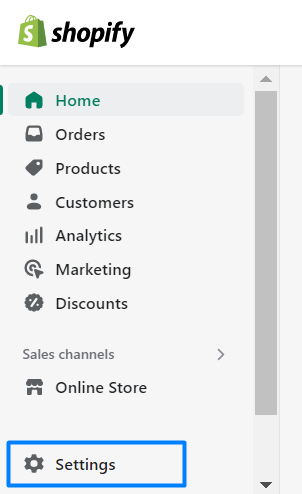
3. Click **Notifications**
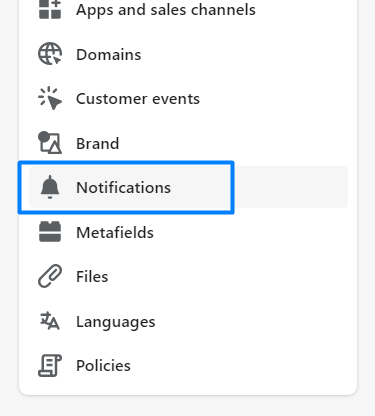
4. Scroll to the bottom of the page and click **Create a webhook**
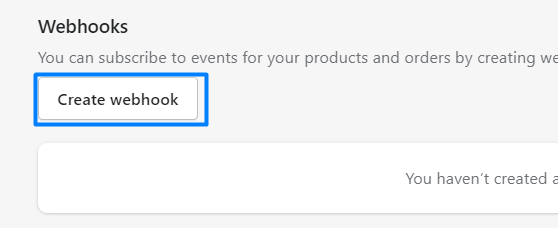
5. Fill in the webhook settings:
| Field | Value |
|-------|-------|
| **Event** | Order Creation |
| **Format** | JSON |
| **URL** | Your Expedy webhook URL (see below) |
| **API version** | Latest |
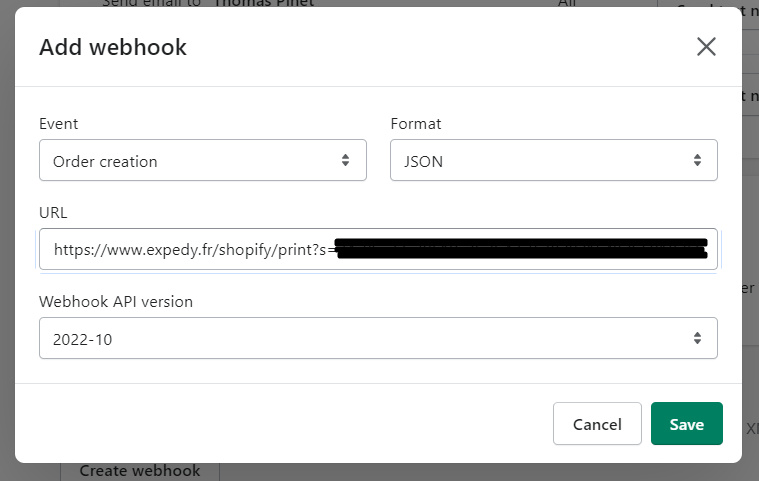
6. Click **Save**
All new Shopify orders will now print automatically on your connected printer. You can add as many webhooks and printers as needed.
---
## Webhook URL
Your webhook URL is available directly in the [Expedy console](https://www.expedy.fr/console/v3/) under **Printers → Select printer → Shopify URL**.
It follows this format:
```text
https://www.expedy.fr/shopify/print?s=SID&t=TOKEN&p=PRINTER_UID
```
| Parameter | Description |
|-----------|-------------|
| `s` | Your API **SID**, available in the console under **API** |
| `t` | Your API **TOKEN**, available in the console under **API** |
| `p` | Your **Printer UID**, visible in the console under **Printers** |
---
## Test your setup
Once the webhook is configured, place a test order to verify that printing works correctly.
See the [Shopify test order documentation](https://help.shopify.com/en/manual/checkout-settings/test-orders) for instructions.
---
## Are you a Shopify expert?
Help other merchants get set up with Expedy Print. Join our [Partner Program](https://www.expedy.fr/contact) and connect with users who need professional assistance.
---
url: https://docs.expedy.io/en/integrations/shopify/order-print-settings-receipt-customisation
title: Order Print Settings : Receipt customisation
updated_at: 2026-10-20T18:07:11.269769+00:00
---
# Order Print Settings : Receipt customisation
Customise what appears on your printed receipts in just a few clicks, add your logo, business details, footer information, and more, directly from the Expedy console.
> ✅ Available for: [Shopify](/integrations/shopify), [GoodBarber](/integrations/goodbarber), Wix, and [HubRise](/integrations/hubrise)
>
> For other integrations, see: [PrestaShop](/integrations/prestashop) · [WooCommerce](/integrations/wordpress-woocommerce) · [WooCommerce WCFM](/integrations/wordpress-woocommerce) · [API](/expedy-print/api-print-v2) · [Zapier](/integrations/zapier) · [Receipt layout](/expedy-print/receipt-layout/text-layout-tags)
---
## Access Order Print Settings
1. Log in to the [Expedy console](https://www.expedy.fr/console/v3/)
2. Go to **Printers**
3. Select the printer you want to configure
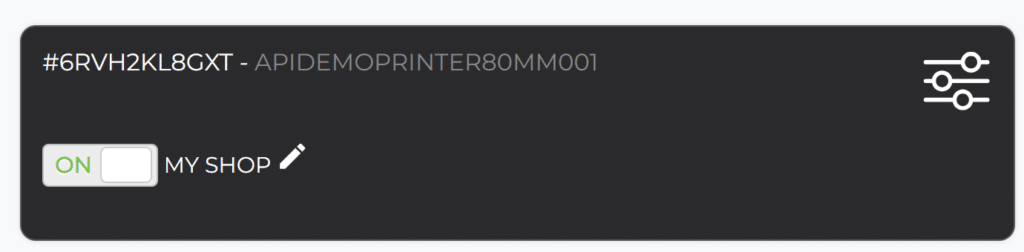
4. Open the **Connections & Plugins** tab
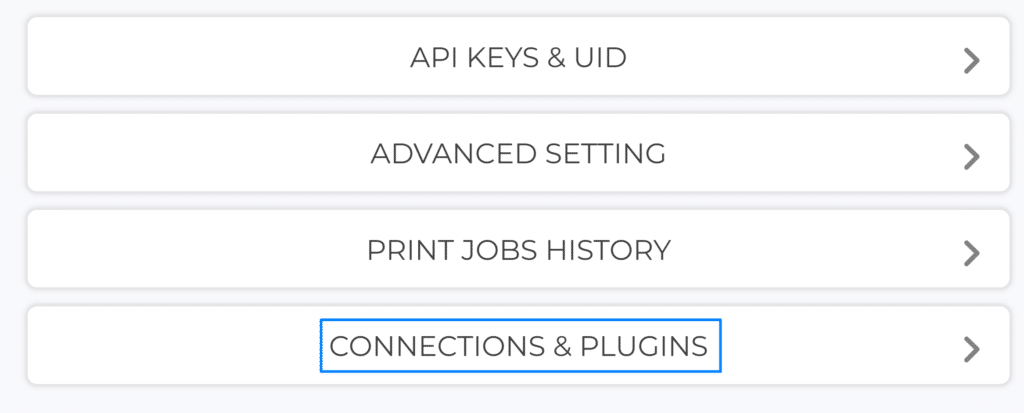
---
## Receipt Header
### Time Zone
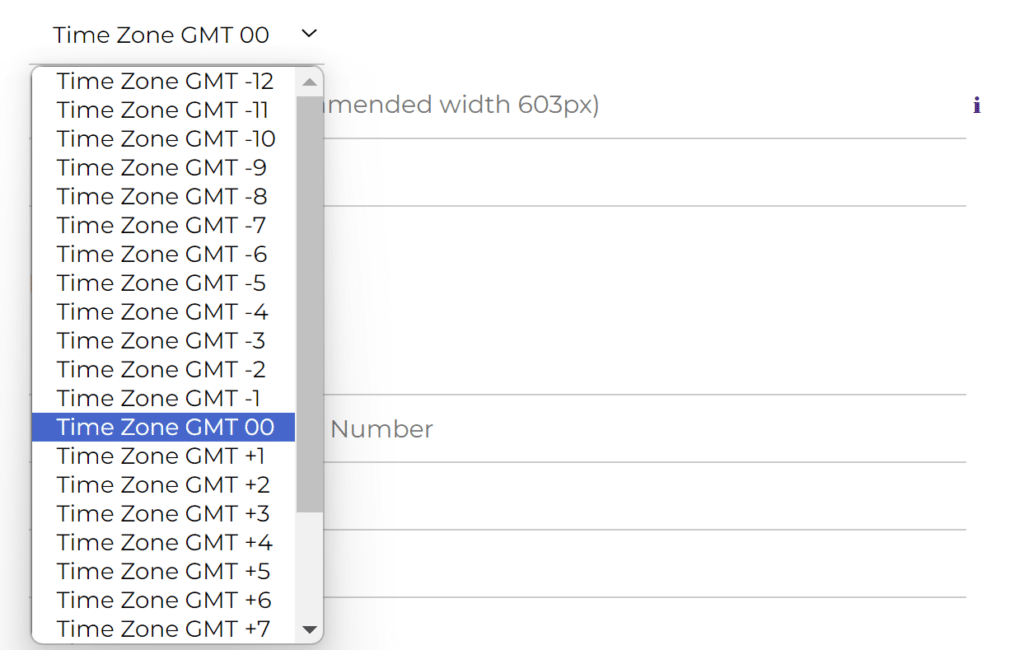
Set the correct time zone to ensure receipts display the right date and time.
### Logo
Add your establishment's logo or any image to the top of the receipt.
See [image requirements](/expedy-print/receipt-layout/image-and-logo-printing) for format and dimension guidelines.
### Company Name
Your shop name or a custom title displayed at the top of the receipt.
---
## Receipt Footer
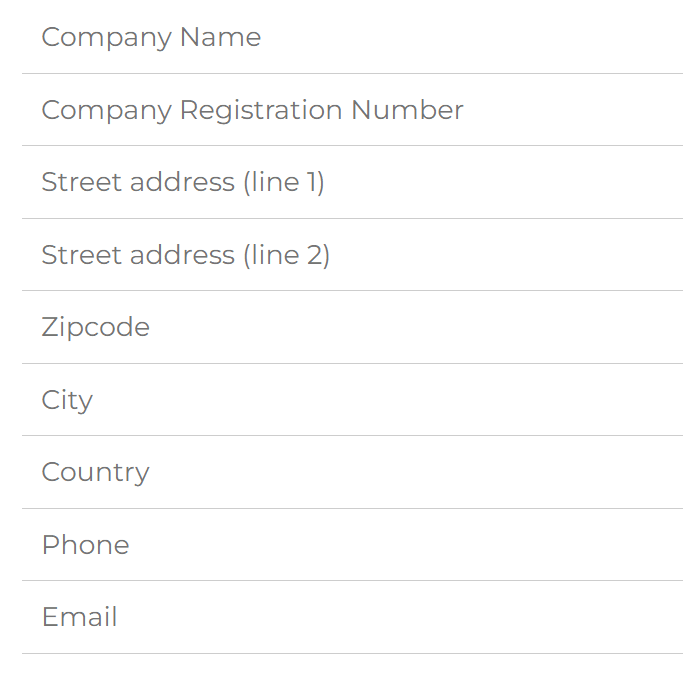
Add any business information you want to appear at the bottom of every receipt:
- Company name
- Company registration number
- Postal address
- Contact details (phone, email, etc.)
All fields are optional and free-form.
---
## Advanced Options
### Ticket copies
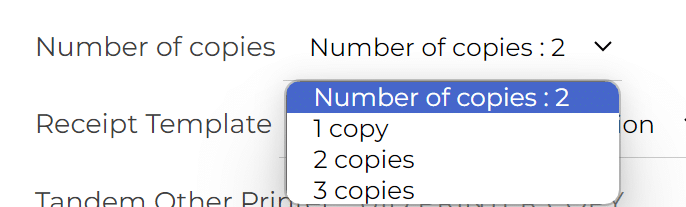
Set the number of copies to print automatically for each order.
### Receipt template
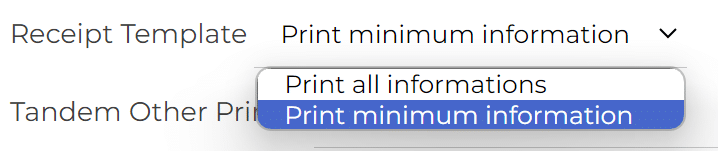
Choose the layout that best suits your workflow.
### Tandem printer
Add a second printer to automatically print a copy of every receipt. Enter the second printer's UID, it must already be added to the same [Expedy account](https://www.expedy.fr/console/v3/).
### SMS order notifications *(France only)*
Enter one or more mobile numbers to receive an SMS for every new order. Separate multiple numbers with semicolons.
> ℹ️ This service is only available in France and is charged at **€0.10 per SMS**. [Contact us](https://help.expedy.io/support/tickets/new) to activate it.
---
url: https://docs.expedy.io/en/integrations/shopify/print-a-copy-of-the-order
title: Print a copy of the order
updated_at: 2026-10-23T05:44:52.814469+00:00
---
# Print a copy of the order
Automatically print the same receipt several times for every new order, useful for keeping one copy in the kitchen, one at the counter, and one for the customer.
---
1. Log in to the [Expedy console](https://www.expedy.fr/console/v3/)
2. Go to **Printers** and select the printer concerned
3. Scroll down to **Advanced Options**
4. Select the number of copies from the **Copies** drop-down menu
5. Click **Save** to confirm
---
url: https://docs.expedy.io/en/integrations/shopify/add-a-logo-to-the-shopify-order-form
title: Add a logo to the Shopify order form
updated_at: 2026-10-22T20:49:27.662771+00:00
---
# Add a logo to the Shopify order form
Display your company logo or name at the top of every receipt printed via Shopify, no code required.
---
1. Log in to the [Expedy console](https://www.expedy.fr/console/v3/)
2. Go to **Printers** and select your printer

3. In the **Print Header** section, paste the HTTPS URL of your logo
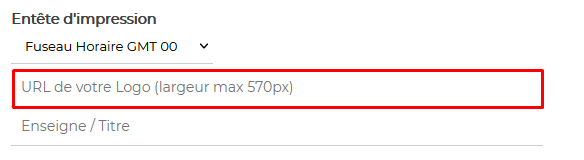
4. Click **Save**
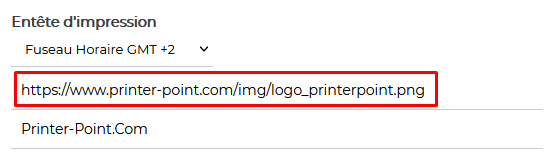
> ⚠️ The image must be hosted on a **secure server (HTTPS)**.
> Avoid transparent backgrounds (alpha layer) and gradients, use flat black on white for best results.
>
> See [image requirements](/expedy-print/receipt-layout/image-and-logo-printing) for format and dimension guidelines.
---
## Centering your logo
Centering is handled directly in the image file, the logo must be positioned in the centre with equal white margins on both sides, sized to match your paper width.
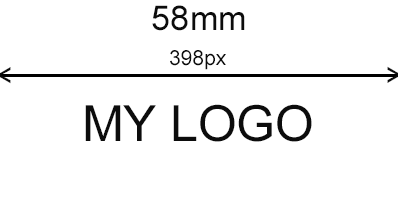
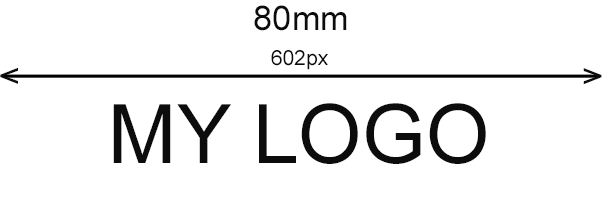

---
## Are you a Shopify expert?
Help other merchants set up Expedy Print on their store. Join our [Partner Program](https://www.expedy.io/en/registration-partner/) and connect with users who need professional assistance.
---
url: https://docs.expedy.io/en/integrations/shopify/connect-shopify-to-expedy-print-with-zapier
title: Shopify and Zapier, print only the orders you choose
updated_at: 2026-10-18T08:30:27.948522+00:00
---
# Shopify and Zapier, print only the orders you choose
Expedy already has a **native Shopify app** that prints every paid order, see [Shopify plugins, cloud print orders automatically](/integrations/shopify/shopify-plugins-cloud-print-orders-automatically). Use it first: it needs no third-party account and it carries the receipt layout settings.
Zapier answers a different question, **printing only some orders, or printing on an event the app does not cover**.
## When Zapier is the better route
| What you want | Native app | Zapier |
|---|---|---|
| Print every paid order | Yes | Yes |
| Print only orders above an amount, or carrying a given tag or product | No | Yes, with a filter step |
| Print when a fulfilment is created, or an order is cancelled or refunded | No | Yes, pick the matching Shopify trigger |
| Send the same order to two printers by rule, kitchen and counter | Tandem printer only | Yes, one action per printer |
| Log the order in a spreadsheet or a Slack channel at the same time | No | Yes, extra actions in the same Zap |
## What you need
- An Expedy account with an active printer. Not added yet? Follow the guide for your machine, [Expedy XPDY80](/expedy-print/installation/add-an-expedy-xpdy80-cloud-printer-to-your-account), [HSPOS](/expedy-print/installation/add-an-hspos-cloud-printer-to-your-account), [Star Micronics](/expedy-print/installation/add-a-star-micronics-printer-to-your-account) or [Raspberry Pi](/expedy-print/installation/add-a-raspberry-pi-cloud-print-server-to-your-account)
- A Shopify store and a [Zapier](https://zapier.com/) account
- Your **API SID**, **API TOKEN** and **API Printer UID**, on the printer page of the [Expedy console](https://www.expedy.fr/console/v3/), in the **API Keys & UID** card
## Build the Zap
1. Pick **Shopify** as the trigger app and **New Paid Order** as the event
2. Optional but this is the whole point, add a **Filter by Zapier** step to keep only the orders you want on paper
3. Add **Expedy Print** as the action, then **Create a Print Job**
4. Connect your Expedy account with your **Expedy SID** and your **Expedy TOKEN**
5. Enter the **Printer UID**, then build the message from the Shopify order fields
Step by step on the Zapier side: [How to integrate Expedy Print with Zapier](/integrations/zapier/how-to-integrate-expedy-print-with-zapier)
## Format the ticket
| What you want | Where to look |
|---|---|
| Align, resize or emphasise text | [Text Layout](/expedy-print/receipt-layout/text-layout-tags) |
| Print a logo or an image | [Image and Logo](/expedy-print/receipt-layout/image-and-logo-printing) |
| Print a QR code | [QR Code](/expedy-print/receipt-layout/qr-code) |
| Print a barcode | [EAN13 Barcode](/expedy-print/receipt-layout/ean13-barcode) |
## Which one to choose
> If every order is printed the same way, stay on the native app: it is simpler and consumes no Zapier task quota. Move to Zapier the day you need a condition, a different event, or a second action alongside the print. Nothing stops you running both, on two different printers.
## Need help?
- [Browse all integrations](/integrations)
- [Open a support ticket](https://help.expedy.io/support/tickets/new)
---
url: https://docs.expedy.io/en/integrations/hubrise/connecting-a-receipt-printer-to-hubrise
title: Connect a receipt printer to HubRise
updated_at: 2026-10-19T19:46:12.083706+00:00
---
# Connect a receipt printer to HubRise
Connect a single receipt printer to all your online sales channels at once, eCommerce stores and delivery platforms included, with ExpedyPRINT and [HubRise](https://www.hubrise.com/).
Orders from any connected source are automatically printed as standardised receipts:
- Online stores (WooCommerce, Shopify, PrestaShop...)
- Delivery platforms (Uber Eats, Just Eat, Deliveroo...)
---
## Compatible printers
- Expedy Cloud Print printers: `PP-58EWG`, `PP-80EWG`, [XPDY80EWBG](https://www.expedy.io/product)
- [Cloud Print Box USB adapter](https://www.expedy.io/product), compatible with any ESC/POS or ESC/P printer (Epson, Star Micronics, Munbyn, Citizen...)
---
## Prerequisites
- An Expedy account with an active printer on it. Not added yet? Follow the guide for your machine: [Expedy XPDY80](/expedy-print/installation/add-an-expedy-xpdy80-cloud-printer-to-your-account), [HSPOS](/expedy-print/installation/add-an-hspos-cloud-printer-to-your-account), [Star Micronics](/expedy-print/installation/add-a-star-micronics-printer-to-your-account) or [Raspberry Pi](/expedy-print/installation/add-a-raspberry-pi-cloud-print-server-to-your-account)
- A [HubRise account](https://manager.hubrise.com/signup), required to aggregate orders from delivery platforms. Create one before moving to the next step.
> Depending on the connector or the point-of-sale software you use, this connection may be set up by your partner. Check with them before you start.
---
## Connect HubRise to your printer
### Step 1, Sign in to your Expedy console
Log in at [https://www.expedy.fr/console/v3/](https://www.expedy.fr/console/v3/)
The dashboard gives you access to your printers, your SIM cards, your API keys and the Help Center.
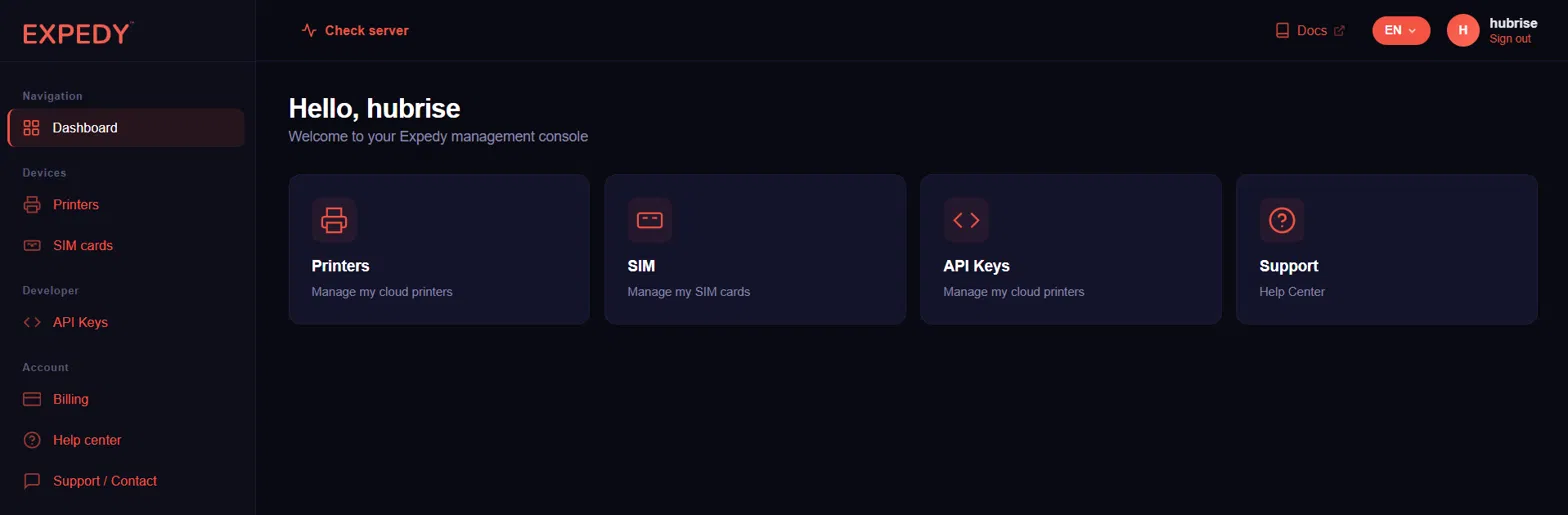
### Step 2, Open your printers
In the left menu, under **Devices**, click **Printers**, or go directly to [https://www.expedy.fr/console/v3/printers](https://www.expedy.fr/console/v3/printers)
This page lists all your cloud printers with their UID, their serial number and their print volume over the last 30 days.
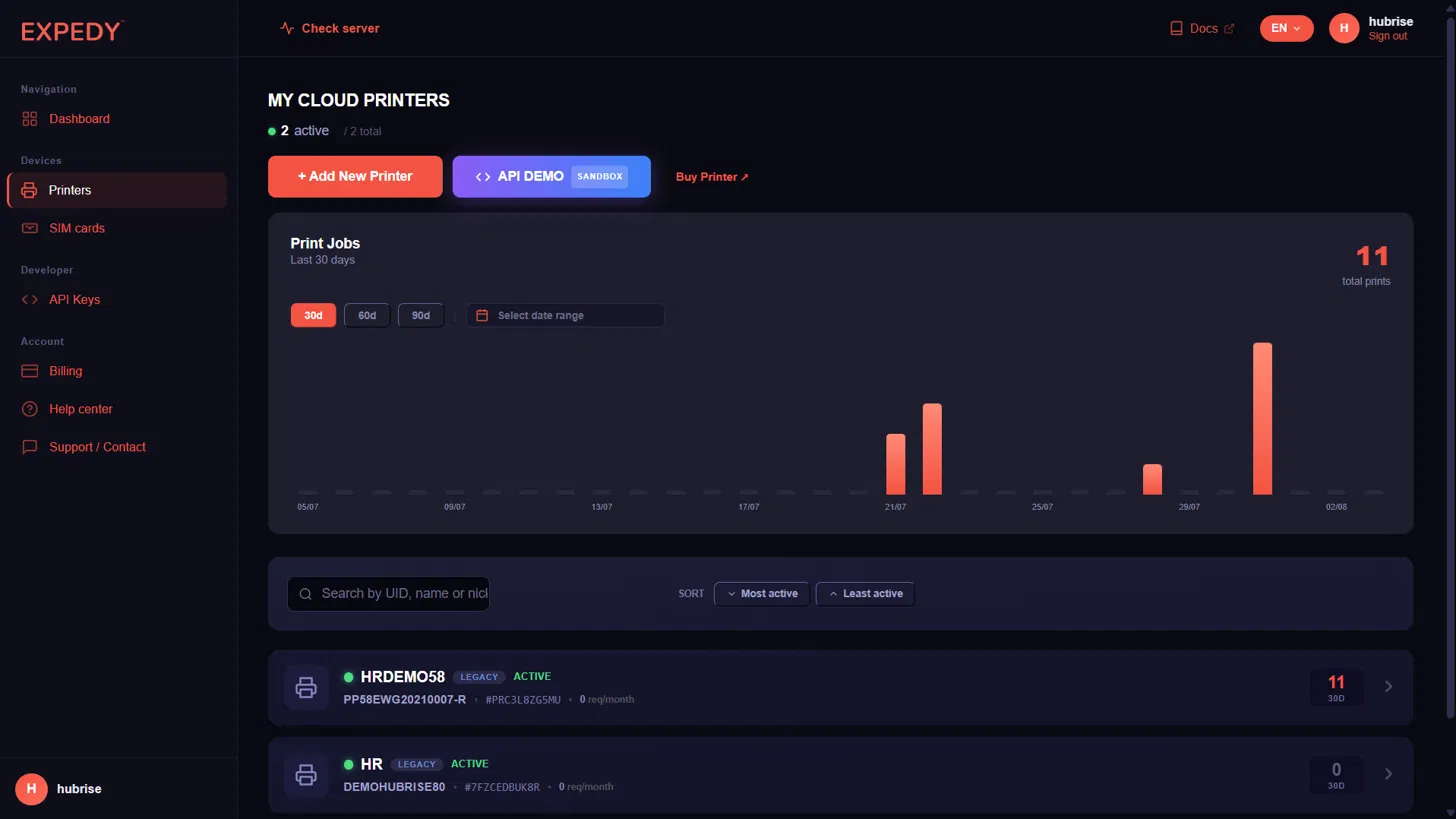
### Step 3, Select the printer to connect
Click the printer you want to link to HubRise, then open the **Connections & Plugins** tab.
In the **HubRise** section, the status shows **Not connected**. Click **Connect HubRise**.

### Step 4, Sign in to HubRise
You are redirected to the HubRise login page. Enter the email address and the password of your HubRise account, then click **Log in**.
### Step 5, Authorise the connection and select your location
HubRise asks you to authorise **EXPEDY PRINT** to access one of your locations.
Select the location you want to associate with this printer in the drop-down list, then click **Allow**.
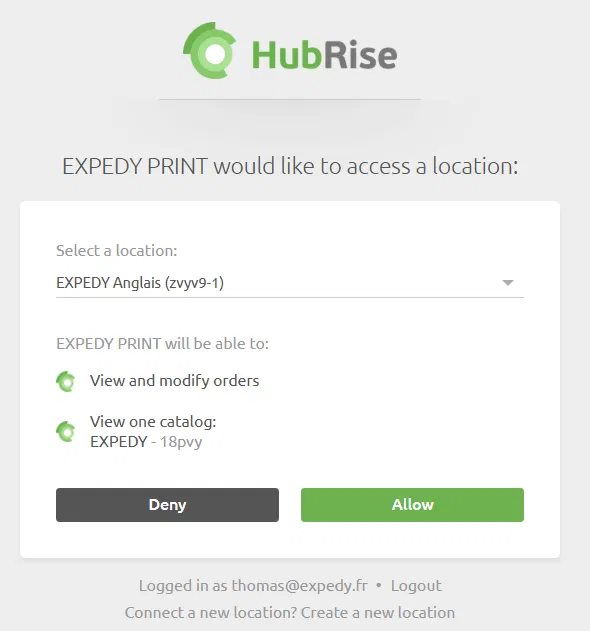
> One printer is linked to one HubRise location. To serve several locations, repeat the operation on another printer.
### Step 6, Back to the Expedy console
You are automatically redirected to your console. The HubRise section now displays **Connected to** followed by the name and the ID of your location, along with the trigger settings.
The connection is active. You can undo it at any time with the **Disconnect** button.
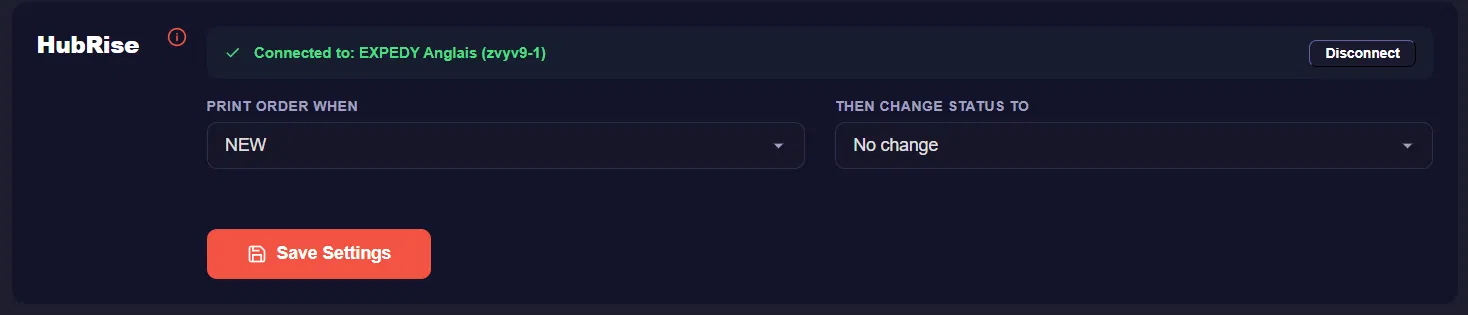
---
## Trigger settings
Two drop-down lists control when a ticket is printed and what happens to the order afterwards.
**Print order when**, the order status that triggers printing: `NEW`, `RECEIVED` or `ACCEPTED`.
**Then change status to**, the automatic status update applied once the ticket is printed: `No change`, `Mark as received` or `Mark as accepted`.
> Always click **Save Settings** to confirm your changes.
### Trigger combinations
| Print order when | Then change status to | Result |
|---|---|---|
| NEW | No change | Prints all new orders. Status unchanged on HubRise and on the original platform. |
| NEW | Mark as received | Prints all new orders and updates the status to **received**. |
| NEW | Mark as accepted | Prints all new orders and updates the status to **accepted**. |
| RECEIVED | No change | Prints received orders. Status unchanged on HubRise and on the original platform. |
| RECEIVED | Mark as accepted | Prints received orders and marks them as **accepted**. |
| ACCEPTED | No change | Prints only the orders you have already accepted manually. Refused or pending orders are not printed. |
Choose `NEW` with `Mark as accepted` for a fully automatic workflow, where every incoming order is printed and confirmed without any manual action. Choose `ACCEPTED` with `No change` if you want to review each order before it reaches the kitchen.
---
## Customise your receipts
Still on the printer page, the **Printer Settings** panel controls the layout of the tickets printed from HubRise and Shopify orders.
### Receipt header
| Field | Description |
|---|---|
| Time zone | Sets the local time printed on the ticket. Select your own time zone so the order timestamps are correct. |
| Logo URL | Direct link to your logo image, 603 px wide maximum. Leave empty to print no logo. |
| Company name (header) | Trading name printed in large characters at the top of the ticket. |
### Receipt footer
The footer carries your legal and contact details, printed at the bottom of every ticket:
- **Company** and **Registration number** (SIRET / VAT)
- **Address line 1**, **Address line 2**, **Zipcode**, **City**, **Country**
- **Phone** and **Email**
Filling these fields turns the order ticket into a compliant customer receipt, which is useful for click and collect and for delivery orders handed to the customer.
### Advanced options
**Number of copies**, the most requested setting. Choose how many identical tickets are printed for each order:
- 2 copies, one for the kitchen and one for the counter or the delivery bag
- 3 copies, kitchen, bar and packing station
Each copy is printed in a single pass, no need to reprint manually.
**Receipt template**, the level of detail printed on the ticket. `Full details` prints the complete ticket with items, options, prices, customer details and totals; shorter templates produce a compact production ticket.
**Tandem printer (copy to another printer)**, enter the UID of a second Expedy printer to receive an exact copy of every ticket. Ideal for splitting the workload between the kitchen and the counter, or between two floors of the same location, without creating a second HubRise connection.
> Click **Save Settings** to apply your layout.
---
## Test your setup
1. Place a test order on one of the platforms connected to your HubRise location
2. Check that the ticket comes out of the printer within a few seconds
3. Check on HubRise that the order status matches the option selected in **Then change status to**
If nothing prints, verify that the printer is powered on and active in the console, and that the location selected during the authorisation step is the one receiving the orders.
Need help? [Open a support ticket](https://help.expedy.io/support/tickets/new)
---
url: https://docs.expedy.io/en/integrations/zapier/how-to-integrate-expedy-print-with-zapier
title: How to integrate Expedy Print with Zapier
updated_at: 2026-10-22T18:05:04.900983+00:00
---
# How to integrate Expedy Print with Zapier
> **Before you start**: you need an Expedy account and an active printer on it. Not added yet? Follow the guide for your machine, [Expedy XPDY80](/expedy-print/installation/add-an-expedy-xpdy80-cloud-printer-to-your-account), [HSPOS](/expedy-print/installation/add-an-hspos-cloud-printer-to-your-account), [Star Micronics](/expedy-print/installation/add-a-star-micronics-printer-to-your-account) or [Raspberry Pi](/expedy-print/installation/add-a-raspberry-pi-cloud-print-server-to-your-account).
Connect Expedy Print to thousands of apps and trigger automatic print jobs based on any event, no code required.
**Examples of what you can automate:**
- Print a preparation slip when a new order is placed (Amazon Seller, eBay, Wix...)
- Print a shipping label when its status changes to "Ready to print" (Packlink, ShippyPro...)
- Print a document as soon as it's saved to a folder (Google Drive, Dropbox, OneDrive...)
- Print a photo when a new post is published (WordPress, Instagram, Facebook, Flickr...)
---
## What is Zapier?
[Zapier](https://www.zapier.com/) is an online automation platform that connects apps and services without any coding. It works by creating automated workflows called **Zaps**, each Zap triggers an action in one app in response to an event in another.
Zapier is **free for up to 100 jobs per month**.
---
## Set up a Zap with Expedy Print
### Step 1, Create a Zapier account
Sign up at [zapier.com](https://www.zapier.com/) with your email, or use your Google, Facebook, or Microsoft login.
### Step 2, Create a new Zap
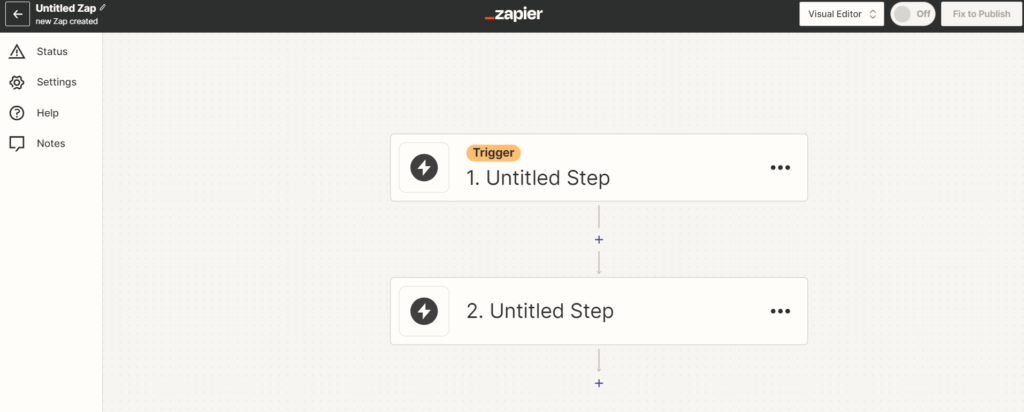
Go to the **Zaps** section and click **Create a Zap**.
### Step 3, Choose your trigger app
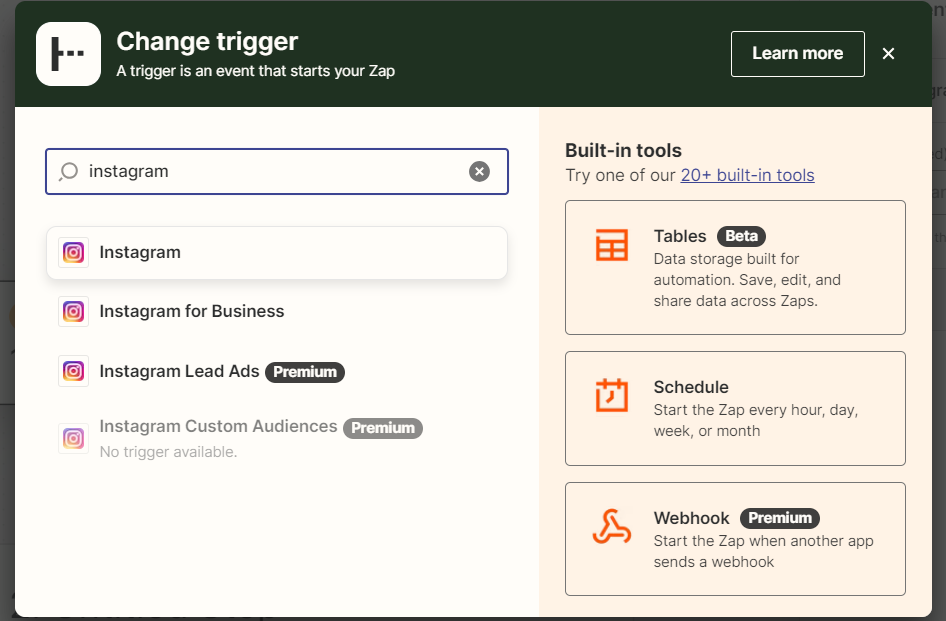
Click **Trigger** and select the app that will start the automation. In this example, we use **Instagram**.
### Step 4, Choose the trigger event
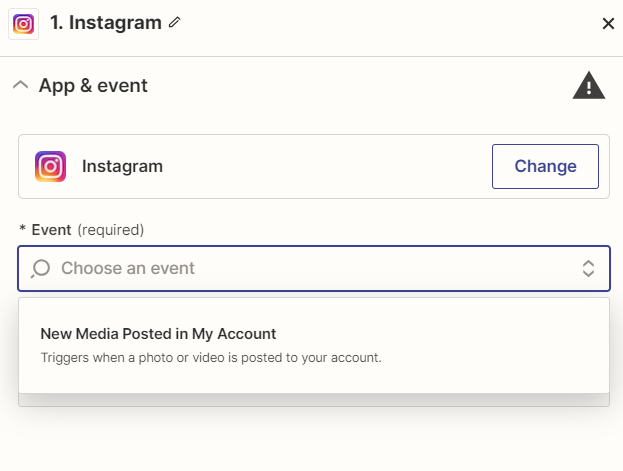
Select the event that will trigger the print job. Here: **New post published**.
### Step 5, Add Expedy Print as the action
In the action step, search for and select **Expedy Print**.
### Step 6, Select the action event
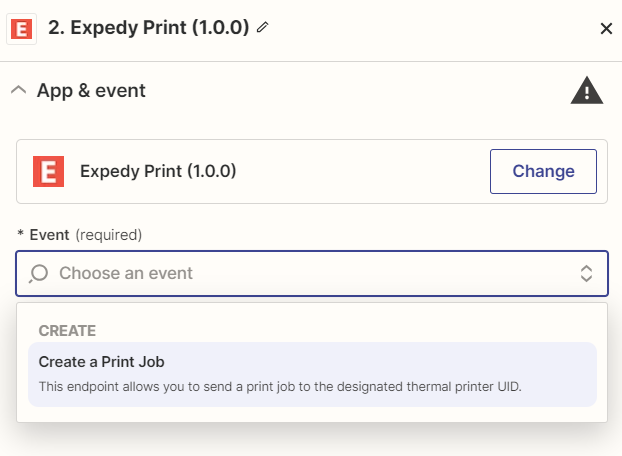
Select **Create a Print Job**.
### Step 7, Connect your Expedy account
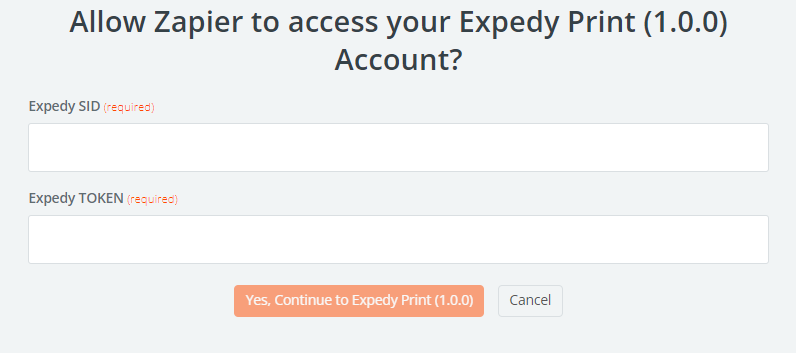
Create a new connection by entering your **API SID** and **TOKEN**, available in the [Expedy console](https://www.expedy.fr/console/v3/) under **API**.
### Step 8, Configure the print job
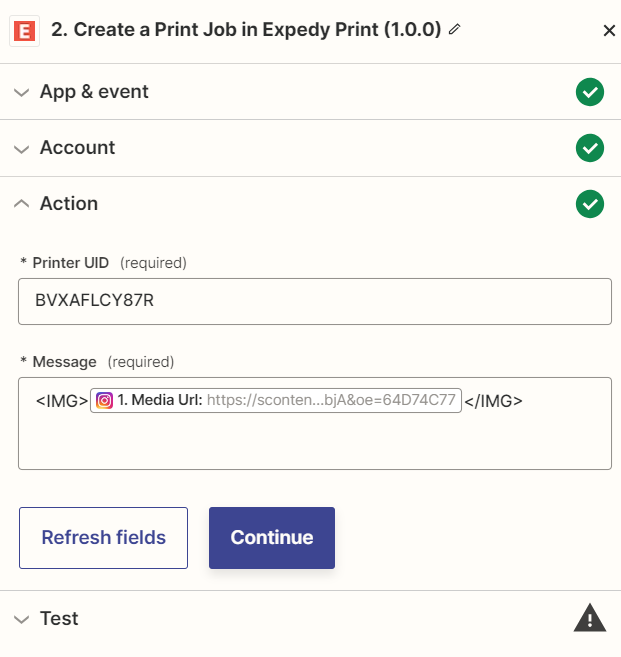
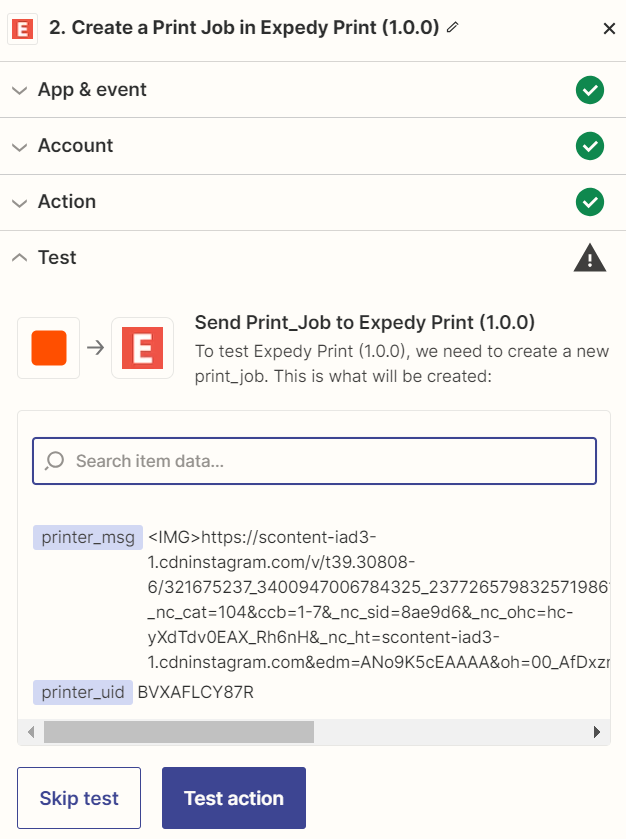
Enter your **Printer UID**, find it in the [Expedy console](https://www.expedy.fr/console/v3/) under **Printers**. Then compose the message with the data you want to print. Use the [`
` tag on a receipt printer, or the bare image URL on a photo printer
Step by step on the Zapier side: [How to integrate Expedy Print with Zapier](/integrations/zapier/how-to-integrate-expedy-print-with-zapier)
> Depending on the connector or the software you use, this setup may be handled by your partner or your agency. Check with them before you start.
## Need help?
- [Browse all integrations](/integrations)
- [Open a support ticket](https://help.expedy.io/support/tickets/new)
---
url: https://docs.expedy.io/en/integrations/webflow/connect-a-receipt-printer-to-webflow
title: Print from Webflow with Expedy PRINT
updated_at: 2026-10-19T21:04:28.964472+00:00
---
# Print from Webflow with Expedy PRINT
[Webflow](https://webflow.com/) is a website and online store builder. It reaches Expedy PRINT in two ways: through **Zapier**, with no code, or through the **Expedy REST API**, when you want full control over the ticket.
## What you need
- An Expedy account with an active printer. Not added yet? Follow the guide for your machine, [Expedy XPDY80](/expedy-print/installation/add-an-expedy-xpdy80-cloud-printer-to-your-account), [HSPOS](/expedy-print/installation/add-an-hspos-cloud-printer-to-your-account), [Star Micronics](/expedy-print/installation/add-a-star-micronics-printer-to-your-account) or [Raspberry Pi](/expedy-print/installation/add-a-raspberry-pi-cloud-print-server-to-your-account)
- Your **API SID**, **API TOKEN** and **API Printer UID**, all three on the printer page of the [Expedy console](https://www.expedy.fr/console/v3/), in the **API Keys & UID** card
## Option 1, through Zapier, no code
Webflow connects to Zapier, and Zapier ships a ready-made **Expedy Print** action. The recipe is always the same: an event in Webflow triggers **Create a Print Job** in Expedy Print, and you map the fields you want on the ticket.
Full walkthrough: **[How to integrate Expedy Print with Zapier](/integrations/zapier/how-to-integrate-expedy-print-with-zapier)**
## Option 2, through the REST API
If Webflow can issue an HTTP request, it can drive the printer directly.
```api
POST https://www.expedy.fr/api/v2/printers/{printer_uid}/print
```
Authentication uses an `Authorization` header carrying your `SID:TOKEN`, with no `Bearer` prefix. Parameters and a complete example are in [Create a Print Job](/expedy-print/api-print-v2/create-a-print-job).
## Formatting the ticket
Whichever route you take, the message accepts the Expedy layout tags:
| What you want | Where to look |
|---|---|
| Align, resize or emphasise text | [Text Layout](/expedy-print/receipt-layout/text-layout-tags) |
| Print a logo or an image | [Image and Logo](/expedy-print/receipt-layout/image-and-logo-printing) |
| Print a QR code | [QR Code](/expedy-print/receipt-layout/qr-code) |
| Print a barcode | [EAN13 Barcode](/expedy-print/receipt-layout/ean13-barcode) |
> Depending on the connector or the software you use, this setup may be handled by your partner or your agency. Check with them before you start.
## Need help?
- [Browse all integrations](/integrations)
- [Open a support ticket](https://help.expedy.io/support/tickets/new)
---
url: https://docs.expedy.io/en/integrations/wordpress-woocommerce/wordpress-woocommerce-extension-plugin-print-orders-automatically
title: WordPress/WooCommerce Extension Plugin : Print orders automatically
updated_at: 2026-10-22T14:29:29.000816+00:00
---
# WordPress/WooCommerce Extension Plugin : Print orders automatically
> **Before you start**: you need an Expedy account and an active printer on it. Not added yet? Follow the guide for your machine, [Expedy XPDY80](/expedy-print/installation/add-an-expedy-xpdy80-cloud-printer-to-your-account), [HSPOS](/expedy-print/installation/add-an-hspos-cloud-printer-to-your-account), [Star Micronics](/expedy-print/installation/add-a-star-micronics-printer-to-your-account) or [Raspberry Pi](/expedy-print/installation/add-a-raspberry-pi-cloud-print-server-to-your-account).
Automatically print new orders on your Expedy printer as soon as they are placed, no manual action
required. The plugin connects your WooCommerce store directly to your printer via the **Expedy API
v2**: no tablet, no local print server, no driver to install.
---
## Try it first (live sandbox)
Want to see the plugin in action before installing it on your own store? A ready-to-use sandbox runs
a full WordPress + WooCommerce + Expedy environment right in your browser:
👉 **[woo.expedy.io](https://woo.expedy.io)**
It comes pre-loaded with a demo order, so you can explore the settings dashboard and preview a printed
ticket immediately, no account and no installation required. The sandbox is temporary and isolated,
so real print jobs aren't sent; use it for interface and receipt-preview testing.
---
## Download
Download the latest version from the official **[Releases page](https://github.com/ExpedyDev/expedyprint-woocommerce-extension/releases)**.
Each release ships the ready-to-install `expedyprint.zip` and its changelog, that single file is all
you need.
---
## Installation
1. [**Download the plugin**](https://github.com/ExpedyDev/expedyprint-woocommerce-extension/releases) (`expedyprint.zip`).
2. In your WordPress admin, go to **Plugins → Add New → Upload Plugin**.
3. Click **Choose File** and select the `.zip` file downloaded in step 1.
4. Click **Install Now**.
5. Click **Activate** once the installation is complete.
6. Make sure **WooCommerce** is installed and active (the plugin needs it to run).
7. A new **ExpedyPRINT** entry appears in your wp-admin menu, open it to configure the plugin.
> No drivers, no command line, no extra software required.
---
## Get your API credentials
The plugin connects to your account using two credentials: an **API SID** (your account identifier)
and an **API token** (your secret key).
1. Don't have an account yet? Create your free account at **[expedy.io/signup](https://www.expedy.io/signup)**.
2. Log in to your [Expedy account](https://www.expedy.io) and open the **API** section.
3. Copy your **API SID** and **API token**.
4. Make sure at least **one cloud printer** is registered on your account.
> Keep your API token private, treat it like a password.
---
## Configuration
In your WordPress admin, open the **ExpedyPRINT** menu and fill in each section.
### 1. API connection
| Setting | Description |
|---------|-------------|
| **API SID** | Your account identifier, from the **API** section of your Expedy account. |
| **API token** | Your secret key, from the **API** section of your Expedy account. Leave blank to keep the value already saved. |
Click **Test connection**. On success, the list of printers on your account is loaded automatically.
### 2. Printer
| Setting | Description |
|---------|-------------|
| **Printer** | Pick your printer from the dropdown, it shows the name, paper width and UID. No need to type anything by hand. Use **Refresh list** if it stays empty, or **Send test print** to print a sample ticket. |
| **Backup printer ID** | *(optional)* UID of a second printer that receives a copy of every ticket. |
| **Paper width** | Paper roll size: **58 mm** or **80 mm**. |
### 3. Printing trigger
| Setting | Description |
|---------|-------------|
| **Print the ticket** | Order status that triggers automatic printing: **When the order is paid** · **When the order is processing** · **When the order is completed**. |
| **Copies** | Number of copies to print automatically for each order (1 to 3). |
| **Time zone** | Adjusts the printed delivery/pickup times if your server is in a different time zone. |
### 4. Receipt header & footer
| Setting | Description |
|---------|-------------|
| **Logo URL** | HTTPS URL of your logo. Recommended max width ~570px. Keep the file small to reduce data usage and improve print speed, if printing is blocked, test without the logo first. |
| **Title** | Title shown at the top of the ticket. |
| **Company name / Company ID / Address / Postcode / City / Phone / Email** | Store details printed in the receipt footer. |
| **Product options detail** | Choose **Full details** or **Minimal details** for the product options printed on each line. |
### 5. Receipt wording
Customize every label printed on the ticket (Order, Product, Price, Subtotal, Tax, Total, Shipping,
Total due, Customer note…). Defaults are in English; type your own wording in any language.
### 6. Advanced
| Setting | Description |
|---------|-------------|
| **Multi-vendor mapping** | Split orders between multiple printers by vendor. Format: `vendor_id:printer_uid` separated by `\|\|`. Example: `4:DESNBXP887K\|\|7:DESHKTI4EOW` |
---
## Preview an order ticket
At the bottom of the settings page, the **Preview an order ticket** tool renders the exact receipt
for any existing order, without printing it and without needing a printer connected. Handy to check
your wording and layout before going live.
---
## Where to find printing logs
Every print attempt (success or failure) is recorded as an **order note** and under
**WooCommerce → Status → Logs** (source `expedyprint`), so you always know what happened.
---
## Compatible plugins
The Expedy plugin is compatible with the following WooCommerce extensions:
- YITH (sub-items / product attributes)
- WooCommerce TM Extra Product Options
- ODT Extended / WooODT Lite (Byconsole)
- Advanced Product Fields Pro (StudioWombat)
- WooCommerce Local Pickup Time Select
- WCFM, Multi Vendor Marketplace Plugin
> We regularly add new compatible plugins. If yours isn't listed, [contact our support team](https://help.expedy.io/support/tickets/new).
---
## Build your own integration
Prefer to print from your own application or connect another platform instead of using this
WooCommerce plugin? Use the official Node.js SDK and API examples:
👉 **[github.com/ExpedyDev/expedy-sdk-node](https://github.com/ExpedyDev/expedy-sdk-node)**
It shows how to authenticate, list your printers and send print jobs through the Expedy API v2.
---
url: https://docs.expedy.io/en/integrations/relay-app/connect-a-receipt-printer-to-relay-app
title: Print from Relay.app with Expedy PRINT
updated_at: 2026-10-16T12:51:51.534765+00:00
---
# Print from Relay.app with Expedy PRINT
[Relay.app](https://www.relay.app/) is an automation platform. It reaches Expedy PRINT in two ways: through **Zapier**, with no code, or through the **Expedy REST API**, when you want full control over the ticket.
## What you need
- An Expedy account with an active printer. Not added yet? Follow the guide for your machine, [Expedy XPDY80](/expedy-print/installation/add-an-expedy-xpdy80-cloud-printer-to-your-account), [HSPOS](/expedy-print/installation/add-an-hspos-cloud-printer-to-your-account), [Star Micronics](/expedy-print/installation/add-a-star-micronics-printer-to-your-account) or [Raspberry Pi](/expedy-print/installation/add-a-raspberry-pi-cloud-print-server-to-your-account)
- Your **API SID**, **API TOKEN** and **API Printer UID**, all three on the printer page of the [Expedy console](https://www.expedy.fr/console/v3/), in the **API Keys & UID** card
## Option 1, through Zapier, no code
Relay.app connects to Zapier, and Zapier ships a ready-made **Expedy Print** action. The recipe is always the same: an event in Relay.app triggers **Create a Print Job** in Expedy Print, and you map the fields you want on the ticket.
Full walkthrough: **[How to integrate Expedy Print with Zapier](/integrations/zapier/how-to-integrate-expedy-print-with-zapier)**
## Option 2, through the REST API
If Relay.app can issue an HTTP request, it can drive the printer directly.
```api
POST https://www.expedy.fr/api/v2/printers/{printer_uid}/print
```
Authentication uses an `Authorization` header carrying your `SID:TOKEN`, with no `Bearer` prefix. Parameters and a complete example are in [Create a Print Job](/expedy-print/api-print-v2/create-a-print-job).
## Formatting the ticket
Whichever route you take, the message accepts the Expedy layout tags:
| What you want | Where to look |
|---|---|
| Align, resize or emphasise text | [Text Layout](/expedy-print/receipt-layout/text-layout-tags) |
| Print a logo or an image | [Image and Logo](/expedy-print/receipt-layout/image-and-logo-printing) |
| Print a QR code | [QR Code](/expedy-print/receipt-layout/qr-code) |
| Print a barcode | [EAN13 Barcode](/expedy-print/receipt-layout/ean13-barcode) |
> Depending on the connector or the software you use, this setup may be handled by your partner or your agency. Check with them before you start.
## Need help?
- [Browse all integrations](/integrations)
- [Open a support ticket](https://help.expedy.io/support/tickets/new)
---
url: https://docs.expedy.io/en/integrations/shippypro/connect-a-receipt-printer-to-shippypro
title: Print your ShippyPro shipping labels automatically
updated_at: 2026-10-22T04:24:50.449666+00:00
---
# Print your ShippyPro shipping labels automatically
[ShippyPro](https://www.shippypro.com/) generates your carrier shipping labels. Through **Zapier**, the label PDF goes straight to your label printer the moment ShippyPro creates it, so nobody has to download it and print it by hand.
> An Expedy cloud receipt printer, XPDY80, HSPOS or Star Micronics, **cannot print a carrier label**: it is a receipt printer. Carrier labels always go through a **Raspberry Pi** or a **Cloud Print Box USB adapter** driving a label printer.
## What you need
- An Expedy account with an active **Raspberry Pi print server** or **Cloud Print Box USB adapter**. Not set up yet? See [Add a Raspberry Pi print server to your account](/expedy-print/installation/add-a-raspberry-pi-cloud-print-server-to-your-account)
- **Your own label printer**, connected by USB to that Raspberry Pi or adapter, with its port set to `LABEL`
- A ShippyPro account and a [Zapier](https://zapier.com/) account
- Your **API SID**, **API TOKEN** and **API Printer UID**, on the printer page of the [Expedy console](https://www.expedy.fr/console/v3/), in the **API Keys & UID** card
## Why a label printer
A carrier label is a PDF in a fixed format, most often 100 x 150 mm. A receipt printer cannot render it at the right size, so the job goes to a label printer driven by a Raspberry Pi or the Cloud Print Box.
On the printer page, run a **USB scan** and set the port that carries the label printer to `LABEL`, not `ESC/POS`. See [Installation on Raspberry Pi](/usb-cloud-printer-adapter/rpi-installation/installation-on-raspberry-pi).
## Build the Zap
1. In Zapier, create a Zap and pick **ShippyPro** as the trigger app
2. Choose the event that fires when a label is created
3. Add **Expedy Print** as the action, then **Create a Print Job**
4. Connect your Expedy account with your **Expedy SID** and your **Expedy TOKEN**
5. Enter the **Printer UID** of the label printer
6. In the message field, map the label PDF URL returned by ShippyPro
Step by step on the Zapier side: [How to integrate Expedy Print with Zapier](/integrations/zapier/how-to-integrate-expedy-print-with-zapier)
## What to send
A label printer takes the PDF URL **on its own, with no tag**:
```text
https://example.com/label.pdf
```
On an ESC/POS receipt printer the same URL has to be wrapped in the `` tag instead. Both forms are detailed in [PDF printing](/expedy-print/receipt-layout/print-pdf).
## Test it
Create a test label in ShippyPro and check that it comes out at the right size. If nothing prints:
- check the **Printer UID**, it must be the label printer, not the receipt printer
- check that the USB port is in `LABEL` mode after the scan
- check that the PDF URL is reachable without authentication, Expedy fetches it from its own servers
> Depending on the connector or the software you use, this setup may be handled by your partner or your agency. Check with them before you start.
## Need help?
- [Browse all integrations](/integrations)
- [Open a support ticket](https://help.expedy.io/support/tickets/new)
---
url: https://docs.expedy.io/en/integrations/veeqo/connect-a-receipt-printer-to-veeqo
title: Print from Veeqo with Expedy PRINT
updated_at: 2026-10-20T10:04:06.898766+00:00
---
# Print from Veeqo with Expedy PRINT
[Veeqo](https://www.veeqo.com/) is an inventory and order management tool. It reaches Expedy PRINT in two ways: through **Zapier**, with no code, or through the **Expedy REST API**, when you want full control over the ticket.
## What you need
- An Expedy account with an active printer. Not added yet? Follow the guide for your machine, [Expedy XPDY80](/expedy-print/installation/add-an-expedy-xpdy80-cloud-printer-to-your-account), [HSPOS](/expedy-print/installation/add-an-hspos-cloud-printer-to-your-account), [Star Micronics](/expedy-print/installation/add-a-star-micronics-printer-to-your-account) or [Raspberry Pi](/expedy-print/installation/add-a-raspberry-pi-cloud-print-server-to-your-account)
- Your **API SID**, **API TOKEN** and **API Printer UID**, all three on the printer page of the [Expedy console](https://www.expedy.fr/console/v3/), in the **API Keys & UID** card
## Option 1, through Zapier, no code
Veeqo connects to Zapier, and Zapier ships a ready-made **Expedy Print** action. The recipe is always the same: an event in Veeqo triggers **Create a Print Job** in Expedy Print, and you map the fields you want on the ticket.
Full walkthrough: **[How to integrate Expedy Print with Zapier](/integrations/zapier/how-to-integrate-expedy-print-with-zapier)**
## Option 2, through the REST API
If Veeqo can issue an HTTP request, it can drive the printer directly.
```api
POST https://www.expedy.fr/api/v2/printers/{printer_uid}/print
```
Authentication uses an `Authorization` header carrying your `SID:TOKEN`, with no `Bearer` prefix. Parameters and a complete example are in [Create a Print Job](/expedy-print/api-print-v2/create-a-print-job).
## Formatting the ticket
Whichever route you take, the message accepts the Expedy layout tags:
| What you want | Where to look |
|---|---|
| Align, resize or emphasise text | [Text Layout](/expedy-print/receipt-layout/text-layout-tags) |
| Print a logo or an image | [Image and Logo](/expedy-print/receipt-layout/image-and-logo-printing) |
| Print a QR code | [QR Code](/expedy-print/receipt-layout/qr-code) |
| Print a barcode | [EAN13 Barcode](/expedy-print/receipt-layout/ean13-barcode) |
> Depending on the connector or the software you use, this setup may be handled by your partner or your agency. Check with them before you start.
## Need help?
- [Browse all integrations](/integrations)
- [Open a support ticket](https://help.expedy.io/support/tickets/new)
---
url: https://docs.expedy.io/en/integrations/fresh-kds/connect-a-receipt-printer-to-fresh-kds
title: Print from Fresh KDS with Expedy PRINT
updated_at: 2026-10-18T23:09:16.871927+00:00
---
# Print from Fresh KDS with Expedy PRINT
[Fresh KDS](https://www.freshkds.com/) is a kitchen display system. It reaches Expedy PRINT in two ways: through **Zapier**, with no code, or through the **Expedy REST API**, when you want full control over the ticket.
## What you need
- An Expedy account with an active printer. Not added yet? Follow the guide for your machine, [Expedy XPDY80](/expedy-print/installation/add-an-expedy-xpdy80-cloud-printer-to-your-account), [HSPOS](/expedy-print/installation/add-an-hspos-cloud-printer-to-your-account), [Star Micronics](/expedy-print/installation/add-a-star-micronics-printer-to-your-account) or [Raspberry Pi](/expedy-print/installation/add-a-raspberry-pi-cloud-print-server-to-your-account)
- Your **API SID**, **API TOKEN** and **API Printer UID**, all three on the printer page of the [Expedy console](https://www.expedy.fr/console/v3/), in the **API Keys & UID** card
## Option 1, through Zapier, no code
Fresh KDS connects to Zapier, and Zapier ships a ready-made **Expedy Print** action. The recipe is always the same: an event in Fresh KDS triggers **Create a Print Job** in Expedy Print, and you map the fields you want on the ticket.
Full walkthrough: **[How to integrate Expedy Print with Zapier](/integrations/zapier/how-to-integrate-expedy-print-with-zapier)**
## Option 2, through the REST API
If Fresh KDS can issue an HTTP request, it can drive the printer directly.
```api
POST https://www.expedy.fr/api/v2/printers/{printer_uid}/print
```
Authentication uses an `Authorization` header carrying your `SID:TOKEN`, with no `Bearer` prefix. Parameters and a complete example are in [Create a Print Job](/expedy-print/api-print-v2/create-a-print-job).
## Formatting the ticket
Whichever route you take, the message accepts the Expedy layout tags:
| What you want | Where to look |
|---|---|
| Align, resize or emphasise text | [Text Layout](/expedy-print/receipt-layout/text-layout-tags) |
| Print a logo or an image | [Image and Logo](/expedy-print/receipt-layout/image-and-logo-printing) |
| Print a QR code | [QR Code](/expedy-print/receipt-layout/qr-code) |
| Print a barcode | [EAN13 Barcode](/expedy-print/receipt-layout/ean13-barcode) |
> Depending on the connector or the software you use, this setup may be handled by your partner or your agency. Check with them before you start.
## Need help?
- [Browse all integrations](/integrations)
- [Open a support ticket](https://help.expedy.io/support/tickets/new)
---
url: https://docs.expedy.io/en/integrations/flex-catering/connect-a-receipt-printer-to-flex-catering
title: Print from Flex Catering with Expedy PRINT
updated_at: 2026-10-23T04:30:05.455+00:00
---
# Print from Flex Catering with Expedy PRINT
**Flex Catering** is an ordering and catering platform. It reaches Expedy PRINT in two ways: through **Zapier**, with no code, or through the **Expedy REST API**, when you want full control over the ticket.
## What you need
- An Expedy account with an active printer. Not added yet? Follow the guide for your machine, [Expedy XPDY80](/expedy-print/installation/add-an-expedy-xpdy80-cloud-printer-to-your-account), [HSPOS](/expedy-print/installation/add-an-hspos-cloud-printer-to-your-account), [Star Micronics](/expedy-print/installation/add-a-star-micronics-printer-to-your-account) or [Raspberry Pi](/expedy-print/installation/add-a-raspberry-pi-cloud-print-server-to-your-account)
- Your **API SID**, **API TOKEN** and **API Printer UID**, all three on the printer page of the [Expedy console](https://www.expedy.fr/console/v3/), in the **API Keys & UID** card
## Option 1, through Zapier, no code
Flex Catering connects to Zapier, and Zapier ships a ready-made **Expedy Print** action. The recipe is always the same: an event in Flex Catering triggers **Create a Print Job** in Expedy Print, and you map the fields you want on the ticket.
Full walkthrough: **[How to integrate Expedy Print with Zapier](/integrations/zapier/how-to-integrate-expedy-print-with-zapier)**
## Option 2, through the REST API
If Flex Catering can issue an HTTP request, it can drive the printer directly.
```api
POST https://www.expedy.fr/api/v2/printers/{printer_uid}/print
```
Authentication uses an `Authorization` header carrying your `SID:TOKEN`, with no `Bearer` prefix. Parameters and a complete example are in [Create a Print Job](/expedy-print/api-print-v2/create-a-print-job).
## Formatting the ticket
Whichever route you take, the message accepts the Expedy layout tags:
| What you want | Where to look |
|---|---|
| Align, resize or emphasise text | [Text Layout](/expedy-print/receipt-layout/text-layout-tags) |
| Print a logo or an image | [Image and Logo](/expedy-print/receipt-layout/image-and-logo-printing) |
| Print a QR code | [QR Code](/expedy-print/receipt-layout/qr-code) |
| Print a barcode | [EAN13 Barcode](/expedy-print/receipt-layout/ean13-barcode) |
> Depending on the connector or the software you use, this setup may be handled by your partner or your agency. Check with them before you start.
## Need help?
- [Browse all integrations](/integrations)
- [Open a support ticket](https://help.expedy.io/support/tickets/new)
---
url: https://docs.expedy.io/en/integrations/google-sheets/connect-a-receipt-printer-to-google-sheets
title: Print from Google Sheets with Expedy PRINT
updated_at: 2026-10-22T04:11:07.151093+00:00
---
# Print from Google Sheets with Expedy PRINT
[Google Sheets](https://workspace.google.com/products/sheets/) is a collaborative data platform. It reaches Expedy PRINT in two ways: through **Zapier**, with no code, or through the **Expedy REST API**, when you want full control over the ticket.
## What you need
- An Expedy account with an active printer. Not added yet? Follow the guide for your machine, [Expedy XPDY80](/expedy-print/installation/add-an-expedy-xpdy80-cloud-printer-to-your-account), [HSPOS](/expedy-print/installation/add-an-hspos-cloud-printer-to-your-account), [Star Micronics](/expedy-print/installation/add-a-star-micronics-printer-to-your-account) or [Raspberry Pi](/expedy-print/installation/add-a-raspberry-pi-cloud-print-server-to-your-account)
- Your **API SID**, **API TOKEN** and **API Printer UID**, all three on the printer page of the [Expedy console](https://www.expedy.fr/console/v3/), in the **API Keys & UID** card
## Option 1, through Zapier, no code
Google Sheets connects to Zapier, and Zapier ships a ready-made **Expedy Print** action. The recipe is always the same: an event in Google Sheets triggers **Create a Print Job** in Expedy Print, and you map the fields you want on the ticket.
Full walkthrough: **[How to integrate Expedy Print with Zapier](/integrations/zapier/how-to-integrate-expedy-print-with-zapier)**
## Option 2, through the REST API
If Google Sheets can issue an HTTP request, it can drive the printer directly.
```api
POST https://www.expedy.fr/api/v2/printers/{printer_uid}/print
```
Authentication uses an `Authorization` header carrying your `SID:TOKEN`, with no `Bearer` prefix. Parameters and a complete example are in [Create a Print Job](/expedy-print/api-print-v2/create-a-print-job).
## Formatting the ticket
Whichever route you take, the message accepts the Expedy layout tags:
| What you want | Where to look |
|---|---|
| Align, resize or emphasise text | [Text Layout](/expedy-print/receipt-layout/text-layout-tags) |
| Print a logo or an image | [Image and Logo](/expedy-print/receipt-layout/image-and-logo-printing) |
| Print a QR code | [QR Code](/expedy-print/receipt-layout/qr-code) |
| Print a barcode | [EAN13 Barcode](/expedy-print/receipt-layout/ean13-barcode) |
> Depending on the connector or the software you use, this setup may be handled by your partner or your agency. Check with them before you start.
## Need help?
- [Browse all integrations](/integrations)
- [Open a support ticket](https://help.expedy.io/support/tickets/new)
---
url: https://docs.expedy.io/en/integrations/chataigne/connect-a-receipt-printer-to-chataigne
title: Receipt printing with Châtaigne
updated_at: 2026-10-21T16:15:35.323091+00:00
---
# Receipt printing with Châtaigne
[Châtaigne](https://chataigne.ai/) is an online ordering solution for hospitality. With Châtaigne, **the receipt printer is installed and configured by Châtaigne**, not from your Expedy console. Get in touch with them to have your printer activated.
## Who does what
| Party | Responsibility |
|---|---|
| Expedy | Supplies the cloud printer, its connectivity (Ethernet, Wi-Fi or 4G SIM) and the console where you follow your print jobs |
| Châtaigne | Pairs the printer with your account, sets the receipt layout and switches the service on |
## Getting your printer activated
1. Order your machine, or use the one you already have
2. Contact Châtaigne and tell them you want to print your orders on an Expedy cloud printer
3. Châtaigne handles the pairing and the receipt layout on their side
4. Once activated, orders print automatically, with nothing left to do on your part
> If your printer already appears in your Expedy account, give Châtaigne its **API Printer UID**, shown on the printer page in the **API Keys & UID** card of the [Expedy console](https://www.expedy.fr/console/v3/).
## Once it is live
From the [Expedy console](https://www.expedy.fr/console/v3/) you can, at any time:
- Check that the machine is reachable, with **Check Status** on the printer page
- Review every job in **Print Jobs History**
- Follow your monthly usage and change plan, the **FREE** plan being capped at 50 print requests per month
Anything about the order content or the ticket layout goes through Châtaigne, since the connection lives on their side.
## Need help?
- [Add your printer to your Expedy account](/expedy-print/installation/add-an-expedy-xpdy80-cloud-printer-to-your-account)
- [Browse all integrations](/integrations)
- Expedy hardware or account question: [open a support ticket](https://help.expedy.io/support/tickets/new)
---
url: https://docs.expedy.io/en/integrations/kurve-kiosks/connect-a-receipt-printer-to-kurve-kiosks
title: Print Kurve Kiosks orders on a receipt printer
updated_at: 2026-10-20T10:17:53.024267+00:00
---
# Print Kurve Kiosks orders on a receipt printer
**Kurve Kiosks** is a self-ordering kiosk solution. It connects to Expedy PRINT through **HubRise**: Kurve Kiosks sends its orders to HubRise, HubRise forwards them to your cloud printer, and the ticket comes out within seconds.
## What you need
- An Expedy account with an active printer. Not added yet? Follow the guide for your machine, [Expedy XPDY80](/expedy-print/installation/add-an-expedy-xpdy80-cloud-printer-to-your-account), [HSPOS](/expedy-print/installation/add-an-hspos-cloud-printer-to-your-account), [Star Micronics](/expedy-print/installation/add-a-star-micronics-printer-to-your-account) or [Raspberry Pi](/expedy-print/installation/add-a-raspberry-pi-cloud-print-server-to-your-account)
- A [HubRise account](https://manager.hubrise.com/signup), which aggregates your sales channels
- A Kurve Kiosks account linked to your HubRise location
## How it works
| Step | What happens |
|---|---|
| 1 | An order is placed on Kurve Kiosks |
| 2 | Kurve Kiosks pushes it to HubRise |
| 3 | Expedy PRINT receives it and prints a standardised ticket |
A single printer covers every channel connected to the same HubRise location, so you do not need one machine per platform.
## Connect it
The setup happens once, on the HubRise side, and is described step by step in the reference guide:
**[Connect a receipt printer to HubRise](/integrations/hubrise/connecting-a-receipt-printer-to-hubrise)**
Then link your Kurve Kiosks account to the same HubRise location. That part is done from the Kurve Kiosks back office, or by Kurve Kiosks support.
## Receipt settings
Once connected, the printer page in the [Expedy console](https://www.expedy.fr/console/v3/) controls what gets printed:
- **Print order when**, the status that triggers printing, `NEW`, `RECEIVED` or `ACCEPTED`
- **Then change status to**, the automatic status update applied after printing
- **Number of copies**, one ticket for the kitchen, one for the counter or the delivery bag
- The receipt header and footer, logo, company name, address and registration number
All of it is detailed in [Connect a receipt printer to HubRise](/integrations/hubrise/connecting-a-receipt-printer-to-hubrise).
> Depending on the connector or the point-of-sale software you use, this setup may be handled by your partner. Check with them before you start.
## Need help?
- [Browse all integrations](/integrations)
- [Open a support ticket](https://help.expedy.io/support/tickets/new)
---
url: https://docs.expedy.io/en/integrations/livepepper/connect-a-receipt-printer-to-livepepper
title: Print LivePepper orders on a receipt printer
updated_at: 2026-10-21T03:42:32.353124+00:00
---
# Print LivePepper orders on a receipt printer
[LivePepper](https://www.livepepper.com/) is an online ordering solution for hospitality. It connects to Expedy PRINT through **HubRise**: LivePepper sends its orders to HubRise, HubRise forwards them to your cloud printer, and the ticket comes out within seconds.
## What you need
- An Expedy account with an active printer. Not added yet? Follow the guide for your machine, [Expedy XPDY80](/expedy-print/installation/add-an-expedy-xpdy80-cloud-printer-to-your-account), [HSPOS](/expedy-print/installation/add-an-hspos-cloud-printer-to-your-account), [Star Micronics](/expedy-print/installation/add-a-star-micronics-printer-to-your-account) or [Raspberry Pi](/expedy-print/installation/add-a-raspberry-pi-cloud-print-server-to-your-account)
- A [HubRise account](https://manager.hubrise.com/signup), which aggregates your sales channels
- A LivePepper account linked to your HubRise location
## How it works
| Step | What happens |
|---|---|
| 1 | An order is placed on LivePepper |
| 2 | LivePepper pushes it to HubRise |
| 3 | Expedy PRINT receives it and prints a standardised ticket |
A single printer covers every channel connected to the same HubRise location, so you do not need one machine per platform.
## Connect it
The setup happens once, on the HubRise side, and is described step by step in the reference guide:
**[Connect a receipt printer to HubRise](/integrations/hubrise/connecting-a-receipt-printer-to-hubrise)**
Then link your LivePepper account to the same HubRise location. That part is done from the LivePepper back office, or by LivePepper support.
## Receipt settings
Once connected, the printer page in the [Expedy console](https://www.expedy.fr/console/v3/) controls what gets printed:
- **Print order when**, the status that triggers printing, `NEW`, `RECEIVED` or `ACCEPTED`
- **Then change status to**, the automatic status update applied after printing
- **Number of copies**, one ticket for the kitchen, one for the counter or the delivery bag
- The receipt header and footer, logo, company name, address and registration number
All of it is detailed in [Connect a receipt printer to HubRise](/integrations/hubrise/connecting-a-receipt-printer-to-hubrise).
> Depending on the connector or the point-of-sale software you use, this setup may be handled by your partner. Check with them before you start.
## Need help?
- [Browse all integrations](/integrations)
- [Open a support ticket](https://help.expedy.io/support/tickets/new)
---
url: https://docs.expedy.io/en/integrations/love2food/connect-a-receipt-printer-to-love2food
title: Receipt printing with Love2Food
updated_at: 2026-10-21T14:29:15.151533+00:00
---
# Receipt printing with Love2Food
**Love2Food** is an order aggregation platform. With Love2Food, **the receipt printer is installed and configured by Love2Food**, not from your Expedy console. Get in touch with them to have your printer activated.
## Who does what
| Party | Responsibility |
|---|---|
| Expedy | Supplies the cloud printer, its connectivity (Ethernet, Wi-Fi or 4G SIM) and the console where you follow your print jobs |
| Love2Food | Pairs the printer with your account, sets the receipt layout and switches the service on |
## Getting your printer activated
1. Order your machine, or use the one you already have
2. Contact Love2Food and tell them you want to print your orders on an Expedy cloud printer
3. Love2Food handles the pairing and the receipt layout on their side
4. Once activated, orders print automatically, with nothing left to do on your part
> If your printer already appears in your Expedy account, give Love2Food its **API Printer UID**, shown on the printer page in the **API Keys & UID** card of the [Expedy console](https://www.expedy.fr/console/v3/).
## Once it is live
From the [Expedy console](https://www.expedy.fr/console/v3/) you can, at any time:
- Check that the machine is reachable, with **Check Status** on the printer page
- Review every job in **Print Jobs History**
- Follow your monthly usage and change plan, the **FREE** plan being capped at 50 print requests per month
Anything about the order content or the ticket layout goes through Love2Food, since the connection lives on their side.
## Need help?
- [Add your printer to your Expedy account](/expedy-print/installation/add-an-expedy-xpdy80-cloud-printer-to-your-account)
- [Browse all integrations](/integrations)
- Expedy hardware or account question: [open a support ticket](https://help.expedy.io/support/tickets/new)
---
url: https://docs.expedy.io/en/integrations/magento/connect-a-receipt-printer-to-magento
title: Print from Magento with Expedy PRINT
updated_at: 2026-10-22T21:58:58.792951+00:00
---
# Print from Magento with Expedy PRINT
[Magento](https://business.adobe.com/products/magento/magento-commerce.html) is an eCommerce platform. It reaches Expedy PRINT in two ways: through **Zapier**, with no code, or through the **Expedy REST API**, when you want full control over the ticket.
## What you need
- An Expedy account with an active printer. Not added yet? Follow the guide for your machine, [Expedy XPDY80](/expedy-print/installation/add-an-expedy-xpdy80-cloud-printer-to-your-account), [HSPOS](/expedy-print/installation/add-an-hspos-cloud-printer-to-your-account), [Star Micronics](/expedy-print/installation/add-a-star-micronics-printer-to-your-account) or [Raspberry Pi](/expedy-print/installation/add-a-raspberry-pi-cloud-print-server-to-your-account)
- Your **API SID**, **API TOKEN** and **API Printer UID**, all three on the printer page of the [Expedy console](https://www.expedy.fr/console/v3/), in the **API Keys & UID** card
## Option 1, through Zapier, no code
Magento connects to Zapier, and Zapier ships a ready-made **Expedy Print** action. The recipe is always the same: an event in Magento triggers **Create a Print Job** in Expedy Print, and you map the fields you want on the ticket.
Full walkthrough: **[How to integrate Expedy Print with Zapier](/integrations/zapier/how-to-integrate-expedy-print-with-zapier)**
## Option 2, through the REST API
If Magento can issue an HTTP request, it can drive the printer directly.
```api
POST https://www.expedy.fr/api/v2/printers/{printer_uid}/print
```
Authentication uses an `Authorization` header carrying your `SID:TOKEN`, with no `Bearer` prefix. Parameters and a complete example are in [Create a Print Job](/expedy-print/api-print-v2/create-a-print-job).
## Formatting the ticket
Whichever route you take, the message accepts the Expedy layout tags:
| What you want | Where to look |
|---|---|
| Align, resize or emphasise text | [Text Layout](/expedy-print/receipt-layout/text-layout-tags) |
| Print a logo or an image | [Image and Logo](/expedy-print/receipt-layout/image-and-logo-printing) |
| Print a QR code | [QR Code](/expedy-print/receipt-layout/qr-code) |
| Print a barcode | [EAN13 Barcode](/expedy-print/receipt-layout/ean13-barcode) |
> Depending on the connector or the software you use, this setup may be handled by your partner or your agency. Check with them before you start.
## Need help?
- [Browse all integrations](/integrations)
- [Open a support ticket](https://help.expedy.io/support/tickets/new)
---
url: https://docs.expedy.io/en/integrations/stripe/connect-a-receipt-printer-to-stripe
title: Print from Stripe with Expedy PRINT
updated_at: 2026-10-23T00:04:03.804011+00:00
---
# Print from Stripe with Expedy PRINT
[Stripe](https://stripe.com/) is an online payment platform. It reaches Expedy PRINT in two ways: through **Zapier**, with no code, or through the **Expedy REST API**, when you want full control over the ticket.
## What you need
- An Expedy account with an active printer. Not added yet? Follow the guide for your machine, [Expedy XPDY80](/expedy-print/installation/add-an-expedy-xpdy80-cloud-printer-to-your-account), [HSPOS](/expedy-print/installation/add-an-hspos-cloud-printer-to-your-account), [Star Micronics](/expedy-print/installation/add-a-star-micronics-printer-to-your-account) or [Raspberry Pi](/expedy-print/installation/add-a-raspberry-pi-cloud-print-server-to-your-account)
- Your **API SID**, **API TOKEN** and **API Printer UID**, all three on the printer page of the [Expedy console](https://www.expedy.fr/console/v3/), in the **API Keys & UID** card
## Option 1, through Zapier, no code
Stripe connects to Zapier, and Zapier ships a ready-made **Expedy Print** action. The recipe is always the same: an event in Stripe triggers **Create a Print Job** in Expedy Print, and you map the fields you want on the ticket.
Full walkthrough: **[How to integrate Expedy Print with Zapier](/integrations/zapier/how-to-integrate-expedy-print-with-zapier)**
## Option 2, through the REST API
If Stripe can issue an HTTP request, it can drive the printer directly.
```api
POST https://www.expedy.fr/api/v2/printers/{printer_uid}/print
```
Authentication uses an `Authorization` header carrying your `SID:TOKEN`, with no `Bearer` prefix. Parameters and a complete example are in [Create a Print Job](/expedy-print/api-print-v2/create-a-print-job).
## Formatting the ticket
Whichever route you take, the message accepts the Expedy layout tags:
| What you want | Where to look |
|---|---|
| Align, resize or emphasise text | [Text Layout](/expedy-print/receipt-layout/text-layout-tags) |
| Print a logo or an image | [Image and Logo](/expedy-print/receipt-layout/image-and-logo-printing) |
| Print a QR code | [QR Code](/expedy-print/receipt-layout/qr-code) |
| Print a barcode | [EAN13 Barcode](/expedy-print/receipt-layout/ean13-barcode) |
> Depending on the connector or the software you use, this setup may be handled by your partner or your agency. Check with them before you start.
## Need help?
- [Browse all integrations](/integrations)
- [Open a support ticket](https://help.expedy.io/support/tickets/new)
---
url: https://docs.expedy.io/en/integrations/lightspeed-retail/connect-a-receipt-printer-to-lightspeed-retail
title: Print from Lightspeed Retail POS with Expedy PRINT
updated_at: 2026-10-22T08:42:49.215292+00:00
---
# Print from Lightspeed Retail POS with Expedy PRINT
[Lightspeed Retail POS](https://www.lightspeedhq.com/) is a point-of-sale solution. It reaches Expedy PRINT in two ways: through **Zapier**, with no code, or through the **Expedy REST API**, when you want full control over the ticket.
## What you need
- An Expedy account with an active printer. Not added yet? Follow the guide for your machine, [Expedy XPDY80](/expedy-print/installation/add-an-expedy-xpdy80-cloud-printer-to-your-account), [HSPOS](/expedy-print/installation/add-an-hspos-cloud-printer-to-your-account), [Star Micronics](/expedy-print/installation/add-a-star-micronics-printer-to-your-account) or [Raspberry Pi](/expedy-print/installation/add-a-raspberry-pi-cloud-print-server-to-your-account)
- Your **API SID**, **API TOKEN** and **API Printer UID**, all three on the printer page of the [Expedy console](https://www.expedy.fr/console/v3/), in the **API Keys & UID** card
## Option 1, through Zapier, no code
Lightspeed Retail POS connects to Zapier, and Zapier ships a ready-made **Expedy Print** action. The recipe is always the same: an event in Lightspeed Retail POS triggers **Create a Print Job** in Expedy Print, and you map the fields you want on the ticket.
Full walkthrough: **[How to integrate Expedy Print with Zapier](/integrations/zapier/how-to-integrate-expedy-print-with-zapier)**
## Option 2, through the REST API
If Lightspeed Retail POS can issue an HTTP request, it can drive the printer directly.
```api
POST https://www.expedy.fr/api/v2/printers/{printer_uid}/print
```
Authentication uses an `Authorization` header carrying your `SID:TOKEN`, with no `Bearer` prefix. Parameters and a complete example are in [Create a Print Job](/expedy-print/api-print-v2/create-a-print-job).
## Formatting the ticket
Whichever route you take, the message accepts the Expedy layout tags:
| What you want | Where to look |
|---|---|
| Align, resize or emphasise text | [Text Layout](/expedy-print/receipt-layout/text-layout-tags) |
| Print a logo or an image | [Image and Logo](/expedy-print/receipt-layout/image-and-logo-printing) |
| Print a QR code | [QR Code](/expedy-print/receipt-layout/qr-code) |
| Print a barcode | [EAN13 Barcode](/expedy-print/receipt-layout/ean13-barcode) |
> Depending on the connector or the software you use, this setup may be handled by your partner or your agency. Check with them before you start.
## Need help?
- [Browse all integrations](/integrations)
- [Open a support ticket](https://help.expedy.io/support/tickets/new)
---
url: https://docs.expedy.io/en/integrations/softr/connect-a-receipt-printer-to-softr
title: Print from Softr with Expedy PRINT
updated_at: 2026-10-21T03:22:51.737292+00:00
---
# Print from Softr with Expedy PRINT
[Softr](https://www.softr.io/) is a no-code app building platform. It reaches Expedy PRINT in two ways: through **Zapier**, with no code, or through the **Expedy REST API**, when you want full control over the ticket.
## What you need
- An Expedy account with an active printer. Not added yet? Follow the guide for your machine, [Expedy XPDY80](/expedy-print/installation/add-an-expedy-xpdy80-cloud-printer-to-your-account), [HSPOS](/expedy-print/installation/add-an-hspos-cloud-printer-to-your-account), [Star Micronics](/expedy-print/installation/add-a-star-micronics-printer-to-your-account) or [Raspberry Pi](/expedy-print/installation/add-a-raspberry-pi-cloud-print-server-to-your-account)
- Your **API SID**, **API TOKEN** and **API Printer UID**, all three on the printer page of the [Expedy console](https://www.expedy.fr/console/v3/), in the **API Keys & UID** card
## Option 1, through Zapier, no code
Softr connects to Zapier, and Zapier ships a ready-made **Expedy Print** action. The recipe is always the same: an event in Softr triggers **Create a Print Job** in Expedy Print, and you map the fields you want on the ticket.
Full walkthrough: **[How to integrate Expedy Print with Zapier](/integrations/zapier/how-to-integrate-expedy-print-with-zapier)**
## Option 2, through the REST API
If Softr can issue an HTTP request, it can drive the printer directly.
```api
POST https://www.expedy.fr/api/v2/printers/{printer_uid}/print
```
Authentication uses an `Authorization` header carrying your `SID:TOKEN`, with no `Bearer` prefix. Parameters and a complete example are in [Create a Print Job](/expedy-print/api-print-v2/create-a-print-job).
## Formatting the ticket
Whichever route you take, the message accepts the Expedy layout tags:
| What you want | Where to look |
|---|---|
| Align, resize or emphasise text | [Text Layout](/expedy-print/receipt-layout/text-layout-tags) |
| Print a logo or an image | [Image and Logo](/expedy-print/receipt-layout/image-and-logo-printing) |
| Print a QR code | [QR Code](/expedy-print/receipt-layout/qr-code) |
| Print a barcode | [EAN13 Barcode](/expedy-print/receipt-layout/ean13-barcode) |
> Depending on the connector or the software you use, this setup may be handled by your partner or your agency. Check with them before you start.
## Need help?
- [Browse all integrations](/integrations)
- [Open a support ticket](https://help.expedy.io/support/tickets/new)
---
url: https://docs.expedy.io/en/integrations/delicity/connect-a-receipt-printer-to-delicity
title: Print Delicity orders on a receipt printer
updated_at: 2026-10-19T05:03:11.636944+00:00
---
# Print Delicity orders on a receipt printer
**Delicity** is a meal delivery platform. It connects to Expedy PRINT through **HubRise**: Delicity sends its orders to HubRise, HubRise forwards them to your cloud printer, and the ticket comes out within seconds.
## What you need
- An Expedy account with an active printer. Not added yet? Follow the guide for your machine, [Expedy XPDY80](/expedy-print/installation/add-an-expedy-xpdy80-cloud-printer-to-your-account), [HSPOS](/expedy-print/installation/add-an-hspos-cloud-printer-to-your-account), [Star Micronics](/expedy-print/installation/add-a-star-micronics-printer-to-your-account) or [Raspberry Pi](/expedy-print/installation/add-a-raspberry-pi-cloud-print-server-to-your-account)
- A [HubRise account](https://manager.hubrise.com/signup), which aggregates your sales channels
- A Delicity account linked to your HubRise location
## How it works
| Step | What happens |
|---|---|
| 1 | An order is placed on Delicity |
| 2 | Delicity pushes it to HubRise |
| 3 | Expedy PRINT receives it and prints a standardised ticket |
A single printer covers every channel connected to the same HubRise location, so you do not need one machine per platform.
## Connect it
The setup happens once, on the HubRise side, and is described step by step in the reference guide:
**[Connect a receipt printer to HubRise](/integrations/hubrise/connecting-a-receipt-printer-to-hubrise)**
Then link your Delicity account to the same HubRise location. That part is done from the Delicity back office, or by Delicity support.
## Receipt settings
Once connected, the printer page in the [Expedy console](https://www.expedy.fr/console/v3/) controls what gets printed:
- **Print order when**, the status that triggers printing, `NEW`, `RECEIVED` or `ACCEPTED`
- **Then change status to**, the automatic status update applied after printing
- **Number of copies**, one ticket for the kitchen, one for the counter or the delivery bag
- The receipt header and footer, logo, company name, address and registration number
All of it is detailed in [Connect a receipt printer to HubRise](/integrations/hubrise/connecting-a-receipt-printer-to-hubrise).
> Depending on the connector or the point-of-sale software you use, this setup may be handled by your partner. Check with them before you start.
## Need help?
- [Browse all integrations](/integrations)
- [Open a support ticket](https://help.expedy.io/support/tickets/new)
---
url: https://docs.expedy.io/en/integrations/typeform/connect-a-receipt-printer-to-typeform
title: Print from Typeform with Expedy PRINT
updated_at: 2026-10-19T20:19:48.332458+00:00
---
# Print from Typeform with Expedy PRINT
[Typeform](https://www.typeform.com/) is an online form builder. It reaches Expedy PRINT in two ways: through **Zapier**, with no code, or through the **Expedy REST API**, when you want full control over the ticket.
## What you need
- An Expedy account with an active printer. Not added yet? Follow the guide for your machine, [Expedy XPDY80](/expedy-print/installation/add-an-expedy-xpdy80-cloud-printer-to-your-account), [HSPOS](/expedy-print/installation/add-an-hspos-cloud-printer-to-your-account), [Star Micronics](/expedy-print/installation/add-a-star-micronics-printer-to-your-account) or [Raspberry Pi](/expedy-print/installation/add-a-raspberry-pi-cloud-print-server-to-your-account)
- Your **API SID**, **API TOKEN** and **API Printer UID**, all three on the printer page of the [Expedy console](https://www.expedy.fr/console/v3/), in the **API Keys & UID** card
## Option 1, through Zapier, no code
Typeform connects to Zapier, and Zapier ships a ready-made **Expedy Print** action. The recipe is always the same: an event in Typeform triggers **Create a Print Job** in Expedy Print, and you map the fields you want on the ticket.
Full walkthrough: **[How to integrate Expedy Print with Zapier](/integrations/zapier/how-to-integrate-expedy-print-with-zapier)**
## Option 2, through the REST API
If Typeform can issue an HTTP request, it can drive the printer directly.
```api
POST https://www.expedy.fr/api/v2/printers/{printer_uid}/print
```
Authentication uses an `Authorization` header carrying your `SID:TOKEN`, with no `Bearer` prefix. Parameters and a complete example are in [Create a Print Job](/expedy-print/api-print-v2/create-a-print-job).
## Formatting the ticket
Whichever route you take, the message accepts the Expedy layout tags:
| What you want | Where to look |
|---|---|
| Align, resize or emphasise text | [Text Layout](/expedy-print/receipt-layout/text-layout-tags) |
| Print a logo or an image | [Image and Logo](/expedy-print/receipt-layout/image-and-logo-printing) |
| Print a QR code | [QR Code](/expedy-print/receipt-layout/qr-code) |
| Print a barcode | [EAN13 Barcode](/expedy-print/receipt-layout/ean13-barcode) |
> Depending on the connector or the software you use, this setup may be handled by your partner or your agency. Check with them before you start.
## Need help?
- [Browse all integrations](/integrations)
- [Open a support ticket](https://help.expedy.io/support/tickets/new)
---
url: https://docs.expedy.io/en/integrations/cs-cart/connect-a-receipt-printer-to-cs-cart
title: Print from CS-Cart with Expedy PRINT
updated_at: 2026-10-22T08:14:08.778252+00:00
---
# Print from CS-Cart with Expedy PRINT
[CS-Cart](https://www.cs-cart.com/) is an eCommerce platform. It reaches Expedy PRINT in two ways: through **Zapier**, with no code, or through the **Expedy REST API**, when you want full control over the ticket.
## What you need
- An Expedy account with an active printer. Not added yet? Follow the guide for your machine, [Expedy XPDY80](/expedy-print/installation/add-an-expedy-xpdy80-cloud-printer-to-your-account), [HSPOS](/expedy-print/installation/add-an-hspos-cloud-printer-to-your-account), [Star Micronics](/expedy-print/installation/add-a-star-micronics-printer-to-your-account) or [Raspberry Pi](/expedy-print/installation/add-a-raspberry-pi-cloud-print-server-to-your-account)
- Your **API SID**, **API TOKEN** and **API Printer UID**, all three on the printer page of the [Expedy console](https://www.expedy.fr/console/v3/), in the **API Keys & UID** card
## Option 1, through Zapier, no code
CS-Cart connects to Zapier, and Zapier ships a ready-made **Expedy Print** action. The recipe is always the same: an event in CS-Cart triggers **Create a Print Job** in Expedy Print, and you map the fields you want on the ticket.
Full walkthrough: **[How to integrate Expedy Print with Zapier](/integrations/zapier/how-to-integrate-expedy-print-with-zapier)**
## Option 2, through the REST API
If CS-Cart can issue an HTTP request, it can drive the printer directly.
```api
POST https://www.expedy.fr/api/v2/printers/{printer_uid}/print
```
Authentication uses an `Authorization` header carrying your `SID:TOKEN`, with no `Bearer` prefix. Parameters and a complete example are in [Create a Print Job](/expedy-print/api-print-v2/create-a-print-job).
## Formatting the ticket
Whichever route you take, the message accepts the Expedy layout tags:
| What you want | Where to look |
|---|---|
| Align, resize or emphasise text | [Text Layout](/expedy-print/receipt-layout/text-layout-tags) |
| Print a logo or an image | [Image and Logo](/expedy-print/receipt-layout/image-and-logo-printing) |
| Print a QR code | [QR Code](/expedy-print/receipt-layout/qr-code) |
| Print a barcode | [EAN13 Barcode](/expedy-print/receipt-layout/ean13-barcode) |
> Depending on the connector or the software you use, this setup may be handled by your partner or your agency. Check with them before you start.
## Need help?
- [Browse all integrations](/integrations)
- [Open a support ticket](https://help.expedy.io/support/tickets/new)
---
url: https://docs.expedy.io/en/integrations/katana/connect-a-receipt-printer-to-katana
title: Print from Katana with Expedy PRINT
updated_at: 2026-10-19T18:10:42.510929+00:00
---
# Print from Katana with Expedy PRINT
**Katana** is an inventory and order management tool. It reaches Expedy PRINT in two ways: through **Zapier**, with no code, or through the **Expedy REST API**, when you want full control over the ticket.
## What you need
- An Expedy account with an active printer. Not added yet? Follow the guide for your machine, [Expedy XPDY80](/expedy-print/installation/add-an-expedy-xpdy80-cloud-printer-to-your-account), [HSPOS](/expedy-print/installation/add-an-hspos-cloud-printer-to-your-account), [Star Micronics](/expedy-print/installation/add-a-star-micronics-printer-to-your-account) or [Raspberry Pi](/expedy-print/installation/add-a-raspberry-pi-cloud-print-server-to-your-account)
- Your **API SID**, **API TOKEN** and **API Printer UID**, all three on the printer page of the [Expedy console](https://www.expedy.fr/console/v3/), in the **API Keys & UID** card
## Option 1, through Zapier, no code
Katana connects to Zapier, and Zapier ships a ready-made **Expedy Print** action. The recipe is always the same: an event in Katana triggers **Create a Print Job** in Expedy Print, and you map the fields you want on the ticket.
Full walkthrough: **[How to integrate Expedy Print with Zapier](/integrations/zapier/how-to-integrate-expedy-print-with-zapier)**
## Option 2, through the REST API
If Katana can issue an HTTP request, it can drive the printer directly.
```api
POST https://www.expedy.fr/api/v2/printers/{printer_uid}/print
```
Authentication uses an `Authorization` header carrying your `SID:TOKEN`, with no `Bearer` prefix. Parameters and a complete example are in [Create a Print Job](/expedy-print/api-print-v2/create-a-print-job).
## Formatting the ticket
Whichever route you take, the message accepts the Expedy layout tags:
| What you want | Where to look |
|---|---|
| Align, resize or emphasise text | [Text Layout](/expedy-print/receipt-layout/text-layout-tags) |
| Print a logo or an image | [Image and Logo](/expedy-print/receipt-layout/image-and-logo-printing) |
| Print a QR code | [QR Code](/expedy-print/receipt-layout/qr-code) |
| Print a barcode | [EAN13 Barcode](/expedy-print/receipt-layout/ean13-barcode) |
> Depending on the connector or the software you use, this setup may be handled by your partner or your agency. Check with them before you start.
## Need help?
- [Browse all integrations](/integrations)
- [Open a support ticket](https://help.expedy.io/support/tickets/new)
---
url: https://docs.expedy.io/en/integrations/honeycart/connect-a-receipt-printer-to-honeycart
title: Print from HoneyCart with Expedy PRINT
updated_at: 2026-10-20T14:23:57.111332+00:00
---
# Print from HoneyCart with Expedy PRINT
**HoneyCart** is an ordering and catering platform. It reaches Expedy PRINT in two ways: through **Zapier**, with no code, or through the **Expedy REST API**, when you want full control over the ticket.
## What you need
- An Expedy account with an active printer. Not added yet? Follow the guide for your machine, [Expedy XPDY80](/expedy-print/installation/add-an-expedy-xpdy80-cloud-printer-to-your-account), [HSPOS](/expedy-print/installation/add-an-hspos-cloud-printer-to-your-account), [Star Micronics](/expedy-print/installation/add-a-star-micronics-printer-to-your-account) or [Raspberry Pi](/expedy-print/installation/add-a-raspberry-pi-cloud-print-server-to-your-account)
- Your **API SID**, **API TOKEN** and **API Printer UID**, all three on the printer page of the [Expedy console](https://www.expedy.fr/console/v3/), in the **API Keys & UID** card
## Option 1, through Zapier, no code
HoneyCart connects to Zapier, and Zapier ships a ready-made **Expedy Print** action. The recipe is always the same: an event in HoneyCart triggers **Create a Print Job** in Expedy Print, and you map the fields you want on the ticket.
Full walkthrough: **[How to integrate Expedy Print with Zapier](/integrations/zapier/how-to-integrate-expedy-print-with-zapier)**
## Option 2, through the REST API
If HoneyCart can issue an HTTP request, it can drive the printer directly.
```api
POST https://www.expedy.fr/api/v2/printers/{printer_uid}/print
```
Authentication uses an `Authorization` header carrying your `SID:TOKEN`, with no `Bearer` prefix. Parameters and a complete example are in [Create a Print Job](/expedy-print/api-print-v2/create-a-print-job).
## Formatting the ticket
Whichever route you take, the message accepts the Expedy layout tags:
| What you want | Where to look |
|---|---|
| Align, resize or emphasise text | [Text Layout](/expedy-print/receipt-layout/text-layout-tags) |
| Print a logo or an image | [Image and Logo](/expedy-print/receipt-layout/image-and-logo-printing) |
| Print a QR code | [QR Code](/expedy-print/receipt-layout/qr-code) |
| Print a barcode | [EAN13 Barcode](/expedy-print/receipt-layout/ean13-barcode) |
> Depending on the connector or the software you use, this setup may be handled by your partner or your agency. Check with them before you start.
## Need help?
- [Browse all integrations](/integrations)
- [Open a support ticket](https://help.expedy.io/support/tickets/new)
---
url: https://docs.expedy.io/en/integrations/gumroad/connect-a-receipt-printer-to-gumroad
title: Print from Gumroad with Expedy PRINT
updated_at: 2026-10-19T21:10:36.49936+00:00
---
# Print from Gumroad with Expedy PRINT
[Gumroad](https://gumroad.com/) is an online cart and checkout platform. It reaches Expedy PRINT in two ways: through **Zapier**, with no code, or through the **Expedy REST API**, when you want full control over the ticket.
## What you need
- An Expedy account with an active printer. Not added yet? Follow the guide for your machine, [Expedy XPDY80](/expedy-print/installation/add-an-expedy-xpdy80-cloud-printer-to-your-account), [HSPOS](/expedy-print/installation/add-an-hspos-cloud-printer-to-your-account), [Star Micronics](/expedy-print/installation/add-a-star-micronics-printer-to-your-account) or [Raspberry Pi](/expedy-print/installation/add-a-raspberry-pi-cloud-print-server-to-your-account)
- Your **API SID**, **API TOKEN** and **API Printer UID**, all three on the printer page of the [Expedy console](https://www.expedy.fr/console/v3/), in the **API Keys & UID** card
## Option 1, through Zapier, no code
Gumroad connects to Zapier, and Zapier ships a ready-made **Expedy Print** action. The recipe is always the same: an event in Gumroad triggers **Create a Print Job** in Expedy Print, and you map the fields you want on the ticket.
Full walkthrough: **[How to integrate Expedy Print with Zapier](/integrations/zapier/how-to-integrate-expedy-print-with-zapier)**
## Option 2, through the REST API
If Gumroad can issue an HTTP request, it can drive the printer directly.
```api
POST https://www.expedy.fr/api/v2/printers/{printer_uid}/print
```
Authentication uses an `Authorization` header carrying your `SID:TOKEN`, with no `Bearer` prefix. Parameters and a complete example are in [Create a Print Job](/expedy-print/api-print-v2/create-a-print-job).
## Formatting the ticket
Whichever route you take, the message accepts the Expedy layout tags:
| What you want | Where to look |
|---|---|
| Align, resize or emphasise text | [Text Layout](/expedy-print/receipt-layout/text-layout-tags) |
| Print a logo or an image | [Image and Logo](/expedy-print/receipt-layout/image-and-logo-printing) |
| Print a QR code | [QR Code](/expedy-print/receipt-layout/qr-code) |
| Print a barcode | [EAN13 Barcode](/expedy-print/receipt-layout/ean13-barcode) |
> Depending on the connector or the software you use, this setup may be handled by your partner or your agency. Check with them before you start.
## Need help?
- [Browse all integrations](/integrations)
- [Open a support ticket](https://help.expedy.io/support/tickets/new)
---
url: https://docs.expedy.io/en/integrations/amazon-seller-central/connect-a-receipt-printer-to-amazon-seller-central
title: Print from Amazon Seller Central with Expedy PRINT
updated_at: 2026-10-20T11:54:36.640965+00:00
---
# Print from Amazon Seller Central with Expedy PRINT
[Amazon Seller Central](https://sellercentral.amazon.com/) is an online marketplace. It reaches Expedy PRINT in two ways: through **Zapier**, with no code, or through the **Expedy REST API**, when you want full control over the ticket.
## What you need
- An Expedy account with an active printer. Not added yet? Follow the guide for your machine, [Expedy XPDY80](/expedy-print/installation/add-an-expedy-xpdy80-cloud-printer-to-your-account), [HSPOS](/expedy-print/installation/add-an-hspos-cloud-printer-to-your-account), [Star Micronics](/expedy-print/installation/add-a-star-micronics-printer-to-your-account) or [Raspberry Pi](/expedy-print/installation/add-a-raspberry-pi-cloud-print-server-to-your-account)
- Your **API SID**, **API TOKEN** and **API Printer UID**, all three on the printer page of the [Expedy console](https://www.expedy.fr/console/v3/), in the **API Keys & UID** card
## Option 1, through Zapier, no code
Amazon Seller Central connects to Zapier, and Zapier ships a ready-made **Expedy Print** action. The recipe is always the same: an event in Amazon Seller Central triggers **Create a Print Job** in Expedy Print, and you map the fields you want on the ticket.
Full walkthrough: **[How to integrate Expedy Print with Zapier](/integrations/zapier/how-to-integrate-expedy-print-with-zapier)**
## Option 2, through the REST API
If Amazon Seller Central can issue an HTTP request, it can drive the printer directly.
```api
POST https://www.expedy.fr/api/v2/printers/{printer_uid}/print
```
Authentication uses an `Authorization` header carrying your `SID:TOKEN`, with no `Bearer` prefix. Parameters and a complete example are in [Create a Print Job](/expedy-print/api-print-v2/create-a-print-job).
## Formatting the ticket
Whichever route you take, the message accepts the Expedy layout tags:
| What you want | Where to look |
|---|---|
| Align, resize or emphasise text | [Text Layout](/expedy-print/receipt-layout/text-layout-tags) |
| Print a logo or an image | [Image and Logo](/expedy-print/receipt-layout/image-and-logo-printing) |
| Print a QR code | [QR Code](/expedy-print/receipt-layout/qr-code) |
| Print a barcode | [EAN13 Barcode](/expedy-print/receipt-layout/ean13-barcode) |
> Depending on the connector or the software you use, this setup may be handled by your partner or your agency. Check with them before you start.
## Need help?
- [Browse all integrations](/integrations)
- [Open a support ticket](https://help.expedy.io/support/tickets/new)
---
url: https://docs.expedy.io/en/integrations/servier-bar/connect-a-receipt-printer-to-servier-bar
title: Print Servier.bar orders on a receipt printer
updated_at: 2026-10-12T02:01:04.638482+00:00
---
# Print Servier.bar orders on a receipt printer
**Servier.bar** is an online ordering solution for hospitality. It connects to Expedy PRINT through **HubRise**: Servier.bar sends its orders to HubRise, HubRise forwards them to your cloud printer, and the ticket comes out within seconds.
## What you need
- An Expedy account with an active printer. Not added yet? Follow the guide for your machine, [Expedy XPDY80](/expedy-print/installation/add-an-expedy-xpdy80-cloud-printer-to-your-account), [HSPOS](/expedy-print/installation/add-an-hspos-cloud-printer-to-your-account), [Star Micronics](/expedy-print/installation/add-a-star-micronics-printer-to-your-account) or [Raspberry Pi](/expedy-print/installation/add-a-raspberry-pi-cloud-print-server-to-your-account)
- A [HubRise account](https://manager.hubrise.com/signup), which aggregates your sales channels
- A Servier.bar account linked to your HubRise location
## How it works
| Step | What happens |
|---|---|
| 1 | An order is placed on Servier.bar |
| 2 | Servier.bar pushes it to HubRise |
| 3 | Expedy PRINT receives it and prints a standardised ticket |
A single printer covers every channel connected to the same HubRise location, so you do not need one machine per platform.
## Connect it
The setup happens once, on the HubRise side, and is described step by step in the reference guide:
**[Connect a receipt printer to HubRise](/integrations/hubrise/connecting-a-receipt-printer-to-hubrise)**
Then link your Servier.bar account to the same HubRise location. That part is done from the Servier.bar back office, or by Servier.bar support.
## Receipt settings
Once connected, the printer page in the [Expedy console](https://www.expedy.fr/console/v3/) controls what gets printed:
- **Print order when**, the status that triggers printing, `NEW`, `RECEIVED` or `ACCEPTED`
- **Then change status to**, the automatic status update applied after printing
- **Number of copies**, one ticket for the kitchen, one for the counter or the delivery bag
- The receipt header and footer, logo, company name, address and registration number
All of it is detailed in [Connect a receipt printer to HubRise](/integrations/hubrise/connecting-a-receipt-printer-to-hubrise).
> Depending on the connector or the point-of-sale software you use, this setup may be handled by your partner. Check with them before you start.
## Need help?
- [Browse all integrations](/integrations)
- [Open a support ticket](https://help.expedy.io/support/tickets/new)
---
url: https://docs.expedy.io/en/integrations/wizishop/connect-a-receipt-printer-to-wizishop
title: Print from WiziShop with Expedy PRINT
updated_at: 2026-10-21T21:45:09.621223+00:00
---
# Print from WiziShop with Expedy PRINT
[WiziShop](https://www.wizishop.com/) is an eCommerce platform. It reaches Expedy PRINT in two ways: through **Zapier**, with no code, or through the **Expedy REST API**, when you want full control over the ticket.
## What you need
- An Expedy account with an active printer. Not added yet? Follow the guide for your machine, [Expedy XPDY80](/expedy-print/installation/add-an-expedy-xpdy80-cloud-printer-to-your-account), [HSPOS](/expedy-print/installation/add-an-hspos-cloud-printer-to-your-account), [Star Micronics](/expedy-print/installation/add-a-star-micronics-printer-to-your-account) or [Raspberry Pi](/expedy-print/installation/add-a-raspberry-pi-cloud-print-server-to-your-account)
- Your **API SID**, **API TOKEN** and **API Printer UID**, all three on the printer page of the [Expedy console](https://www.expedy.fr/console/v3/), in the **API Keys & UID** card
## Option 1, through Zapier, no code
WiziShop connects to Zapier, and Zapier ships a ready-made **Expedy Print** action. The recipe is always the same: an event in WiziShop triggers **Create a Print Job** in Expedy Print, and you map the fields you want on the ticket.
Full walkthrough: **[How to integrate Expedy Print with Zapier](/integrations/zapier/how-to-integrate-expedy-print-with-zapier)**
## Option 2, through the REST API
If WiziShop can issue an HTTP request, it can drive the printer directly.
```api
POST https://www.expedy.fr/api/v2/printers/{printer_uid}/print
```
Authentication uses an `Authorization` header carrying your `SID:TOKEN`, with no `Bearer` prefix. Parameters and a complete example are in [Create a Print Job](/expedy-print/api-print-v2/create-a-print-job).
## Formatting the ticket
Whichever route you take, the message accepts the Expedy layout tags:
| What you want | Where to look |
|---|---|
| Align, resize or emphasise text | [Text Layout](/expedy-print/receipt-layout/text-layout-tags) |
| Print a logo or an image | [Image and Logo](/expedy-print/receipt-layout/image-and-logo-printing) |
| Print a QR code | [QR Code](/expedy-print/receipt-layout/qr-code) |
| Print a barcode | [EAN13 Barcode](/expedy-print/receipt-layout/ean13-barcode) |
> Depending on the connector or the software you use, this setup may be handled by your partner or your agency. Check with them before you start.
## Need help?
- [Browse all integrations](/integrations)
- [Open a support ticket](https://help.expedy.io/support/tickets/new)
---
url: https://docs.expedy.io/en/integrations/square/connect-a-receipt-printer-to-square
title: Print from Square with Expedy PRINT
updated_at: 2026-10-22T17:21:13.729801+00:00
---
# Print from Square with Expedy PRINT
[Square](https://squareup.com/) is a point-of-sale solution. It reaches Expedy PRINT in two ways: through **Zapier**, with no code, or through the **Expedy REST API**, when you want full control over the ticket.
## What you need
- An Expedy account with an active printer. Not added yet? Follow the guide for your machine, [Expedy XPDY80](/expedy-print/installation/add-an-expedy-xpdy80-cloud-printer-to-your-account), [HSPOS](/expedy-print/installation/add-an-hspos-cloud-printer-to-your-account), [Star Micronics](/expedy-print/installation/add-a-star-micronics-printer-to-your-account) or [Raspberry Pi](/expedy-print/installation/add-a-raspberry-pi-cloud-print-server-to-your-account)
- Your **API SID**, **API TOKEN** and **API Printer UID**, all three on the printer page of the [Expedy console](https://www.expedy.fr/console/v3/), in the **API Keys & UID** card
## Option 1, through Zapier, no code
Square connects to Zapier, and Zapier ships a ready-made **Expedy Print** action. The recipe is always the same: an event in Square triggers **Create a Print Job** in Expedy Print, and you map the fields you want on the ticket.
Full walkthrough: **[How to integrate Expedy Print with Zapier](/integrations/zapier/how-to-integrate-expedy-print-with-zapier)**
## Option 2, through the REST API
If Square can issue an HTTP request, it can drive the printer directly.
```api
POST https://www.expedy.fr/api/v2/printers/{printer_uid}/print
```
Authentication uses an `Authorization` header carrying your `SID:TOKEN`, with no `Bearer` prefix. Parameters and a complete example are in [Create a Print Job](/expedy-print/api-print-v2/create-a-print-job).
## Formatting the ticket
Whichever route you take, the message accepts the Expedy layout tags:
| What you want | Where to look |
|---|---|
| Align, resize or emphasise text | [Text Layout](/expedy-print/receipt-layout/text-layout-tags) |
| Print a logo or an image | [Image and Logo](/expedy-print/receipt-layout/image-and-logo-printing) |
| Print a QR code | [QR Code](/expedy-print/receipt-layout/qr-code) |
| Print a barcode | [EAN13 Barcode](/expedy-print/receipt-layout/ean13-barcode) |
> Depending on the connector or the software you use, this setup may be handled by your partner or your agency. Check with them before you start.
## Need help?
- [Browse all integrations](/integrations)
- [Open a support ticket](https://help.expedy.io/support/tickets/new)
---
url: https://docs.expedy.io/en/integrations/tastycloud/connect-a-receipt-printer-to-tastycloud
title: Print TastyCloud orders on a receipt printer
updated_at: 2026-10-21T11:54:43.39257+00:00
---
# Print TastyCloud orders on a receipt printer
[TastyCloud](https://www.tastycloud.fr/) is an online ordering solution for hospitality. It connects to Expedy PRINT through **HubRise**: TastyCloud sends its orders to HubRise, HubRise forwards them to your cloud printer, and the ticket comes out within seconds.
## What you need
- An Expedy account with an active printer. Not added yet? Follow the guide for your machine, [Expedy XPDY80](/expedy-print/installation/add-an-expedy-xpdy80-cloud-printer-to-your-account), [HSPOS](/expedy-print/installation/add-an-hspos-cloud-printer-to-your-account), [Star Micronics](/expedy-print/installation/add-a-star-micronics-printer-to-your-account) or [Raspberry Pi](/expedy-print/installation/add-a-raspberry-pi-cloud-print-server-to-your-account)
- A [HubRise account](https://manager.hubrise.com/signup), which aggregates your sales channels
- A TastyCloud account linked to your HubRise location
## How it works
| Step | What happens |
|---|---|
| 1 | An order is placed on TastyCloud |
| 2 | TastyCloud pushes it to HubRise |
| 3 | Expedy PRINT receives it and prints a standardised ticket |
A single printer covers every channel connected to the same HubRise location, so you do not need one machine per platform.
## Connect it
The setup happens once, on the HubRise side, and is described step by step in the reference guide:
**[Connect a receipt printer to HubRise](/integrations/hubrise/connecting-a-receipt-printer-to-hubrise)**
Then link your TastyCloud account to the same HubRise location. That part is done from the TastyCloud back office, or by TastyCloud support.
## Receipt settings
Once connected, the printer page in the [Expedy console](https://www.expedy.fr/console/v3/) controls what gets printed:
- **Print order when**, the status that triggers printing, `NEW`, `RECEIVED` or `ACCEPTED`
- **Then change status to**, the automatic status update applied after printing
- **Number of copies**, one ticket for the kitchen, one for the counter or the delivery bag
- The receipt header and footer, logo, company name, address and registration number
All of it is detailed in [Connect a receipt printer to HubRise](/integrations/hubrise/connecting-a-receipt-printer-to-hubrise).
> Depending on the connector or the point-of-sale software you use, this setup may be handled by your partner. Check with them before you start.
## Need help?
- [Browse all integrations](/integrations)
- [Open a support ticket](https://help.expedy.io/support/tickets/new)
---
url: https://docs.expedy.io/en/integrations/just-eat/connect-a-receipt-printer-to-just-eat
title: Print Just Eat orders on a receipt printer
updated_at: 2026-10-22T02:35:26.601145+00:00
---
# Print Just Eat orders on a receipt printer
[Just Eat](https://www.just-eat.fr/) is a meal delivery platform. It connects to Expedy PRINT through **HubRise**: Just Eat sends its orders to HubRise, HubRise forwards them to your cloud printer, and the ticket comes out within seconds.
## What you need
- An Expedy account with an active printer. Not added yet? Follow the guide for your machine, [Expedy XPDY80](/expedy-print/installation/add-an-expedy-xpdy80-cloud-printer-to-your-account), [HSPOS](/expedy-print/installation/add-an-hspos-cloud-printer-to-your-account), [Star Micronics](/expedy-print/installation/add-a-star-micronics-printer-to-your-account) or [Raspberry Pi](/expedy-print/installation/add-a-raspberry-pi-cloud-print-server-to-your-account)
- A [HubRise account](https://manager.hubrise.com/signup), which aggregates your sales channels
- A Just Eat account linked to your HubRise location
## How it works
| Step | What happens |
|---|---|
| 1 | An order is placed on Just Eat |
| 2 | Just Eat pushes it to HubRise |
| 3 | Expedy PRINT receives it and prints a standardised ticket |
A single printer covers every channel connected to the same HubRise location, so you do not need one machine per platform.
## Connect it
The setup happens once, on the HubRise side, and is described step by step in the reference guide:
**[Connect a receipt printer to HubRise](/integrations/hubrise/connecting-a-receipt-printer-to-hubrise)**
Then link your Just Eat account to the same HubRise location. That part is done from the Just Eat back office, or by Just Eat support.
## Receipt settings
Once connected, the printer page in the [Expedy console](https://www.expedy.fr/console/v3/) controls what gets printed:
- **Print order when**, the status that triggers printing, `NEW`, `RECEIVED` or `ACCEPTED`
- **Then change status to**, the automatic status update applied after printing
- **Number of copies**, one ticket for the kitchen, one for the counter or the delivery bag
- The receipt header and footer, logo, company name, address and registration number
All of it is detailed in [Connect a receipt printer to HubRise](/integrations/hubrise/connecting-a-receipt-printer-to-hubrise).
> Depending on the connector or the point-of-sale software you use, this setup may be handled by your partner. Check with them before you start.
## Need help?
- [Browse all integrations](/integrations)
- [Open a support ticket](https://help.expedy.io/support/tickets/new)
---
url: https://docs.expedy.io/en/integrations/thrivecart/connect-a-receipt-printer-to-thrivecart
title: Print from ThriveCart with Expedy PRINT
updated_at: 2026-10-19T21:58:25.165515+00:00
---
# Print from ThriveCart with Expedy PRINT
[ThriveCart](https://thrivecart.com/) is an online cart and checkout platform. It reaches Expedy PRINT in two ways: through **Zapier**, with no code, or through the **Expedy REST API**, when you want full control over the ticket.
## What you need
- An Expedy account with an active printer. Not added yet? Follow the guide for your machine, [Expedy XPDY80](/expedy-print/installation/add-an-expedy-xpdy80-cloud-printer-to-your-account), [HSPOS](/expedy-print/installation/add-an-hspos-cloud-printer-to-your-account), [Star Micronics](/expedy-print/installation/add-a-star-micronics-printer-to-your-account) or [Raspberry Pi](/expedy-print/installation/add-a-raspberry-pi-cloud-print-server-to-your-account)
- Your **API SID**, **API TOKEN** and **API Printer UID**, all three on the printer page of the [Expedy console](https://www.expedy.fr/console/v3/), in the **API Keys & UID** card
## Option 1, through Zapier, no code
ThriveCart connects to Zapier, and Zapier ships a ready-made **Expedy Print** action. The recipe is always the same: an event in ThriveCart triggers **Create a Print Job** in Expedy Print, and you map the fields you want on the ticket.
Full walkthrough: **[How to integrate Expedy Print with Zapier](/integrations/zapier/how-to-integrate-expedy-print-with-zapier)**
## Option 2, through the REST API
If ThriveCart can issue an HTTP request, it can drive the printer directly.
```api
POST https://www.expedy.fr/api/v2/printers/{printer_uid}/print
```
Authentication uses an `Authorization` header carrying your `SID:TOKEN`, with no `Bearer` prefix. Parameters and a complete example are in [Create a Print Job](/expedy-print/api-print-v2/create-a-print-job).
## Formatting the ticket
Whichever route you take, the message accepts the Expedy layout tags:
| What you want | Where to look |
|---|---|
| Align, resize or emphasise text | [Text Layout](/expedy-print/receipt-layout/text-layout-tags) |
| Print a logo or an image | [Image and Logo](/expedy-print/receipt-layout/image-and-logo-printing) |
| Print a QR code | [QR Code](/expedy-print/receipt-layout/qr-code) |
| Print a barcode | [EAN13 Barcode](/expedy-print/receipt-layout/ean13-barcode) |
> Depending on the connector or the software you use, this setup may be handled by your partner or your agency. Check with them before you start.
## Need help?
- [Browse all integrations](/integrations)
- [Open a support ticket](https://help.expedy.io/support/tickets/new)
---
url: https://docs.expedy.io/en/integrations/foodpanda/connect-a-receipt-printer-to-foodpanda
title: Print Foodpanda orders on a receipt printer
updated_at: 2026-10-22T19:20:05.567532+00:00
---
# Print Foodpanda orders on a receipt printer
[Foodpanda](https://www.foodpanda.com/) is a meal delivery platform. It connects to Expedy PRINT through **HubRise**: Foodpanda sends its orders to HubRise, HubRise forwards them to your cloud printer, and the ticket comes out within seconds.
## What you need
- An Expedy account with an active printer. Not added yet? Follow the guide for your machine, [Expedy XPDY80](/expedy-print/installation/add-an-expedy-xpdy80-cloud-printer-to-your-account), [HSPOS](/expedy-print/installation/add-an-hspos-cloud-printer-to-your-account), [Star Micronics](/expedy-print/installation/add-a-star-micronics-printer-to-your-account) or [Raspberry Pi](/expedy-print/installation/add-a-raspberry-pi-cloud-print-server-to-your-account)
- A [HubRise account](https://manager.hubrise.com/signup), which aggregates your sales channels
- A Foodpanda account linked to your HubRise location
## How it works
| Step | What happens |
|---|---|
| 1 | An order is placed on Foodpanda |
| 2 | Foodpanda pushes it to HubRise |
| 3 | Expedy PRINT receives it and prints a standardised ticket |
A single printer covers every channel connected to the same HubRise location, so you do not need one machine per platform.
## Connect it
The setup happens once, on the HubRise side, and is described step by step in the reference guide:
**[Connect a receipt printer to HubRise](/integrations/hubrise/connecting-a-receipt-printer-to-hubrise)**
Then link your Foodpanda account to the same HubRise location. That part is done from the Foodpanda back office, or by Foodpanda support.
## Receipt settings
Once connected, the printer page in the [Expedy console](https://www.expedy.fr/console/v3/) controls what gets printed:
- **Print order when**, the status that triggers printing, `NEW`, `RECEIVED` or `ACCEPTED`
- **Then change status to**, the automatic status update applied after printing
- **Number of copies**, one ticket for the kitchen, one for the counter or the delivery bag
- The receipt header and footer, logo, company name, address and registration number
All of it is detailed in [Connect a receipt printer to HubRise](/integrations/hubrise/connecting-a-receipt-printer-to-hubrise).
> Depending on the connector or the point-of-sale software you use, this setup may be handled by your partner. Check with them before you start.
## Need help?
- [Browse all integrations](/integrations)
- [Open a support ticket](https://help.expedy.io/support/tickets/new)
---
url: https://docs.expedy.io/en/integrations/starshipit/connect-a-receipt-printer-to-starshipit
title: Print your Starshipit shipping labels automatically
updated_at: 2026-10-20T14:44:16.905478+00:00
---
# Print your Starshipit shipping labels automatically
[Starshipit](https://www.starshipit.com/) generates your carrier shipping labels. Through **Zapier**, the label PDF goes straight to your label printer the moment Starshipit creates it, so nobody has to download it and print it by hand.
> An Expedy cloud receipt printer, XPDY80, HSPOS or Star Micronics, **cannot print a carrier label**: it is a receipt printer. Carrier labels always go through a **Raspberry Pi** or a **Cloud Print Box USB adapter** driving a label printer.
## What you need
- An Expedy account with an active **Raspberry Pi print server** or **Cloud Print Box USB adapter**. Not set up yet? See [Add a Raspberry Pi print server to your account](/expedy-print/installation/add-a-raspberry-pi-cloud-print-server-to-your-account)
- **Your own label printer**, connected by USB to that Raspberry Pi or adapter, with its port set to `LABEL`
- A Starshipit account and a [Zapier](https://zapier.com/) account
- Your **API SID**, **API TOKEN** and **API Printer UID**, on the printer page of the [Expedy console](https://www.expedy.fr/console/v3/), in the **API Keys & UID** card
## Why a label printer
A carrier label is a PDF in a fixed format, most often 100 x 150 mm. A receipt printer cannot render it at the right size, so the job goes to a label printer driven by a Raspberry Pi or the Cloud Print Box.
On the printer page, run a **USB scan** and set the port that carries the label printer to `LABEL`, not `ESC/POS`. See [Installation on Raspberry Pi](/usb-cloud-printer-adapter/rpi-installation/installation-on-raspberry-pi).
## Build the Zap
1. In Zapier, create a Zap and pick **Starshipit** as the trigger app
2. Choose the event that fires when a label is created
3. Add **Expedy Print** as the action, then **Create a Print Job**
4. Connect your Expedy account with your **Expedy SID** and your **Expedy TOKEN**
5. Enter the **Printer UID** of the label printer
6. In the message field, map the label PDF URL returned by Starshipit
Step by step on the Zapier side: [How to integrate Expedy Print with Zapier](/integrations/zapier/how-to-integrate-expedy-print-with-zapier)
## What to send
A label printer takes the PDF URL **on its own, with no tag**:
```text
https://example.com/label.pdf
```
On an ESC/POS receipt printer the same URL has to be wrapped in the `` tag instead. Both forms are detailed in [PDF printing](/expedy-print/receipt-layout/print-pdf).
## Test it
Create a test label in Starshipit and check that it comes out at the right size. If nothing prints:
- check the **Printer UID**, it must be the label printer, not the receipt printer
- check that the USB port is in `LABEL` mode after the scan
- check that the PDF URL is reachable without authentication, Expedy fetches it from its own servers
> Depending on the connector or the software you use, this setup may be handled by your partner or your agency. Check with them before you start.
## Need help?
- [Browse all integrations](/integrations)
- [Open a support ticket](https://help.expedy.io/support/tickets/new)
---
url: https://docs.expedy.io/en/integrations/dishop/connect-a-receipt-printer-to-dishop
title: Print Dishop orders on a receipt printer
updated_at: 2026-10-22T10:15:56.680078+00:00
---
# Print Dishop orders on a receipt printer
**Dishop** is an online ordering solution for hospitality. It connects to Expedy PRINT through **HubRise**: Dishop sends its orders to HubRise, HubRise forwards them to your cloud printer, and the ticket comes out within seconds.
## What you need
- An Expedy account with an active printer. Not added yet? Follow the guide for your machine, [Expedy XPDY80](/expedy-print/installation/add-an-expedy-xpdy80-cloud-printer-to-your-account), [HSPOS](/expedy-print/installation/add-an-hspos-cloud-printer-to-your-account), [Star Micronics](/expedy-print/installation/add-a-star-micronics-printer-to-your-account) or [Raspberry Pi](/expedy-print/installation/add-a-raspberry-pi-cloud-print-server-to-your-account)
- A [HubRise account](https://manager.hubrise.com/signup), which aggregates your sales channels
- A Dishop account linked to your HubRise location
## How it works
| Step | What happens |
|---|---|
| 1 | An order is placed on Dishop |
| 2 | Dishop pushes it to HubRise |
| 3 | Expedy PRINT receives it and prints a standardised ticket |
A single printer covers every channel connected to the same HubRise location, so you do not need one machine per platform.
## Connect it
The setup happens once, on the HubRise side, and is described step by step in the reference guide:
**[Connect a receipt printer to HubRise](/integrations/hubrise/connecting-a-receipt-printer-to-hubrise)**
Then link your Dishop account to the same HubRise location. That part is done from the Dishop back office, or by Dishop support.
## Receipt settings
Once connected, the printer page in the [Expedy console](https://www.expedy.fr/console/v3/) controls what gets printed:
- **Print order when**, the status that triggers printing, `NEW`, `RECEIVED` or `ACCEPTED`
- **Then change status to**, the automatic status update applied after printing
- **Number of copies**, one ticket for the kitchen, one for the counter or the delivery bag
- The receipt header and footer, logo, company name, address and registration number
All of it is detailed in [Connect a receipt printer to HubRise](/integrations/hubrise/connecting-a-receipt-printer-to-hubrise).
> Depending on the connector or the point-of-sale software you use, this setup may be handled by your partner. Check with them before you start.
## Need help?
- [Browse all integrations](/integrations)
- [Open a support ticket](https://help.expedy.io/support/tickets/new)
---
url: https://docs.expedy.io/en/integrations/shopify/shopify-plugins-cloud-print-orders-automatically
title: Shopify plugins : Cloud Print orders automatically
updated_at: 2026-10-20T20:55:43.462262+00:00
---
# Shopify plugins : Cloud Print orders automatically
> **Before you start**: you need an Expedy account and an active printer on it. Not added yet? Follow the guide for your machine, [Expedy XPDY80](/expedy-print/installation/add-an-expedy-xpdy80-cloud-printer-to-your-account), [HSPOS](/expedy-print/installation/add-an-hspos-cloud-printer-to-your-account), [Star Micronics](/expedy-print/installation/add-a-star-micronics-printer-to-your-account) or [Raspberry Pi](/expedy-print/installation/add-a-raspberry-pi-cloud-print-server-to-your-account).
When a customer places an order on your [Shopify store](http://shopify.pxf.io/DVYkPa), a receipt is automatically printed on your connected printer, no button to click, no manual action required.
---
## How it works
Shopify's **Webhook** feature allows you to push order data to an external URL instantly when an event occurs. By pointing a webhook to the Expedy API, every new order triggers an automatic print job on your printer.
---
## Setup, Create a Webhook in Shopify
1. Log in to your [Shopify admin](https://accounts.shopify.com/store-login)
2. Go to **Settings**

3. Click **Notifications**

4. Scroll to the bottom of the page and click **Create a webhook**

5. Fill in the webhook settings:
| Field | Value |
|-------|-------|
| **Event** | Order Creation |
| **Format** | JSON |
| **URL** | Your Expedy webhook URL (see below) |
| **API version** | Latest |

6. Click **Save**
All new Shopify orders will now print automatically on your connected printer. You can add as many webhooks and printers as needed.
---
## Webhook URL
Your webhook URL is available directly in the [Expedy console](https://www.expedy.fr/console/v3/) under **Printers → Select printer → Shopify URL**.
It follows this format:
```text
https://www.expedy.fr/shopify/print?s=SID&t=TOKEN&p=PRINTER_UID
```
| Parameter | Description |
|-----------|-------------|
| `s` | Your API **SID**, available in the console under **API** |
| `t` | Your API **TOKEN**, available in the console under **API** |
| `p` | Your **Printer UID**, visible in the console under **Printers** |
---
## Test your setup
Once the webhook is configured, place a test order to verify that printing works correctly.
See the [Shopify test order documentation](https://help.shopify.com/en/manual/checkout-settings/test-orders) for instructions.
---
## Are you a Shopify expert?
Help other merchants get set up with Expedy Print. Join our [Partner Program](https://www.expedy.fr/contact) and connect with users who need professional assistance.
---
url: https://docs.expedy.io/en/integrations/shopify/order-print-settings-receipt-customisation
title: Order Print Settings : Receipt customisation
updated_at: 2026-10-20T18:07:11.269769+00:00
---
# Order Print Settings : Receipt customisation
Customise what appears on your printed receipts in just a few clicks, add your logo, business details, footer information, and more, directly from the Expedy console.
> ✅ Available for: [Shopify](/integrations/shopify), [GoodBarber](/integrations/goodbarber), Wix, and [HubRise](/integrations/hubrise)
>
> For other integrations, see: [PrestaShop](/integrations/prestashop) · [WooCommerce](/integrations/wordpress-woocommerce) · [WooCommerce WCFM](/integrations/wordpress-woocommerce) · [API](/expedy-print/api-print-v2) · [Zapier](/integrations/zapier) · [Receipt layout](/expedy-print/receipt-layout/text-layout-tags)
---
## Access Order Print Settings
1. Log in to the [Expedy console](https://www.expedy.fr/console/v3/)
2. Go to **Printers**

3. Select the printer you want to configure

4. Open the **Connections & Plugins** tab

---
## Receipt Header
### Time Zone

Set the correct time zone to ensure receipts display the right date and time.
### Logo
Add your establishment's logo or any image to the top of the receipt.
See [image requirements](/expedy-print/receipt-layout/image-and-logo-printing) for format and dimension guidelines.
### Company Name
Your shop name or a custom title displayed at the top of the receipt.
---
## Receipt Footer

Add any business information you want to appear at the bottom of every receipt:
- Company name
- Company registration number
- Postal address
- Contact details (phone, email, etc.)
All fields are optional and free-form.
---
## Advanced Options
### Ticket copies

Set the number of copies to print automatically for each order.
### Receipt template

Choose the layout that best suits your workflow.
### Tandem printer
Add a second printer to automatically print a copy of every receipt. Enter the second printer's UID, it must already be added to the same [Expedy account](https://www.expedy.fr/console/v3/).
### SMS order notifications *(France only)*
Enter one or more mobile numbers to receive an SMS for every new order. Separate multiple numbers with semicolons.
> ℹ️ This service is only available in France and is charged at **€0.10 per SMS**. [Contact us](https://help.expedy.io/support/tickets/new) to activate it.
---
url: https://docs.expedy.io/en/integrations/shopify/print-a-copy-of-the-order
title: Print a copy of the order
updated_at: 2026-10-23T05:44:52.814469+00:00
---
# Print a copy of the order
Automatically print the same receipt several times for every new order, useful for keeping one copy in the kitchen, one at the counter, and one for the customer.
---
1. Log in to the [Expedy console](https://www.expedy.fr/console/v3/)
2. Go to **Printers** and select the printer concerned
3. Scroll down to **Advanced Options**
4. Select the number of copies from the **Copies** drop-down menu
5. Click **Save** to confirm
---
url: https://docs.expedy.io/en/integrations/shopify/add-a-logo-to-the-shopify-order-form
title: Add a logo to the Shopify order form
updated_at: 2026-10-22T20:49:27.662771+00:00
---
# Add a logo to the Shopify order form
Display your company logo or name at the top of every receipt printed via Shopify, no code required.
---
1. Log in to the [Expedy console](https://www.expedy.fr/console/v3/)

2. Go to **Printers** and select your printer

3. In the **Print Header** section, paste the HTTPS URL of your logo

4. Click **Save**

> ⚠️ The image must be hosted on a **secure server (HTTPS)**.
> Avoid transparent backgrounds (alpha layer) and gradients, use flat black on white for best results.
>
> See [image requirements](/expedy-print/receipt-layout/image-and-logo-printing) for format and dimension guidelines.
---
## Centering your logo
Centering is handled directly in the image file, the logo must be positioned in the centre with equal white margins on both sides, sized to match your paper width.



---
## Are you a Shopify expert?
Help other merchants set up Expedy Print on their store. Join our [Partner Program](https://www.expedy.io/en/registration-partner/) and connect with users who need professional assistance.
---
url: https://docs.expedy.io/en/integrations/shopify/connect-shopify-to-expedy-print-with-zapier
title: Shopify and Zapier, print only the orders you choose
updated_at: 2026-10-18T08:30:27.948522+00:00
---
# Shopify and Zapier, print only the orders you choose
Expedy already has a **native Shopify app** that prints every paid order, see [Shopify plugins, cloud print orders automatically](/integrations/shopify/shopify-plugins-cloud-print-orders-automatically). Use it first: it needs no third-party account and it carries the receipt layout settings.
Zapier answers a different question, **printing only some orders, or printing on an event the app does not cover**.
## When Zapier is the better route
| What you want | Native app | Zapier |
|---|---|---|
| Print every paid order | Yes | Yes |
| Print only orders above an amount, or carrying a given tag or product | No | Yes, with a filter step |
| Print when a fulfilment is created, or an order is cancelled or refunded | No | Yes, pick the matching Shopify trigger |
| Send the same order to two printers by rule, kitchen and counter | Tandem printer only | Yes, one action per printer |
| Log the order in a spreadsheet or a Slack channel at the same time | No | Yes, extra actions in the same Zap |
## What you need
- An Expedy account with an active printer. Not added yet? Follow the guide for your machine, [Expedy XPDY80](/expedy-print/installation/add-an-expedy-xpdy80-cloud-printer-to-your-account), [HSPOS](/expedy-print/installation/add-an-hspos-cloud-printer-to-your-account), [Star Micronics](/expedy-print/installation/add-a-star-micronics-printer-to-your-account) or [Raspberry Pi](/expedy-print/installation/add-a-raspberry-pi-cloud-print-server-to-your-account)
- A Shopify store and a [Zapier](https://zapier.com/) account
- Your **API SID**, **API TOKEN** and **API Printer UID**, on the printer page of the [Expedy console](https://www.expedy.fr/console/v3/), in the **API Keys & UID** card
## Build the Zap
1. Pick **Shopify** as the trigger app and **New Paid Order** as the event
2. Optional but this is the whole point, add a **Filter by Zapier** step to keep only the orders you want on paper
3. Add **Expedy Print** as the action, then **Create a Print Job**
4. Connect your Expedy account with your **Expedy SID** and your **Expedy TOKEN**
5. Enter the **Printer UID**, then build the message from the Shopify order fields
Step by step on the Zapier side: [How to integrate Expedy Print with Zapier](/integrations/zapier/how-to-integrate-expedy-print-with-zapier)
## Format the ticket
| What you want | Where to look |
|---|---|
| Align, resize or emphasise text | [Text Layout](/expedy-print/receipt-layout/text-layout-tags) |
| Print a logo or an image | [Image and Logo](/expedy-print/receipt-layout/image-and-logo-printing) |
| Print a QR code | [QR Code](/expedy-print/receipt-layout/qr-code) |
| Print a barcode | [EAN13 Barcode](/expedy-print/receipt-layout/ean13-barcode) |
## Which one to choose
> If every order is printed the same way, stay on the native app: it is simpler and consumes no Zapier task quota. Move to Zapier the day you need a condition, a different event, or a second action alongside the print. Nothing stops you running both, on two different printers.
## Need help?
- [Browse all integrations](/integrations)
- [Open a support ticket](https://help.expedy.io/support/tickets/new)
---
url: https://docs.expedy.io/en/integrations/hubrise/connecting-a-receipt-printer-to-hubrise
title: Connect a receipt printer to HubRise
updated_at: 2026-10-19T19:46:12.083706+00:00
---
# Connect a receipt printer to HubRise
Connect a single receipt printer to all your online sales channels at once, eCommerce stores and delivery platforms included, with ExpedyPRINT and [HubRise](https://www.hubrise.com/).
Orders from any connected source are automatically printed as standardised receipts:
- Online stores (WooCommerce, Shopify, PrestaShop...)
- Delivery platforms (Uber Eats, Just Eat, Deliveroo...)
---
## Compatible printers
- Expedy Cloud Print printers: `PP-58EWG`, `PP-80EWG`, [XPDY80EWBG](https://www.expedy.io/product)
- [Cloud Print Box USB adapter](https://www.expedy.io/product), compatible with any ESC/POS or ESC/P printer (Epson, Star Micronics, Munbyn, Citizen...)
---
## Prerequisites
- An Expedy account with an active printer on it. Not added yet? Follow the guide for your machine: [Expedy XPDY80](/expedy-print/installation/add-an-expedy-xpdy80-cloud-printer-to-your-account), [HSPOS](/expedy-print/installation/add-an-hspos-cloud-printer-to-your-account), [Star Micronics](/expedy-print/installation/add-a-star-micronics-printer-to-your-account) or [Raspberry Pi](/expedy-print/installation/add-a-raspberry-pi-cloud-print-server-to-your-account)
- A [HubRise account](https://manager.hubrise.com/signup), required to aggregate orders from delivery platforms. Create one before moving to the next step.
> Depending on the connector or the point-of-sale software you use, this connection may be set up by your partner. Check with them before you start.
---
## Connect HubRise to your printer
### Step 1, Sign in to your Expedy console
Log in at [https://www.expedy.fr/console/v3/](https://www.expedy.fr/console/v3/)
The dashboard gives you access to your printers, your SIM cards, your API keys and the Help Center.

### Step 2, Open your printers
In the left menu, under **Devices**, click **Printers**, or go directly to [https://www.expedy.fr/console/v3/printers](https://www.expedy.fr/console/v3/printers)
This page lists all your cloud printers with their UID, their serial number and their print volume over the last 30 days.

### Step 3, Select the printer to connect
Click the printer you want to link to HubRise, then open the **Connections & Plugins** tab.
In the **HubRise** section, the status shows **Not connected**. Click **Connect HubRise**.

### Step 4, Sign in to HubRise
You are redirected to the HubRise login page. Enter the email address and the password of your HubRise account, then click **Log in**.
### Step 5, Authorise the connection and select your location
HubRise asks you to authorise **EXPEDY PRINT** to access one of your locations.
Select the location you want to associate with this printer in the drop-down list, then click **Allow**.

> One printer is linked to one HubRise location. To serve several locations, repeat the operation on another printer.
### Step 6, Back to the Expedy console
You are automatically redirected to your console. The HubRise section now displays **Connected to** followed by the name and the ID of your location, along with the trigger settings.
The connection is active. You can undo it at any time with the **Disconnect** button.

---
## Trigger settings
Two drop-down lists control when a ticket is printed and what happens to the order afterwards.
**Print order when**, the order status that triggers printing: `NEW`, `RECEIVED` or `ACCEPTED`.
**Then change status to**, the automatic status update applied once the ticket is printed: `No change`, `Mark as received` or `Mark as accepted`.
> Always click **Save Settings** to confirm your changes.
### Trigger combinations
| Print order when | Then change status to | Result |
|---|---|---|
| NEW | No change | Prints all new orders. Status unchanged on HubRise and on the original platform. |
| NEW | Mark as received | Prints all new orders and updates the status to **received**. |
| NEW | Mark as accepted | Prints all new orders and updates the status to **accepted**. |
| RECEIVED | No change | Prints received orders. Status unchanged on HubRise and on the original platform. |
| RECEIVED | Mark as accepted | Prints received orders and marks them as **accepted**. |
| ACCEPTED | No change | Prints only the orders you have already accepted manually. Refused or pending orders are not printed. |
Choose `NEW` with `Mark as accepted` for a fully automatic workflow, where every incoming order is printed and confirmed without any manual action. Choose `ACCEPTED` with `No change` if you want to review each order before it reaches the kitchen.
---
## Customise your receipts
Still on the printer page, the **Printer Settings** panel controls the layout of the tickets printed from HubRise and Shopify orders.
### Receipt header
| Field | Description |
|---|---|
| Time zone | Sets the local time printed on the ticket. Select your own time zone so the order timestamps are correct. |
| Logo URL | Direct link to your logo image, 603 px wide maximum. Leave empty to print no logo. |
| Company name (header) | Trading name printed in large characters at the top of the ticket. |
### Receipt footer
The footer carries your legal and contact details, printed at the bottom of every ticket:
- **Company** and **Registration number** (SIRET / VAT)
- **Address line 1**, **Address line 2**, **Zipcode**, **City**, **Country**
- **Phone** and **Email**
Filling these fields turns the order ticket into a compliant customer receipt, which is useful for click and collect and for delivery orders handed to the customer.
### Advanced options
**Number of copies**, the most requested setting. Choose how many identical tickets are printed for each order:
- 2 copies, one for the kitchen and one for the counter or the delivery bag
- 3 copies, kitchen, bar and packing station
Each copy is printed in a single pass, no need to reprint manually.
**Receipt template**, the level of detail printed on the ticket. `Full details` prints the complete ticket with items, options, prices, customer details and totals; shorter templates produce a compact production ticket.
**Tandem printer (copy to another printer)**, enter the UID of a second Expedy printer to receive an exact copy of every ticket. Ideal for splitting the workload between the kitchen and the counter, or between two floors of the same location, without creating a second HubRise connection.
> Click **Save Settings** to apply your layout.
---
## Test your setup
1. Place a test order on one of the platforms connected to your HubRise location
2. Check that the ticket comes out of the printer within a few seconds
3. Check on HubRise that the order status matches the option selected in **Then change status to**
If nothing prints, verify that the printer is powered on and active in the console, and that the location selected during the authorisation step is the one receiving the orders.
Need help? [Open a support ticket](https://help.expedy.io/support/tickets/new)
---
url: https://docs.expedy.io/en/integrations/zapier/how-to-integrate-expedy-print-with-zapier
title: How to integrate Expedy Print with Zapier
updated_at: 2026-10-22T18:05:04.900983+00:00
---
# How to integrate Expedy Print with Zapier
> **Before you start**: you need an Expedy account and an active printer on it. Not added yet? Follow the guide for your machine, [Expedy XPDY80](/expedy-print/installation/add-an-expedy-xpdy80-cloud-printer-to-your-account), [HSPOS](/expedy-print/installation/add-an-hspos-cloud-printer-to-your-account), [Star Micronics](/expedy-print/installation/add-a-star-micronics-printer-to-your-account) or [Raspberry Pi](/expedy-print/installation/add-a-raspberry-pi-cloud-print-server-to-your-account).
Connect Expedy Print to thousands of apps and trigger automatic print jobs based on any event, no code required.
**Examples of what you can automate:**
- Print a preparation slip when a new order is placed (Amazon Seller, eBay, Wix...)
- Print a shipping label when its status changes to "Ready to print" (Packlink, ShippyPro...)
- Print a document as soon as it's saved to a folder (Google Drive, Dropbox, OneDrive...)
- Print a photo when a new post is published (WordPress, Instagram, Facebook, Flickr...)
---
## What is Zapier?

[Zapier](https://www.zapier.com/) is an online automation platform that connects apps and services without any coding. It works by creating automated workflows called **Zaps**, each Zap triggers an action in one app in response to an event in another.
Zapier is **free for up to 100 jobs per month**.
---
## Set up a Zap with Expedy Print
### Step 1, Create a Zapier account

Sign up at [zapier.com](https://www.zapier.com/) with your email, or use your Google, Facebook, or Microsoft login.
### Step 2, Create a new Zap

Go to the **Zaps** section and click **Create a Zap**.
### Step 3, Choose your trigger app

Click **Trigger** and select the app that will start the automation. In this example, we use **Instagram**.
### Step 4, Choose the trigger event

Select the event that will trigger the print job. Here: **New post published**.
### Step 5, Add Expedy Print as the action

In the action step, search for and select **Expedy Print**.
### Step 6, Select the action event

Select **Create a Print Job**.
### Step 7, Connect your Expedy account

Create a new connection by entering your **API SID** and **TOKEN**, available in the [Expedy console](https://www.expedy.fr/console/v3/) under **API**.
### Step 8, Configure the print job


Enter your **Printer UID**, find it in the [Expedy console](https://www.expedy.fr/console/v3/) under **Printers**. Then compose the message with the data you want to print. Use the [`![]() ` tag](/expedy-print/receipt-layout/image-and-logo-printing) to print an image, or the [receipt layout tags](/expedy-print/receipt-layout/text-layout-tags) to format text.
### Step 9, Test and publish
Click **Test action**. A success message confirms the job was sent. If you get an error, double-check your **API keys** and **Printer UID**. Then click **Publish** to activate your Zap.
---
## Verify the print job
You can confirm the job was received in the [Expedy console](https://www.expedy.fr/console/v3/) under **Printers → Select printer → Print Jobs History**.
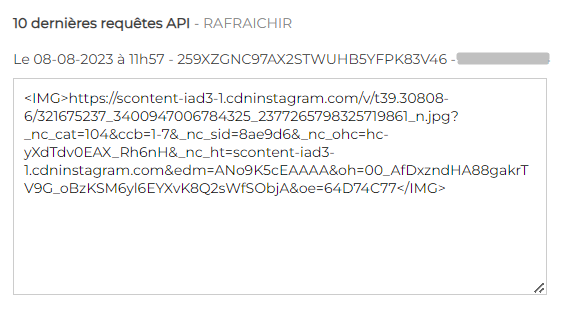
---
> Need help formatting your receipts? Follow the [receipt layout guide](/expedy-print/receipt-layout/text-layout-tags).
>
> You can also add filters and conditions to your Zaps to handle more advanced automation scenarios. Have a question? [Contact us](https://help.expedy.io/support/tickets/new).
---
url: https://docs.expedy.io/en/integrations/wordpress-woocommerce/wcfm-woocommerce-plugin-print-orders-to-each-vendor-printer
title: WCFM Plugin : Print orders to each vendor printer
updated_at: 2026-10-20T14:11:36.219346+00:00
---
# WCFM Plugin : Print orders to each vendor printer
> **Before you start**: you need an Expedy account and an active printer on it. Not added yet? Follow the guide for your machine, [Expedy XPDY80](/expedy-print/installation/add-an-expedy-xpdy80-cloud-printer-to-your-account), [HSPOS](/expedy-print/installation/add-an-hspos-cloud-printer-to-your-account), [Star Micronics](/expedy-print/installation/add-a-star-micronics-printer-to-your-account) or [Raspberry Pi](/expedy-print/installation/add-a-raspberry-pi-cloud-print-server-to-your-account).
Automatically route each vendor's orders to their own printer, no PC, no tablet, no manual action
required. As soon as an order is placed, the receipt prints directly at the vendor's location with all
the information needed to prepare it: customer name, reference, phone number, delivery address, order
type, and more. The plugin connects your WCFM marketplace to your printers via the **Expedy API v2**.
---
## Try it first (live sandbox)
Want to see the plugin in action before installing it on your own marketplace? A ready-to-use sandbox
runs a full WordPress + WooCommerce + Expedy environment right in your browser:
👉 **[woo.expedy.io](https://woo.expedy.io)**
It comes pre-loaded with a demo order, so you can explore the settings dashboard and preview a printed
ticket immediately, no account and no installation required. The sandbox is temporary and isolated, so
real print jobs aren't sent; use it for interface and receipt-preview testing.
---
## Download
Download the latest version from the official **[Releases page](https://github.com/ExpedyDev/expedyprint-woocommerce-extension/releases)**.
Each release ships the ready-to-install `expedyprint.zip` and its changelog, that single file is all
you need.
---
## Installation
1. [**Download the plugin**](https://github.com/ExpedyDev/expedyprint-woocommerce-extension/releases) (`expedyprint.zip`).
2. In your WordPress admin, go to **Plugins → Add New → Upload Plugin**.
3. Click **Choose File** and select the `.zip` file downloaded in step 1.
4. Click **Install Now**.
5. Click **Activate** once the installation is complete.
6. Make sure **WooCommerce** and **WCFM** are installed and active.
7. A new **ExpedyPRINT** entry appears in your wp-admin menu, open it to configure the plugin.
> No drivers, no command line, no extra software required.
---
## Get your API credentials
The plugin connects to your account using two credentials: an **API SID** (your account identifier)
and an **API token** (your secret key).
1. Don't have an account yet? Create your free account at **[expedy.io/signup](https://www.expedy.io/signup)**.
2. Log in to your [Expedy account](https://www.expedy.io) and open the **API** section. [Contact support](https://support.expedy.fr/hc/fr/requests/new) if you don't have access.
3. Copy your **API SID** and **API token**.
4. Make sure your **vendor printers** are registered on your account.
> Keep your API token private, treat it like a password.
---
## Configuration
In your WordPress admin, open the **ExpedyPRINT** menu and fill in each section.
### 1. API connection
| Setting | Description |
|---------|-------------|
| **API SID** | Your account identifier, from the **API** section of your Expedy account. |
| **API token** | Your secret key, from the **API** section of your Expedy account. Leave blank to keep the value already saved. |
Click **Test connection**. On success, the list of printers on your account is loaded automatically.
### 2. Printer
| Setting | Description |
|---------|-------------|
| **Printer** | The default printer, used for any order that isn't routed to a specific vendor. Pick it from the dropdown, it shows the name, paper width and UID. Use **Send test print** to print a sample ticket. |
| **Backup printer ID** | *(optional)* UID of a second printer that receives a copy of every ticket. |
| **Paper width** | Paper roll size: **58 mm** or **80 mm**. |
### 3. Printing trigger
| Setting | Description |
|---------|-------------|
| **Print the ticket** | Order status that triggers automatic printing: **When the order is paid** · **When the order is processing** · **When the order is completed**. |
| **Copies** | Number of copies to print automatically for each order (1 to 3). |
| **Time zone** | Adjusts the printed delivery/pickup times if your server is in a different time zone. |
### 4. Receipt header & footer
| Setting | Description |
|---------|-------------|
| **Logo URL** | HTTPS URL of your logo. Recommended max width ~570px. Keep the file small to reduce data usage and improve print speed, if printing is blocked, test without the logo first. |
| **Title** | Title shown at the top of the ticket. |
| **Company name / Company ID / Address / Postcode / City / Phone / Email** | Store details printed in the receipt footer. |
| **Product options detail** | Choose **Full details** or **Minimal details** for the product options printed on each line. |
### 5. Receipt wording
Customize every label printed on the ticket (Order, Product, Price, Subtotal, Tax, Total, Shipping,
Total due, Customer note…). Defaults are in English; type your own wording in any language.
### 6. Advanced, Multi-vendor mapping
This is where WCFM routing is configured. See the next section for the full walkthrough.
---
## Multi-vendor routing (WCFM)
This is what the plugin is built for: send each vendor's orders to **their own** Expedy printer.
1. In **WCFM**, find each vendor's **ID** (Vendors list, or the vendor's store/profile).
2. For each vendor, note the **printer UID** their orders should print on (visible in the **Printer**
dropdown, or in your Expedy account).
3. Go to **ExpedyPRINT → Advanced → Multi-vendor mapping** and enter the pairs
`vendor_id:printer_uid`, separated by `\|\|`.
Example: `4:DESNBXP887K\|\|7:DESHKTI4EOW`
When an order contains a vendor's products, its receipt is sent automatically to that vendor's printer.
Any order without a mapped vendor falls back to the default **Printer** set in section 2.
---
## Video tutorial
Watch the step-by-step setup: https://www.youtube.com/watch?v=IYipTBSybsw
---
## Where to find printing logs
Every print attempt (success or failure) is recorded as an **order note** and under
**WooCommerce → Status → Logs** (source `expedyprint`), so you always know what happened.
---
## Compatible plugins
The Expedy plugin is compatible with the following WooCommerce extensions:
- YITH (sub-items / product attributes)
- WooCommerce TM Extra Product Options
- ODT Extended / WooODT Lite (Byconsole)
- Advanced Product Fields Pro (StudioWombat)
- WooCommerce Local Pickup Time Select
- WCFM, Multi Vendor Marketplace Plugin
> We regularly add new compatible plugins. If yours isn't listed, [contact our support team](https://support.expedy.fr/hc/fr/requests/new).
---
## Build your own integration
Prefer to print from your own application or connect another platform instead of using this WooCommerce
plugin? Use the official Node.js SDK and API examples:
👉 **[github.com/ExpedyDev/expedy-sdk-node](https://github.com/ExpedyDev/expedy-sdk-node)**
It shows how to authenticate, list your printers and send print jobs through the Expedy API v2.
---
url: https://docs.expedy.io/en/integrations/goodbarber/print-goodbarber-orders-on-a-receipt-printer
title: Print GoodBarber eCommerce orders via Zapier
updated_at: 2026-10-20T15:27:05.908377+00:00
---
# Print GoodBarber eCommerce orders via Zapier
[GoodBarber](https://www.goodbarber.com/) eCommerce connects to Expedy PRINT **through Zapier**. Every new order placed in your app or your web store triggers a print job, and the ticket comes out of your cloud printer within seconds.

> The native GoodBarber webhook described in earlier versions of this guide is no longer used. Zapier is now the only supported route.
---
## What you need
- An Expedy account with an active printer. Not added yet? Follow the guide for your machine, [Expedy XPDY80](/expedy-print/installation/add-an-expedy-xpdy80-cloud-printer-to-your-account), [HSPOS](/expedy-print/installation/add-an-hspos-cloud-printer-to-your-account), [Star Micronics](/expedy-print/installation/add-a-star-micronics-printer-to-your-account) or [Raspberry Pi](/expedy-print/installation/add-a-raspberry-pi-cloud-print-server-to-your-account)
- A [GoodBarber eCommerce](https://www.goodbarber.com/) account
- A [Zapier](https://zapier.com/) account, free up to 100 tasks per month
> Depending on your setup, this connection may be handled by your partner or your agency. Check with them before you start.
---
## Step 1, Create the Zap
Log in to Zapier, click **+ Create** in the left menu, then **Zaps**.
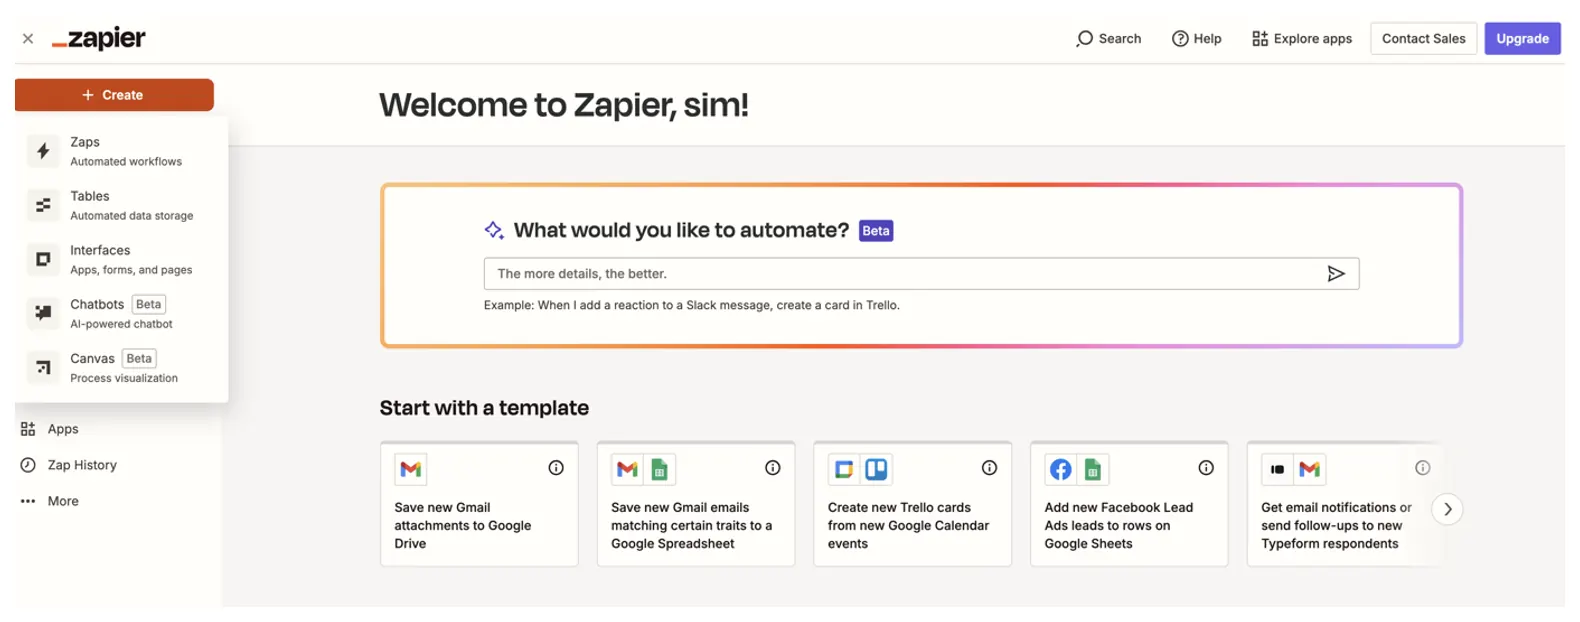
## Step 2, Set GoodBarber eCommerce as the trigger
In the Zap editor, click the **Trigger** block, *Select the event that starts your Zap*.
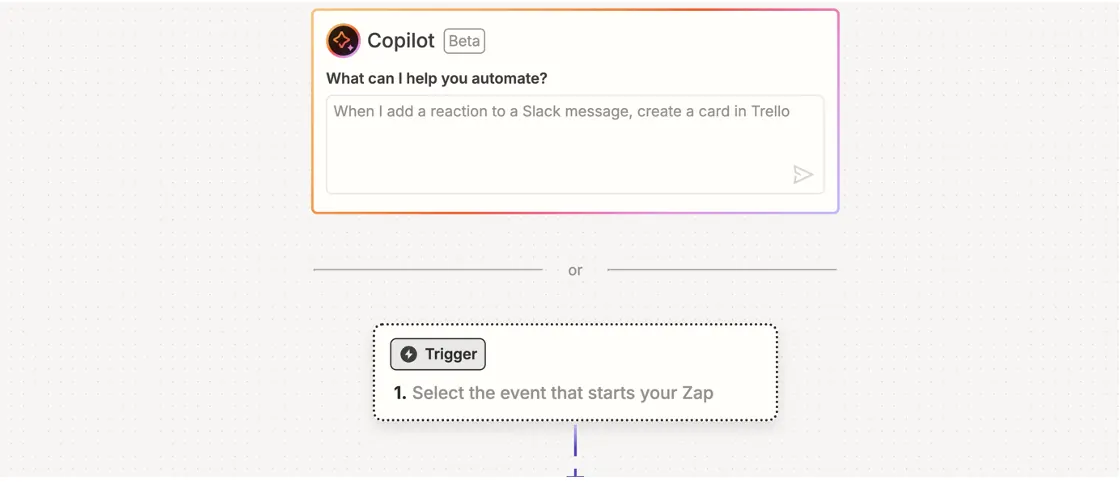
Search for and select **GoodBarber eCommerce**, then choose **New Order** as the trigger event.
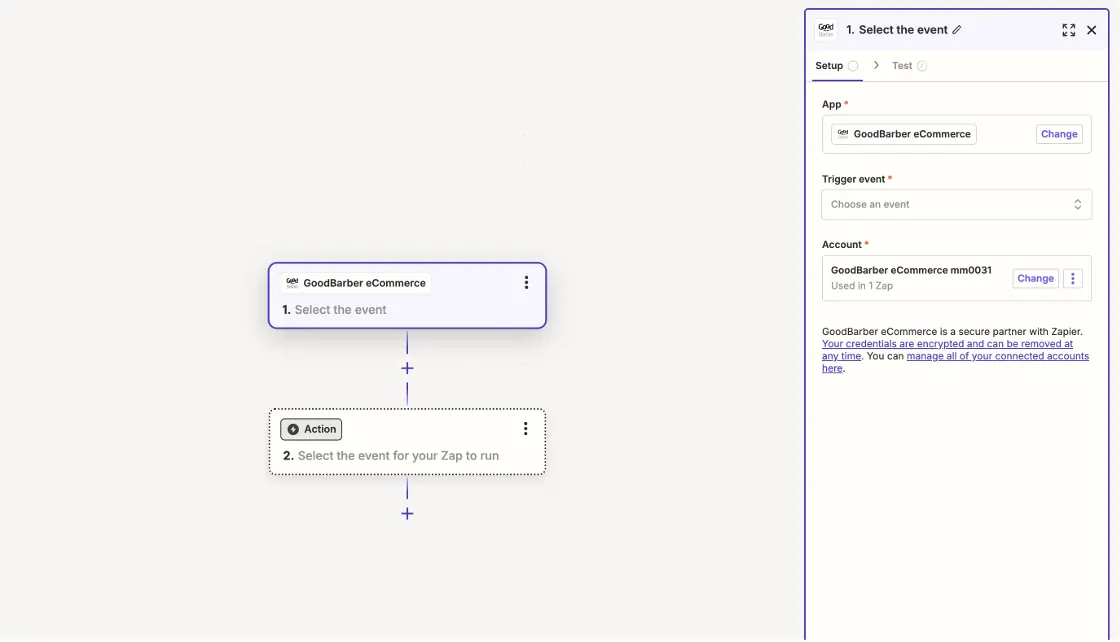
## Step 3, Connect your GoodBarber account
Zapier asks for the **App ID** and the **Key** of your GoodBarber store.
Open the **Explore apps** menu in Zapier and search for GoodBarber eCommerce.
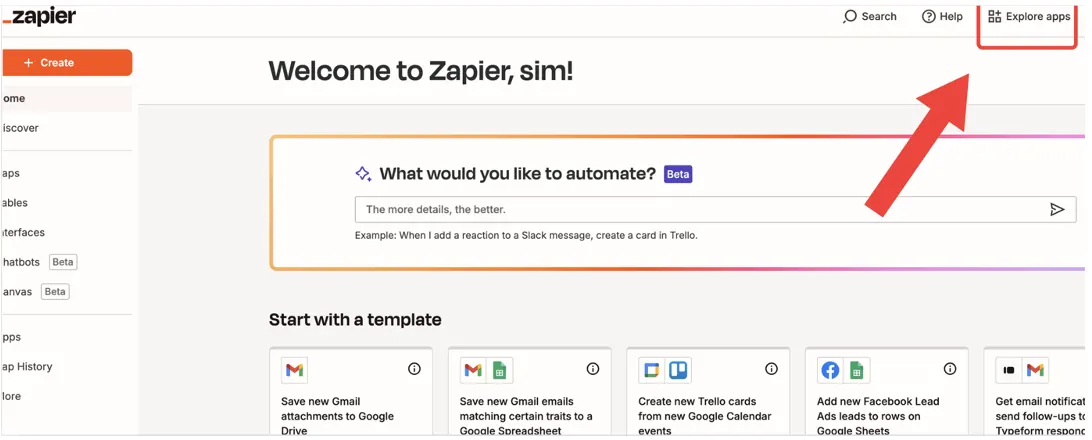
Then, in your GoodBarber back office:
1. Open the **Extensions Store** and install the **Zapier** extension if it is not there yet
2. Go to **Settings**, **Zapier**
3. Click **Create a new key set**, the **App ID** and the **Key** appear
4. Copy both values
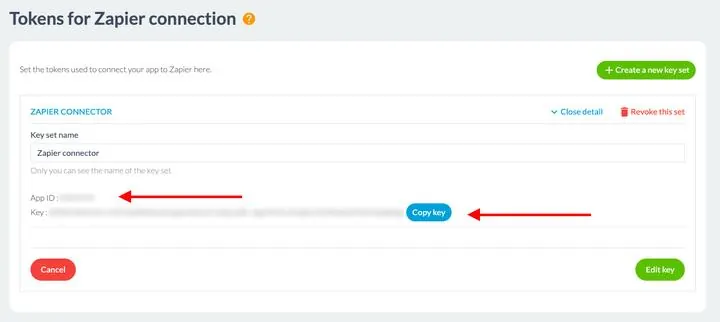
Paste them into the Zapier dialog, then click **Yes, Continue to GoodBarber eCommerce**.
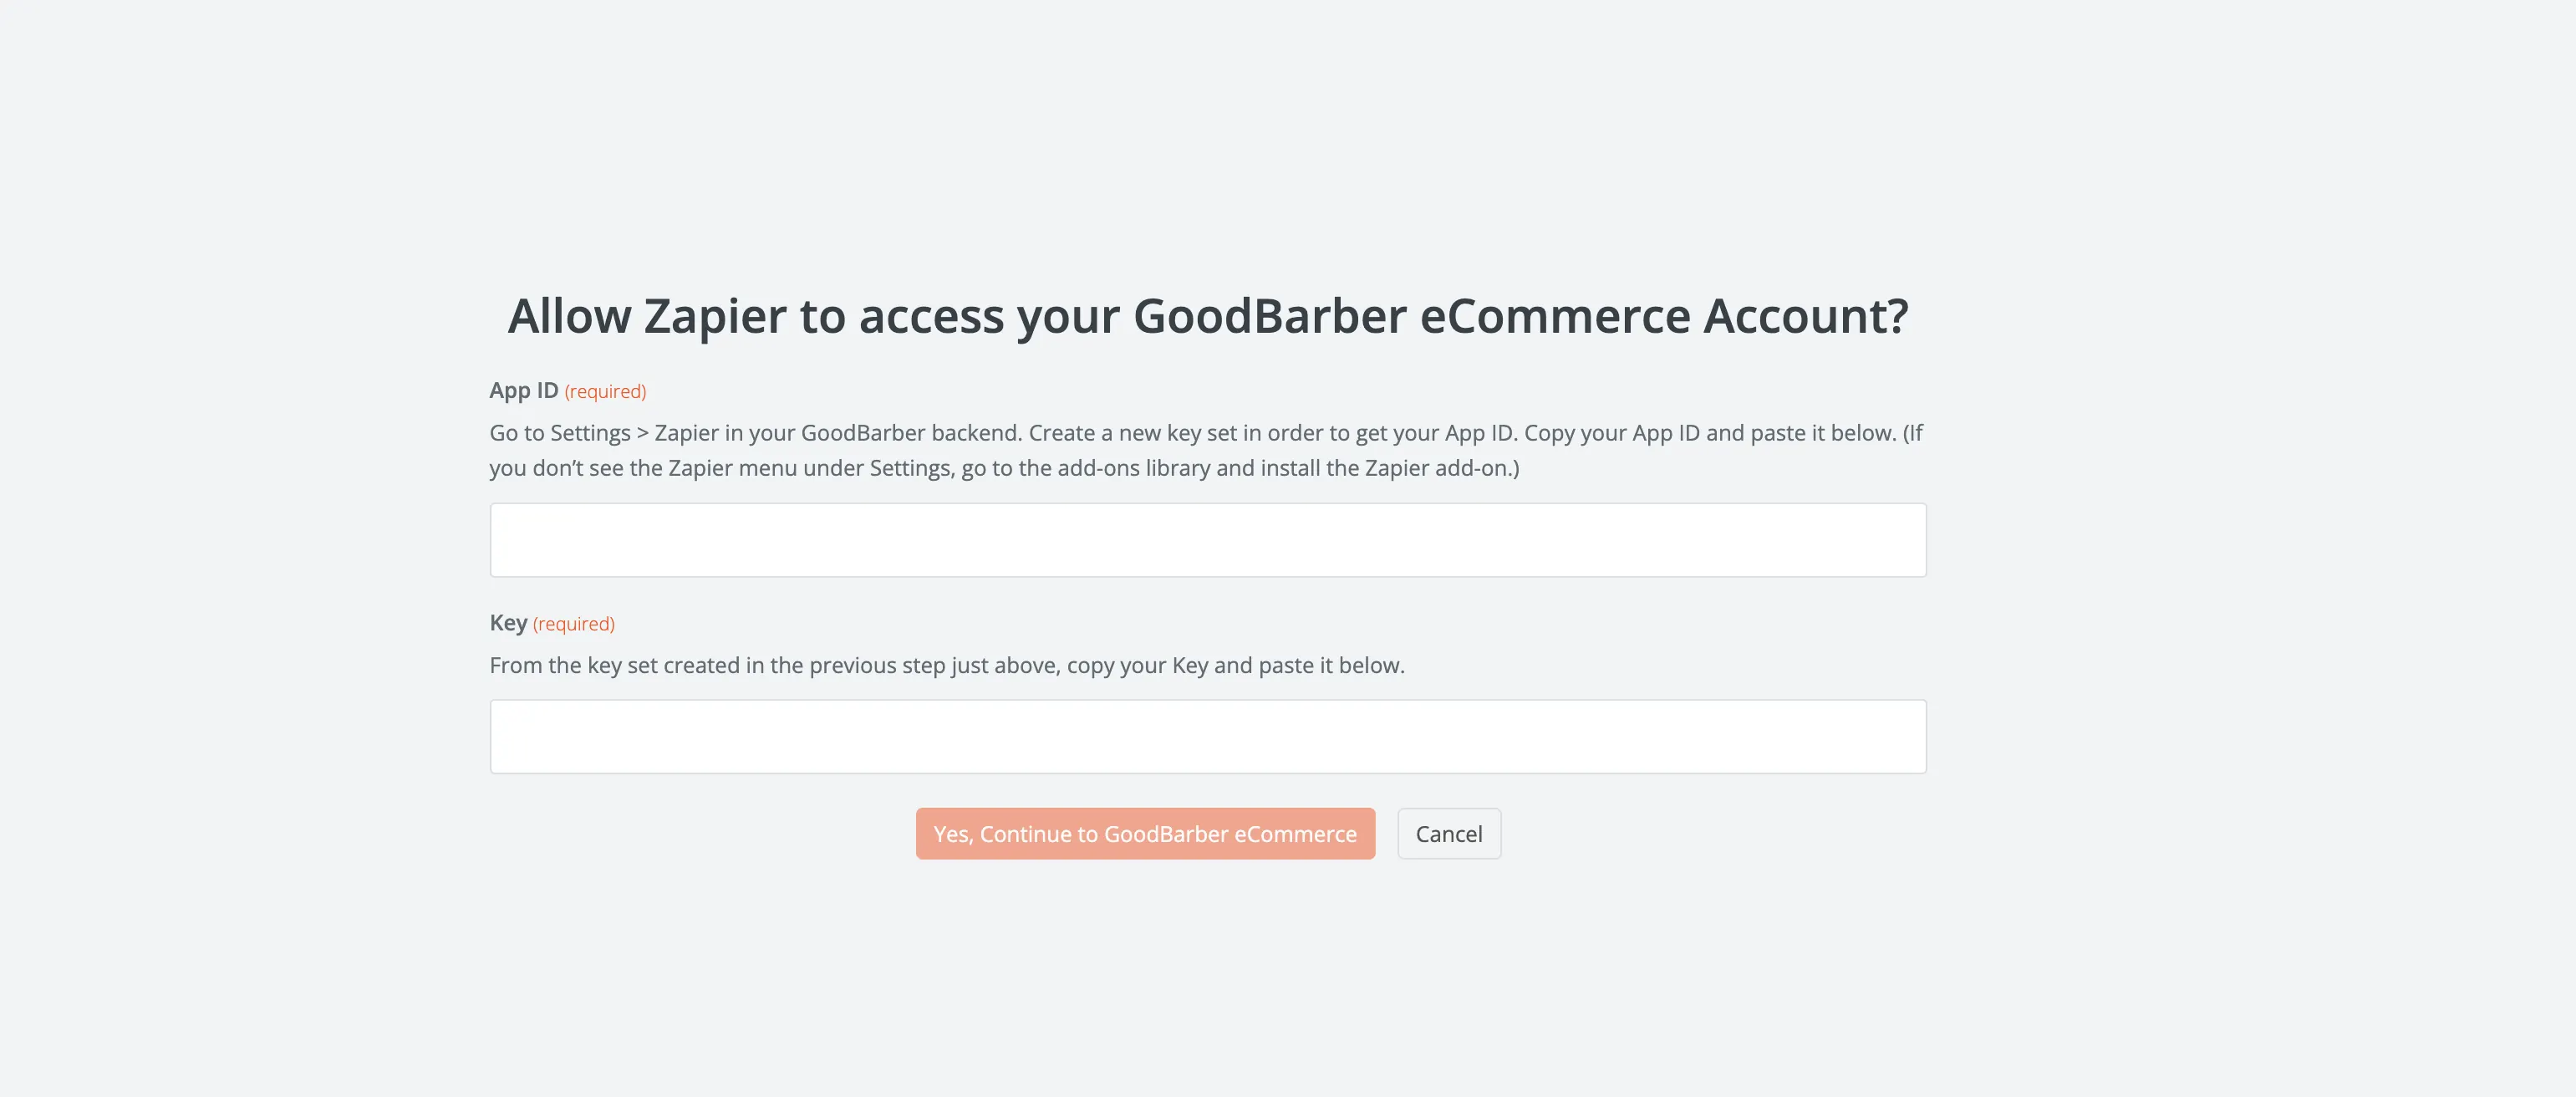
The trigger is configured, the block now reads **1. New Order**.
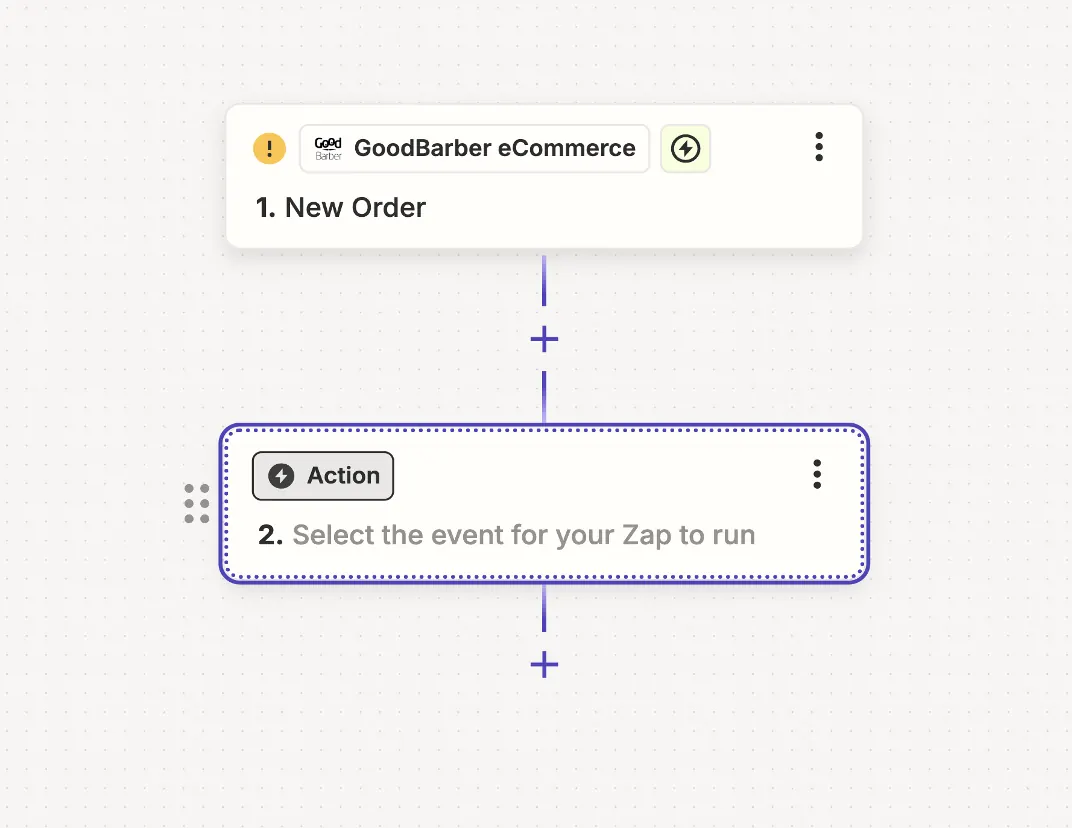
## Step 4, Add Expedy Print as the action
Click the **Action** block and select **Expedy Print**.
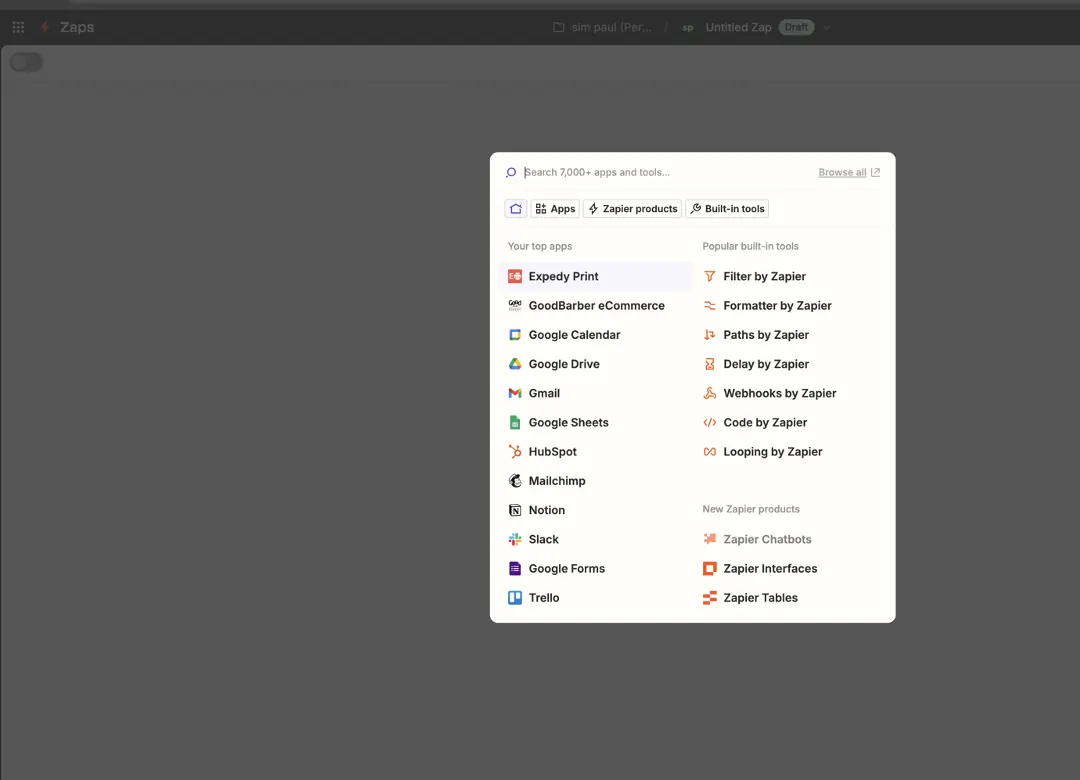
Choose **Create a Print Job** as the action event.
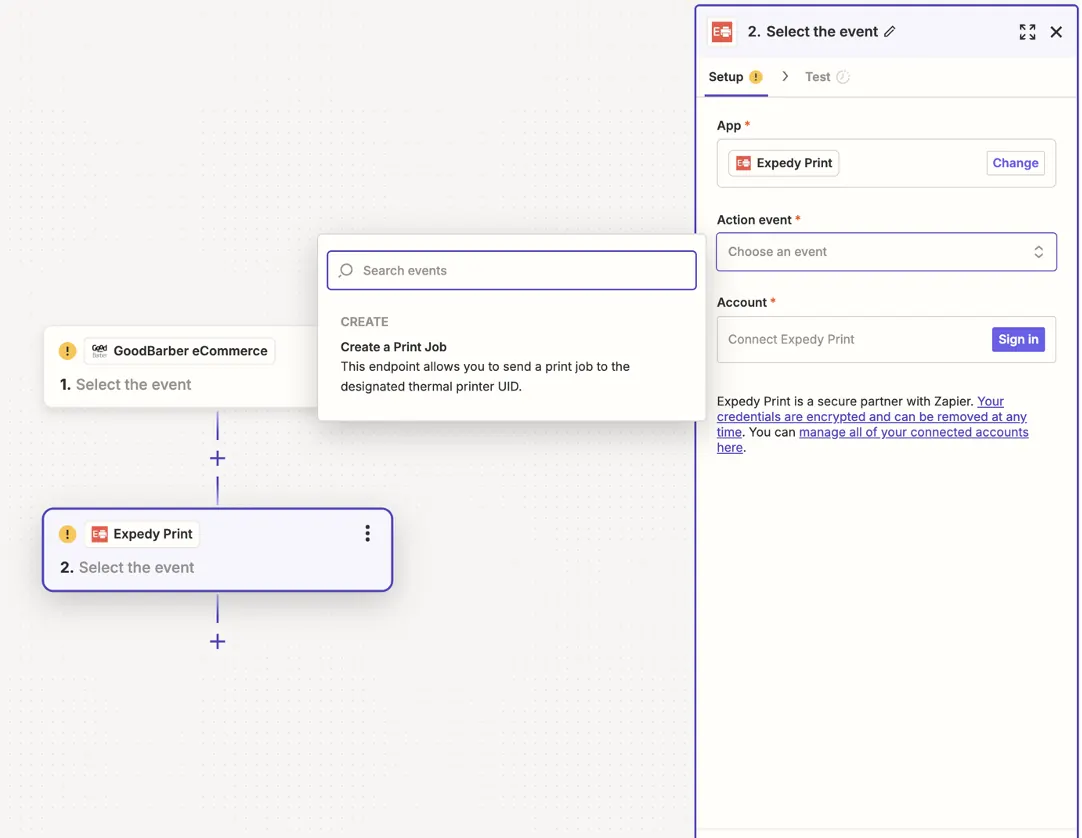
Connect your Expedy account with your **Expedy SID** and your **Expedy TOKEN**. Both are in the [Expedy console](https://www.expedy.fr/console/v3/), on the printer page, in the **API Keys & UID** card.
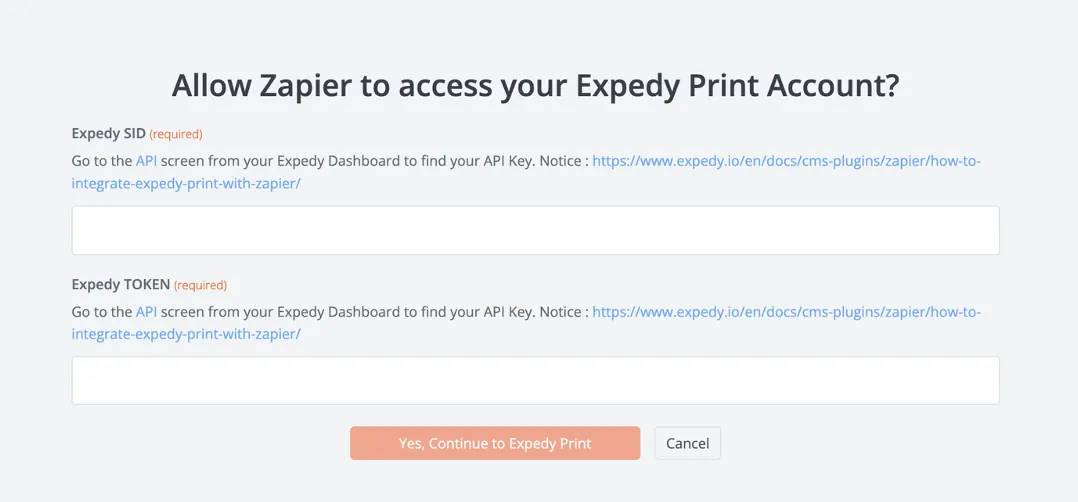
Then fill in the print job:
| Field | What to enter |
|---|---|
| Printer UID | The **API Printer UID**, from the same **API Keys & UID** card |
| Message | The receipt content, built from the GoodBarber order fields Zapier offers: order number, customer, items, total, delivery address |
Use the [receipt layout tags](/expedy-print/receipt-layout/text-layout-tags) to align, resize and emphasise text, and the [image tag](/expedy-print/receipt-layout/image-and-logo-printing) to print your logo.
## Step 5, Test, then turn the Zap on
Click **Test action**. A ticket should come out of the printer. If Zapier returns an error, check the **Expedy SID**, the **Expedy TOKEN** and the **Printer UID**.
Then click **Publish** to turn the Zap on. From that point on, every new GoodBarber order prints automatically.
You can confirm each job in the console, on the printer page, in the **Print Jobs History** panel.
---
## Going further
- [Format your receipts](/expedy-print/receipt-layout/text-layout-tags)
- [Everything you can automate with Zapier](/integrations/zapier/how-to-integrate-expedy-print-with-zapier)
A question? [Open a support ticket](https://help.expedy.io/support/tickets/new)
---
url: https://docs.expedy.io/en/integrations/wordpress-woocommerce/connect-woocommerce-to-expedy-print-with-zapier
title: WooCommerce and Zapier, print only the orders you choose
updated_at: 2026-10-16T12:44:42.182863+00:00
---
# WooCommerce and Zapier, print only the orders you choose
Expedy already has a **native WooCommerce app** that prints every paid order, see [WordPress/WooCommerce extension plugin](/integrations/wordpress-woocommerce/wordpress-woocommerce-extension-plugin-print-orders-automatically). Use it first: it needs no third-party account and it carries the receipt layout settings.
Zapier answers a different question, **printing only some orders, or printing on an event the app does not cover**.
> Zapier's WooCommerce connection requires a paid extension on the WooCommerce side. The native Expedy plugin does not.
## When Zapier is the better route
| What you want | Native app | Zapier |
|---|---|---|
| Print every paid order | Yes | Yes |
| Print only orders above an amount, or carrying a given tag or product | No | Yes, with a filter step |
| Print when a fulfilment is created, or an order is cancelled or refunded | No | Yes, pick the matching WooCommerce trigger |
| Send the same order to two printers by rule, kitchen and counter | Tandem printer only | Yes, one action per printer |
| Log the order in a spreadsheet or a Slack channel at the same time | No | Yes, extra actions in the same Zap |
## What you need
- An Expedy account with an active printer. Not added yet? Follow the guide for your machine, [Expedy XPDY80](/expedy-print/installation/add-an-expedy-xpdy80-cloud-printer-to-your-account), [HSPOS](/expedy-print/installation/add-an-hspos-cloud-printer-to-your-account), [Star Micronics](/expedy-print/installation/add-a-star-micronics-printer-to-your-account) or [Raspberry Pi](/expedy-print/installation/add-a-raspberry-pi-cloud-print-server-to-your-account)
- A WooCommerce store and a [Zapier](https://zapier.com/) account
- Your **API SID**, **API TOKEN** and **API Printer UID**, on the printer page of the [Expedy console](https://www.expedy.fr/console/v3/), in the **API Keys & UID** card
## Build the Zap
1. Pick **WooCommerce** as the trigger app and **New Order** as the event
2. Optional but this is the whole point, add a **Filter by Zapier** step to keep only the orders you want on paper
3. Add **Expedy Print** as the action, then **Create a Print Job**
4. Connect your Expedy account with your **Expedy SID** and your **Expedy TOKEN**
5. Enter the **Printer UID**, then build the message from the WooCommerce order fields
Step by step on the Zapier side: [How to integrate Expedy Print with Zapier](/integrations/zapier/how-to-integrate-expedy-print-with-zapier)
## Format the ticket
| What you want | Where to look |
|---|---|
| Align, resize or emphasise text | [Text Layout](/expedy-print/receipt-layout/text-layout-tags) |
| Print a logo or an image | [Image and Logo](/expedy-print/receipt-layout/image-and-logo-printing) |
| Print a QR code | [QR Code](/expedy-print/receipt-layout/qr-code) |
| Print a barcode | [EAN13 Barcode](/expedy-print/receipt-layout/ean13-barcode) |
## Which one to choose
> If every order is printed the same way, stay on the native app: it is simpler and consumes no Zapier task quota. Move to Zapier the day you need a condition, a different event, or a second action alongside the print. Nothing stops you running both, on two different printers.
## Need help?
- [Browse all integrations](/integrations)
- [Open a support ticket](https://help.expedy.io/support/tickets/new)
---
# Digital Signage
---
url: https://docs.expedy.io/en/digital-signage/displays/get-displays-all
title: List all your displays
updated_at: 2026-10-21T02:07:28.646854+00:00
---
# List all your displays
```api
GET https://www.expedy.fr/api/v2/displays/all
```
This endpoint allows you to list all your displays
## Authentication
This endpoint requires an `Authorization` header with a valid API key.
## Response 200
OK
| Parameter | Type | Required | Description |
|-----------|------|----------|-------------|
| `display_id` | `string` | No | |
| `display_name` | `string` | No | |
| `display_model` | `string` | No | |
| `host_device_uid` | `string` | No | |
| `hdmi_port` | `string` | No | |
| `display_state` | `string` | No | |
| `display_power` | `string` | No | |
| `display_dim` | `string` | No | |
| `display_resolution` | `string` | No | |
| `display_fps` | `string` | No | |
| `display_capabilities` | `array` | No | |
**`display_capabilities` properties:**
| Parameter | Type | Required | Description |
|-----------|------|----------|-------------|
| `rez` | `string` | No | |
| `freqs` | `array` | No | |
**`freqs` properties:**
| Parameter | Type | Required | Description |
|-----------|------|----------|-------------|
| `freq` | `string` | No | |
| `selected` | `string` | No | |
**Response Example:**
```json
[
{
"display_id": "1",
"display_name": "Main Hall screen",
"display_model": "SAM-SMB2230N",
"host_device_uid": "MMAAZ112PI",
"hdmi_port": "1",
"display_state": "connected",
"display_power": "1",
"display_dim": "477mmx268mm",
"display_resolution": "1920x1080",
"display_fps": "60.00",
"display_capabilities": [
{
"rez": "1920x1080",
"freqs": [
{
"freq": "60.00*"
},
{
"freq": "50.00"
},
{
"freq": "59.94"
}
],
"selected": "60.00*"
},
{
"rez": "1600x1200",
"freqs": [
{
"freq": "60.00"
}
],
"selected": ""
},
{
"rez": "1680x1050",
"freqs": [
{
"freq": "59.88"
}
],
"selected": ""
},
{
"rez": "1280x1024",
"freqs": [
{
"freq": "75.02"
},
{
"freq": "60.02"
}
],
"selected": ""
},
{
"rez": "1440x900",
"freqs": [
{
"freq": "74.98"
},
{
"freq": "59.90"
}
],
"selected": ""
},
{
"rez": "1280x960",
"freqs": [
{
"freq": "60.00"
}
],
"selected": ""
},
{
"rez": "1280x800",
"freqs": [
{
"freq": "59.91"
}
],
"selected": ""
},
{
"rez": "1152x864",
"freqs": [
{
"freq": "75.00"
}
],
"selected": ""
},
{
"rez": "1280x720",
"freqs": [
{
"freq": "60.00"
},
{
"freq": "50.00"
},
{
"freq": "59.94"
}
],
"selected": ""
},
{
"rez": "1024x768",
"freqs": [
{
"freq": "75.03"
},
{
"freq": "70.07"
},
{
"freq": "60.00"
}
],
"selected": ""
},
{
"rez": "832x624",
"freqs": [
{
"freq": "74.55"
}
],
"selected": ""
},
{
"rez": "800x600",
"freqs": [
{
"freq": "72.19"
},
{
"freq": "75.00"
},
{
"freq": "60.32"
},
{
"freq": "56.25"
}
],
"selected": ""
},
{
"rez": "720x480",
"freqs": [
{
"freq": "60.00"
},
{
"freq": "59.94"
}
],
"selected": ""
},
{
"rez": "640x480",
"freqs": [
{
"freq": "75.00"
},
{
"freq": "72.81"
},
{
"freq": "66.67"
},
{
"freq": "60.00"
},
{
"freq": "59.94"
}
],
"selected": ""
},
{
"rez": "720x400",
"freqs": [
{
"freq": "70.08"
}
],
"selected": ""
}
]
},
{
"display_id": "2",
"display_name": "Second Hall Screen",
"display_model": "none",
"host_device_uid": "MMAAZ112PI",
"hdmi_port": "2",
"display_state": "unknown",
"display_power": "1",
"display_dim": "0mmx0mm",
"display_resolution": "1024x768",
"display_fps": "60.00",
"display_capabilities": [
{
"rez": "1024x768",
"freqs": [
{
"freq": "60.00*"
}
],
"selected": "60.00*"
},
{
"rez": "800x600",
"freqs": [
{
"freq": "60.32"
},
{
"freq": "56.25"
}
],
"selected": ""
},
{
"rez": "848x480",
"freqs": [
{
"freq": "60.00"
}
],
"selected": ""
},
{
"rez": "640x480",
"freqs": [
{
"freq": "59.94"
}
],
"selected": ""
}
]
},
{
"display_id": "11",
"display_name": "Entrance 1",
"display_model": "",
"host_device_uid": "NYBFYLP9ZJF",
"hdmi_port": "1",
"display_state": "",
"display_power": "",
"display_dim": "",
"display_resolution": "none",
"display_fps": "none",
"display_capabilities": []
},
{
"display_id": "12",
"display_name": "Entrance 2",
"display_model": "",
"host_device_uid": "NYBFYLP9ZJF",
"hdmi_port": "2",
"display_state": "",
"display_power": "",
"display_dim": "",
"display_resolution": "none",
"display_fps": "none",
"display_capabilities": []
},
{
"display_id": "17",
"display_name": "Center Wide Wall",
"display_model": "SAM-SMB2230N",
"host_device_uid": "YTES85MCGRX",
"hdmi_port": "1",
"display_state": "connected",
"display_power": "",
"display_dim": "477mmx268mm",
"display_resolution": "none",
"display_fps": "none",
"display_capabilities": []
}
]
```
---
url: https://docs.expedy.io/en/digital-signage/displays/post-displays-display-id-resolution
title: Set Resolution & Frequency
updated_at: 2026-10-20T01:38:47.727207+00:00
---
# Set Resolution & Frequency
```api
POST https://www.expedy.fr/api/v2/displays/{display_id}/resolution
```
This endpoint allows you to set a display's resolution and frequency configuration.
## Authentication
This endpoint requires an `Authorization` header with a valid API key.
## Path Parameters
| Parameter | Type | Required | Description |
|-----------|------|----------|-------------|
| `display_id` | `string` | Yes | |
## Request Body
Content-Type: `application/json`
| Parameter | Type | Required | Description |
|-----------|------|----------|-------------|
| `display_resolution` | `string` | Yes | (ex: `1920x1080`) |
| `display_frequency` | `string` | Yes | (ex: `60`) |
**Request Example:**
```json
{
"display_resolution": "1920x1080",
"display_frequency": "50.00"
}
```
## Response 200
OK
| Parameter | Type | Required | Description |
|-----------|------|----------|-------------|
| `last_ping` | `integer` | No | |
**Response Example:**
```json
{
"request_uid": "1X5ERXL94BYVWHP92DK3MCASUGJ"
}
```
---
url: https://docs.expedy.io/en/digital-signage/displays/get-displays-display-id-orientation-display-orientation
title: Set Orientation
updated_at: 2026-10-21T08:07:39.794735+00:00
---
# Set Orientation
```api
GET https://www.expedy.fr/api/v2/displays/{display_id}/orientation/{display_orientation}
```
This endpoint allows you to set/change the display's orientation.
Valid arguments are : "norotate", "rotateleft", "rotateright", "invert"
## Authentication
This endpoint requires an `Authorization` header with a valid API key.
## Path Parameters
| Parameter | Type | Required | Description |
|-----------|------|----------|-------------|
| `display_id` | `string` | Yes | |
| `display_orientation` | `string` | Yes | norotate,rotateleft,rotateright,invert |
## Response 200
OK
| Parameter | Type | Required | Description |
|-----------|------|----------|-------------|
| `last_ping` | `number` | No | (ex: `1641509604`) |
**Response Example:**
```json
{
"last_ping": 1641509604
}
```
---
url: https://docs.expedy.io/en/digital-signage/medias/get-medias-media-id-play-device-uid-hdmi-port-loop
title: Play media
updated_at: 2026-09-26T02:35:27.32126+00:00
---
# Play media
```api
GET https://www.expedy.fr/api/v2/medias/{media_id}/play/{device_uid}/{hdmi_port}/{loop}
```
This endpoint allows you to play a specific media file on a specific device, on one or both of its hdmi ports.
Valid hdmi_port arguments are : "1", "2" or "sync" (play on both hdmi outputs)
Valid loop arguments are : "0" (no loop) or "1" (infinite loop)
## Authentication
This endpoint requires an `Authorization` header with a valid API key.
## Path Parameters
| Parameter | Type | Required | Description |
|-----------|------|----------|-------------|
| `media_id` | `string` | Yes | |
| `device_uid` | `string` | Yes | |
| `device_uid` | `string` | Yes | |
| `hdmi_port` | `string` | Yes | |
| `loop` | `string` | Yes | |
## Response 200
OK
| Parameter | Type | Required | Description |
|-----------|------|----------|-------------|
| `last_ping` | `number` | No | (ex: `1641509604`) |
**Response Example:**
```json
{
"last_ping": 1641509604
}
```
---
url: https://docs.expedy.io/en/digital-signage/hdmi/get-devices-device-uid-hdmi-conf
title: Get Last Seen Hdmi Port Configuration
updated_at: 2026-09-27T20:09:24.762551+00:00
---
# Get Last Seen Hdmi Port Configuration
```api
GET https://www.expedy.fr/api/v2/devices/{device_uid}/hdmi/conf
```
This endpoint allows you to get the device's last seen hdmi configuration, with infos about any display connected (1 or 2, depending on your device model), in json format.
## Authentication
This endpoint requires an `Authorization` header with a valid API key.
## Path Parameters
| Parameter | Type | Required | Description |
|-----------|------|----------|-------------|
| `device_uid` | `string` | Yes | The Device's unique id, as found in your Expedy account |
## Response 200
OK
| Parameter | Type | Required | Description |
|-----------|------|----------|-------------|
| `last_ping` | `string` | No | |
| `hdmi_conf` | `array` | No | |
**`hdmi_conf` properties:**
| Parameter | Type | Required | Description |
|-----------|------|----------|-------------|
| `hdmi_port` | `string` | No | |
| `display_id` | `string` | No | |
| `display_name` | `string` | No | |
| `display_model` | `string` | No | |
| `display_state` | `string` | No | |
| `display_power` | `string` | No | |
| `display_dim` | `string` | No | |
| `display_resolution` | `string` | No | |
| `display_fps` | `string` | No | |
| `display_capabilities` | `array` | No | |
**`display_capabilities` properties:**
| Parameter | Type | Required | Description |
|-----------|------|----------|-------------|
| `rez` | `string` | No | |
| `freqs` | `array` | No | |
**`freqs` properties:**
| Parameter | Type | Required | Description |
|-----------|------|----------|-------------|
| `freq` | `string` | No | |
| `selected` | `string` | No | |
**Response Example:**
```json
{
"last_ping": "1657236661",
"hdmi_conf": [
{
"hdmi_port": "1",
"display_id": "1",
"display_name": "Main office screen1",
"display_model": "SAM-SMB2230N",
"display_state": "connected",
"display_power": "1",
"display_dim": "477mmx268mm",
"display_resolution": "1920x1080",
"display_fps": "60.00",
"display_capabilities": [
{
"rez": "1920x1080",
"freqs": [
{
"freq": "60.00*"
},
{
"freq": "50.00"
},
{
"freq": "59.94"
}
],
"selected": "60.00*"
},
{
"rez": "1600x1200",
"freqs": [
{
"freq": "60.00"
}
],
"selected": ""
},
{
"rez": "1680x1050",
"freqs": [
{
"freq": "59.88"
}
],
"selected": ""
},
{
"rez": "1280x1024",
"freqs": [
{
"freq": "75.02"
},
{
"freq": "60.02"
}
],
"selected": ""
},
{
"rez": "1440x900",
"freqs": [
{
"freq": "74.98"
},
{
"freq": "59.90"
}
],
"selected": ""
},
{
"rez": "1280x960",
"freqs": [
{
"freq": "60.00"
}
],
"selected": ""
},
{
"rez": "1280x800",
"freqs": [
{
"freq": "59.91"
}
],
"selected": ""
},
{
"rez": "1152x864",
"freqs": [
{
"freq": "75.00"
}
],
"selected": ""
},
{
"rez": "1280x720",
"freqs": [
{
"freq": "60.00"
},
{
"freq": "50.00"
},
{
"freq": "59.94"
}
],
"selected": ""
},
{
"rez": "1024x768",
"freqs": [
{
"freq": "75.03"
},
{
"freq": "70.07"
},
{
"freq": "60.00"
}
],
"selected": ""
},
{
"rez": "832x624",
"freqs": [
{
"freq": "74.55"
}
],
"selected": ""
},
{
"rez": "800x600",
"freqs": [
{
"freq": "72.19"
},
{
"freq": "75.00"
},
{
"freq": "60.32"
},
{
"freq": "56.25"
}
],
"selected": ""
},
{
"rez": "720x480",
"freqs": [
{
"freq": "60.00"
},
{
"freq": "59.94"
}
],
"selected": ""
},
{
"rez": "640x480",
"freqs": [
{
"freq": "75.00"
},
{
"freq": "72.81"
},
{
"freq": "66.67"
},
{
"freq": "60.00"
},
{
"freq": "59.94"
}
],
"selected": ""
},
{
"rez": "720x400",
"freqs": [
{
"freq": "70.08"
}
],
"selected": ""
}
]
},
{
"hdmi_port": "2",
"display_id": "2",
"display_name": "Second office Screen",
"display_model": "none",
"display_state": "unknown",
"display_power": "1",
"display_dim": "0mmx0mm",
"display_resolution": "1024x768",
"display_fps": "60.00",
"display_capabilities": [
{
"rez": "1024x768",
"freqs": [
{
"freq": "60.00*"
}
],
"selected": "60.00*"
},
{
"rez": "800x600",
"freqs": [
{
"freq": "60.32"
},
{
"freq": "56.25"
}
],
"selected": ""
},
{
"rez": "848x480",
"freqs": [
{
"freq": "60.00"
}
],
"selected": ""
},
{
"rez": "640x480",
"freqs": [
{
"freq": "59.94"
}
],
"selected": ""
}
]
}
]
}
```
---
url: https://docs.expedy.io/en/digital-signage/hdmi/get-devices-device-uid-hdmi-scan
title: Scan Hdmi Ports
updated_at: 2026-10-21T13:29:13.690536+00:00
---
# Scan Hdmi Ports
```api
GET https://www.expedy.fr/api/v2/devices/{device_uid}/hdmi/scan
```
This endpoint allows you to initiate a scan of the device's hdmi ports for any display connected (1 or 2, depending on your device model)
## Authentication
This endpoint requires an `Authorization` header with a valid API key.
## Path Parameters
| Parameter | Type | Required | Description |
|-----------|------|----------|-------------|
| `device_uid` | `string` | Yes | The Device's unique id, as found in your Expedy account |
## Response 200
OK
| Parameter | Type | Required | Description |
|-----------|------|----------|-------------|
| `last_ping` | `integer` | No | (ex: `1641509604`) |
**Response Example:**
```json
{
"last_ping": 1641509604
}
```
` tag](/expedy-print/receipt-layout/image-and-logo-printing) to print an image, or the [receipt layout tags](/expedy-print/receipt-layout/text-layout-tags) to format text.
### Step 9, Test and publish

Click **Test action**. A success message confirms the job was sent. If you get an error, double-check your **API keys** and **Printer UID**. Then click **Publish** to activate your Zap.
---
## Verify the print job
You can confirm the job was received in the [Expedy console](https://www.expedy.fr/console/v3/) under **Printers → Select printer → Print Jobs History**.

---
> Need help formatting your receipts? Follow the [receipt layout guide](/expedy-print/receipt-layout/text-layout-tags).
>
> You can also add filters and conditions to your Zaps to handle more advanced automation scenarios. Have a question? [Contact us](https://help.expedy.io/support/tickets/new).
---
url: https://docs.expedy.io/en/integrations/wordpress-woocommerce/wcfm-woocommerce-plugin-print-orders-to-each-vendor-printer
title: WCFM Plugin : Print orders to each vendor printer
updated_at: 2026-10-20T14:11:36.219346+00:00
---
# WCFM Plugin : Print orders to each vendor printer
> **Before you start**: you need an Expedy account and an active printer on it. Not added yet? Follow the guide for your machine, [Expedy XPDY80](/expedy-print/installation/add-an-expedy-xpdy80-cloud-printer-to-your-account), [HSPOS](/expedy-print/installation/add-an-hspos-cloud-printer-to-your-account), [Star Micronics](/expedy-print/installation/add-a-star-micronics-printer-to-your-account) or [Raspberry Pi](/expedy-print/installation/add-a-raspberry-pi-cloud-print-server-to-your-account).
Automatically route each vendor's orders to their own printer, no PC, no tablet, no manual action
required. As soon as an order is placed, the receipt prints directly at the vendor's location with all
the information needed to prepare it: customer name, reference, phone number, delivery address, order
type, and more. The plugin connects your WCFM marketplace to your printers via the **Expedy API v2**.
---
## Try it first (live sandbox)
Want to see the plugin in action before installing it on your own marketplace? A ready-to-use sandbox
runs a full WordPress + WooCommerce + Expedy environment right in your browser:
👉 **[woo.expedy.io](https://woo.expedy.io)**
It comes pre-loaded with a demo order, so you can explore the settings dashboard and preview a printed
ticket immediately, no account and no installation required. The sandbox is temporary and isolated, so
real print jobs aren't sent; use it for interface and receipt-preview testing.
---
## Download
Download the latest version from the official **[Releases page](https://github.com/ExpedyDev/expedyprint-woocommerce-extension/releases)**.
Each release ships the ready-to-install `expedyprint.zip` and its changelog, that single file is all
you need.
---
## Installation
1. [**Download the plugin**](https://github.com/ExpedyDev/expedyprint-woocommerce-extension/releases) (`expedyprint.zip`).
2. In your WordPress admin, go to **Plugins → Add New → Upload Plugin**.
3. Click **Choose File** and select the `.zip` file downloaded in step 1.
4. Click **Install Now**.
5. Click **Activate** once the installation is complete.
6. Make sure **WooCommerce** and **WCFM** are installed and active.
7. A new **ExpedyPRINT** entry appears in your wp-admin menu, open it to configure the plugin.
> No drivers, no command line, no extra software required.
---
## Get your API credentials
The plugin connects to your account using two credentials: an **API SID** (your account identifier)
and an **API token** (your secret key).
1. Don't have an account yet? Create your free account at **[expedy.io/signup](https://www.expedy.io/signup)**.
2. Log in to your [Expedy account](https://www.expedy.io) and open the **API** section. [Contact support](https://support.expedy.fr/hc/fr/requests/new) if you don't have access.
3. Copy your **API SID** and **API token**.
4. Make sure your **vendor printers** are registered on your account.
> Keep your API token private, treat it like a password.
---
## Configuration
In your WordPress admin, open the **ExpedyPRINT** menu and fill in each section.
### 1. API connection
| Setting | Description |
|---------|-------------|
| **API SID** | Your account identifier, from the **API** section of your Expedy account. |
| **API token** | Your secret key, from the **API** section of your Expedy account. Leave blank to keep the value already saved. |
Click **Test connection**. On success, the list of printers on your account is loaded automatically.
### 2. Printer
| Setting | Description |
|---------|-------------|
| **Printer** | The default printer, used for any order that isn't routed to a specific vendor. Pick it from the dropdown, it shows the name, paper width and UID. Use **Send test print** to print a sample ticket. |
| **Backup printer ID** | *(optional)* UID of a second printer that receives a copy of every ticket. |
| **Paper width** | Paper roll size: **58 mm** or **80 mm**. |
### 3. Printing trigger
| Setting | Description |
|---------|-------------|
| **Print the ticket** | Order status that triggers automatic printing: **When the order is paid** · **When the order is processing** · **When the order is completed**. |
| **Copies** | Number of copies to print automatically for each order (1 to 3). |
| **Time zone** | Adjusts the printed delivery/pickup times if your server is in a different time zone. |
### 4. Receipt header & footer
| Setting | Description |
|---------|-------------|
| **Logo URL** | HTTPS URL of your logo. Recommended max width ~570px. Keep the file small to reduce data usage and improve print speed, if printing is blocked, test without the logo first. |
| **Title** | Title shown at the top of the ticket. |
| **Company name / Company ID / Address / Postcode / City / Phone / Email** | Store details printed in the receipt footer. |
| **Product options detail** | Choose **Full details** or **Minimal details** for the product options printed on each line. |
### 5. Receipt wording
Customize every label printed on the ticket (Order, Product, Price, Subtotal, Tax, Total, Shipping,
Total due, Customer note…). Defaults are in English; type your own wording in any language.
### 6. Advanced, Multi-vendor mapping
This is where WCFM routing is configured. See the next section for the full walkthrough.
---
## Multi-vendor routing (WCFM)
This is what the plugin is built for: send each vendor's orders to **their own** Expedy printer.
1. In **WCFM**, find each vendor's **ID** (Vendors list, or the vendor's store/profile).
2. For each vendor, note the **printer UID** their orders should print on (visible in the **Printer**
dropdown, or in your Expedy account).
3. Go to **ExpedyPRINT → Advanced → Multi-vendor mapping** and enter the pairs
`vendor_id:printer_uid`, separated by `\|\|`.
Example: `4:DESNBXP887K\|\|7:DESHKTI4EOW`
When an order contains a vendor's products, its receipt is sent automatically to that vendor's printer.
Any order without a mapped vendor falls back to the default **Printer** set in section 2.
---
## Video tutorial
Watch the step-by-step setup: https://www.youtube.com/watch?v=IYipTBSybsw
---
## Where to find printing logs
Every print attempt (success or failure) is recorded as an **order note** and under
**WooCommerce → Status → Logs** (source `expedyprint`), so you always know what happened.
---
## Compatible plugins
The Expedy plugin is compatible with the following WooCommerce extensions:
- YITH (sub-items / product attributes)
- WooCommerce TM Extra Product Options
- ODT Extended / WooODT Lite (Byconsole)
- Advanced Product Fields Pro (StudioWombat)
- WooCommerce Local Pickup Time Select
- WCFM, Multi Vendor Marketplace Plugin
> We regularly add new compatible plugins. If yours isn't listed, [contact our support team](https://support.expedy.fr/hc/fr/requests/new).
---
## Build your own integration
Prefer to print from your own application or connect another platform instead of using this WooCommerce
plugin? Use the official Node.js SDK and API examples:
👉 **[github.com/ExpedyDev/expedy-sdk-node](https://github.com/ExpedyDev/expedy-sdk-node)**
It shows how to authenticate, list your printers and send print jobs through the Expedy API v2.
---
url: https://docs.expedy.io/en/integrations/goodbarber/print-goodbarber-orders-on-a-receipt-printer
title: Print GoodBarber eCommerce orders via Zapier
updated_at: 2026-10-20T15:27:05.908377+00:00
---
# Print GoodBarber eCommerce orders via Zapier
[GoodBarber](https://www.goodbarber.com/) eCommerce connects to Expedy PRINT **through Zapier**. Every new order placed in your app or your web store triggers a print job, and the ticket comes out of your cloud printer within seconds.

> The native GoodBarber webhook described in earlier versions of this guide is no longer used. Zapier is now the only supported route.
---
## What you need
- An Expedy account with an active printer. Not added yet? Follow the guide for your machine, [Expedy XPDY80](/expedy-print/installation/add-an-expedy-xpdy80-cloud-printer-to-your-account), [HSPOS](/expedy-print/installation/add-an-hspos-cloud-printer-to-your-account), [Star Micronics](/expedy-print/installation/add-a-star-micronics-printer-to-your-account) or [Raspberry Pi](/expedy-print/installation/add-a-raspberry-pi-cloud-print-server-to-your-account)
- A [GoodBarber eCommerce](https://www.goodbarber.com/) account
- A [Zapier](https://zapier.com/) account, free up to 100 tasks per month
> Depending on your setup, this connection may be handled by your partner or your agency. Check with them before you start.
---
## Step 1, Create the Zap
Log in to Zapier, click **+ Create** in the left menu, then **Zaps**.

## Step 2, Set GoodBarber eCommerce as the trigger
In the Zap editor, click the **Trigger** block, *Select the event that starts your Zap*.

Search for and select **GoodBarber eCommerce**, then choose **New Order** as the trigger event.

## Step 3, Connect your GoodBarber account
Zapier asks for the **App ID** and the **Key** of your GoodBarber store.
Open the **Explore apps** menu in Zapier and search for GoodBarber eCommerce.


Then, in your GoodBarber back office:
1. Open the **Extensions Store** and install the **Zapier** extension if it is not there yet
2. Go to **Settings**, **Zapier**
3. Click **Create a new key set**, the **App ID** and the **Key** appear
4. Copy both values

Paste them into the Zapier dialog, then click **Yes, Continue to GoodBarber eCommerce**.

The trigger is configured, the block now reads **1. New Order**.

## Step 4, Add Expedy Print as the action
Click the **Action** block and select **Expedy Print**.

Choose **Create a Print Job** as the action event.

Connect your Expedy account with your **Expedy SID** and your **Expedy TOKEN**. Both are in the [Expedy console](https://www.expedy.fr/console/v3/), on the printer page, in the **API Keys & UID** card.

Then fill in the print job:
| Field | What to enter |
|---|---|
| Printer UID | The **API Printer UID**, from the same **API Keys & UID** card |
| Message | The receipt content, built from the GoodBarber order fields Zapier offers: order number, customer, items, total, delivery address |
Use the [receipt layout tags](/expedy-print/receipt-layout/text-layout-tags) to align, resize and emphasise text, and the [image tag](/expedy-print/receipt-layout/image-and-logo-printing) to print your logo.
## Step 5, Test, then turn the Zap on
Click **Test action**. A ticket should come out of the printer. If Zapier returns an error, check the **Expedy SID**, the **Expedy TOKEN** and the **Printer UID**.
Then click **Publish** to turn the Zap on. From that point on, every new GoodBarber order prints automatically.
You can confirm each job in the console, on the printer page, in the **Print Jobs History** panel.
---
## Going further
- [Format your receipts](/expedy-print/receipt-layout/text-layout-tags)
- [Everything you can automate with Zapier](/integrations/zapier/how-to-integrate-expedy-print-with-zapier)
A question? [Open a support ticket](https://help.expedy.io/support/tickets/new)
---
url: https://docs.expedy.io/en/integrations/wordpress-woocommerce/connect-woocommerce-to-expedy-print-with-zapier
title: WooCommerce and Zapier, print only the orders you choose
updated_at: 2026-10-16T12:44:42.182863+00:00
---
# WooCommerce and Zapier, print only the orders you choose
Expedy already has a **native WooCommerce app** that prints every paid order, see [WordPress/WooCommerce extension plugin](/integrations/wordpress-woocommerce/wordpress-woocommerce-extension-plugin-print-orders-automatically). Use it first: it needs no third-party account and it carries the receipt layout settings.
Zapier answers a different question, **printing only some orders, or printing on an event the app does not cover**.
> Zapier's WooCommerce connection requires a paid extension on the WooCommerce side. The native Expedy plugin does not.
## When Zapier is the better route
| What you want | Native app | Zapier |
|---|---|---|
| Print every paid order | Yes | Yes |
| Print only orders above an amount, or carrying a given tag or product | No | Yes, with a filter step |
| Print when a fulfilment is created, or an order is cancelled or refunded | No | Yes, pick the matching WooCommerce trigger |
| Send the same order to two printers by rule, kitchen and counter | Tandem printer only | Yes, one action per printer |
| Log the order in a spreadsheet or a Slack channel at the same time | No | Yes, extra actions in the same Zap |
## What you need
- An Expedy account with an active printer. Not added yet? Follow the guide for your machine, [Expedy XPDY80](/expedy-print/installation/add-an-expedy-xpdy80-cloud-printer-to-your-account), [HSPOS](/expedy-print/installation/add-an-hspos-cloud-printer-to-your-account), [Star Micronics](/expedy-print/installation/add-a-star-micronics-printer-to-your-account) or [Raspberry Pi](/expedy-print/installation/add-a-raspberry-pi-cloud-print-server-to-your-account)
- A WooCommerce store and a [Zapier](https://zapier.com/) account
- Your **API SID**, **API TOKEN** and **API Printer UID**, on the printer page of the [Expedy console](https://www.expedy.fr/console/v3/), in the **API Keys & UID** card
## Build the Zap
1. Pick **WooCommerce** as the trigger app and **New Order** as the event
2. Optional but this is the whole point, add a **Filter by Zapier** step to keep only the orders you want on paper
3. Add **Expedy Print** as the action, then **Create a Print Job**
4. Connect your Expedy account with your **Expedy SID** and your **Expedy TOKEN**
5. Enter the **Printer UID**, then build the message from the WooCommerce order fields
Step by step on the Zapier side: [How to integrate Expedy Print with Zapier](/integrations/zapier/how-to-integrate-expedy-print-with-zapier)
## Format the ticket
| What you want | Where to look |
|---|---|
| Align, resize or emphasise text | [Text Layout](/expedy-print/receipt-layout/text-layout-tags) |
| Print a logo or an image | [Image and Logo](/expedy-print/receipt-layout/image-and-logo-printing) |
| Print a QR code | [QR Code](/expedy-print/receipt-layout/qr-code) |
| Print a barcode | [EAN13 Barcode](/expedy-print/receipt-layout/ean13-barcode) |
## Which one to choose
> If every order is printed the same way, stay on the native app: it is simpler and consumes no Zapier task quota. Move to Zapier the day you need a condition, a different event, or a second action alongside the print. Nothing stops you running both, on two different printers.
## Need help?
- [Browse all integrations](/integrations)
- [Open a support ticket](https://help.expedy.io/support/tickets/new)
---
# Digital Signage
---
url: https://docs.expedy.io/en/digital-signage/displays/get-displays-all
title: List all your displays
updated_at: 2026-10-21T02:07:28.646854+00:00
---
# List all your displays
```api
GET https://www.expedy.fr/api/v2/displays/all
```
This endpoint allows you to list all your displays
## Authentication
This endpoint requires an `Authorization` header with a valid API key.
## Response 200
OK
| Parameter | Type | Required | Description |
|-----------|------|----------|-------------|
| `display_id` | `string` | No | |
| `display_name` | `string` | No | |
| `display_model` | `string` | No | |
| `host_device_uid` | `string` | No | |
| `hdmi_port` | `string` | No | |
| `display_state` | `string` | No | |
| `display_power` | `string` | No | |
| `display_dim` | `string` | No | |
| `display_resolution` | `string` | No | |
| `display_fps` | `string` | No | |
| `display_capabilities` | `array` | No | |
**`display_capabilities` properties:**
| Parameter | Type | Required | Description |
|-----------|------|----------|-------------|
| `rez` | `string` | No | |
| `freqs` | `array` | No | |
**`freqs` properties:**
| Parameter | Type | Required | Description |
|-----------|------|----------|-------------|
| `freq` | `string` | No | |
| `selected` | `string` | No | |
**Response Example:**
```json
[
{
"display_id": "1",
"display_name": "Main Hall screen",
"display_model": "SAM-SMB2230N",
"host_device_uid": "MMAAZ112PI",
"hdmi_port": "1",
"display_state": "connected",
"display_power": "1",
"display_dim": "477mmx268mm",
"display_resolution": "1920x1080",
"display_fps": "60.00",
"display_capabilities": [
{
"rez": "1920x1080",
"freqs": [
{
"freq": "60.00*"
},
{
"freq": "50.00"
},
{
"freq": "59.94"
}
],
"selected": "60.00*"
},
{
"rez": "1600x1200",
"freqs": [
{
"freq": "60.00"
}
],
"selected": ""
},
{
"rez": "1680x1050",
"freqs": [
{
"freq": "59.88"
}
],
"selected": ""
},
{
"rez": "1280x1024",
"freqs": [
{
"freq": "75.02"
},
{
"freq": "60.02"
}
],
"selected": ""
},
{
"rez": "1440x900",
"freqs": [
{
"freq": "74.98"
},
{
"freq": "59.90"
}
],
"selected": ""
},
{
"rez": "1280x960",
"freqs": [
{
"freq": "60.00"
}
],
"selected": ""
},
{
"rez": "1280x800",
"freqs": [
{
"freq": "59.91"
}
],
"selected": ""
},
{
"rez": "1152x864",
"freqs": [
{
"freq": "75.00"
}
],
"selected": ""
},
{
"rez": "1280x720",
"freqs": [
{
"freq": "60.00"
},
{
"freq": "50.00"
},
{
"freq": "59.94"
}
],
"selected": ""
},
{
"rez": "1024x768",
"freqs": [
{
"freq": "75.03"
},
{
"freq": "70.07"
},
{
"freq": "60.00"
}
],
"selected": ""
},
{
"rez": "832x624",
"freqs": [
{
"freq": "74.55"
}
],
"selected": ""
},
{
"rez": "800x600",
"freqs": [
{
"freq": "72.19"
},
{
"freq": "75.00"
},
{
"freq": "60.32"
},
{
"freq": "56.25"
}
],
"selected": ""
},
{
"rez": "720x480",
"freqs": [
{
"freq": "60.00"
},
{
"freq": "59.94"
}
],
"selected": ""
},
{
"rez": "640x480",
"freqs": [
{
"freq": "75.00"
},
{
"freq": "72.81"
},
{
"freq": "66.67"
},
{
"freq": "60.00"
},
{
"freq": "59.94"
}
],
"selected": ""
},
{
"rez": "720x400",
"freqs": [
{
"freq": "70.08"
}
],
"selected": ""
}
]
},
{
"display_id": "2",
"display_name": "Second Hall Screen",
"display_model": "none",
"host_device_uid": "MMAAZ112PI",
"hdmi_port": "2",
"display_state": "unknown",
"display_power": "1",
"display_dim": "0mmx0mm",
"display_resolution": "1024x768",
"display_fps": "60.00",
"display_capabilities": [
{
"rez": "1024x768",
"freqs": [
{
"freq": "60.00*"
}
],
"selected": "60.00*"
},
{
"rez": "800x600",
"freqs": [
{
"freq": "60.32"
},
{
"freq": "56.25"
}
],
"selected": ""
},
{
"rez": "848x480",
"freqs": [
{
"freq": "60.00"
}
],
"selected": ""
},
{
"rez": "640x480",
"freqs": [
{
"freq": "59.94"
}
],
"selected": ""
}
]
},
{
"display_id": "11",
"display_name": "Entrance 1",
"display_model": "",
"host_device_uid": "NYBFYLP9ZJF",
"hdmi_port": "1",
"display_state": "",
"display_power": "",
"display_dim": "",
"display_resolution": "none",
"display_fps": "none",
"display_capabilities": []
},
{
"display_id": "12",
"display_name": "Entrance 2",
"display_model": "",
"host_device_uid": "NYBFYLP9ZJF",
"hdmi_port": "2",
"display_state": "",
"display_power": "",
"display_dim": "",
"display_resolution": "none",
"display_fps": "none",
"display_capabilities": []
},
{
"display_id": "17",
"display_name": "Center Wide Wall",
"display_model": "SAM-SMB2230N",
"host_device_uid": "YTES85MCGRX",
"hdmi_port": "1",
"display_state": "connected",
"display_power": "",
"display_dim": "477mmx268mm",
"display_resolution": "none",
"display_fps": "none",
"display_capabilities": []
}
]
```
---
url: https://docs.expedy.io/en/digital-signage/displays/post-displays-display-id-resolution
title: Set Resolution & Frequency
updated_at: 2026-10-20T01:38:47.727207+00:00
---
# Set Resolution & Frequency
```api
POST https://www.expedy.fr/api/v2/displays/{display_id}/resolution
```
This endpoint allows you to set a display's resolution and frequency configuration.
## Authentication
This endpoint requires an `Authorization` header with a valid API key.
## Path Parameters
| Parameter | Type | Required | Description |
|-----------|------|----------|-------------|
| `display_id` | `string` | Yes | |
## Request Body
Content-Type: `application/json`
| Parameter | Type | Required | Description |
|-----------|------|----------|-------------|
| `display_resolution` | `string` | Yes | (ex: `1920x1080`) |
| `display_frequency` | `string` | Yes | (ex: `60`) |
**Request Example:**
```json
{
"display_resolution": "1920x1080",
"display_frequency": "50.00"
}
```
## Response 200
OK
| Parameter | Type | Required | Description |
|-----------|------|----------|-------------|
| `last_ping` | `integer` | No | |
**Response Example:**
```json
{
"request_uid": "1X5ERXL94BYVWHP92DK3MCASUGJ"
}
```
---
url: https://docs.expedy.io/en/digital-signage/displays/get-displays-display-id-orientation-display-orientation
title: Set Orientation
updated_at: 2026-10-21T08:07:39.794735+00:00
---
# Set Orientation
```api
GET https://www.expedy.fr/api/v2/displays/{display_id}/orientation/{display_orientation}
```
This endpoint allows you to set/change the display's orientation.
Valid arguments are : "norotate", "rotateleft", "rotateright", "invert"
## Authentication
This endpoint requires an `Authorization` header with a valid API key.
## Path Parameters
| Parameter | Type | Required | Description |
|-----------|------|----------|-------------|
| `display_id` | `string` | Yes | |
| `display_orientation` | `string` | Yes | norotate,rotateleft,rotateright,invert |
## Response 200
OK
| Parameter | Type | Required | Description |
|-----------|------|----------|-------------|
| `last_ping` | `number` | No | (ex: `1641509604`) |
**Response Example:**
```json
{
"last_ping": 1641509604
}
```
---
url: https://docs.expedy.io/en/digital-signage/medias/get-medias-media-id-play-device-uid-hdmi-port-loop
title: Play media
updated_at: 2026-09-26T02:35:27.32126+00:00
---
# Play media
```api
GET https://www.expedy.fr/api/v2/medias/{media_id}/play/{device_uid}/{hdmi_port}/{loop}
```
This endpoint allows you to play a specific media file on a specific device, on one or both of its hdmi ports.
Valid hdmi_port arguments are : "1", "2" or "sync" (play on both hdmi outputs)
Valid loop arguments are : "0" (no loop) or "1" (infinite loop)
## Authentication
This endpoint requires an `Authorization` header with a valid API key.
## Path Parameters
| Parameter | Type | Required | Description |
|-----------|------|----------|-------------|
| `media_id` | `string` | Yes | |
| `device_uid` | `string` | Yes | |
| `device_uid` | `string` | Yes | |
| `hdmi_port` | `string` | Yes | |
| `loop` | `string` | Yes | |
## Response 200
OK
| Parameter | Type | Required | Description |
|-----------|------|----------|-------------|
| `last_ping` | `number` | No | (ex: `1641509604`) |
**Response Example:**
```json
{
"last_ping": 1641509604
}
```
---
url: https://docs.expedy.io/en/digital-signage/hdmi/get-devices-device-uid-hdmi-conf
title: Get Last Seen Hdmi Port Configuration
updated_at: 2026-09-27T20:09:24.762551+00:00
---
# Get Last Seen Hdmi Port Configuration
```api
GET https://www.expedy.fr/api/v2/devices/{device_uid}/hdmi/conf
```
This endpoint allows you to get the device's last seen hdmi configuration, with infos about any display connected (1 or 2, depending on your device model), in json format.
## Authentication
This endpoint requires an `Authorization` header with a valid API key.
## Path Parameters
| Parameter | Type | Required | Description |
|-----------|------|----------|-------------|
| `device_uid` | `string` | Yes | The Device's unique id, as found in your Expedy account |
## Response 200
OK
| Parameter | Type | Required | Description |
|-----------|------|----------|-------------|
| `last_ping` | `string` | No | |
| `hdmi_conf` | `array` | No | |
**`hdmi_conf` properties:**
| Parameter | Type | Required | Description |
|-----------|------|----------|-------------|
| `hdmi_port` | `string` | No | |
| `display_id` | `string` | No | |
| `display_name` | `string` | No | |
| `display_model` | `string` | No | |
| `display_state` | `string` | No | |
| `display_power` | `string` | No | |
| `display_dim` | `string` | No | |
| `display_resolution` | `string` | No | |
| `display_fps` | `string` | No | |
| `display_capabilities` | `array` | No | |
**`display_capabilities` properties:**
| Parameter | Type | Required | Description |
|-----------|------|----------|-------------|
| `rez` | `string` | No | |
| `freqs` | `array` | No | |
**`freqs` properties:**
| Parameter | Type | Required | Description |
|-----------|------|----------|-------------|
| `freq` | `string` | No | |
| `selected` | `string` | No | |
**Response Example:**
```json
{
"last_ping": "1657236661",
"hdmi_conf": [
{
"hdmi_port": "1",
"display_id": "1",
"display_name": "Main office screen1",
"display_model": "SAM-SMB2230N",
"display_state": "connected",
"display_power": "1",
"display_dim": "477mmx268mm",
"display_resolution": "1920x1080",
"display_fps": "60.00",
"display_capabilities": [
{
"rez": "1920x1080",
"freqs": [
{
"freq": "60.00*"
},
{
"freq": "50.00"
},
{
"freq": "59.94"
}
],
"selected": "60.00*"
},
{
"rez": "1600x1200",
"freqs": [
{
"freq": "60.00"
}
],
"selected": ""
},
{
"rez": "1680x1050",
"freqs": [
{
"freq": "59.88"
}
],
"selected": ""
},
{
"rez": "1280x1024",
"freqs": [
{
"freq": "75.02"
},
{
"freq": "60.02"
}
],
"selected": ""
},
{
"rez": "1440x900",
"freqs": [
{
"freq": "74.98"
},
{
"freq": "59.90"
}
],
"selected": ""
},
{
"rez": "1280x960",
"freqs": [
{
"freq": "60.00"
}
],
"selected": ""
},
{
"rez": "1280x800",
"freqs": [
{
"freq": "59.91"
}
],
"selected": ""
},
{
"rez": "1152x864",
"freqs": [
{
"freq": "75.00"
}
],
"selected": ""
},
{
"rez": "1280x720",
"freqs": [
{
"freq": "60.00"
},
{
"freq": "50.00"
},
{
"freq": "59.94"
}
],
"selected": ""
},
{
"rez": "1024x768",
"freqs": [
{
"freq": "75.03"
},
{
"freq": "70.07"
},
{
"freq": "60.00"
}
],
"selected": ""
},
{
"rez": "832x624",
"freqs": [
{
"freq": "74.55"
}
],
"selected": ""
},
{
"rez": "800x600",
"freqs": [
{
"freq": "72.19"
},
{
"freq": "75.00"
},
{
"freq": "60.32"
},
{
"freq": "56.25"
}
],
"selected": ""
},
{
"rez": "720x480",
"freqs": [
{
"freq": "60.00"
},
{
"freq": "59.94"
}
],
"selected": ""
},
{
"rez": "640x480",
"freqs": [
{
"freq": "75.00"
},
{
"freq": "72.81"
},
{
"freq": "66.67"
},
{
"freq": "60.00"
},
{
"freq": "59.94"
}
],
"selected": ""
},
{
"rez": "720x400",
"freqs": [
{
"freq": "70.08"
}
],
"selected": ""
}
]
},
{
"hdmi_port": "2",
"display_id": "2",
"display_name": "Second office Screen",
"display_model": "none",
"display_state": "unknown",
"display_power": "1",
"display_dim": "0mmx0mm",
"display_resolution": "1024x768",
"display_fps": "60.00",
"display_capabilities": [
{
"rez": "1024x768",
"freqs": [
{
"freq": "60.00*"
}
],
"selected": "60.00*"
},
{
"rez": "800x600",
"freqs": [
{
"freq": "60.32"
},
{
"freq": "56.25"
}
],
"selected": ""
},
{
"rez": "848x480",
"freqs": [
{
"freq": "60.00"
}
],
"selected": ""
},
{
"rez": "640x480",
"freqs": [
{
"freq": "59.94"
}
],
"selected": ""
}
]
}
]
}
```
---
url: https://docs.expedy.io/en/digital-signage/hdmi/get-devices-device-uid-hdmi-scan
title: Scan Hdmi Ports
updated_at: 2026-10-21T13:29:13.690536+00:00
---
# Scan Hdmi Ports
```api
GET https://www.expedy.fr/api/v2/devices/{device_uid}/hdmi/scan
```
This endpoint allows you to initiate a scan of the device's hdmi ports for any display connected (1 or 2, depending on your device model)
## Authentication
This endpoint requires an `Authorization` header with a valid API key.
## Path Parameters
| Parameter | Type | Required | Description |
|-----------|------|----------|-------------|
| `device_uid` | `string` | Yes | The Device's unique id, as found in your Expedy account |
## Response 200
OK
| Parameter | Type | Required | Description |
|-----------|------|----------|-------------|
| `last_ping` | `integer` | No | (ex: `1641509604`) |
**Response Example:**
```json
{
"last_ping": 1641509604
}
```