Paramétrage WiFi
Il existe 4 façons de configurer le Wi-Fi sur votre imprimante Expedy :
- Logiciel Windows
- WPS (automatique, sans saisie de mot de passe)
- Smartphone
- API distante (nécessite l'option Cloud)
1. Logiciel Windows
Modèles compatibles : PP58EWG, PP58EWG-R, PP80EWG, XPDY80EWB, XPDY80EWBG, PP80UEWBT, XPDY80UWB, PP80USBEBW, XPDY80U, XPDY80USBEBW, XPDYPOS80UEB
Avant de commencer, consultez comment connecter le logiciel à l'imprimante.
Télécharger le logiciel PrinterSetting ->
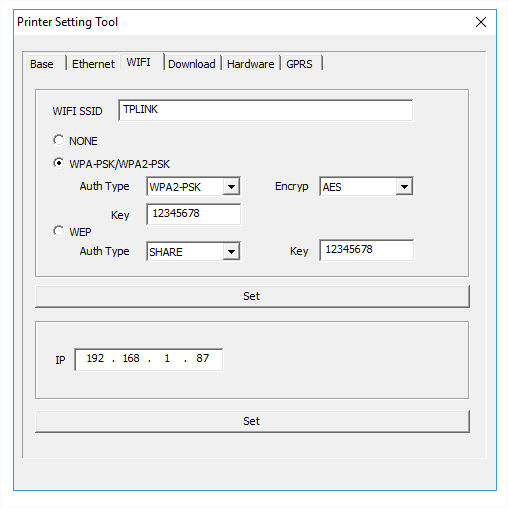
- Ouvrez l'onglet Wi-Fi
- Saisissez le SSID de votre réseau Wi-Fi (le nom de votre routeur ou de votre box Internet)
- Saisissez votre clé secrète WPA (mot de passe)
- Cliquez sur SET. L'imprimante redémarre et se connecte
⚠️ Les noms de réseau et les mots de passe Wi-Fi sont sensibles à la casse. Vérifiez qu'aucune liste blanche d'adresses MAC n'est configurée sur votre routeur.
ℹ️ Seuls les réseaux 2,4 GHz sont pris en charge. La bande 5 GHz n'est pas compatible.
ℹ️ Le logiciel permet d'écrire des paramètres mais ne peut pas lire la configuration existante de l'imprimante. Les valeurs affichées dans le logiciel sont données à titre d'exemple.
Désactiver le Wi-Fi
Dans l'onglet Wi-Fi, sélectionnez NONE puis cliquez sur SET pour valider.
2. WPS (configuration automatique)
Modèles compatibles : XPDY80EWB, XPDY80EWBG
Le WPS permet de se connecter à un réseau Wi-Fi sécurisé sans saisir manuellement de mot de passe.
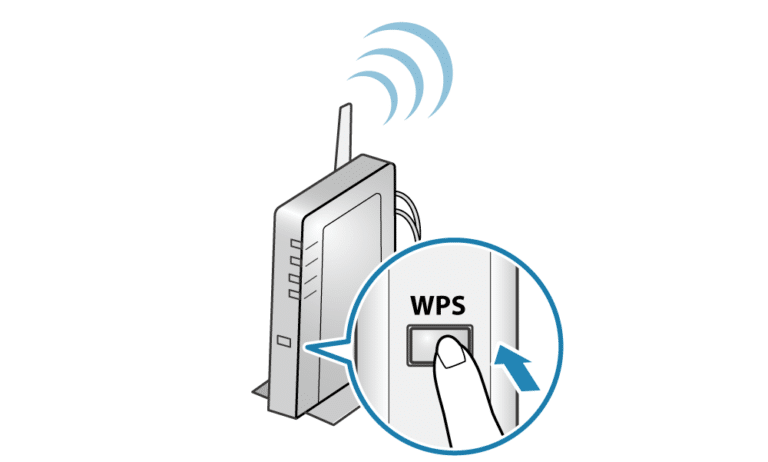
- Appuyez sur le bouton WPS de votre routeur ou de votre point d'accès
- Allumez l'imprimante
- Dans le menu de l'imprimante, allez dans Enter -> Start WiFi WPS et appuyez sur Enter
- Revenez au menu principal, l'imprimante se connecte automatiquement
3. Smartphone (Wi-Fi direct)
Étape 1. Connectez votre téléphone au point d'accès de l'imprimante
- Ouvrez les paramètres Wi-Fi de votre téléphone
- Connectez-vous au réseau DIRECT-XXX
- Mot de passe par défaut : 88888888
- Si votre téléphone signale que le réseau n'a pas d'accès Internet, choisissez Conserver la connexion, c'est normal
Étape 2. Configurez le Wi-Fi depuis votre navigateur
- Scannez le QR code imprimé par l'imprimante, ou ouvrez http://192.168.223.1 dans le navigateur de votre téléphone
- Saisissez le SSID et le mot de passe de votre réseau Wi-Fi
⚠️ Respectez exactement les majuscules, minuscules, tirets et soulignés

4. API distante (Cloud)
Modèles compatibles : PP58EWG, PP58EWG-R, PP80EWG, XPDY80EWB, XPDY80EWBG
ℹ️ L'option Cloud doit être activée au préalable, en savoir plus.
L'imprimante doit déjà être connectée à Internet pour recevoir la commande. Raccordez-la via un câble Ethernet ou une carte SIM 3G/4G et attendez que le voyant passe au vert fixe (Server Connected).
- Dans la console Expedy, allez dans Printers -> Select printer
- Envoyez la commande suivante comme message d'impression :
<SETWIFI>ssid<ssid/pwd>pwd</SETWIFI>
Cette commande peut également être envoyée via l'API.
⚠️ Les noms de réseau et les mots de passe Wi-Fi sont sensibles à la casse. Vérifiez qu'aucune liste blanche d'adresses MAC n'est configurée sur votre routeur.
ℹ️ Le routeur doit autoriser le port TCP/UDP 1883 (entrant et sortant).
ℹ️ Seuls les réseaux 2,4 GHz sont pris en charge. La bande 5 GHz n'est pas compatible.