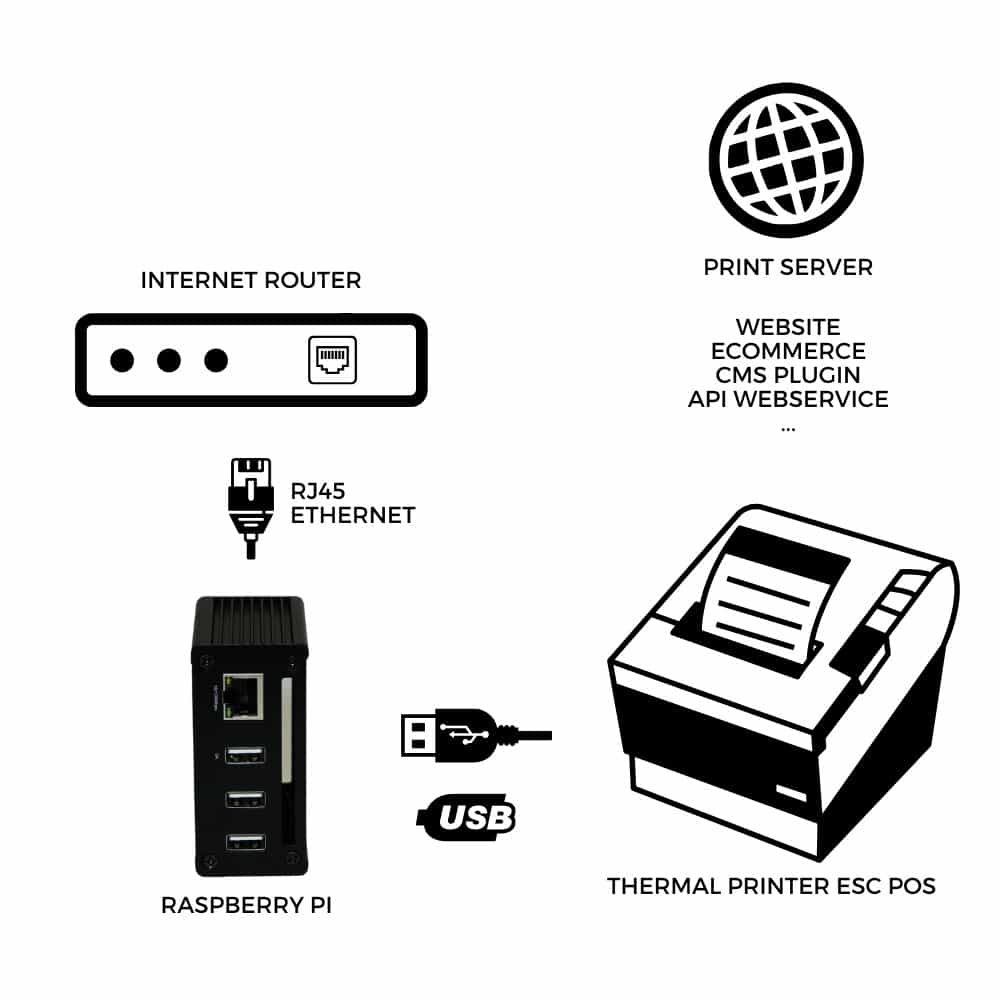
Installation on Raspberry Pi
Transform your Raspberry Pi Zero or 4 into a Cloud Print Server. Connect a USB printer, plug in to your network, and start sending print jobs from any application or API.
You have purchased an Expedy Raspberry Pi SD card or the IMG.GZ download file, compatible with Raspberry Pi Zero and 4, all versions. Thank you for your trust! 😊
ℹ️ Using a Raspberry Pi 1, 2, 3 or 5? Contact us
Already have a pre-installed SD card? Skip directly to Step 4, Start RPI.
1. Download the IMG.GZ file
Download the Expedy image file from your order confirmation or directly from the product page.
2. Install Raspberry Pi Imager
Download: https://www.raspberrypi.com/software/
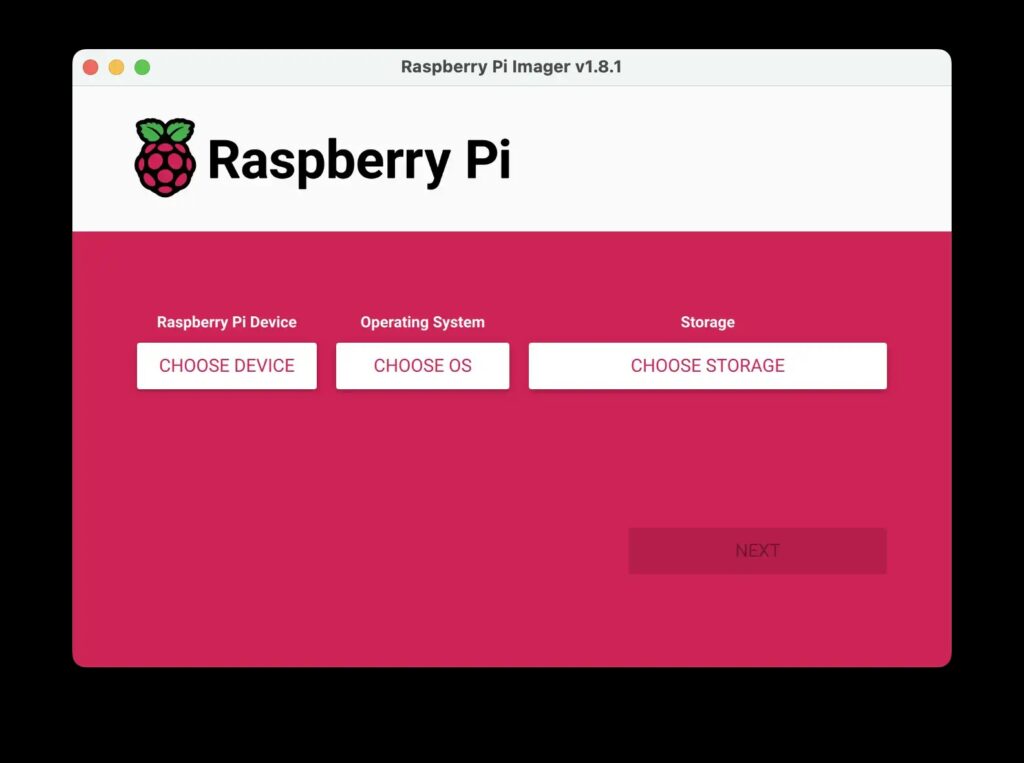
- Insert a new SD card into your computer (minimum 8 GB)
- Raspberry Pi Device, Leave empty
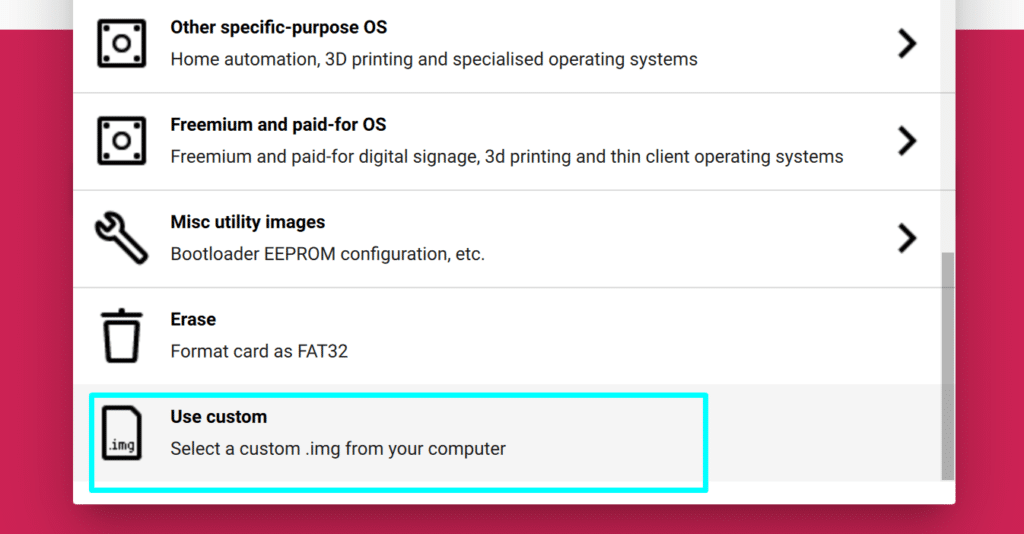
- Operating System, Select Use Custom and choose the downloaded
.img.gzfile - Storage, Select your SD card
- Click Write, if Raspberry Pi Imager offers to apply custom settings, select No
3. Enter your API key
- Insert the SD card into your computer
- Open the boot volume on the SD card
- Edit the
rpi_id.txtfile and enter the unique RPI ID key received by email, Buy a key - Save the file and safely eject the SD card
4. Start RPI
- Insert the SD card into your Raspberry Pi Zero or 4
- Connect the Raspberry Pi to your router via Ethernet cable
- Connect your printer to the USB1 port
- Power up the Raspberry Pi
5. Printer settings
- Log in to https://www.expedy.fr/console/v3/
- Open the device, from Machines or from Printers depending on how it was registered
- In the Check Status card, click Check Status. For a Raspberry Pi the console pings the machine through the API and answers Online or Offline
- Open the Raspberry Pi settings card and click USB scan
- The USB ports grid lists what is connected on
USB 1toUSB 4. A port with nothing plugged in shows Free, and the time of the Last scan appears next to the heading
Each detected port then exposes its own selectors:
| Selector | Options |
|---|---|
| Print mode | ESC/POS for receipt printers driven by ESC/POS commands (Epson TM, Star TSP143, Munbyn, Citizen), no driver required. LABEL for laser, inkjet, label and photo printers, which need a driver installed. |
| Width | 58, 80, 104 or 210 MM, matching the roll actually loaded |
| Graphic mode | Graphics (Default), or BitImageRaster / BitImageColumn if support asks for it |
Not registered on your account yet? See Add a Raspberry Pi print server to your account.
6. Connect your application
Frequently asked questions
The PING doesn't show the current date, what should I check?
- Verify the network connection
- Make sure the RPI ID key is correctly entered in
rpi_id.txt - Check that port 1883 is open on your router. Most standard internet boxes have it open by default, contact your network provider if you don't have router access
The Raspberry Pi is connected and the printer is recognized, but nothing prints?
- Go to Printers → Select printer → Print Jobs History and check for API requests
- Check the USB connection on the USB1 port, plugins and Zapier use USB1 by default. In custom integrations, you can target any USB port and connect up to 4 printers on the same Raspberry Pi
Can the Raspberry Pi connect via Wi-Fi?
Yes, Wi-Fi is supported. For further details, contact us.