Ethernet cable and WiFi connection
Turn any compatible printer into a remote print server with the Expedy Cloud Print Box.
⚠️ Ports 1883 and 8883 must be open on your network for the adapter to connect to the Expedy servers.
1. Connect via Ethernet
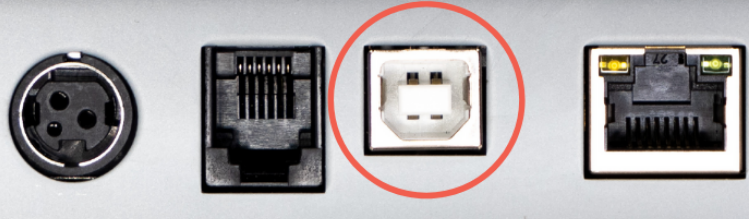
- Connect an RJ45 Ethernet cable between the Cloud Print Box and your internet router
- Connect a USB cable between the Cloud Print Box and your printer (USB Type-B port, usually on the back of the printer)
⚠️ Always use the USB cable supplied by the printer manufacturer when possible
- Power on the printer first, then connect the power cable to the Cloud Print Box
- The Cloud Print Box will boot and connect to the internet automatically
2. Verify connectivity

- Log in to the Expedy console
- Go to Machines and select your machine
- Check that Last PING displays the current date and time, this confirms a successful internet connection
3. Detect and configure the printer
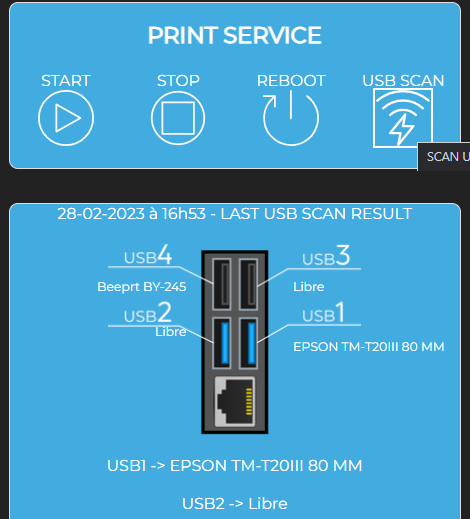
- In the Print Service section, click USB Scan
- Select ESC/POS as the printer type
- Choose your paper width: 58mm or 80mm
- Set the appropriate graphics mode
- Click Save
Your printer is now ready to receive remote print jobs via the API or eCommerce plugins.
4. Connect via Wi-Fi
Both 2.4 GHz and 5 GHz frequencies are supported.
ℹ️ To configure Wi-Fi, the Cloud Print Box must already be connected to the internet, either via Ethernet cable or a 4G USB dongle.
Add a Wi-Fi network
- Log in to the Expedy console
- Go to Machines and select your machine
- In the Wi-Fi module, click Add New
- Enter your network SSID (network name) and password
💡 If you haven't changed your router credentials, they're usually printed on a label on the back of your router or shown on its LCD screen
- Click Save New SSID to confirm
- Click Update Configuration to push the Wi-Fi settings to the device