Connect a receipt printer to HubRise
Connect a single receipt printer to all your online sales channels at once, eCommerce stores and delivery platforms included, with ExpedyPRINT and HubRise.
Orders from any connected source are automatically printed as standardised receipts:
- Online stores (WooCommerce, Shopify, PrestaShop...)
- Delivery platforms (Uber Eats, Just Eat, Deliveroo...)
Compatible printers
- Expedy Cloud Print printers:
PP-58EWG,PP-80EWG, XPDY80EWBG - Cloud Print Box USB adapter, compatible with any ESC/POS or ESC/P printer (Epson, Star Micronics, Munbyn, Citizen...)
Prerequisites
- An Expedy account with an active printer on it. Not added yet? Follow the guide for your machine: Expedy XPDY80, HSPOS, Star Micronics or Raspberry Pi
- A HubRise account, required to aggregate orders from delivery platforms. Create one before moving to the next step.
Depending on the connector or the point-of-sale software you use, this connection may be set up by your partner. Check with them before you start.
Connect HubRise to your printer
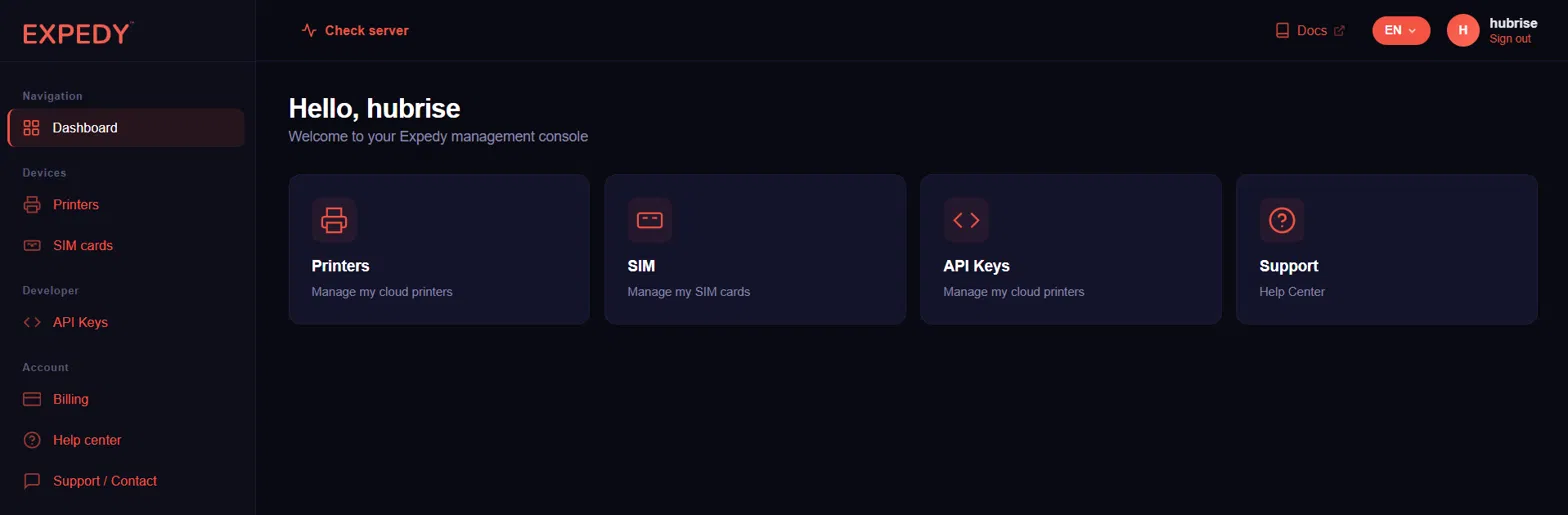
Step 1, Sign in to your Expedy console
Log in at https://www.expedy.fr/console/v3/
The dashboard gives you access to your printers, your SIM cards, your API keys and the Help Center.
Step 2, Open your printers
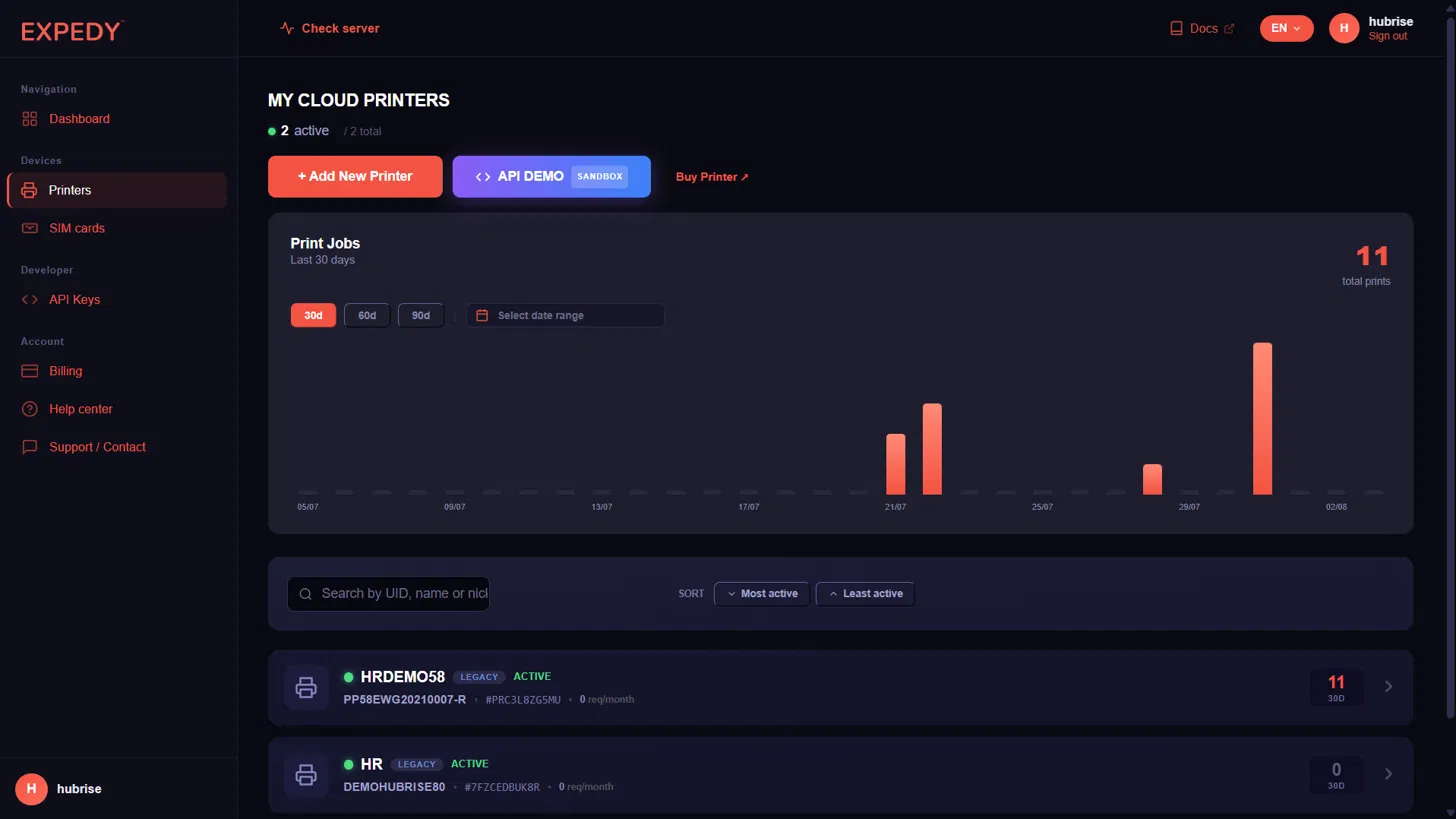
In the left menu, under Devices, click Printers, or go directly to https://www.expedy.fr/console/v3/printers
This page lists all your cloud printers with their UID, their serial number and their print volume over the last 30 days.
Step 3, Select the printer to connect
Click the printer you want to link to HubRise, then open the Connections & Plugins tab.
In the HubRise section, the status shows Not connected. Click Connect HubRise.

Step 4, Sign in to HubRise
You are redirected to the HubRise login page. Enter the email address and the password of your HubRise account, then click Log in.
Step 5, Authorise the connection and select your location
HubRise asks you to authorise EXPEDY PRINT to access one of your locations.
Select the location you want to associate with this printer in the drop-down list, then click Allow.
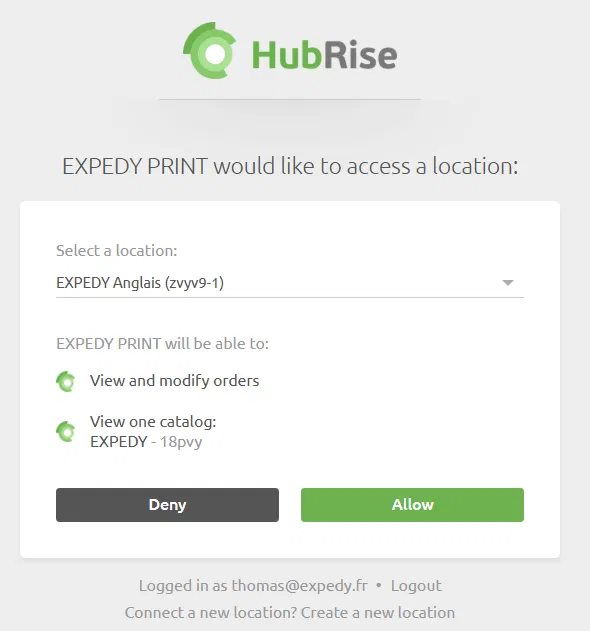
One printer is linked to one HubRise location. To serve several locations, repeat the operation on another printer.
Step 6, Back to the Expedy console
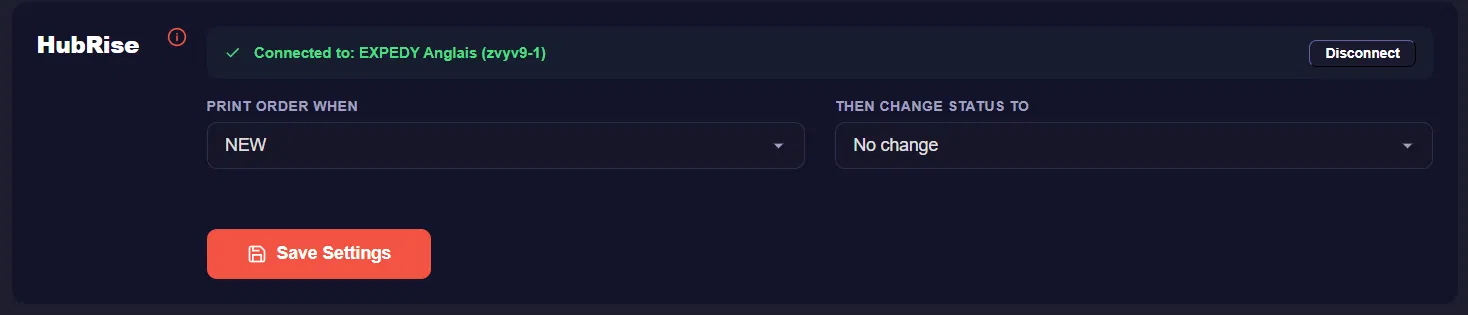
You are automatically redirected to your console. The HubRise section now displays Connected to followed by the name and the ID of your location, along with the trigger settings.
The connection is active. You can undo it at any time with the Disconnect button.
Trigger settings
Two drop-down lists control when a ticket is printed and what happens to the order afterwards.
Print order when, the order status that triggers printing: NEW, RECEIVED or ACCEPTED.
Then change status to, the automatic status update applied once the ticket is printed: No change, Mark as received or Mark as accepted.
Always click Save Settings to confirm your changes.
Trigger combinations
| Print order when | Then change status to | Result |
|---|---|---|
| NEW | No change | Prints all new orders. Status unchanged on HubRise and on the original platform. |
| NEW | Mark as received | Prints all new orders and updates the status to received. |
| NEW | Mark as accepted | Prints all new orders and updates the status to accepted. |
| RECEIVED | No change | Prints received orders. Status unchanged on HubRise and on the original platform. |
| RECEIVED | Mark as accepted | Prints received orders and marks them as accepted. |
| ACCEPTED | No change | Prints only the orders you have already accepted manually. Refused or pending orders are not printed. |
Choose NEW with Mark as accepted for a fully automatic workflow, where every incoming order is printed and confirmed without any manual action. Choose ACCEPTED with No change if you want to review each order before it reaches the kitchen.
Customise your receipts
Still on the printer page, the Printer Settings panel controls the layout of the tickets printed from HubRise and Shopify orders.
Receipt header
| Field | Description |
|---|---|
| Time zone | Sets the local time printed on the ticket. Select your own time zone so the order timestamps are correct. |
| Logo URL | Direct link to your logo image, 603 px wide maximum. Leave empty to print no logo. |
| Company name (header) | Trading name printed in large characters at the top of the ticket. |
Receipt footer
The footer carries your legal and contact details, printed at the bottom of every ticket:
- Company and Registration number (SIRET / VAT)
- Address line 1, Address line 2, Zipcode, City, Country
- Phone and Email
Filling these fields turns the order ticket into a compliant customer receipt, which is useful for click and collect and for delivery orders handed to the customer.
Advanced options
Number of copies, the most requested setting. Choose how many identical tickets are printed for each order:
- 2 copies, one for the kitchen and one for the counter or the delivery bag
- 3 copies, kitchen, bar and packing station
Each copy is printed in a single pass, no need to reprint manually.
Receipt template, the level of detail printed on the ticket. Full details prints the complete ticket with items, options, prices, customer details and totals; shorter templates produce a compact production ticket.
Tandem printer (copy to another printer), enter the UID of a second Expedy printer to receive an exact copy of every ticket. Ideal for splitting the workload between the kitchen and the counter, or between two floors of the same location, without creating a second HubRise connection.
Click Save Settings to apply your layout.
Test your setup
- Place a test order on one of the platforms connected to your HubRise location
- Check that the ticket comes out of the printer within a few seconds
- Check on HubRise that the order status matches the option selected in Then change status to
If nothing prints, verify that the printer is powered on and active in the console, and that the location selected during the authorisation step is the one receiving the orders.
Need help? Open a support ticket