WiFi Setup
There are 4 ways to configure Wi-Fi on your Expedy printer:
- Windows software
- WPS (automatic, no password entry)
- Smartphone
- Remote API (requires the Cloud option)
1. Windows Software
Supported models: PP58EWG, PP58EWG-R, PP80EWG, XPDY80EWB, XPDY80EWBG, PP80UEWBT, XPDY80UWB, PP80USBEBW, XPDY80U, XPDY80USBEBW, XPDYPOS80UEB
Before you begin, read how to connect the software to the printer.
Download the PrinterSetting software ->
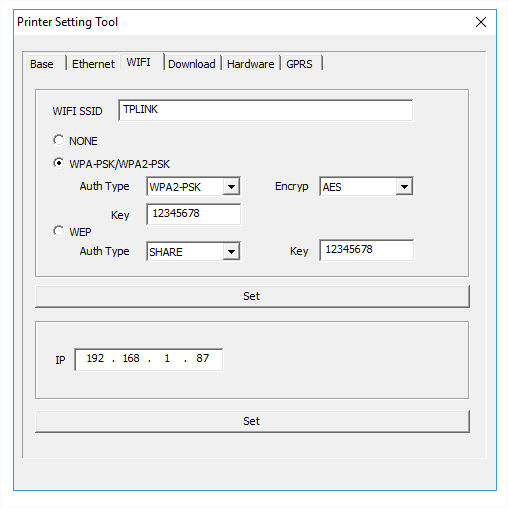
- Open the Wi-Fi tab
- Enter your Wi-Fi SSID (your router or internet box name)
- Enter your WPA secret key (password)
- Click SET. The printer will restart and connect
⚠️ Wi-Fi names and passwords are case-sensitive. Check that no MAC address whitelist is configured on your router.
ℹ️ Only 2.4 GHz networks are supported. 5 GHz is not compatible.
ℹ️ The software allows you to write settings but cannot read existing printer configuration. Values shown in the software are examples only.
Disable Wi-Fi
In the Wi-Fi tab, select NONE then click SET to confirm.
2. WPS (Automatic Setup)
Supported models: XPDY80EWB, XPDY80EWBG
WPS lets you connect to a secured Wi-Fi network without manually entering a password.
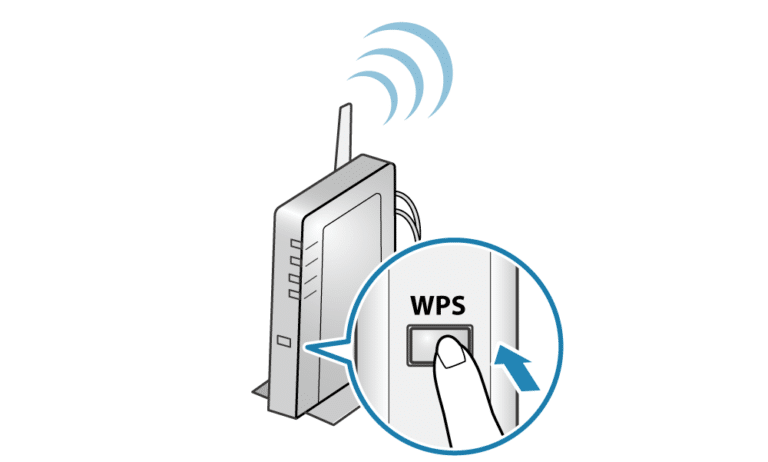
- Press the WPS button on your router or access point
- Power on the printer
- In the printer menu, go to Enter -> Start WiFi WPS and press Enter
- Return to the main menu, the printer will connect automatically
3. Smartphone (Direct Wi-Fi AP)
Step 1. Connect your phone to the printer hotspot
- Open your phone's Wi-Fi settings
- Connect to the DIRECT-XXX network
- Default password: 88888888
- If your phone warns that the network has no internet access, select Keep connection, this is expected
Step 2. Configure Wi-Fi from your browser
- Scan the QR code printed on the printer, or open http://192.168.223.1 in your phone's browser
- Enter your Wi-Fi SSID and password
⚠️ Respect upper/lowercase, hyphens, and underscores exactly

4. Remote API (Cloud)
Supported models: PP58EWG, PP58EWG-R, PP80EWG, XPDY80EWB, XPDY80EWBG
ℹ️ The Cloud option must be activated first, find out more.
The printer must already be connected to the internet to receive the command. Connect it via Ethernet cable or 3G/4G SIM card and wait until the LED turns steady green (Server Connected).
- In the Expedy console, go to Printers -> Select printer
- Send the following command as the print message:
<SETWIFI>ssid<ssid/pwd>pwd</SETWIFI>
This can also be sent via the API.
⚠️ Wi-Fi names and passwords are case-sensitive. Check that no MAC address whitelist is configured on your router.
ℹ️ Router must allow TCP/UDP port 1883 (incoming and outgoing).
ℹ️ Only 2.4 GHz networks are supported. 5 GHz is not compatible.